Overview
The first recitation basically had two sections: soldering and building simple circuits. I completed the whole assignment with the help of my partner, Leah.
Material
- Breadboard
- 1 * LM7805 Voltage Regulator
- 1 * Buzzer
- 1 * Push-Button Switch
- 1 * Arcade Button
- 1 * 220 ohm Resistor
- 1 * 10K ohm Resistor
- 1 * 10K ohm Variable Resistor (Potentiometer)
- 1 * LED
- 1 * 100 nF (0.1uF) Capacitor
- 1 * 12 volt power supply
- 1 * Barrel Jack
- 1 * Multimeter
- Several Jumper Cables (Hook-up Wires)
Soldering:
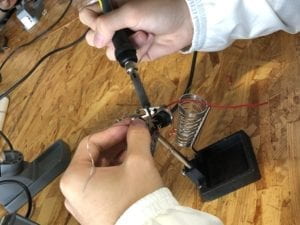
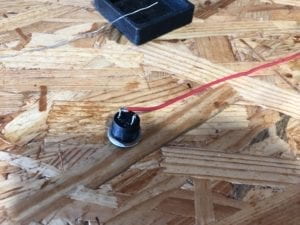
We were asked to connect two wires to the button with a soldering iron and solder. In this section, I learned how to use a soldering iron properly. For example, the appropriate temperature for a normal soldering iron is about 300℃ and we should first heat up the connecting parts with the soldering iron and then then use the solder. During the soldering process, my soldering iron just couldn’t heat up to that temperature for some reasons. Then I borrowed my partner’s iron and completed the assignment.


Building circuits:
In this section, the assignments were building three circuits.
1. Door bell

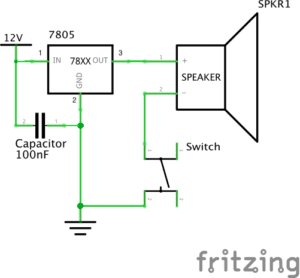
My partner and I actually had no idea about what to do with the first diagram and all the material provided. One of the factors that caused our confusion was that we didn’t know how the electric current flow inside the breadboard. The other reason was that we didn’t clearly understand the diagram.So we asked the kind learning assistant, Eszter to help us. She explained everything through practice and explicit explanation patiently. We figured out everything and completed the circuit correctly. Yet the speaker failed to make any sound. After examining the circuit, we suspected that the speaker itself was broken and we replaced it with a new one.
2. Lamp

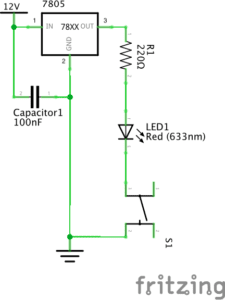
When completing the circuit correctly, the lamp wasn’t on. We found out that it was the poor connection that caused it. So we reconnect the wire more solidly and it worked.
3.Dimmable Lamp
The process of building the third circuit was smooth and nothing went wrong.
Reflection
In this recitation, I’ve learned the proper processor soldering, understood how the breadboard and the diagram worked. More importantly, I memorized the symbol of some of the electronic components.
Question 1:
In the book “The Art Of Interactive Design”, the author’s definition of interaction is”a cyclic process in which two actors alternately listen, think, and speak.” and listen, think and speak could be replaced with input, process, output. (5). In this sense, the two actors in the three circuits would be the button and the speaker, the button and the lamp and the variable resistor and the lamp. Each thing in every pair of them would react to the other. It is in the process of these reactions that contain the three steps, which were input , process and output.
Question 2:
Art is the symbol of humanity, and physical computing would serve as a carrier of the human’s mind. Physical computing alone could not present Interactive art, it needs something to transform people’s gesture to digital information. So there comes the interactive design. Therefore, interactive design should be the combination of interactive design and physical computing.