Building Circuits
Materials:
- 1 * Breadboard–the base for plugging in the electronci components
- 1 * LM7805 Voltage Regulator–keeps the voltage of the circuit at a stable value
- 1 * Buzzer–speaker
- 1 * Push-Button Switch–connect/disconnect the circuit
- 1 * Arcade Button–connect/disconnect the circuit
- 1 * 220 ohm Resistor–avoid short circuit, protection
- 1 * 10K ohm Resistor–avoid short circuit, protection
- 1 * 10K ohm Variable Resistor (Potentiometer)–avoid short circuit, protection; change the magnitude of the current
- 1 * LED–lighting/check if the circuit works
- 1 * 100 nF (0.1uF) Capacitor–stores electric charge
- 1 * 12 volt power supply–provides power
- 1 * Barrel Jack–connect things with different ports together
- 1 * Multimeter –read the value of direct/alternating volatage; resistance
- Several Jumper Cables (Hook-up Wires)
Soldering
I have experience with soldering before, so this part was not hard. The only problem I ran into was cutting of the plastic shell. But soon I got the hang of it. It’d be helpful if I use the sharper part of the plier first to crack the plastic a little, then use the blund part to pull it away.
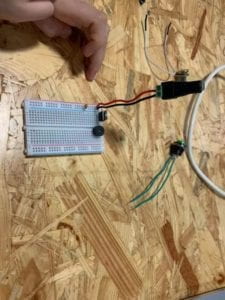
Circuit 1:
We were totally lost at the beginning, having no idea how the breadboard works (do the reading before recitation!). Our circuit was correct at the first time, but the speaker just didn’t work. It turned out the speaker itself was broken (how can we tell this before building the curcuit all over again?)

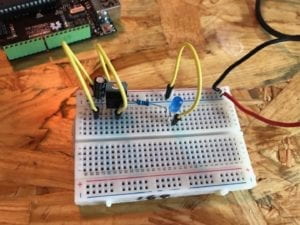
Circuit 2:
The last two circuits were built outside the class. I was so anxious to finish the work that I connected the LED directly to the 12V power supply. Without a doubt, the LED flashed once and died immediately. I should’ve put a resistor/voltage regulator or connected it to a 5V power supply.
Circuit 3:
At first, when I asked for a capacitor from the equipment room, I got a random capacitor. But the LED began blinking when the power was on, so did the little light on the plug. It must be something wrong. Marcela helped me to find a new capacitor, and everything worked. Capacitors are different from each other.
I also made some mistakes, such as putting LED reversely (should be long-1 short-2); placing the variable resistor horizontally (should cross different voltage lines).
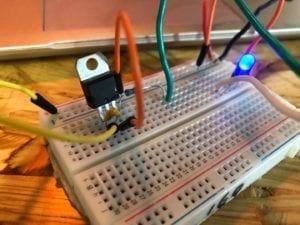
Also, the direction of the button could be tricky. The legs that face toward each other should be placed horizontally.
Questions:
Question 1:
According to the reading, interaction is a cyclic process in which two actors alternately listen, think, and speak. In the circuits, whether the actuator is a lamp or a doorbell, the basic processes are the same: turning on and off the switch is making the circuit “listen”; the working of the circuit is “thinking”, and the buzz sound of the dourbell or the lamp’s lighting up is speaking.
Question 2:
I was deeply impressed by the artwork showed on class called “the wooden mirror”, created by Daniel Rozin. It receives data from a video camera, and then mirrors the interactor. In this case, the interactive design itself is intriguing and can be called art. However, in some other cases, technology only serves as a bridge between an artistic idea and the actual artwork.