In this recitation, we learned how to send information from Arduino to processing and vice versa. The time slot was divided into two sections: one to create an “Etch a Sketch” machine using potentiometers to control the direction of a line on processing, and the other to create a musical instrument using the buzzer and variables from processing to change the pitch.
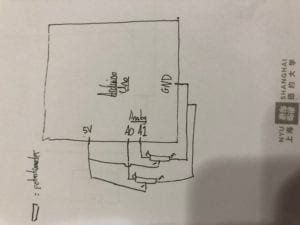
Exercise 1: The Arduino code was very simple to set up, but the processing code took some time. I started by drawing ellipses in the draw loop, but they would not create a continuous line because they could not keep up with the frame rate. After making a line, the transition was much smoother. Besides that, the processing code required a lot of library information I am not familiar with to work properly, which can be very confusing. Below is the final product along with a schematic of the Arduino circuit:

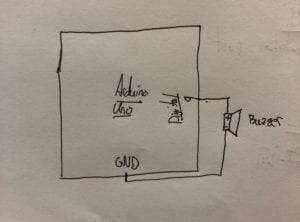
Exercise 2: For this portion, I decided to use the “mouseX” position on processing to alter the pitch of the buzzer. Originally, the buzzer did not have much of a range because it was only registering the width of the canvas for the x values, which did not extend to the limits of the buzzer’s range. Using the map function, I was able to use the entire range of the buzzer with my limited canvas space. I ran out of time, but I would have liked to draw a line when my mouse was pressed, which would not have been very difficult since we have already done that in a class exercise. Again, below are the video and schematic of Exercise 2:

(NOTE: I used the same breadboard for this as the last exercise, so the circuit looks much more complicated than the schematic because the two potentiometers from Exercise 1 are still attached, but they serve no purpose in Exercise 2).