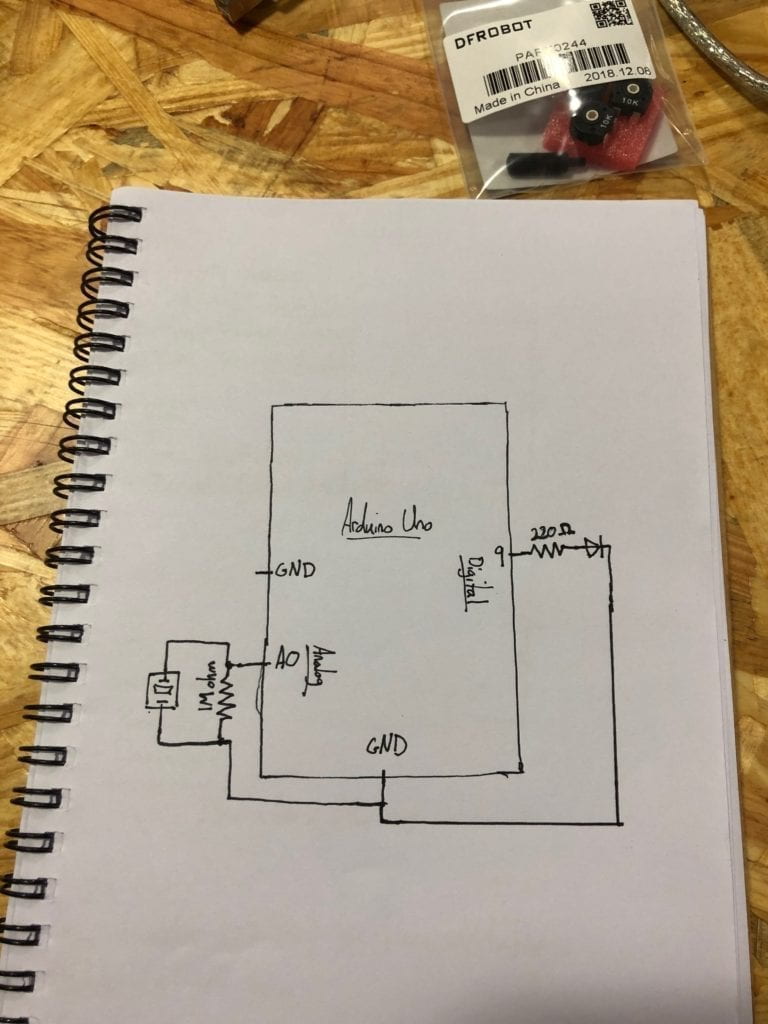
In this recitation, the objective was to create a circuit that includes a sensor and Arduino. For this task, we opted for the vibration sensor. Our materials included an LED, a 220-ohm resistor, a piezo disk, a 1 megaohm resistor, and Arduino. With the preset “Knock” coding from Arduino and a few modifications, we were able to make a functioning circuit.
The only problems we faced in this recitation were code related. For example, in one attempt, only the built-in LED would light up. Below is the schematic for our design:

Reflection: Overall, everything went as planned. If we had more time, we would have wanted to make the LED flicker when the sensor detected a vibration. That makes the coding much more complicated, but I think we could have managed. This project helped me gain an understanding of how a variety of sensors function and what uses they may have (although many classmates’ designs, like ours, served no real purpose).
Question 1: We intended to create a circuit in which an LED would light up when a vibration sensor detected motion. If this were used for a pragmatic purpose, a nuclear power plant manager could (with some modifications), have the LED on his person light up if there are vibrations detected from a sensor in a restricted section of the plant. Assuming the environment around the sensor does cause vibrations and trigger the sensor, only unnatural sources of vibration would be present, thus allowing the manager to know if someone is where they shouldn’t be.
Question 2: A code is a set of instructions that follow an order. Like baking a cake, first you must identify/define all the ingredients (variables). Then, a certain set of pre-written instructions are followed to produce an outcome. In a recipe, a person follows the instructions, and in a code a computer follows them. Even though the outcome is very different, both follow very similar instructional patterns.