Electronics & Soldering
Materials:
- 1 * Breadboard
- 1 * LM7805 Voltage Regulator
- 1 * Buzzer
- 1 * Push-Button Switch
- 1 * Arcade Button
- 1 * 220 ohm Resistor
- 1 * 10K ohm Resistor
- 1 * 10K ohm Variable Resistor (Potentiometer)
- 1 * LED
- 1 * 100 nF (0.1uF) Capacitor
- 1 * 12 volt power supply
- 1 * Barrel Jack
- 1 * Multimeter
- Several Jumper Cables (Hook-up Wires)
Introduction:
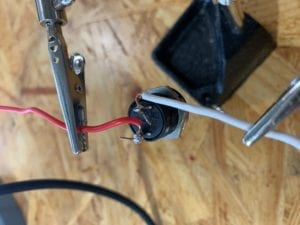
For soldering, we started out with a button, two wires, and a solder. Then, we had to trim the wires so that we could use the solder to melt the wires onto the button. We soldered the button together so that we would be able to use the button in our next projects. By doing this exercise, I learned how to solder and use the tool safely.
Exercise 1: Door Bell
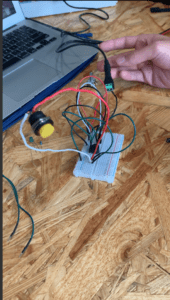
For this exercise, I learned about circuits and what the difference between ground and positive means on the breadboard. I used the breadboard to connect different wires and lastly to the button that I made. The final result was when I plugged the breadboard into the power, it made a ringing sound.
Exercise 2: Lamp
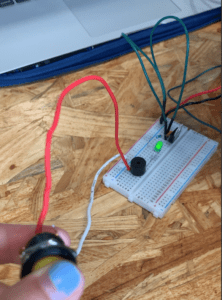
In this exercise, I basically did the same exact thing with the button except this time, I attached a LED light to it as well. The end result is when I pressed the button/switch, the LED light would turn on and off. This was more difficult because I had to figure out how to use a resistor the correct way.

Reflection:
I loved this lab, it was so fun and interesting for me because I’ve never done anything like this before. It was a cool experience being able to connect wires on the breadboard and so satisfying to be able to achieve and finish the exercises on my own. By doing this lab, I learned a lot about circuits and how to tell if the wire should go in the positive or negative; how to read a diagram; how resistors and capacitors work; and how to connect everything to a breadboard.
Questions:
- I think the circuits that I built are an example of interactivity because they made me think outside of the box about how to create a working circuit. Another reason that the circuit is interactive is because someone has to press the button/switch in order for it to turn on or off.