Recitation Exercise:
For the initial exercise, I wanted to take an entirely new design in order to create an animation that displays rotating flowers. For the first step, I created the design of the flower. The flower design included the coding for the center of the circle as well as the coding for the petals, which coded a singular flower and copied it 5 times, around the designated radial rotation. I then took this flower and copied it across the entire page by establishing it under myFunction. By allowing this, I took the x and y coordinates of the flower and used a for() function in order to duplicate the flower across the entire background. Then, once having an entire page filled with flowers, I used a rotation function in order to rotate the radians of the flower in relation to the position of the mouse as well as the passing of the frames, in order to incorporate a degree of interactivity. The final result is a screen full of flowers that rotate by themselves, and can either speed up or slow down rotation with the user’s interaction. For the future, I would like to create randomly generated flowers that change color and speed and float down from the top of the screen that can be controlled by the user’s mouse. This would bring in a new level of complexity but it is something I would genuinely like to tackle next. For now, this exercise has taught me how to use myFunction to duplicate the same shape multiple times and apply the same animation to all of them simultaneously. I also learned the importance of the push + pop matrix when dealing with void draw functions.
Code:
void setup() {
size(600, 600);
background(255);
smooth();
noStroke();
}
void draw() {
background(255);
for(int i = 0; i<width+100; i=i+120){
for(int j = 0; j<height+100; j=j+120){
fill(0);
//ellipse(i, j, 50,50);
myFunction(i, j);
}
}
}
void myFunction(float x, float y) {
pushMatrix();
translate(x, y);
rotate(radians(frameCount + mouseX));
//petals
fill(190, 120, 150);
for (int i = 0; i < 5; i++) {
ellipse(0, -40, 50, 50);
rotate(radians(72));
}
//circle
fill(230, 180, 150);
ellipse(0, 0, 50, 50);
popMatrix();
}
Recitation Homework:
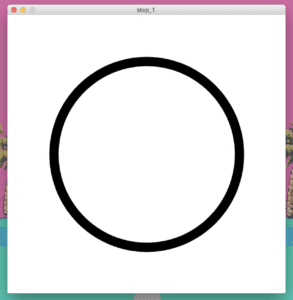
step 1: this first step proved to be very simple. just to draw a circle and place it in the center of the canvas
step 2: for this next step, I created an integer for the diameter of the circle. and then under the draw function, I established a formula that allows the integer to increase and then decrease in order to expand and contract the circle
step 3: in order to make the circle change color continuously, I added the HSB color mode function, I then created a variable for the stroke called c, which allows the color to change to whatever that variable is. Then I took the variable c and created a formula under the draw function which allows it to increase and decrease to change to all colors of the rainbow
step 4: this was the most difficult step. I replaced my fixed x and y values for the position of the circle and replacd them with the integers x and y. I also added integers called xmove and ymove, Then I created a keypressed function in which for each arrow key, it would apply a value to the xmove and ymove integer. Then in the main code, I added two formulas which add the xmove and ymove values to the original x and y values. This is so every time the keys are pressed, these values of xmove and ymove, indicated by the arrow keys would add to the x and y values of the circle and create a new position.
Code:
void setup(){
size(600, 600);
strokeWeight(20);
}
int z;
int steps = 3;
int c;
int step = 3/2;
int x = 300;
int y = 300;
int xmove;
int ymove;
void draw(){
x=x+xmove;
y=y+ymove;
pushMatrix();
background(100);
circle(x,y,z);
colorMode(HSB, 100);
stroke (c, 100, 100);
c = c+step;
if (c>100 || c<0) {
step = -step;
}
z = z+steps;
if (z>400 || z<-400){
steps = -steps;
}
popMatrix();
}
void keyPressed() {
if (key == CODED) {
if (keyCode == RIGHT) {
xmove = 2;
} else if (keyCode == LEFT) {
xmove = -2;
} else if (keyCode == UP) {
ymove = -2;
} else if (keyCode == DOWN) {
ymove = 2;
}}}
Reflection:
During this function I learned a lot about the interaction between setup, draw, and myFunction. The most interesting code I learned was the keypressed, which allowed the pressing of the keyboard to initiate the input of a value to a certain variable. Although I am still slightly confused by the colorMode variable, as it allows me to change the values that line up with the color spectrum, and I know how to code it, however I’m still unsure about how its placement within setup and draw affects its functioning. Overall, I’m glad I was able to do this exercise because it genuinely helped me further my understanding of Processing.