Midterm Project: Pianote – Jackson McQueeney – Marcela Godoy
CONTEXT AND SIGNIFICANCE
My definition of interactivity has evolved over the course of this class, but it essentially refers to communication between two or more actors, including machines and humans, in the form of inputs and outputs. During the first group project, my group’s idea focused almost entirely on the interactive aspect of design, without considering if the design was even useful. However, for the midterm project, my partner and I designed a product that is both interactive and useful. Our project, called the “Pianote” was a piano that could teach the user how to play piano, based on the ability of the user to accurately respond to the notes that the program prompted. While its free-play mode was basically just a keyboard, the interactive aspect is present in the learning mode, offering a new degree of interactivity to a traditional keyboard. This project was aimed at those who want to learn how to play music.
CONCEPTION AND DESIGN
As I said before, the Pianote (as a prototype) is a seven-note keyboard with two modes. One of these modes, free-play mode, allows the user to play anything they want to play. The other mode, learning mode, teaches the user to play “Twinkle, Twinkle”. The Arduino was hidden inside of a laser-cut box, and the a breadboard was mounted to the top of the box. The following image is of this box’s SVG file:

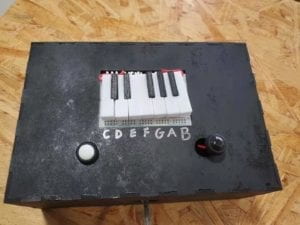
A series of flat wires connected the buttons on the breadboard to the Arduino. A set of 3D-printed piano keys were secured to the tops of the buttons, so the keys functioned more or less as regular piano keys. In terms of hardware design, the project was rather straightforward. However, the software facilitated its interactivity. One button corresponded to free-play mode, while the other corresponded to learning mode, and the user could freely switch between modes. In learning mode, the user, when prompted, would tap a key. If done correctly, they would learn how to play “Twinkle, Twinkle” on a keyboard. However, if the user incorrectly played a key, the software would correct them.
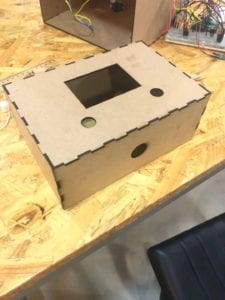
This is the laser-cut apparatus, made following suggestions from the user test, before the application of paint and insertion of the Arduino. The following image is the finished product:
FABRICATION AND PRODUCTION
The project was not entirely ready for the user test, as there were still problems with the code. However, we did receive useful feedback, including suggestions on how the software could hypothetically operate. Conceptually, the software aspect was simple to explain to users even though it did not yet work properly. When the user selected learning mode, the serial monitor would continuously loop the first prompt from that mode.
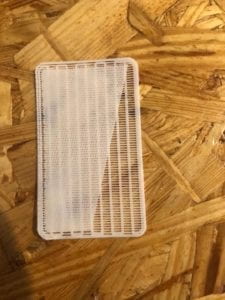
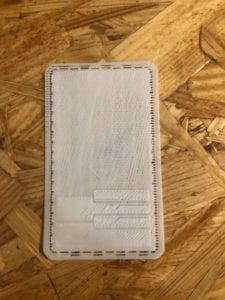
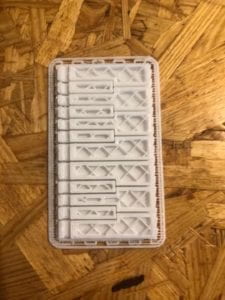
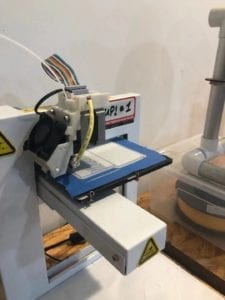
Most user critiques and suggestions regarded the hardware. In the original prototype, the laser-cut box had not been made yet, and we substituted it with a cardboard box. During the user tests, users found this to be rather unsightly and structurally unsound, so the laser-cut box was a definite improvement. Also, the original design indicated which key corresponded with each note on the serial monitor. For example, it would refer to the “C” key as the “key on the far left”. Users found this cumbersome, so we instead labelled the keys on the physical device. Additionally, in retrospect, one improvement that could have been made to the project would be the fabrication of custom buttons, that would more accurately function as piano keys. The fabrication of keys using the 3D printer presented some challenges. As the keys were printed, the corners of the mat would lift off of the print surface, and this happened after we replaced the tape as well. We asked the lab manager for assistance, so he switched the print material. However, the same problem arose. The first three of the following images is a different attempt with the same 3D printer. The last image is of the mat lifting off of the print surface:
CONCLUSIONS
This project sought to teach musical beginners how to play piano in an interactive way. In the regard that interaction is the communication of two or more actors through the medium of inputs and outputs, I believe that our project is interactive. While not necessarily misaligned with my definition of interaction, I believe that some aspects of the project would be better suited as hardware rather than software. Specifically, I think initial basic instructions would be better as a part of the physical device. Users (at least after the user test) generally interacted with our project as intended. They would read the prompt for their desired user mode, and then would generally not have any issues following the prompt on the serial monitor. However, one improvement I would be interested in pursuing would be implementing the use of LEDs to indicate which keys should be pressed. Rather than reading instructions from the serial monitor, the user could react to an activated LED in real time.