During this recitation, we are told to make a processing Etch A Sketch and a musical instrument with arduino. The circuit is quite simple. What we should do is only connecting two potentiometers. However, for me, writing the code is very challenging. Using the examples given, we try to send messages from arduino to processing and from processing to arduino.
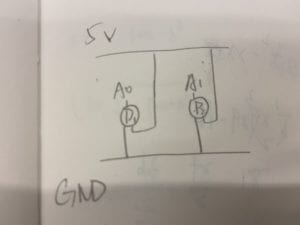
Exercise 1
The first step is to use the potentiometers to control the position of a circle. I succeeded at once, however, there is one problem that the circle will sometimes be out of the canvas.
Arduino:
void setup() {
Serial.begin(9600);
}
void loop() {
int sensor1 = analogRead(A0);
int sensor2 = analogRead(A2);
//int mappedsensor1 = map(sensor1,0,1023,0,255);
//int mappedsensor2 = map(sensor2,0,1023,0,255);
// keep this format
Serial.print(sensor1);
Serial.print(“,”); // put comma between sensor values
Serial.print(sensor2);
Serial.println(); // add linefeed after sending the last sensor value
// too fast communication might cause some latency in Processing
// this delay resolves the issue.
delay(100);
}
Processing:
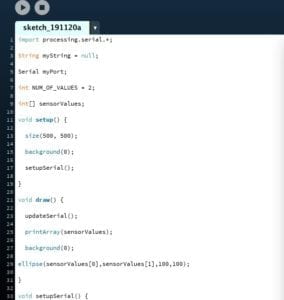
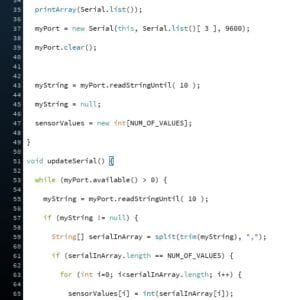
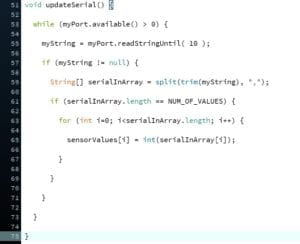
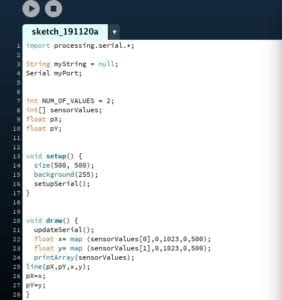
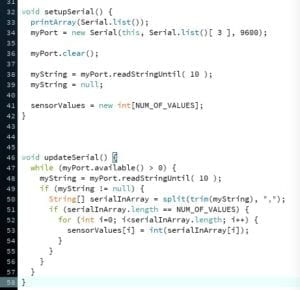
So in the second step, the fellow tell me that maybe I can use the map() to adjust the position of the image. At the beginning I am stuck in “how to draw a line”, but soon after that I realize I just have to let the beginning point to be the previous sensorValue and the endpoint to be the current sensorValue.
Processing:
Exercise 2
In this exercise, we use mouse to control the sound of a buzzer. We use the sample code for multiple values from processing to arduino. The mouseX is the frequency of the tune and the mouseY is the duration.
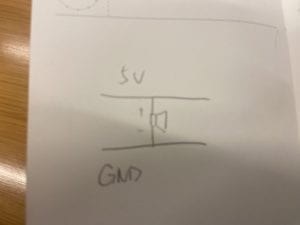
Processing:
// IMA NYU Shanghai
// Interaction Lab


/**
 * This example is to send multiple values from Processing to Arduino.
 * You can find the arduino example file in the same folder which works with this Processing file.
 * Please note that the echoSerialData function asks Arduino to send the data saved in the values array
 * to check if it is receiving the correct bytes.
 **/


import processing.serial.*;

int NUM_OF_VALUES = 2;  /** YOU MUST CHANGE THIS ACCORDING TO YOUR PROJECT **/


Serial myPort;
String myString;

// This is the array of values you might want to send to Arduino.
int values[] = new int[NUM_OF_VALUES];

void setup() {
  size(500, 500);
  background(0);

  printArray(Serial.list());
  myPort = new Serial(this, Serial.list()[ 9], 9600);
  // check the list of the ports,
  // find the port "/dev/cu.usbmodem----" or "/dev/tty.usbmodem----"
  // and replace PORT_INDEX above with the index of the port

  myPort.clear();
  // Throw out the first reading,
  // in case we started reading in the middle of a string from the sender.
  myString = myPort.readStringUntil( 10 );  // 10 = '\n'  Linefeed in ASCII
  myString = null;
}


void draw() {
  background(0);

  values[0]=mouseX;
  values[1]=mouseY;

  // changes the values
  // sends the values to Arduino.
  sendSerialData();

  // This causess the communication to become slow and unstable.
  // You might want to comment this out when everything is ready.
  // The parameter 200 is the frequency of echoing.
  // The higher this number, the slower the program will be
  // but the higher this number, the more stable it will be.
  echoSerialData(200);
}

void sendSerialData() {
  String data = "";
  for (int i=0; i<values.length; i++) {
    data += values[i];
    //if i is less than the index number of the last element in the values array
    if (i < values.length-1) {
      data += ","; // add splitter character "," between each values element
    }
    //if it is the last element in the values array
    else {
      data += "n"; // add the end of data character "n"
    }
  }
  //write to Arduino
  myPort.write(data);
}


void echoSerialData(int frequency) {
  //write character 'e' at the given frequency
  //to request Arduino to send back the values array
  if (frameCount % frequency == 0) myPort.write('e');

  String incomingBytes = "";
  while (myPort.available() > 0) {
    //add on all the characters received from the Arduino to the incomingBytes string
    incomingBytes += char(myPort.read());
  }
  //print what Arduino sent back to Processing
  print( incomingBytes );
}
Arduino:
int tempValue = 0;
int valueIndex = 0;
/* This is the array of values storing the data from Processing. */
int values[NUM_OF_VALUES];
void setup() {
Serial.begin(9600);
pinMode(11, OUTPUT);
}
void loop() {
getSerialData();
tone(11, values[0],values[1]*10);
// add your code here
// use elements in the values array
// values[0] // values[1] }
//recieve serial data from Processing
void getSerialData() {
if (Serial.available()) {
char c = Serial.read();
//switch – case checks the value of the variable in the switch function
//in this case, the char c, then runs one of the cases that fit the value of the variable
//for more information, visit the reference page: https://www.arduino.cc/en/Reference/SwitchCase
switch (c) {
//if the char c from Processing is a number between 0 and 9
case ‘0’…’9′:
//save the value of char c to tempValue
//but simultaneously rearrange the existing values saved in tempValue
//for the digits received through char c to remain coherent
//if this does not make sense and would like to know more, send an email to me!
tempValue = tempValue * 10 + c – ‘0’;
break;
//if the char c from Processing is a comma
//indicating that the following values of char c is for the next element in the values array
case ‘,’:
values[valueIndex] = tempValue;
//reset tempValue value
tempValue = 0;
//increment valuesIndex by 1
valueIndex++;
break;
//if the char c from Processing is character ‘n’
//which signals that it is the end of data
case ‘n’:
//save the tempValue
//this will b the last element in the values array
values[valueIndex] = tempValue;
//reset tempValue and valueIndex values
//to clear out the values array for the next round of readings from Processing
tempValue = 0;
valueIndex = 0;
break;
//if the char c from Processing is character ‘e’
//it is signalling for the Arduino to send Processing the elements saved in the values array
//this case is triggered and processed by the echoSerialData function in the Processing sketch
case ‘e’: // to echo
for (int i = 0; i < NUM_OF_VALUES; i++) {
Serial.print(values[i]);
if (i < NUM_OF_VALUES – 1) {
Serial.print(‘,’);
}
else {
Serial.println();
}
}
break;
}
}
}
Reflect on the interaction involved for each step
- In exercise one, there is interaction because the position of the circle or the line is changing according to the changes on the potentiometers. The first potentiometer determines the x-axis and the second determines the y-axis.
- In exercise two, there is interaction because the sound made by the buzzer is changing according to the mouse position on the canvas. If the mouseX turns big, the frequency will be higher, which means the tone will be higher. If the mouseY turns big, the duration will be longer, which means the length of the time of the sound will be longer.