From our previous definition of interactivity, our group, consisting of me, Jonathan Lin, and Tom Zhu, wanted to create a game that fulfilled categories of being interesting and entertaining. In the projects researched for the previous group project, two actors engaged with one another to produce unique outputs, as seen in Alias‘s response when users say a keyword. My definition of interaction is the engagement between at least two actors who produce variable outputs that are interdependent on each other’s inputs. We believed that creating a game would be the best way to have the user interact with the project, since winning the game would depend on the user’s actions. We decided to create a disaster simulation game, called Shake to Quake, in which two users would each shake a 3D printed city to create an earthquake. The first person to “topple” all of the towers would win the game. The game’s nature is not unique, since multiplayer games are commonplace, but the concept of a future city facing natural disasters puts a unique twist on it. Our project is intended for kids and adults alike to have friendly competition and see how can shake the hardest and fastest.
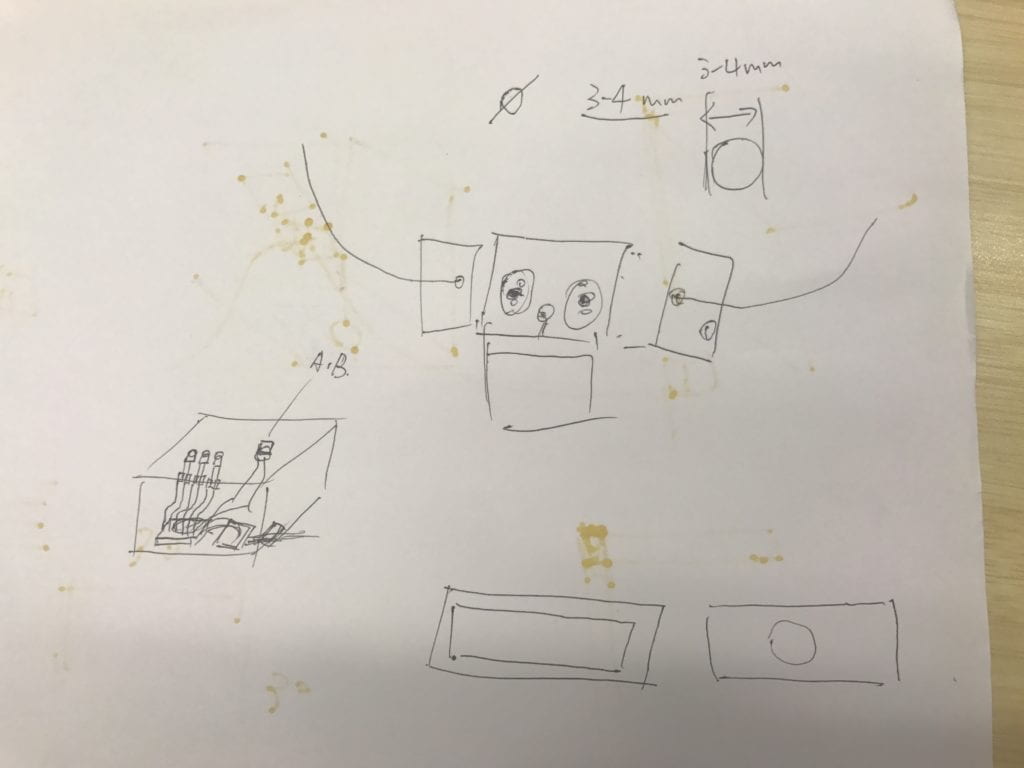
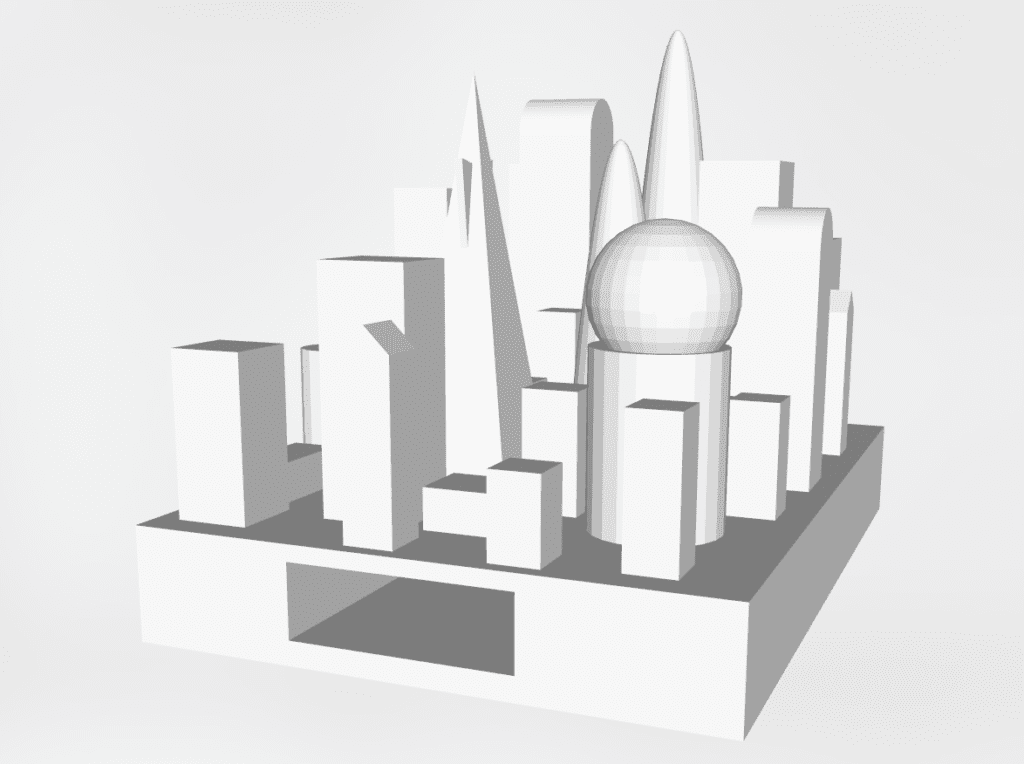
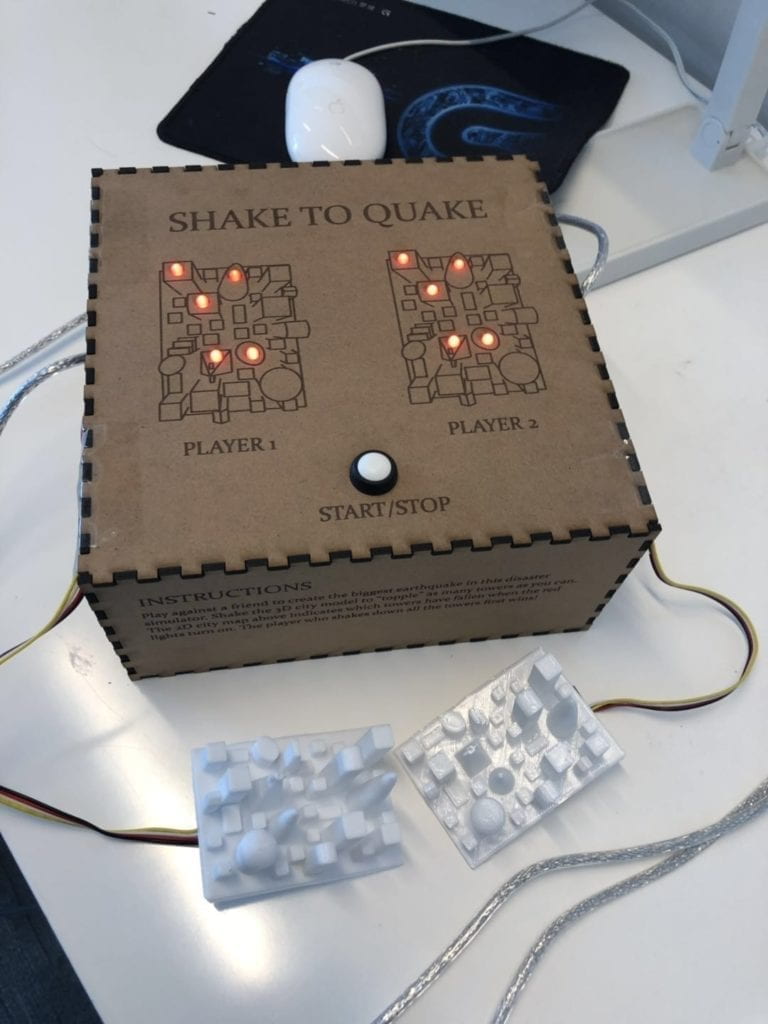
We knew we had to use an acceleration sensor to gauge the motion of the shaking cities, so in Tinkercad, I designed a city on a platform that could encase the sensor for users to hold easily. To indicate which towers had “fell,” we decided to use LEDs. We initially thought of putting the LEDs in the 3D model to physically indicate which ones fell, but we decided that it would be too hard to manage with sizing and the wires. So, I suggested that we make a 2D birdseye representation of the city and position LEDs on top. With this, Tom added that we put the representation on top of a Makercase box to contain the Arduino and wires and make the project more aesthetically pleasing. We debated whether to use multicolored LEDs that could change color depending on the magnitude of the shake, but the amount of wires needed would have limited the number of LEDs we could use. As a result, we decided to use five red LEDs for each player that would turn on as the user shook the city.
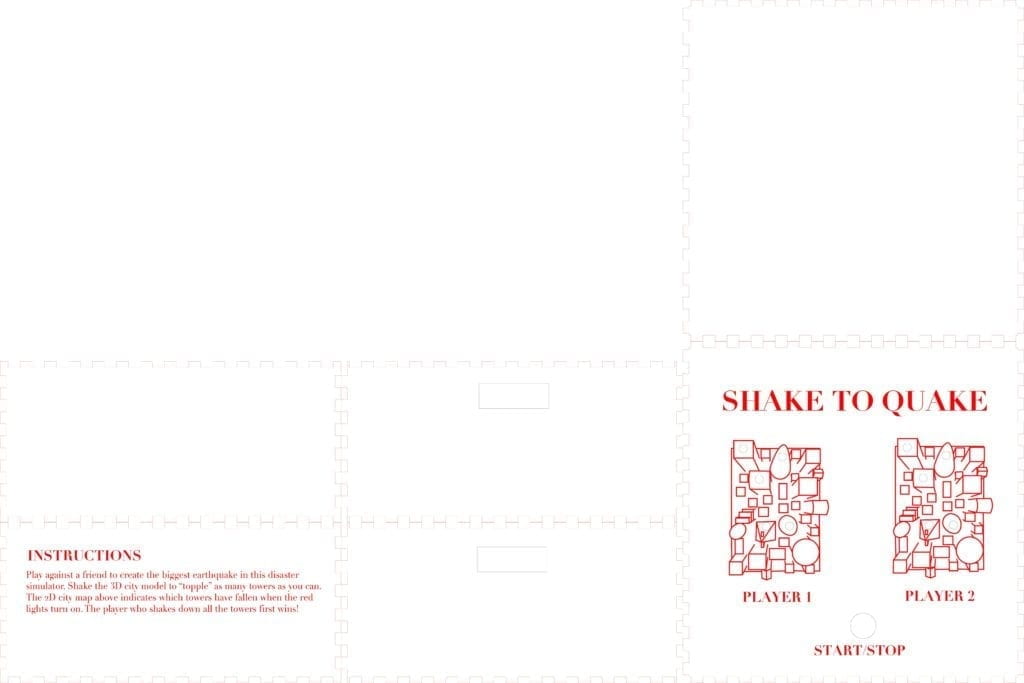
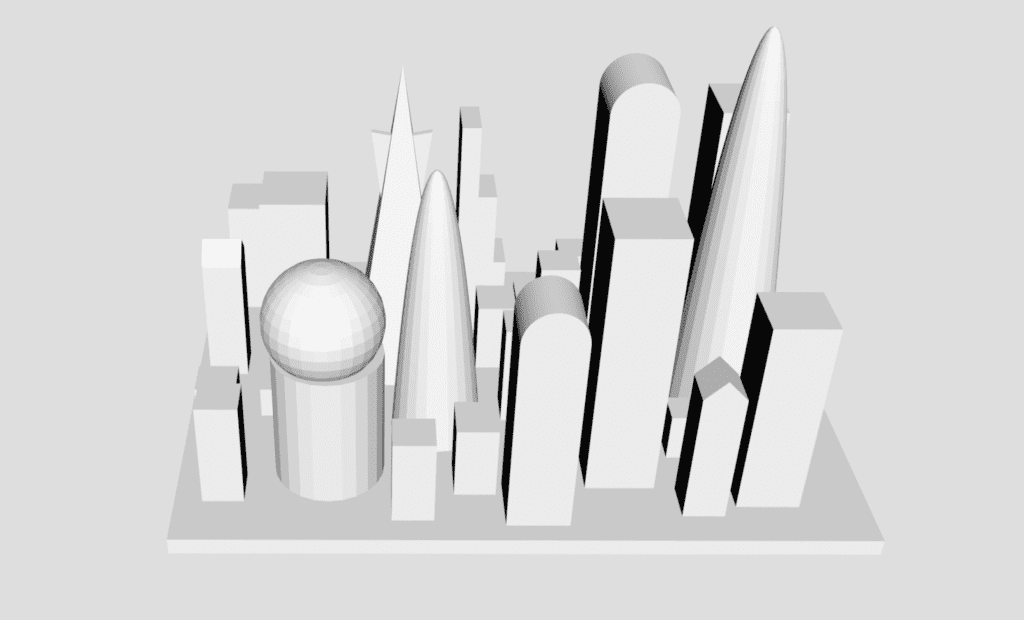
I took over the fabrication for the project, while Tom and Jonathan worked on code and hardware. In addition to the 3D models, I also designed the box, using Adobe Illustrator to draw two engravings of the city with holes placed on specific towers for LEDs to show through, and a hole for an a button to be placed to start the game. I also put holes on the sides of the box for wires connecting the sensor and Arduino to go through. After finishing the Tinkercad design, I went to the Fabrication Lab to have the city 3D printed. However, the printer had to be restarted many times while the initial layer was still being printed out, so I was advised to make my design smaller and take out the hollow base so that it was simply a thinner plane below the city. After moving to a different printer, the city was successfully completed. While in the lab, I also had the box laser cut. The holes turned out to be the perfect size for the LEDs and button. The sensor was taped to the city, and Tom assembled the Arduino and LEDs with the box, resulting in an almost complete project for the User Testing Session. We had one city printed, but the second was still in the making. During the session, we found that people enjoyed the game, but had trouble knowing when the game had begun. Some people also had difficulties finding a good way to hold the city models. Another suggestion we had was to change the LEDs from gradually turning on to turning off to indicate that the buildings had lost power. Tom made adjustments to the code so that the LEDs would blink when the start button was pushed and would turn off instead of on during the game. However, we kept the cities taped to the sensor because the time constraint didn’t allow us to reprint a different design.
Our goal with Shake to Quake was to create a fun multiplayer game to simulate a mini earthquake and resulting destruction. The project was interactive because the LED signals would change depending on how hard the player shook the city, which then would encourage the players to shake harder or remain the same in order to win. However, the outputs were not unique for each player, since the lights would turn off one by one eventually whether the player was lightly or strongly shaking. In the end, our result was successful, since people seemed to enjoy playing the game and were able to grasp the concept of an earthquake simulation. If I had more time, I would improve the models so that they were easier to hold and the wires and sensors were more securely fastened. Additionally, I would try to make the project more educational about earthquakes and their effects. From the fabrication hiccups, I learned that designs must take many redesigns and trials in order to reach the desired outcome, and that it is a matter of using and iterating. Our team was able to smoothly create this project because we effectively split up different jobs according to our individual strengths, so that when all components were put together, the whole project was a success.
Shake to Quake may be a simply fun game, but the process of creating it from my design role was an very insightful and new experience. Turning a computer generated design into a physically tangible object has inspired me to continue with 3D fabrication in the future. I’ve come to realize that digital art lives in not only a 2D screen, but also in 3D reality.