Overview:
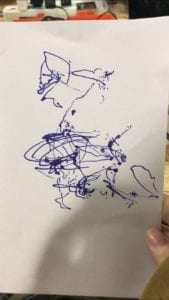
For this recitation we build a drawing machine, combining two stepper motor circuits, my partner and I each made in the first step and assembled the drawing machine with various fasteners and 3D printed parts. Our artwork resulted in picture following.

Step 1:

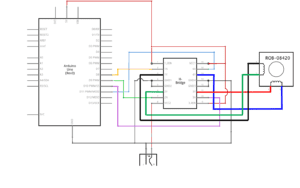
First, my partner and I individually built the first circuit, following the circuit diagram. Although I triple checked the wiring of the circuit my motor would not turn on when I uploaded the code. After asking a professor for help, he also double checked the wiring and found no problems, so we replaced each main part until the circuit worked. The H-bridge had been bent from the last use and would not connect to the breadboard properly, after the H-bridge was exchanged the circuit worked successfully. We used the sample code from arduino,stepper_oneRevolution. Below is the working stepper motor after the replacement of the h-bridge.
Step 2:
Step two required trial and error adding a potentiometer to the circuit was easy, connecting the middle pin to A0 and the other two pins to power and ground. Incorporating the mapping code was a bit more difficult. We used the code MotorKnob and altered it to include mapping the potentiometer to the motor using syntax: int izzy = map(val, 0, 1023, 0, 200);. We also changed the variables to be consistent with their new labels in this case “izzy” and “amy” and changed the #define STEP to #define STEP 200 to account for the steppers 200 steps. After the changes to the code were made the potentiometer successfully controlled stepper motor.
Step 3:
Putting together the machine itself was straight forward, fastening the different components together with paper fasteners. We had difficulty getting the pen close enough to paper to draw, and we eventually propped up a piece of paper on a notebook to get it to the correct height. After adjusting the height we also had to weigh the paper down so it doesn’t move with the pen (as it did on our first try). The potentiometer controls were a bit jumpy and not smooth for the most part while drawing, so in reality it was better for scribbling and abstract art than any precise and deliberate movement.
Question 1:
What kind of machines would you be interested in building?Add a reflection about the use of actuators, the digital manipulation of art, and the creative process to your blog post.
I think an interesting variation on the drawing machine we created would be to see a drawing machine that created pointillism style drawings. It would not only be interesting to see an interpretation on other piece that don’t use pointillism but also be interesting to create one’s own. Pointillism would require increased accuracy as if each point is placed even a bit off the drawing could look nothing like what is intended. To create a pointillism machine someone would need multiple actuators including 2-4 motors to control the positioning of the pen similarly to the drawing machine we made. I also think that controlling them from one source rather than four separate potentiometers would help the precision and accuracy. In addition to the motors controlling the position of the pen there would need to be an actuator controlling the downwards movement of the pen able to grip it and pull/ push it straight down to the paper and pull/push it back up off the paper. I think a linear actuator of some sort could provide the correct linear motion needed. To build this would require many steps setting up the motors that will position the pen and hopefully could be attached to a rod and bearing system to allow the pen to move in 2 directions horizontally and vertically. That would also help support the pen and eliminate the instability we say in our drawing machine. This project would be interesting to choose whether this are it computer program based and copy art into pointillism or if it should rather be used for creating new art completely.
Question 2:
Choose an art installation mentioned in the reading ART + Science NOW, Stephen Wilson (Kinetics chapter). Post your thoughts about it and make a comparison with the work you did during this recitation. How do you think that the artist selected those specific actuators for his project?
Matt Heckert and his Centripetal Sound Mechanics from ART + Science NOW, Stephen Wilson (Kinetics chapter) tried to create an experience for his viewers to observe and have sensory involvement in a system of mechanics. The installation was especially interesting to me because I had never thought that a mechanical system was an experience that people should have. However, although art is always up to interpretation, I think that the experience of mechanical system is experienced by humans in other ways daily, as we reap the benefits of mechanics and technology with all the everyday items we use. But we never see the process or mechanics behind it. This sensory art installation was interesting as most people don’t witness mechanical systems in their everyday life, giving the audience a new experience. The actuators played a central role in his project as it created the sounds central to the installation. Heckert used motors in his design to control the movement of a metal ring up and down each metal structure simulating the sounds of a mechanical system and producing an experience for his audience. The actuator choice seemed quite deliberate as his goal was a vertical movement to push metal rings up and down each sculpture. In addition, mechanics was a central theme of his exhibition and motors and other mechanical actuators fit his message to his audience and his practical purpose. Compared to our recitation, the art installation was predesigned to produce a listing experience for his audience. Our drawing machine required physical participation to control the actuators and the art piece. In addition, the art we created in class was a more traditional visual style art, whereas his art piece encompassed multiple senses, which seemed to be a common theme in many of the articles featured pieces.