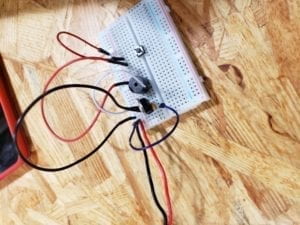
Circuit 1: Door Bell

Components:
- Capacitor, stores electricity.
- Voltage Regulator, stabilizes the voltage at a constant level.
- Push Button (Switch), switches between an open circuit and a closed circuit.
- Speaker, makes sound.
- Power (12V) , provides DC electricity power.
- Ground, prevents electric leakage from hurting human body.
- Jumper Cable, connects components and carries electricity.
It took us roughly an hour to figure out how to make it work. Firstly we had no idea how to use a breadboard until one of the fellows told us that the horizontal wholes on the same half are connected while the vertical ones are not. We also learned that the vertical wholes at the two sides of the board should be connected to power and ground lines.
We then came into a problem about the switch. The switch has four legs but we did not know which two to connect. We again consulted one of the fellows and learned that we should include only two legs in the circuit and connect them – leave the other two outside the circuit.
Lastly, we had trouble connecting to the ground. We found the circuit working well without connecting to the ground. And again, we asked one of the fellows to show us and we learned that we just simply had to connect the third leg of the voltage regulator to the minus side of the circuit, or negative electrode (I googled it).
What’s funny is, it is only after we completed the circuit when found out that our socket was broken…
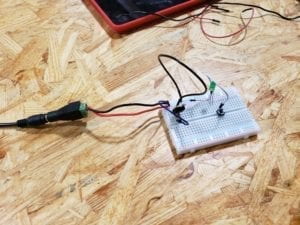
Circuit 2: Lamp
- Resistor, provides resistance in the circuit to limit the current flow so that the load (door bell) works properly.
- Capacitor, stores electricity.
- Voltage Regulator, stabilizes the voltage at a constant level.
- Push Button (Switch), switches between an open circuit and a closed circuit.
- LED, gives out light.
- Power (12V) , provides DC electricity power.
- Ground, prevents electric leakage from hurting human body.
- Jumper Cable, connects components and carries electricity.
Circuit 2 was rather simple. We just had to replace the speaker with the LED and add a resistor next to it. We completed within 2 minutes, no problems at all.
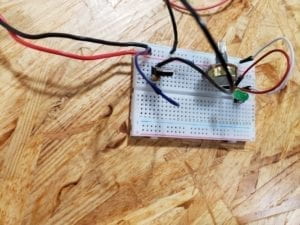
Circuit 3: Dimmable Lamp

- Resistor, provides resistance in the circuit to limit the current flow so that the load (door bell) works properly.
- Capacitor, stores electricity.
- Voltage Regulator, stabilizes the voltage at a constant level.
- Push Button (Switch), switches between an open circuit and a closed circuit.
- LED, gives out light.
- Power (12V) , provides DC electricity power.
- Ground, prevents electric leakage from hurting human body.
- Jumper Cable, connects components and carries electricity.
- Variable Resistor / Potentiometer, varies its own resistance so as to varies current flow in the circuit, in order to dim the light.
Well… We thought it would be easy if we just had to include a variable resistor next to the LED. But when we connected its two legs with the circuit and span its dial, the LED did not dim. And shortly after that, we recalled our high school Physics class and remembered that if a variable resistor was connected with its legs on the two sides, it would become a constant resistor. That is, we had to connect its middle leg to the resistor and another to LED, left the other leg disconnected.
Question 1:
After reading The Art of Interactive Design, in what way do you think that the circuits you built today include interactivity? Please explain your answer.
I think our circuits include interactivity because when we switch it on, it listens(receiving an input), thinks (processing the input), and speaks (producing output). At the same time, I speak (giving an input), think (imagining what would happen), and listen (literally listen to the doorbell, e.g.) Although I suppose the author of that reading would deem that kind of interaction as silly, I do believe the circuits interacted with me in terms of input, processing and output.
Question 2:
How can Interaction Design and Physical Computing be used to create Interactive Art? You can reference Zack Lieberman’s video or any other artist that you know .
Interaction Design and Physical Computing can be used to detect and record physical movements, gestures, and other analog signals made by either human or something else. For example, the eyewriter presented in the video detects eyeball movements. Those inputs can then be transformed to digital records, just like the eyeball movements being transformed into shapes and images. All these processes involves interactivity and eventually create art works, hence Interactive Art.