Intro
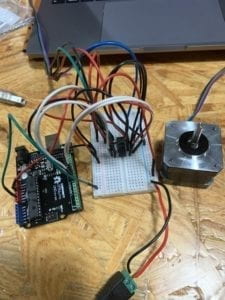
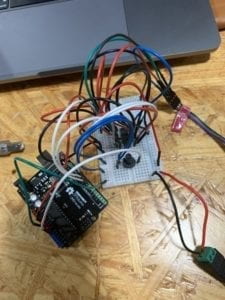
During this recitation we were asked to control a stepper motor by the use of an H-bridge. The purpose of this was to familiarize us with the function of each prong on the H-bridge, and also introduce us to the way a stepper motor works. In addition, we also had the task of coding the stepper motor, so it could work as a drawing machine.
Materials
For Steps 1 and 2
1 * 42STH33-0404AC stepper motor
1 * L293D ic chip
1 * power jack
1 * 12 VDC power supply
1 * Arduino kit and its contents
For Step 3
2 * Laser-cut short arms
2 * Laser-cut long arms
1* Laser-cut motor holder
2 * 3D printed motor coupling
5 * Paper Fasteners
1 * Pen that fits the laser-cut mechanisms
Paper
Step 1


Building the circuit with the H-bridge was very easy. The only issued that occurred was when I accidentally connected the wires to the wrong end of the H-bridge; I thought the semi-circle went on the bottom of the circuit. All I had to do was turn the H-bridge around to face the other way and the problem was solved! We were able to use a sample code, so there were no issues when coding the stepper motor to run.
Step 2

Adding the potentiometer into the circuit was a fairly simple process because it was completely separate of the rest of the circuit. It was the same as all of the other times we had used it in the past. It also helped that we had built a similar circuit in class the day before, I had a hard time with the code that allowed this circuit to run. We were given the example code, but we had modify the number of steps to 200. This was because the stepper motor is a 200 step motor, and having the code include 200 steps would make the motor as accurate as possible. To change the number of steps, I used the map function, and the code worked perfectly. The potentiometer could be used to turn the motor!
Step 3

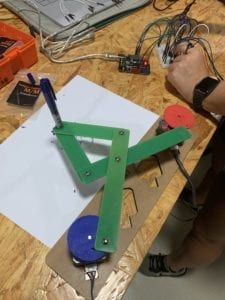
Step 3 was to create a drawing machine with our partner’s and our motor. Building the drawing machine was very easy, but we had trouble with getting our motors to work properly. Despite working previously, both of our motors had issues. My motor was running by itself, even though I was not turning the potentiometer. My partner’s motor would not run at all. We were not able to completely solve the problem due to class ending, but we could conclude that something within our circuits must be wrong. This is because the code had worked before, and the motor turned when the potentiometer was used, but now it didn’t work. Nothing in the code had changed, so we must have messed something up within each of our circuits while we were building the drawing machine.
Question 1
I think it would be very fun to build machines like the one we built during this recitation. It would be very cool to make a really big version of this, kind of like an extra large Etch-a-Sketch. To do this a larger motor would be necessary, and it would need a larger number of steps so it could be as accurate as possible. It would be great to have this despite all of the digital art that we have today. The physical creation of art is an important tradition that we should keep a hold of. It allows us to combine the old history of art with contemporary art and technology.
Question 2
I found Nicholas Stedman’s Blanket Project to be very interesting. It is supposed to be a completely autonomous blanket that seeks to find human contact and serve as a “subtle companion”. This machine is very different compared to the drawing machine we built during recitation. The first and most obvious difference is that it does not need a human to navigate it at all times. The drawing machine required us to turn our potentiometer in order for it to draw. Stedman most likely uses many different motors, so the blanket can navigate to the best of its ability.