Link To Code: https://github.com/cy1323/CelineYu/tree/master/Recitation%208
Exercise 1:
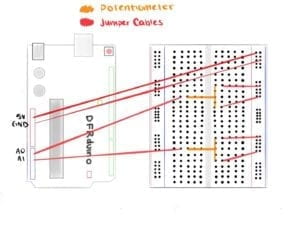
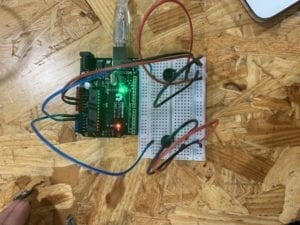
For the first exercise, I was told to recreate an Etch A Sketch through the combination of Processing and Arduino. I first copied and pasted all of the necessary lines of code from the provided Serial Communication folder into separate Arduino and Processing files. I decided that I would first focus on the Arduino side. I deleted the portions that were deemed useless and so, left just sensor1 and sensor2 to coordinate with the two variables I planned to utilize for the sketch: X and Y. I also deleted the Serial print lines that were unnecessary and finished my void loop() function with Serial.println(Sensor2), so that the numbers would come out smoothly as a set of two numbers, as if I was pressing the “return” button for each set. Afterward, I moved onto the Processing page, making sure to not to delete the portions that I needed to complete the exercise. I changed the NUM_OF_VALUES to a value of 2 to correlate with the two variables and equated the integer, PORT_INDEX to 16 so that the Processing and Arduino would connect and collaborate with one another. Then, I created an ellipse with the attributes (posX, posY, 100, 100) inside the void draw function, making sure to create posX and posY as integers at the beginning of my code.
At this point, I was stuck and confused. Not knowing how to proceed, I asked for help from one of the helping assistants. She graciously explained to me what I needed to complete and guided me on how I could get to that final product. The assistant did not tell me exactly how to achieve the intended results but provided me with ample information and guidance for me to complete it with a full understanding of what I was doing. I positioned posX and posY and correlated them to the potentiometers by equating them to sensorValues 0 and 1, which would translate into sensor1 and sensor2 in Arduino. She also walked me through the basics of using the map function, one I have always been confused about. I used the function to enclose the range in which the ellipse would maneuver across the canvas, changing it from 0, 1023 → 0, 500. This would ensure that the circle, when being manipulated by the potentiometers, would not go past the edges of the canvas.
After testing out the circuit and moving around the potentiometer values to maneuver the ellipse, I decided I would add another portion to the code. I added to Processing, that whenever the SHIFT key was pressed, the page would reset by having its background changed to black. I wanted to add this feature of a reset button that would erase the trail of circles the user had created on the canvas. This feature parallels that of the original Etch a Sketch and its “RESET” button that activates when one shakes the toy. The response is incredibly fast, too fast for my liking, However, due to time, I was unable to work around with the delay mechanisms of the code to correct the timing of the SHIFT key and its output.


Screen Recording 2019-04-19 at 2.29.06 PM
Exercise 2:
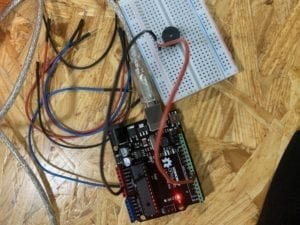
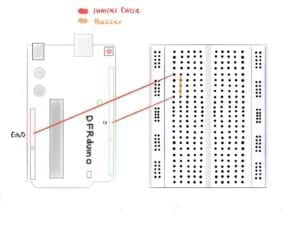
For the second assignment, I was instructed to create a musical instrument with a buzzer and my understanding of Arduino and Processing. Contrary to the first assignment, I needed the Arduino to read serial values from Processing and not the other way around. Once again, I copied and pasted the outlines from the Serial Communication folder and got to work on the processing. I altered the NUM_OF_VALUES to a 2 and selected 16 for my PORT_INDEX int, as I did in the first exercise. Then, with the knowledge and information I learned from the Sketch exercise, I went straight to void draw and typed in values[0] and values[1] and equated them to mouseX and mouseY, letting the Arduino know what information it will be reading to translate into frequency and duration for its tone function. Moving on to Arduino, I went straight to void loop, creating 2 separate integers for int freq and int duration. I mapped the two integers so that I could control the minimum and maximum amount for both the frequency and duration of the buzzer and its output. Following the map functions, I created the tone function and placed 11, freq and duration as the three attributes that created its base. 11 to correspond with the pin I chose when making the circuit, freq to correlate with the mouseX value found in Processing and finally, duration, as it would correspond with the Processing’s mouseY values. With a little tweaking, the second exercise was also a success.

