Github Code: https://github.com/cy1323/CelineYu/tree/master/Recitation%209
Setup:
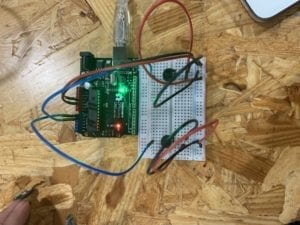
For recitation 10, I am told to manipulate media through the serial communication of Arduino and Processing. I immediately made the decision that I would work with the live camera over actual photographs. First, I created a circuit that would focus on the two potentiometers I plan to send input from to Processing through the Arduino software. This part was quite easy considering the number of times I’ve made the same circuit, making sure that I connect the potentiometers to A0 and A1. I then implemented the required information from the recitation folders and placed them into their respective places in Arduino and Processing, then ensuring not to leave out anything that was crucial to the success of the overall project. I changed the NUM_OF_VALUES integer to a 2 to correlate with the two potentiometers from the circuit, set PORT_INDEX to a 10 and worked to incorporate the code from previous coursework that reprinted the live camera feed through the shape of rectangles.
Next, I created integers: hue and resizing to correlate with the Arduino values being sent to processing. Then, as I learned from my previous lectures and recitations, set those integers to sensorValues 0 and 1, making sure that afterward, I set them to a limited range through the usage of the map function.
I was surprised to find out that the resizing function was not working, but with the help of teaching assistants, I learned that this was because there were no values being sent from Arduino to Processing. I went back to Arduino and confirmed that the potentiometers were indeed showing altered values. It was quick to find the source of the problem after this, I realized that I had counted the PORT_INDEX value incorrectly in Arduino, instead of starting with 0, I started counting from 1. The actual PORT_INDEX integer value was supposed to be a 9, not a 10. After changing this, the potentiometer worked perfectly, and soon the rectangles that reconstructed the camera feed changed in size as I turned the potentiometer around and around.
With the other potentiometer, I intended to use its values to alter the tint of the camera feed. This was significantly difficult, no matter how I tried to achieve this aspect, nothing worked. I tried tint, fill, opacity and a lot of other things, but ultimately asked to receive help from the teaching assistants. Together, we had a bit of difficulty with trying to understand what was stopping the code from working but then was given the hint to create an overlying layer of squares that stained the one below giving the effect that the camera feed was tinted. I immediately went to work and was also given the suggestion to use ColorMode (HSB), as learned from previous recitations in order to use values of hue, saturation, brightness, and opacity as compared to the original fill function that only represented color codes. I set the Arduino integer hue (sensorValue 1) as the first value and then set brightness and saturation to 100 and opacity to a 100 as well. The remaining potentiometer worked flawlessly after this.
Final Product (Video): Rec9
After finishing the reading for Computer Vision for Artists and Designers I have learned how Processing is just one example that takes the form of the environment that provides direct read-access to “the array of video pixels obtained by a computer’s fame grabber.” It is the implementation of machine vision techniques directly from first principles, rewarding users a memorable experience. It’s amazing to see how the computer reads an array of numbers and is able to process it and create output from this compilation of numbers. I find how this matter of technology use in my project in this recitation is prominent through my usage of serial communication between Arduino and Processing. I allow the computer to communicate with one another, send values to one another and from there, create an endless cycle of input and output.