Blog Post
In this week’s recitation, the goal was to use an H-Bridge to control the stepper motor which all together would create a drawing machine. While I was intimidated at first because we were tasked with working alone, I gained confidence throughout the process despite some setbacks that occurred.
Materials:
For Steps 1 and 2
1 * 42STH33-0404AC stepper motor
1 * L293D ic chip
1 * power jack
1 * 12 VDC power supply
1 * Arduino kit and its contents
For Step 3
2 * Laser-cut short arms
2 * Laser-cut long arms
1* Laser-cut motor holder
2 * 3D printed motor coupling
5 * Paper Fasteners
1 * Pen that fits the laser-cut mechanisms
Paper

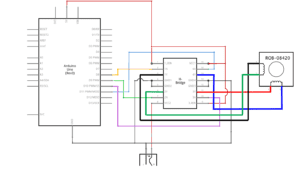
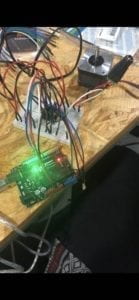
The first step was to connect jumper cables from the H-Bridge to stepper motor and arduino board in order to make the stepper motor rotate. For the most part, I did well following the schematic, but I wasn’t clear at first when the instructors told us to not plug in 12V and 5V on the same line. I realized later if these power sources were on the same horizontal line, we could damage the arduino board, or even worse, our computers!

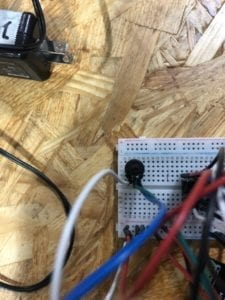
The next step was to attach a potentiometer onto the breadboard in order to control the rotation of the stepper motor and this is where things became complicated for me. The main problem was that the first time I plugged in the potentiometer, I connected all of the jumper cables on the same horizontal line, which meant my arduino board wouldn’t turn on. Then I realized that each prong of the potentiometer should have the jumper cables vertical so each of them are connected individually. However, even when I did this, I couldn’t control the stepper motor and the fellows around me were confused as well… AIYA! We thought that there could have been something wrong with the code, but I used the map function and wrote map(val, 0, 1023, 0, 200). Eventually, once we had switched H-Bridges and called over one of the professors, we found out we were actually controlling the stepper motor all along, but the movement was slower than we anticipated, so we did not think it was working.

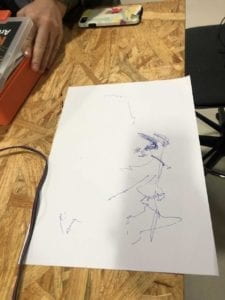
After all of this back and forth, finally my partner and I put together the drawing machine and the pen was moving pretty slowly, but it was moving, so we had accomplished the recitation task!

Question 1:
What kind of machines would you be interested in building?Add a reflection about the use of actuators, the digital manipulation of art, and the creative process to your blog post.
Whenever I look at the revolutions on the stepper motor, it reminds me of the same movement of a skip it toy that we would use as kids. You would put a hoop around your ankle and, as you skipped, the ball attached to the string would have to go under your other foot. It sounds like a complicated game, but I would want to bring an interactive game like this back to life using the stepper motor. The stepper motor would be inside of the ball of the skip it machine in order to make the revolutions and we would use a potentiometer to control how fast the revolutions of the string were. Unlike the other skip it machine where your body momentum is what is moving the toy, in this game, the stepper motor is controlling the revolutions. Then, the cool new part would be, we would attach chalk or a sidewalk pen, and the speed and movement of the child would translate into art on the streets!

Question 2:
Choose an art installation mentioned in the reading ART + Science NOW, Stephen Wilson (Kinetics chapter). Post your thoughts about it and make a comparison with the work you did during this recitation. How do you think that the artist selected those specific actuators for his project?
One art installation that I found interesting in this article was The Drumming and Drawing Subhuman. This art piece uses motors to move the arms of the robot up and down to make the sounds on the drums. I am not sure the name of the actuator, but I am sure the artist used a motor similar to ours in that it should be able to control the movement of the arms, while the potentiometer would regulate the speed in order to make different sounds which is expected in music. This reminded me of the drawing project we made in the class because we also used a interactive motor in order to manifest physical art that people could experience.