1. Concept And Design
1.1. Inspiration
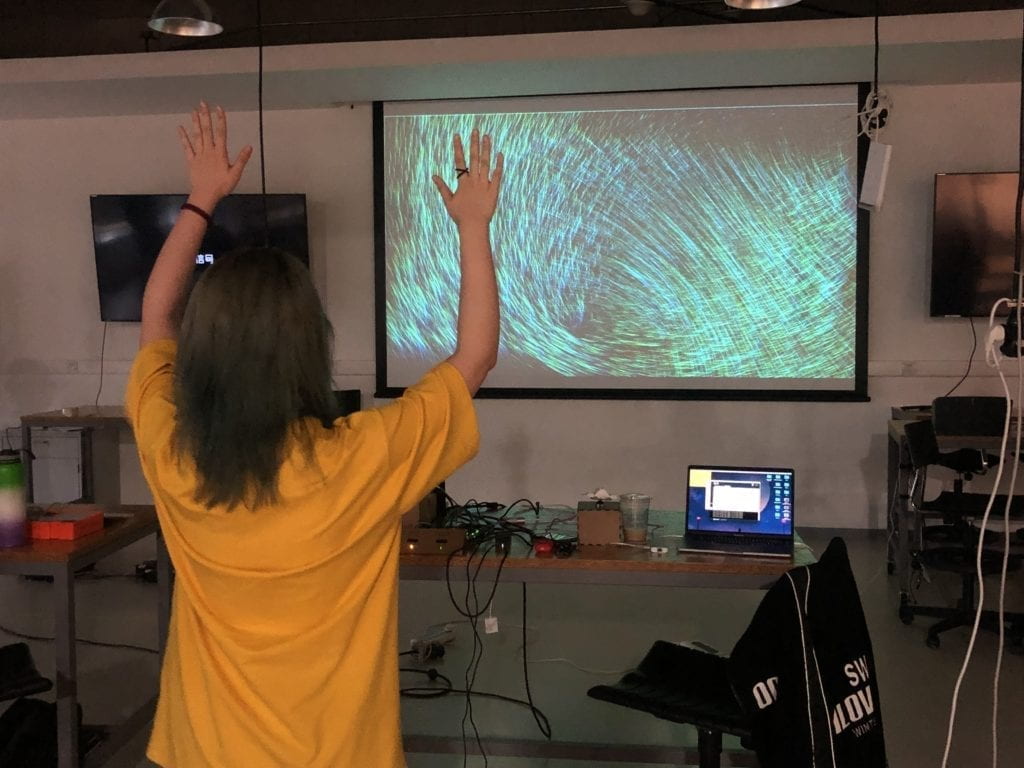
Nowadays, over-stress has become a very common problem. The idea of my final project is to build an interactive gestured-controlled particle system which can help people reduce stress levels. My project uses Microsoft Kinect and Arduino to detect the user’s gesture and uses Processing to display a dynamic particle system. By enabling its users to interact with the particles using gestures, my project tries to immerse users in the process of waving their hands and thus release their stress.
This project is inspired by an amazing app called Atomus. In this app, the users can place their fingers on the screen to interact with the particles which move in a certain orbit. When the fingers move, the orbit will change correspondingly. With relaxing background music, this app appears to be very attractive and stress-reducing to me. Thus, I decided to build a particle system in my final project.
Demo video of Atomus retrieved from Google Play Store
This project is also inspired by meditation. Meditation is one of the effective strategies to cope with the pressure. In meditation, people usually close their eyes and move their hands slowly. From meditation, I got the idea of combining the particle system and gestures. I want to use gestures as the input of the system. This recalls the form of meditation and makes my project  more relaxing. Additionally, this will reduce the learning cost and make my project easier to use because it is people’s instinct to make gestures.
Image retrieved from https://happy-and-relaxed.com/events/woman-meditating-ocean/
1.2. Gesture Recognition
However, when I was finding solutions for gesture detecting, I met the first challenge. Initially, I didn’t know Kinect and I wanted to use the OpenCV library to achieve this goal. I searched online and read lots of relevant articles. Generally, there are two solutions:
-
- Hue Filter + Contour Detection. This method only retains colors that are similar to the skin tone and calculates their contours to determine the position of the hand. I tried this solution with Python. Though this method has high performance, it doesn’t distinguish between hands, arms, and faces. Therefore, I quickly rejected this idea.
- Deep Learning. CMU Perceptual Computing Lab trained and released a model which can accurately recognize the skeleton of hands (Paper Here & Code Here). I downloaded the model and tested it. Though the accuracy and robustness were perfect, the performance was astonishingly slow (approx. 0.5 fps on my laptop). I have to reject this idea again.
Just as I was confused, one of my friends recommended Kinect to me. Kinect integrates a normal camera and an infrared-ray camera and uses structured 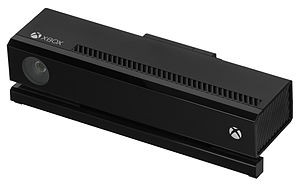 light to recognize human bodies. I immediately borrowed one Kinect 2 from the ER and tested it. Surprisingly, Kinect provided not only fast and accurate body skeleton recognition but also friendly development interface. So I was sure that I would use it.
Image retrieved from https://vvvv.org/documentation/kinect
1.3. Extra Control Panel
In addition to Kinect, I also designed an Arduino-driven control panel. This 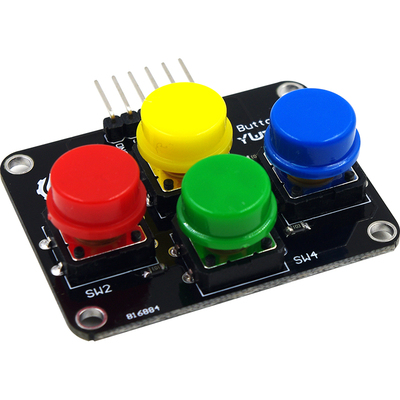 panel complements Kinect’s interactions and provides features such as “Calibrate Sensor” and “Change Color”. Kenneth lent me a four-color button module like this. I found this module very useful. Combined with the prompt information on the screen, it is easy for the users to distinguish the function of the buttons by their colors.
Image retrieved from taobao.com
2. Fabrication And Production
2.1. Data Forwarder (C#)
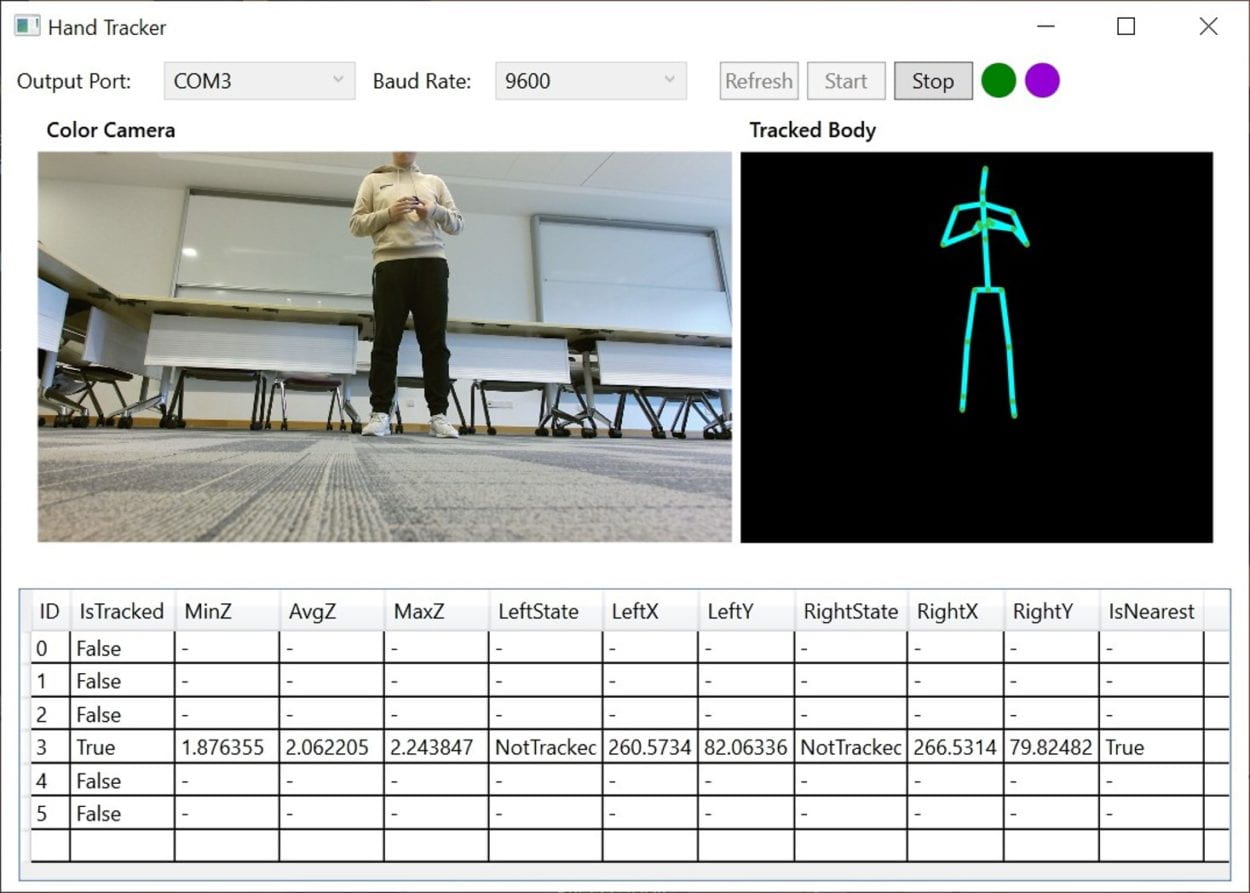
As for the production, most of my effort was put into programming. I first created a C# application which receives data from Kinect with Microsoft’s official API and sends them to Processing. Though I later realized that Processing provides some libraries which can directly obtain data from Kinect, I still chose to make a separate program because I am more familiar with C# and I can build a GUI with C# to help to debug. With reference to Microsoft’s example codes, I made it (Code Here). And it looks like this:
In order to live up to what I’ve learned in Interaction Lab, I chose to use serial to transfer data from this C# application to Processing. It’s worth mentioning that I found an interesting software called Virtual Serial Port Driver (Official Website) which is able to create two virtual serial ports and connects them virtually. I can just send data to one virtual port and Processing will receive data from the other one.
2.2. Particle System (Processing)
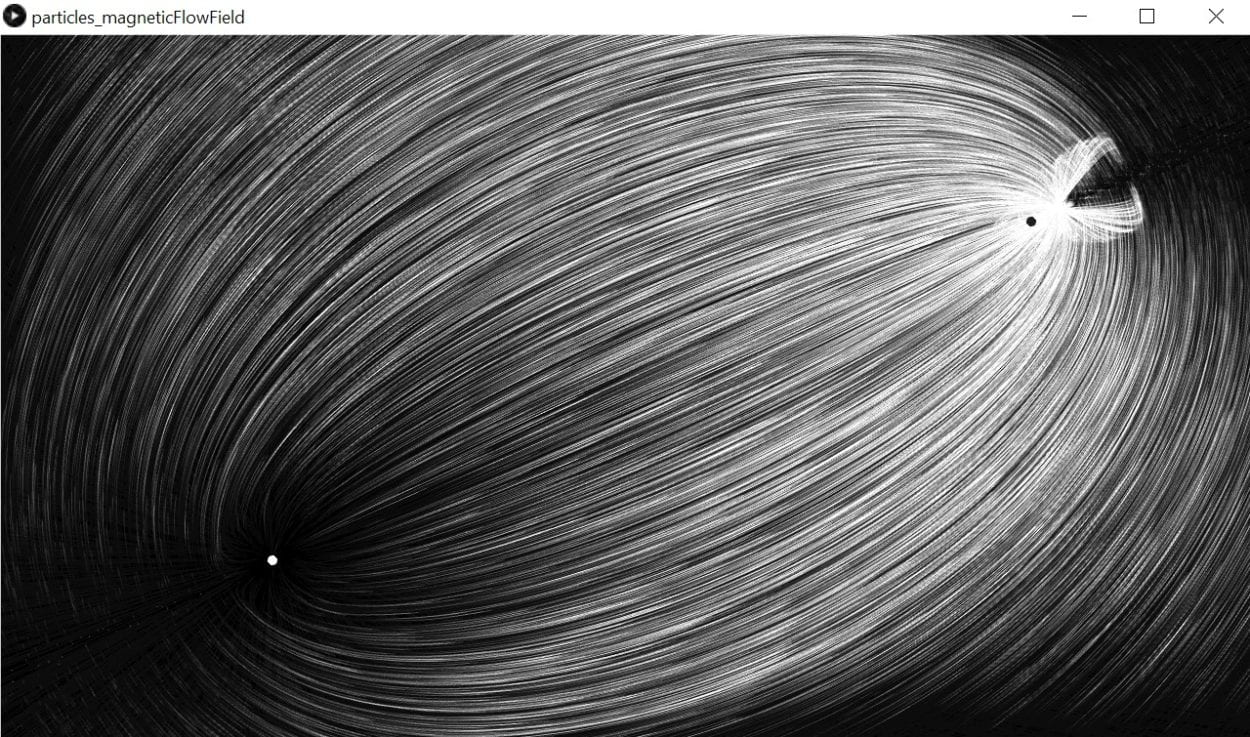
Building the particle system was quite a challenge for me because it involves lots of physical computation and graphical techniques. Fortunately, I found a repository on GitHub (Link Here) which already implements a particle system with a magnetic field. By understanding and modifying these codes, I implemented the features of receiving data from the serial ports and updating the magnet field in real-time. Basically, when the user’s hands move, the positions of the two dots will change. And when the user makes a fist, the dot attracts particles; when the user opens his/her hand, the dot emits particles. This is how the first version looks like:
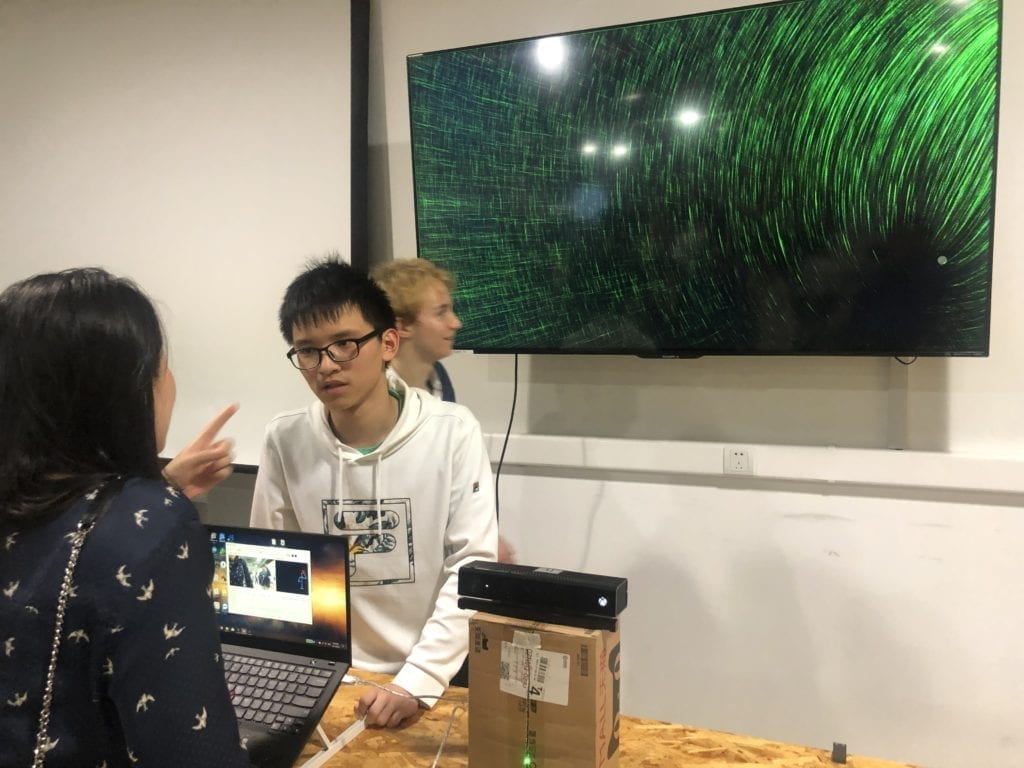
2.3. User Testing Session & Arduino Part
In the user testing session, my project was tested by lots of people, and I received several insightful comments. And according to these comments, I made many adaptations to my projects. One comment was that the dots which represent hands sometimes fluctuates too quickly and I should add a data filter to eliminate fluctuation. So, I updated my C# application and add a mean filter to process the Kinect data before they are sent to Processing.
Another comment I received was that I should make the particles colorful and add some relaxing sound effects that vary with user input. I did add some codes to change the particle color based on the distance between the user’s hands. However, as for the sound effects, I found that it’s a big task to implement a dynamic sound generator. So, I didn’t achieve that goal.
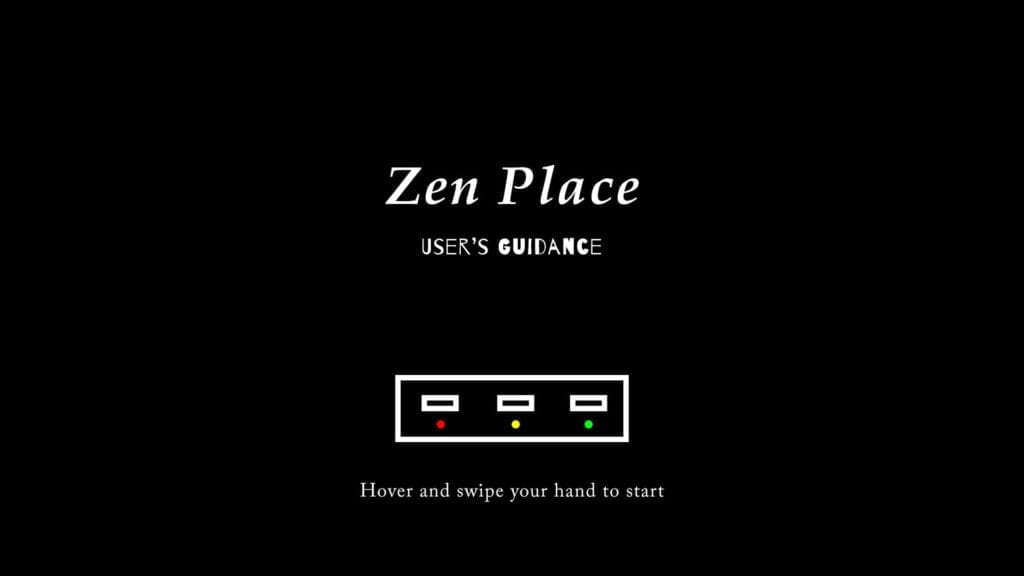
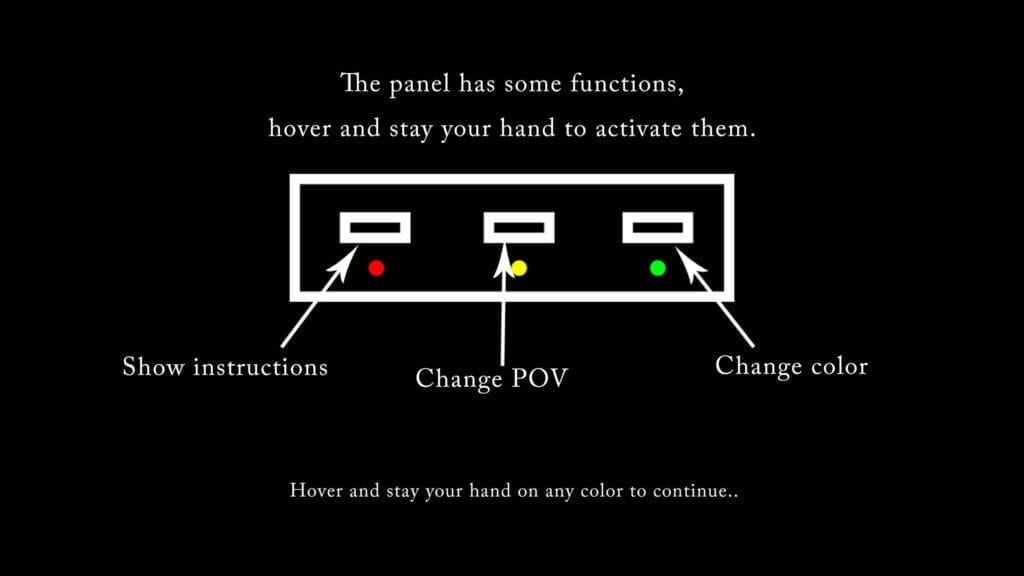
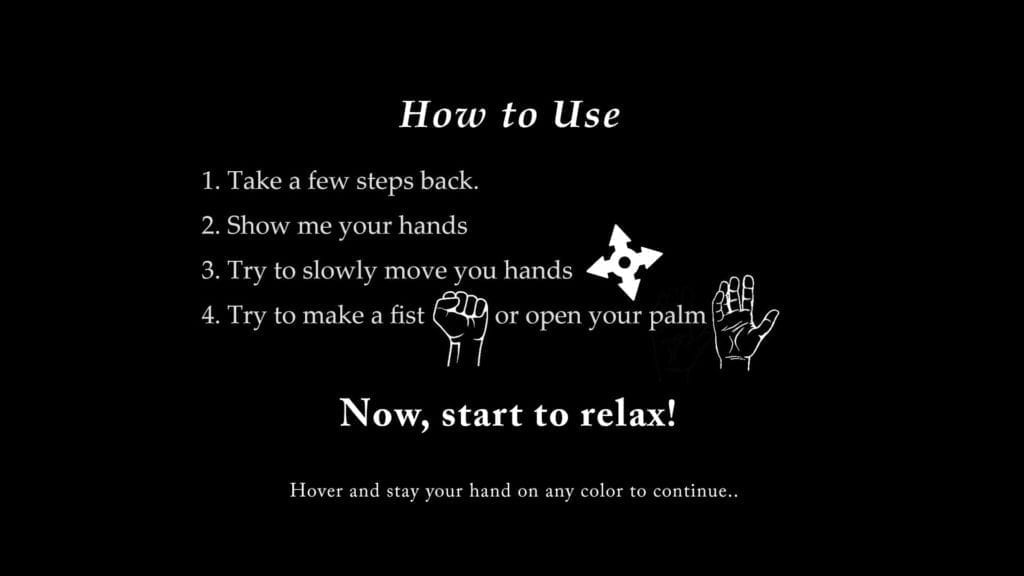
The third comment was that I should provide more aids to teach the users how to use my project. Not everyone is familiar with Kinect and not everyone knows what it does. I myself also noticed during user testing session that lots of people never attempted to change their gestures. It means that it is relatively hard for users to figure out how to interact with my project. Therefore, after the user testing session, I added several instruction pages in the Processing to guide the users. Here are the instruction pages:
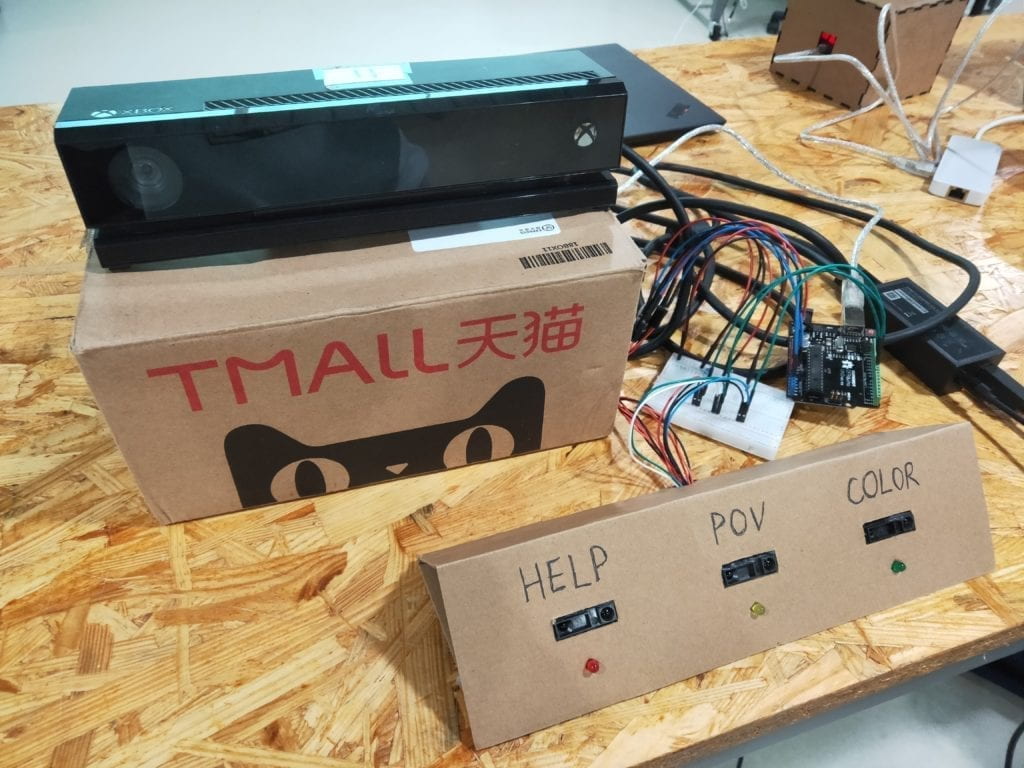
The last comment was that I should keep the interaction provided by Kinect and the interaction provided by Arduino consistent. As a result, I gave up the idea of using the 4-color buttons module. Instead, I turned to use infrared distance sensors to detect the user’s gesture commands. In this way, I could make the interactions consistent–both don’t require touch. I used the cardboard to fabricate a control panel with three distance sensors and three LEDs. It is able to detect basic gestures including “hover and stay” and “hover and swipe.” Here is how my Arduino component looks like:
2.4. Miscellaneous
The project code (including Arduino and Processing) can be found Here.
Also, here are several photos and videos of the final version (some of them are from Young and Jingyi):


3. Conclusion
In my final project essay, I defined interaction as “timely information transfer between human and machines which forms a cycle and affects the next loop.” I also emphasized that an appropriate interaction always gives the user enough hints to start the interaction correctly. My final project aligns with my previous definition of interaction. It responds promptly to the user’s input. And each response will encourage and affect the user’s next input. Moreover, the instruction pages act as hints to help the users start interaction correctly.
However, my project also gives me some implications about the interaction. It pushed me to think about the protocol of interaction. The protocol of interaction specifies how information is passed and guarantees that the information can be understood by both human and the machine. For instance, in traditional interaction, pressing a button or rotating a potentiometer is often the protocol of interaction. Human knows this protocol so he/she won’t try to express his/her information in the wrong way; the machine knows this protocol so that it can receive information from the users. However, these protocols can usually be expressed as current magnitude or voltage level, which is easy for the machines to measure but hard for a human to comprehend and learn. As is our common sense, some people may find it hard to use computers and smartphones–they cannot understand the protocol of clicking. The Kinect demonstrates how the interaction will be in the future. I really love the concept of NUI (Natural User Interface). NUI means the interaction is more acceptable to the users and easier to learn, such as gesture control and voice control. With NUI, the protocol of interaction is becoming more user-friendly and more natural. People can immediately know the proper way to interact as the protocol of interaction here is no longer pressing buttons but closer to human’s instincts. The protocol of interaction is varied and is becoming more and more natural.
Through the user testing session, and the IMA show, I found that my users interacted with my project well. However, if I had more time, I will continue to do these improvements:
-
- Add dynamic sound effects
- Fabricate a case to pack everything up
- Make an interactive user guidance
- Support multi-users
The initial goal of my project is to help people reduce their stress. Most of my users cannot fully recognize the purpose of my project. Therefore, I should have emphasized the goal of my project in a more straightforward way. Anyway, almost all the users found my project amazing and interesting. So, this is what I did well.
Through the whole process of the final project, I learned a lot. I learned how to incorporate existed code into my project; I learned how to find and evaluate different solutions; I learned how to listen to my users and make good use of their advice. Finally, I would like to thank Professor Chung for being so nice and offering us a pleasant experience in the Interaction Lab!