Link: http://imanas.shanghai.nyu.edu/~qc532/week6/audio/
Description:
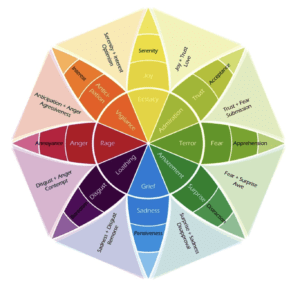
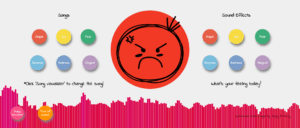
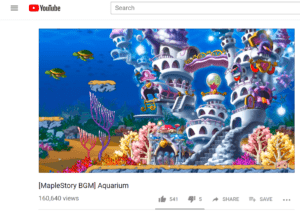
Daisy and I basically agreed on everything while we were working on the Audio Project. We decided to create a project based on mood where certain sounds, noises, and colors would affect one’s mood. The way it worked was each “mood” you clicked was matched accordingly with it’s color associated with that mood. Furthermore, each song we chose was based on the mood you would feel from listening to the song. For instance, for “anger”, we chose a hardcore punk song that was full of angry vibes. After that, you could choose a certain human sound effect associated with a mood to change the atmosphere of the song. For example, if you chose the “angry” sound effect with the “angry” song, there would be screaming in the background that would work well with the “angry” song. But if you choose a “sadness” sound effect with the “angry song”, the entire atmosphere of the song would change or not feel right.
Process:
Daisy was in charge of the coding for the Audio Project and also came up with the idea for the project while I was in-charge of finding the music and sounds for the project as well as editing and remixing the audio through Audacity (although Daisy did give me some suggestions and advice throughout the process).
I particularly listen to a lot of music, played in several bands before and have even done music journalism in the past so I thought with my experience around music, I would be able to do well for the audio part of the project. I chose songs who’s lyrics were centered around a particular mood (such as “Riot Squad” by Bad Brains for “Anger”) and then also searched up human sounds that one would make while experiencing that certain mood (such as the sound of someone yelling in frustration for “Anger”)
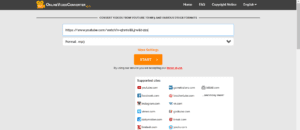
For the human sound effects, I would first find a recording of it on YouTube first and then copy+paste the url into a YouTube to mp3 converter online. After doing this, I would upload the url into Audacity and then I began to experiment with the mp3. Somethings I did to edit the recording was to change the speed, pitch, distortion, amplification, and tempo for the audio. The way the edited mp3 would sound was it would play the original audio first, then it would play different edited versions of the audio one after another throughout the entire audio.While experimenting with the audio, I did encounter some problems. One problem I encountered was that for each audio portion that was edited, the volume for each audio wasn’t always consistent with each other. I realized that when I added the echo effect to the audio, it would make the audio louder and louder so I removed that effect from the Audio Project. Not only that, but I figured out that by choosing the “Normalize” effect on Audacity, it would make the frequency for each audio equal which would make the volume for each audio consistent with each other as well.

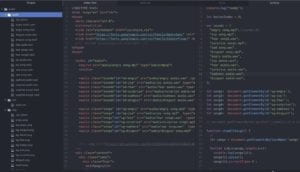
Here is a screenshot of the coding that my partner Daisy did for the project:
We made it a priority to start this project early, because for my last project, it was done a bit late so we definitely wanted to prepare early this time. By doing this, we were definitely able to establish everything we wanted and find out problems in our assignment early on so we could fix and avoid them by the time we turned it in.
Post-Audio Project : I felt really happy with the way the project turned out in the end, cause originally I wasn’t too sure if mixing a human sound effect would work well with a song. However, the two different sound recordings worked a lot better than I had expected and I felt that the project was really able to convey what we wanted to express. Overall, I really enjoyed this project and definitely learned how to use a new application: Audacity.