Documentation
Link: https://gist.github.com/cy1323/79c6e9671c94c26764650fa4f6d21948
For starters, I went onto TurboSquid, a website dedicated for a community of 3D Object creation. I found this cat object that caught my attention upon first glance. I immediately wanted to use it, considering that all the other examples didn’t seem as concrete and geometric, which is what I was looking for.
3D Object: https://www.turbosquid.com/FullPreview/Index.cfm/ID/1340490
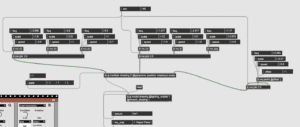
I duplicated the patch I made in class and got to work with the assignment. At first, I got really confused as to how I should upload my 3d object into the patch, but after carefully looking through the professor’s example patch, I learned that I needed to use jit.gl.model and a ‘read’ message to call upon the 3d file sitting in my desktop. I began to play around with the 3 parameters we had learned to manipulate in class: position, rotation and scale. There were times where I would get very confused with the functions, but I learned to be careful when changing the decimal values on them. For this assignment, I wanted to strive for a cohesive object, not just separate objects that could be visibly distinguished. To do this, I started off by upping the overall ‘dim’ value to 80. Afterwards, I continued to manipulate the positions modules much more heavily than I did the rotation and scale factors of the patch. With the finished product, I achieved a cohesive object that moved in a serpent-like manner, or that of a dragon-like manner.
Jitter Recording: Screen Recording 2019-11-20 at 7.25.22 PM
After I finalized the movement of the overall 3d object, I proceeded to work on the visual effects with Vizzie. I decided that I would use both generative modules and effects to create the visual overlay for my assignment. I took the video output created through jitter and used a CHROMAKEYR to relate the video with a generative 3EASEMAPPR. From there on, I utilized one of my favorite transformative modules, the KALEIDR, to ‘transform’ the overall output into a geometric and concrete visualization. I then attempted to use a different effect, the SKETCHR to see what these colorful shapes would look like in the basic form of lines. I ended up with a very black and white video that emphasized the borders of each and every shape found in the output. I didn’t necessarily like this outcome and so decided that I would use a trusty old MIXFADR to mix together the outputs of both the SKETCHR and the previous KALEIDR effects. After toggling with the settings, I was able to achieve an imagery that I found to be significantly abstract and mysterious.
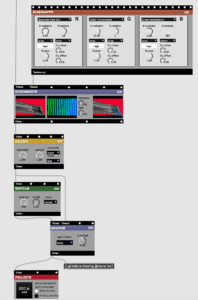
I wanted to then capture this Vizzie compilation as a texture for the jitter modules, but was stuck in the process. I looked over class notes, searched the internet and asked for help within the Max application itself. I thought that I had figured it out by utilizing the jit.gl.texture drawing component and attaching it to the final Vizzie output, but I was met with defeat when I went back to program it into the jitter section. I tried and tried, but the texture just didn’t seem to overlay the jitter output. I hope that I can learn to achieve and master this texture function in the next class.
Final Results: Screen Recording 2019-11-20 at 6.48.51 PM
*After several tries, I was not able to achieve a snapshot of the resulting patch. Every time I reopened the patch after creating and filling in the snapshot, Max would revert my selections and settings back to its default. I apologize for not being able to solve this situation.*