The goal of this project is to recreate Braitenberg’s four state vehicle. He cites the use of a “flip flop brick” that allows the device to utilize past states to determine the next action.
Following Mim’s diagram of a clocked “RS” flip-flop sequential logic circuit I was able to develop program that manages the flow of information in such a way that allows it to react to an outside force. Here the outside force triggers what is called a “clock”. The “clock” is the signal that when triggered completes the circuit and sends the information through the flip-flop block.

Test Button A
Test Button A Demo
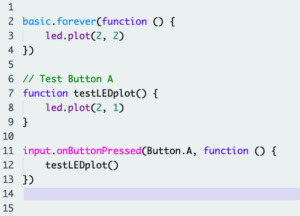
To begin, I started with the smallest component. First, I needed to determine whether the signal was being received at all. To do this, I created the testA function where the letter displayed on the LED screen would change if the button was pressed. The natural (starting) state was a “B” but, when the button A was pressed the screen would display “A”.
testLEDplot()
Test Plot Demo
In order to recognize which state the vehicle is in I decided to use the LED screen to make the distinction more clear. By assigning the LED pin (2,2) as state1 and LED pin (2,1) as state2, I was able to see the passing of states as each iteration was triggered by the pressing of button A.
After getting a better understanding of the led.plot() function, I felt it was time to tackle the flip flop brick. This required me to outline how state1 would change as the signal was passed as well as orient it in a way that allowed state2 to change only when state1 went from false to true.
This idea of changing the states from false to true mirrors Braitenberg’s vehicle’s motors changing from off to on.
Four State: Trial I
Fail
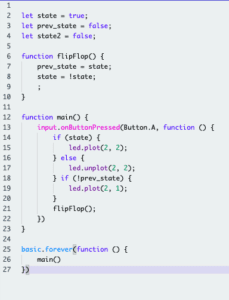
The first attempt resulted in the LEDs flipping off and on together with each instance of the button A being pressed.
Four State: Trial II
Fail
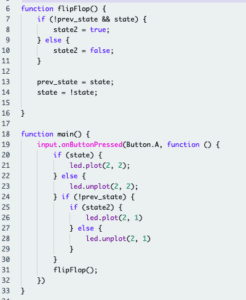
Attempt 2 showed sate1 LED flipping on and off while the state2 LED flipped on once and stayed on forever.
Four State: Trial III
Fail
Attempt 3 saw state1 and state2 LEDs changing however the pattern was not according to the 4 states Braitenberg mentioned. Instead they would transition from state1 on to state2 on then state1 would go dark while state2 would continuously stay on.
*picture only shows the portion of the program changed within the Trial the rest is same
Four State: Trial IV
Fail
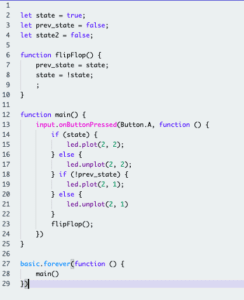
In an attempt to correct the LED of state2, I tried to put an if statement within the flip flop block. However, this only proved to make the LEDs perform an incorrect sequence.
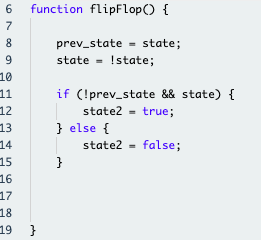
*picture only shows the portion of the program changed within the Trial the rest is same
Trial V LED 4 States
Success
Four State LED + Button A Demo
Trial 4 was a success. Both LEDs completed the correct state sequence with each instance of the signal being passed as the button A was pressed. By using the nested if decision structures I was able to have state2 change only under the approved circumstances.
let state = false;
let prev_state = !state;
let state2 = false;

function flipFlop() {
   prev_state = state;
   state = !state;

   //if state goes from OFF to ON
   if (!prev_state && state) {

       //make state2 ON
       state2 = !state2;
   }
}
function main() {
   // when button A is pressed
   input.onButtonPressed(Button.A, function () {

       // when state is true
       if (state) {

           //turn ON light
           led.plot(2, 2);
       } else {
           //turn OFF light
           led.unplot(2, 2);

       } if (!prev_state) {
           if (state2) {
               //turn ON light
               led.plot(2, 1)
           } else {
               //turn OFF light
               led.unplot(2, 1)
           }
       } flipFlop();
   })
}

basic.forever(function () {
   main()
})
robotbit.Motors
success
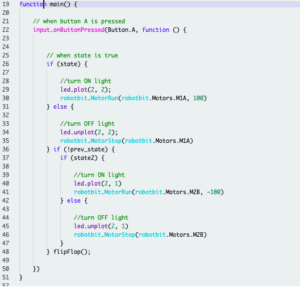
Incorporating the robotbit’s motors was a success. Nothing in the structure of the code was changed. The only line added was the addition of the motors turning on or off according to the two states (state and state2).
Reflection
While the basic characteristics of Braitenberg’s 4 state turtle are present in this project, I hope to develop this further with a specific organism in mind. This would allow me to create a creature that exhibits more complex behavior and would also come across more natural.
In order to achieve this I would use the robotbit’s ultrasonic sensor to survey the surroundings. Additionally, I think the use of the accelerometer could pose an interesting challenge. While pressing a button is extremely unnatural, nudging the bot would be much more realistic. As an animal comes in contact with a creature, touch is the sense that would most likely instigate a fight or flight response therefore, using the accelerometer to detect a harsh vibration (from a hit or shove) would come across more natural as the bot decides how it should respond.
