Final Project Individual Reflection by Amy DeCillis

Line Riders – Amy DeCillis – Marcela 

CONCEPTION AND DESIGN

From the start, I really wanted to stress interactivity via multiple inputs. To do this, I reinvented Line Rider, a one player game I used to watch my brothers play growing up, and made it multiplayer. Another key goal of mine was to include multiple sensors and tools that would force users to move their bodies and coordinate with each other rather than just sitting still looking at a computer screen alone. In order to achieve this goal, I used a motion sensor, a distance sensor, a joystick, and a potentiometer. Some of these made perfect sense in terms of the actual game while others were used purely to make users move their bodies. For instance, the potentiometer and joystick made sense for the users actually drawing the line and moving the rider’s position on the line. The motion sensor and distance sensor were less intuitive for the rider and were included to make people move and for added fun.

 FABRICATION AND PRODUCTION

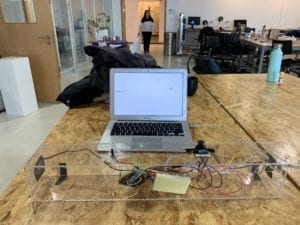
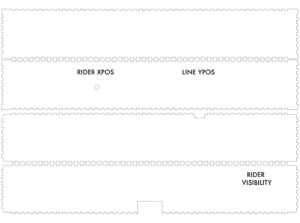
Because I wanted to emphasize collaboration between users, I designed a single box that held all of the inputs. I could have had separate boxes and increased distance between users, but I wanted the users to be physically close. In order to not make it too crowded for the players who had to physically move around, I put the motion and distance sensors on the end of the box/control panel to give them more room.

During our final presentations, someone suggested that I design the box in a way that connects to the project more, which I agree with. Someone else suggested that I create separate boxes for each input. I disagree not only because I wanted the users to be physically close, but also in discussion with the lab assistants during laser cutting, that would have actually wasted more material than creating a single big box.

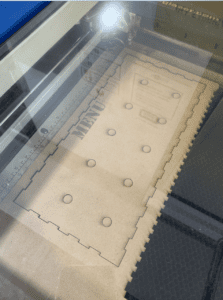
One failure I noticed after laser cutting was my design for the labels on the sides. Instead of having them at the top of the box, they were written sideways which was a little inconvenient for users to read. During user testing some of the feedback I got suggested that I should decrease the number of inputs and that not all users have equally important roles. I disagree, however, because without each input, the users are not able to ultimately reach the target and the users must coordinate with each other and collaborate because of the unique roles at the very end.

CONCLUSIONS

I ultimately wanted to recreate a game I played growing up but with multiple players and a high level of interactivity. In this game, users not only had to interact in various ways with the game itself, but also with each other. From the line’s y position, the riders x position/speed, the rider’s size, and the visibility of the rider, there were many ways that the users influenced the game. Additionally, each user had to communicate and collaborate with the other users to reach a goal. In this sense, the interaction was a true conversation that was constantly changing and adapting. 

During user testing, before I had laser cut the final box/control panel, users seemed to genuinely enjoy playing with my project. Unfortunately, during final presentations, users seemed less enthused. I definitely should have added a sound component and designed it so hitting the target was more obvious and there was more of a reward. I also think that different difficulty levels would have made it more appealing to different skill levels. I do think that even if users did not necessarily enjoy playing it the way I had hoped, they still nevertheless had to collaborate with each other and that to me is a success.

There are of course many multiplayer games out there in the world, but Line Rider is part of my childhood. In talking with other Americans my age, it also was a big part of theirs. I am happy that I was able to recreate this game and make it multiplayer because as someone who is the youngest of five children, I think the best times are spent with others. Had my siblings and I had this version of Line Rider when we were younger, maybe our relationship would be even closer. In an age where everyone is on their cellphone and becoming more isolated in many ways, I hope there are more collaborative games that get people moving and talking with each other. 

Our Planet Final Reflection–Vivien Hao–Professor Inmi Lee

Our Planet—Vivien Hao—Professor Inmi Lee

CONCEPTION AND DESIGN:

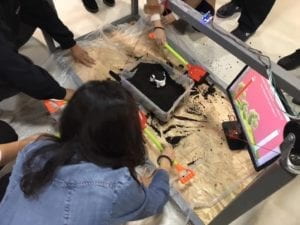
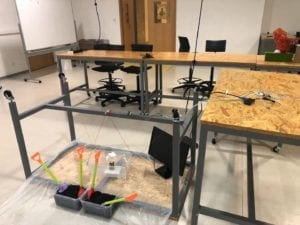
            We have made some small changes after the user testing. Like what Professor Marcele has suggested, if we put the two boxes of sand on the two sides, it might make participants feel like they are in a competition, which we do not want to see. We want to promote cooperation. In addition, participants had a hard time seeing the screen. So they did not understand what the purpose behind planting a tree is. With all these confusions from the participants in mind, my partner and I decided to move the screen to an eye-level, at which participants can easily see the image of a growing tree. Instead of using sand, we have filled the boxes with dirt because participants would grab the idea of planting a tree well if we use dirt instead of sand. We think that when the participants can see the growing tree in front of then, they would understand why they have to dig dirt and plant the trees. For this project, we were very careful with the choice of materials. Since the message we want to communicate is a global issue, so in this process, we did not want to raise other global issues such as wasteful usages of materials. We want to be as much environmental-friendly as possible. We used reusable boxes to put dirt. We placed the weight sensor on the table without destroying neither the sensor nor the table. We knew that we did not want to destroy anything in this process, if possible. I think because we had this belief since the beginning, so throughout the material selection process, we knew clearly what are the materials that we would not consider due to the unsustainable issue they might have. In the beginning, we had the idea of laser cutting four boxes. And use those four boxes as containers for dirt. But we then rejected this idea because if we did so, we could have wasted so many materials. And certainly enough, a better solution would be to use reusable plastic boxes. By using reusable plastic boxes, we could well communicate our idea of being environmental-friendly.

FABRICATION AND PRODUCTION:

            In the User Testing Session, we have encountered several issues that we did not previously thought might have occurred, such as participants did not know what they were supposed to do, they did not understand the purpose of planting a tree, participants treated the cooperation process as a competition, we did not have enough dirt, etc. After the user testing, we knew clearly that we have to make changes to solve these issues. We added a monitor screen that could display the growing tree. We placed the monitor on the floor so that participants can see the outcomes directly. We have also placed the weight sensor on a table so that it would be more stable than just simply grabbing it by hand. These changes could not have been made if we did not have the User Testing Session. We could not have seen those issues. I think these changes were very effective. In the final presentation, we could see that participants knew what to do. Like I have mentioned earlier, in this project, we wanted to be as much environmental-friendly as possible. So we have tried to only to use reusable materials throughout the process. This resonates with our overall project goal—to make people aware of the global warming issue—and with such a goal in mind, so we wanted to communicate this idea throughout the entire project.

CONCLUSIONS:

            The goal of this project is to raise people’s awareness of the global warming issue that we are currently encountering. Throughout the project, we encourage interactions between the participants and the project. We also encourage cooperation among the participants. Through this cooperation process, interaction occurs. Participants need to cooperate simultaneously in order for the project to give a satisfying outcome. However, I think this part could have been more interactive if we have made the project offer a second response to the participants. For the current project, people could only see one outcome—the earth will explode no matter what. The audience did participate in a way that we wanted them to participate in. They were willing to cooperate with each other throughout the process and understand the final outcome would be the earth will explode no matter what we do. I think if we had more time, we could have enlarged the project by size. We could have added more dirt so that more participants could join the game, and by have enough participants to play this game, the earth will not explode. By doing that, we would not be so pessimistic. I think throughout this project, we have been very pessimistic. And from the feedback we have gathered from the participants, we know that we could have been more optimistic. I have learned that no matter how terrible the situation might be, we have to be optimistic and always have hope. Even though we know that due to our irresponsible actions, the earth is facing serious dangers, we still need to try to put in the effort and save the earth. Throughout the process of building this project, we were very on-schedule. We did not really push things till the last minute. We did not have to pull all-nighters in the lab the night before the deadlines. I think this is one of our most noticeable accomplishments. Through this imperfect project, we really want to make people aware of the fact that our home planet is facing serious dangers due to our irresponsible action. We have to take immediate actions. We have to, and we must care about this planet.

Final Blog Post for Final Project by Ryan Yuan

Project Name: Intereferit

For this project, I work alone, and the final work is a new interface for musical instrument. 

Based on the previous research I had done before the production started, the project would be related to music. The keyboard MIDI player I had found and the website of The International Conference on New Interfaces for Musical Expression, AKA NIME, gave me a lot of inspirations on making a musical instrument. As what had been mentioned by professor Eric during class, conductive tape could be an interesting way of interaction, so I finally thought of making a musical instrument that is only based on interaction built by conducive tape. The concept of utilizing conductive tape is by making a circuit based on the tape, the sensor part connects to an input port on Arduino board, the trigger part connects to the ground. 

After thinking about the way of interaction, I started thinking about how the interface would look like. I am very interested in Japanese history, and I have been playing a Japanese game that is related to the Japanese Warring States Period in recent days, so I was inspired by it and wanted to make the interface related to something about the history. There are family lines for each family during the Warring States Period, and these lines all look differently from each other and has its own meaning. Oda family and Tokugawa family are the two most famous family during that period as these two families are the two that had united the whole country, and I like these two families very much, so I want to adapt their family lines into my project. And this is the reason why my final project is the combination of their two family lines. 

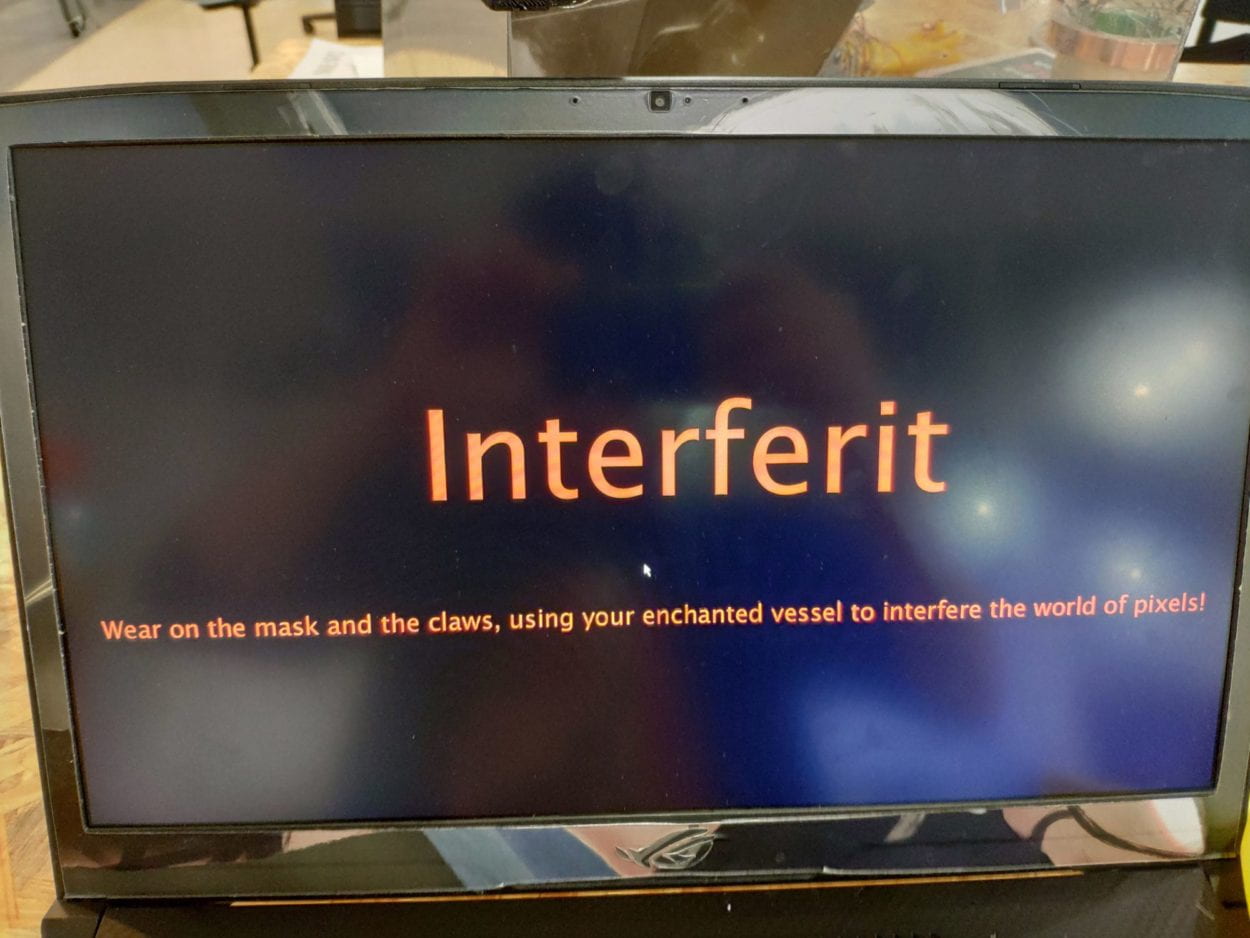
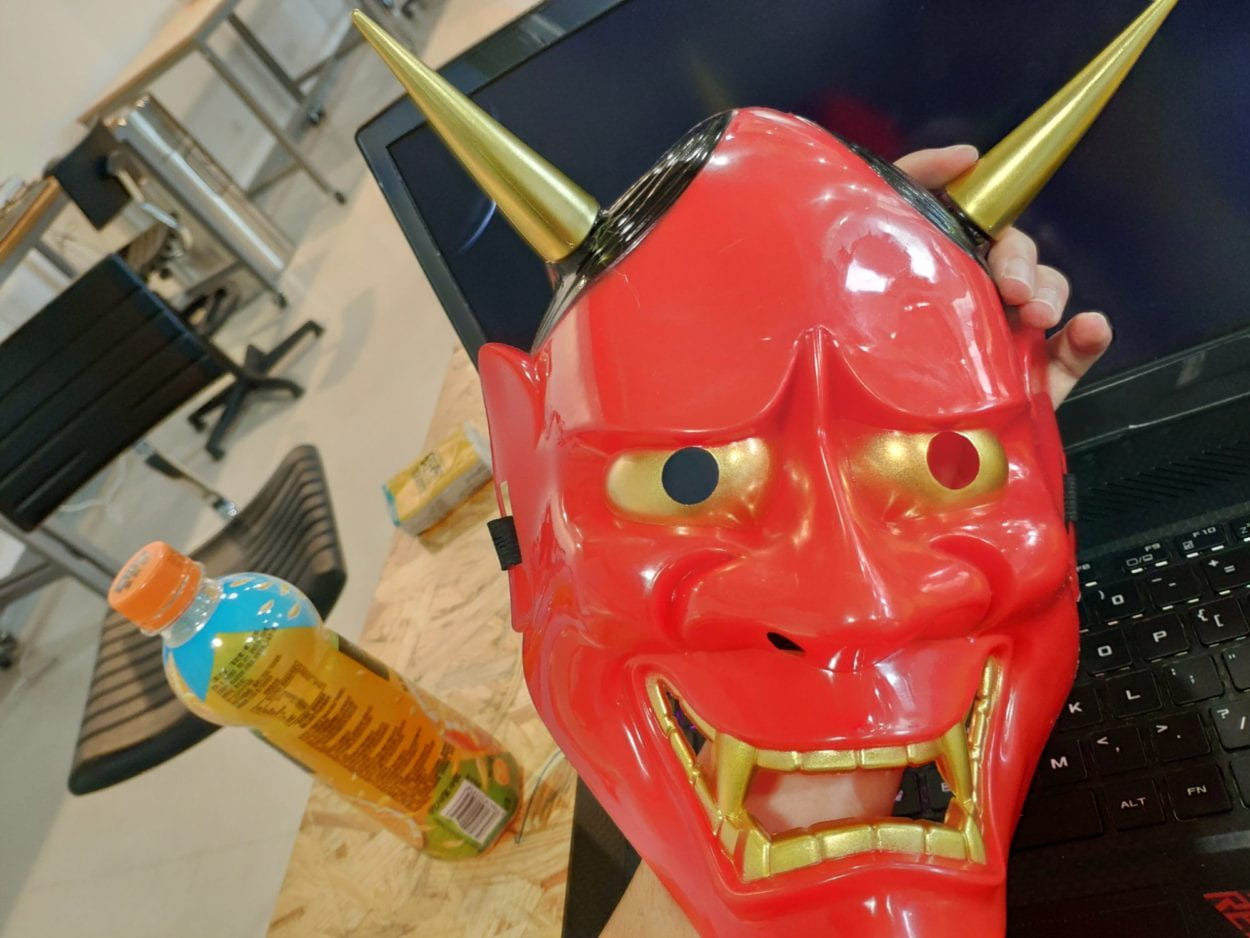
The idea of the whole project is not only a musical instrument, but it is also about connection. For the physical interaction part, the two family lines indicate the actual connection of the two family in history. Then for the virtual interaction part, I want to make visualization of the instrument, that when the user is playing the instrument, there will be effects on the screen, and these effects will be passed on in some way to the next user to make connection with others. So I think of water ripples effect, as water ripples will be triggered and be passed on since they will last for some time in real life when a water ripple is triggered. For the effect of water ripples in processing, the water ripples will be realized by pixel manipulation, that the RGB value will be passed to other pixels when a water ripple is triggered at one pixel, to make it look like spreading. And I am thinkging of the way of how to control where to trigger the water ripples on the screen, so I have thinked about color tracking by using camera capture. The concept is that, if the object is in certain RGB value and if I set a condition to only track those pixels and make them visible, the result will be like as if I am doing object tracking. So I get a traditional Japanese ghost mask which is red, not only to fit the Japanes style and realize the tracking function, but also to fit the concept that, we are the ghost in the vision of the camera, and we will bring intereference to the pixels.

Now talking about the reason why I name the project Intereferit, it is a word combined with interefere and inherit, intereference means we will interefere the pixels and these intereference, or as to say the water ripples will be passed on to the next user on the screen, which is inherit. 

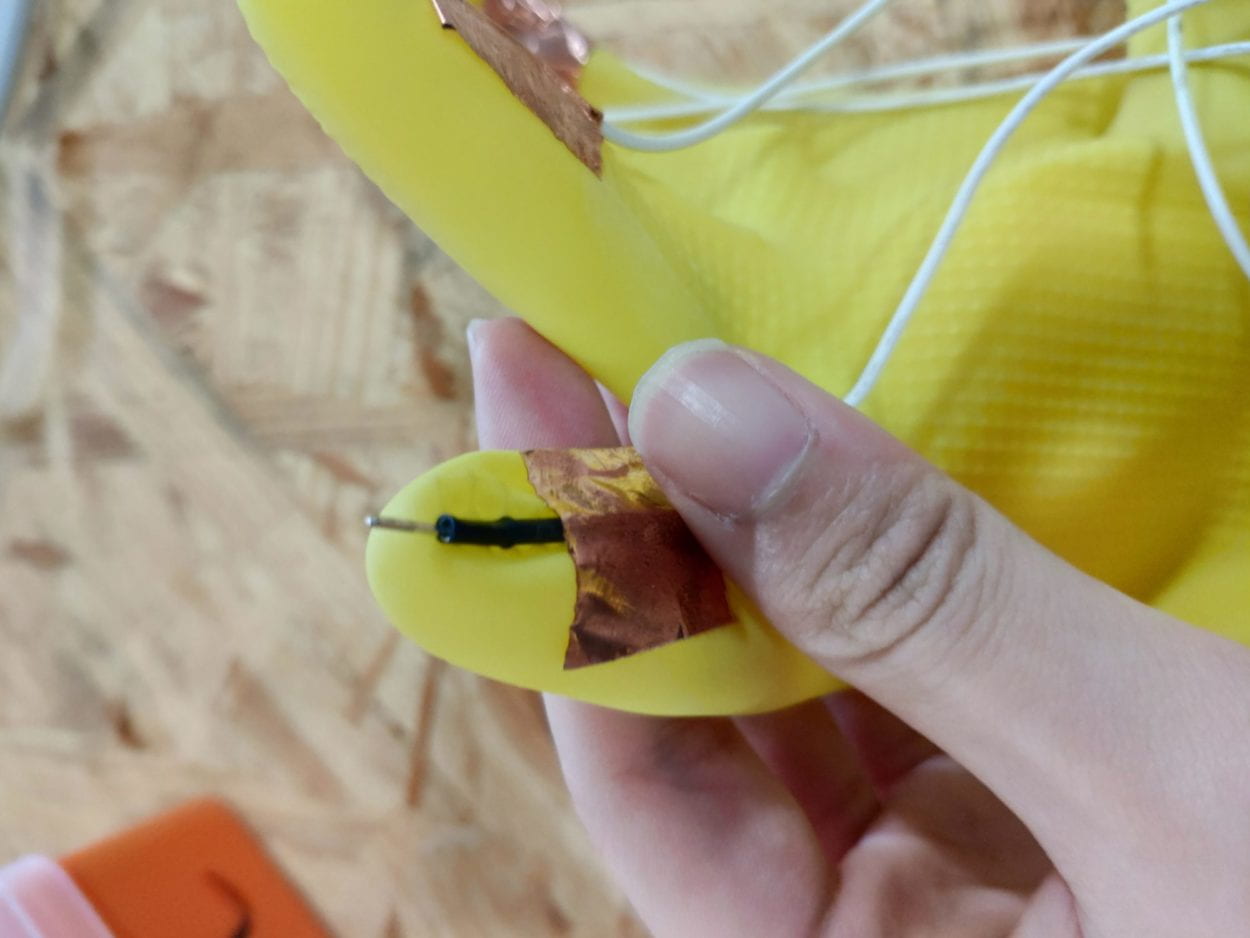
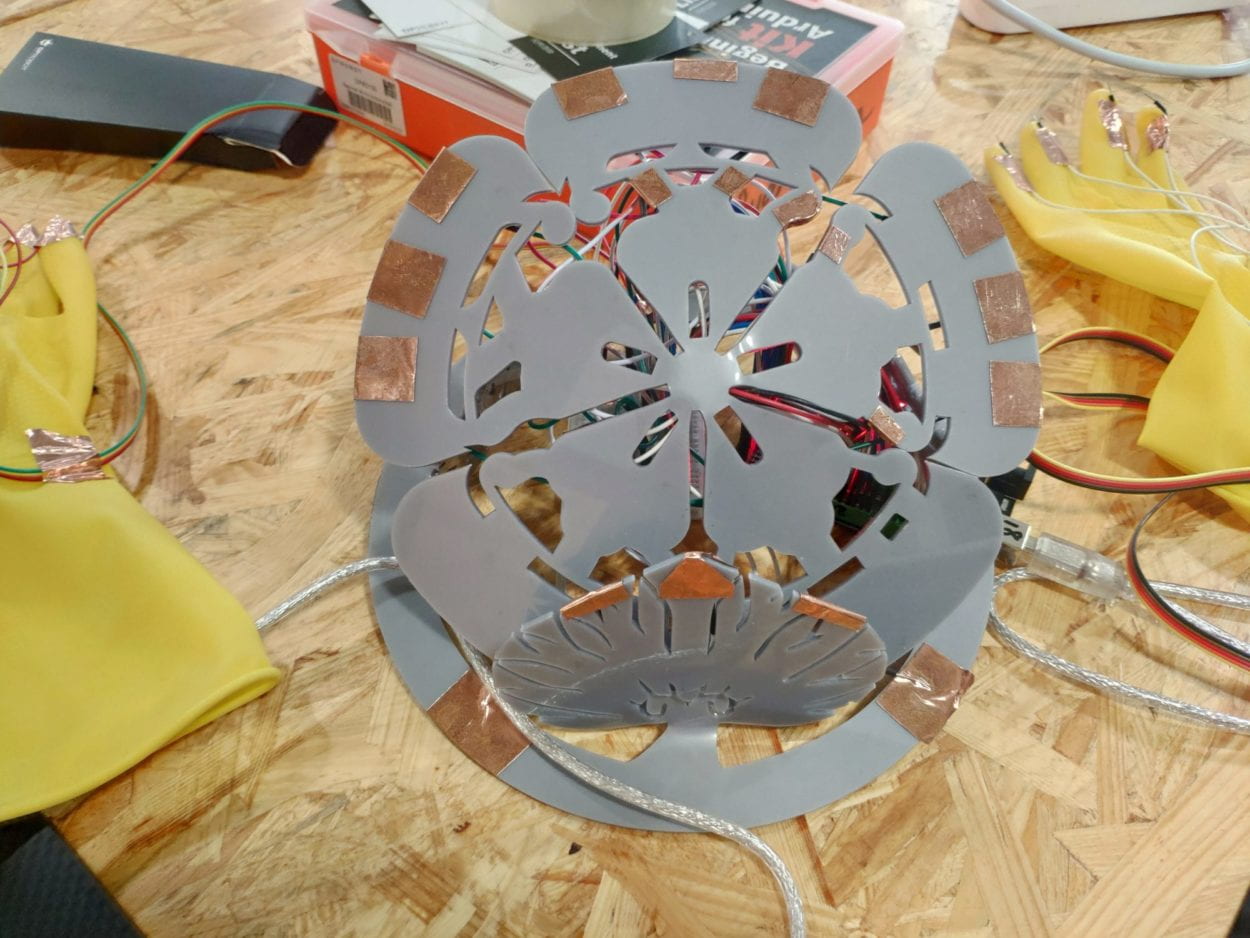
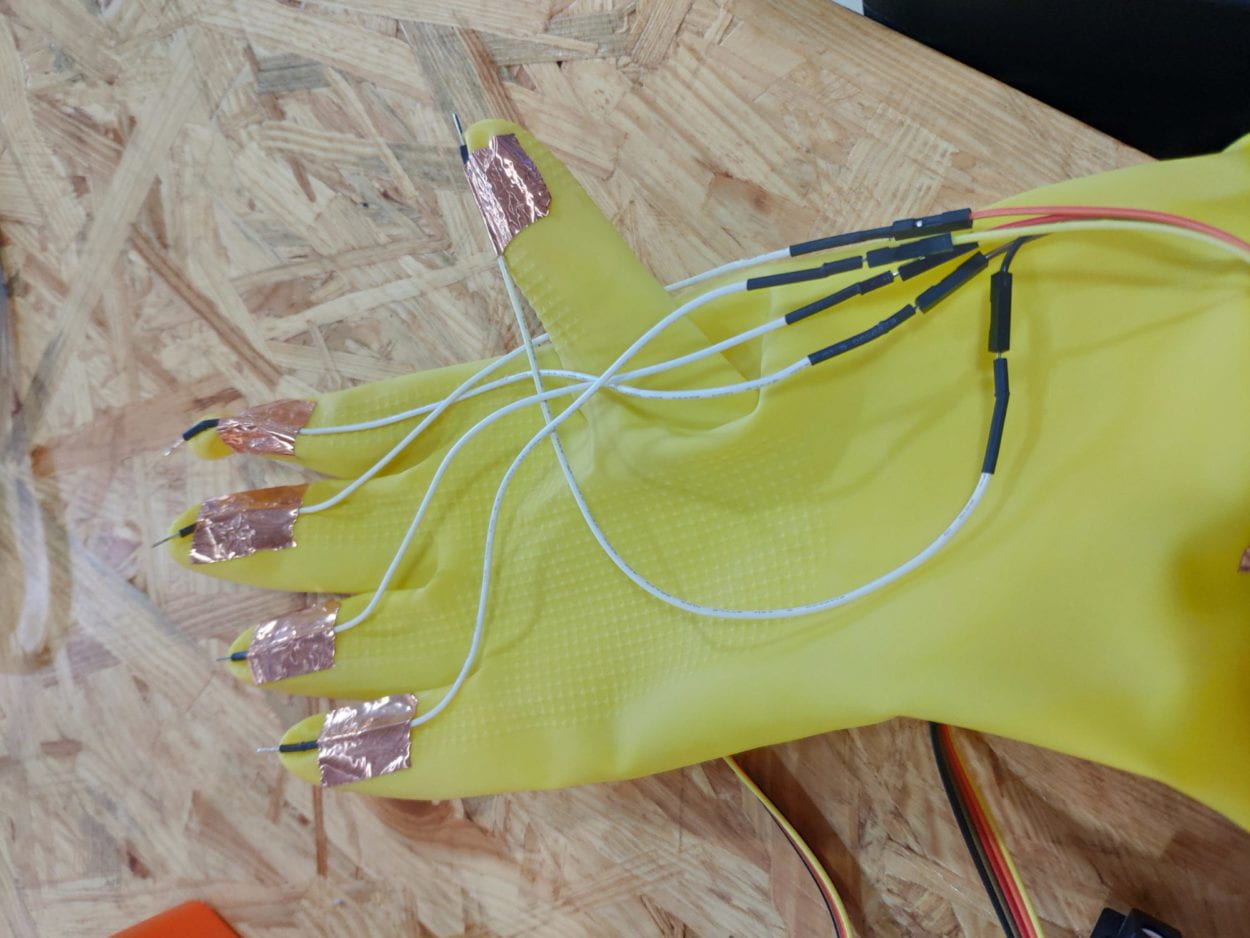
For the production part. The physical component, firstly, the musical instrument. I get the picture of the two family lines online, but find out that there are so many gaps in these pictures that if I am going to laser cut these two pictures will be resulting in have a lot of scattered parts. So I have to connect these parts to make them together, I have been struggled for this part, I want to connect these parts in AI, but I barely know how to draw in AI, so I waste hours figuring out the problem and result in nothing. I finally finish the work with Photoshop and then inport the file into AI to do the laser cutting. I want to make the family lines bended to make the physical part looks stereoscopic, but not just two flat pictures to tap on, and this fits the idea of a new interface that is designed by me. Since the icon should be bended in different direction, so wood can not be used to do the cutting as it can only be bended in one way, so I use acrylic board to make the icons. And I use the thermal spray gun in the fab lab to do the bending job, I heat the part where I need to bend, and then when it is hot enough, it will be bended due to the property of plastic, and then I can modify the angle to make it look like how I want it to be. Then I use AB gum to stick the two icons together to finish the physical part. Then I need to stick the tape onto it, to make the keys to tap on for the interaction. I first stick thirty tapes on the instrument to make thirty keys, and each is connected to a wire connected to the breadboard. I also borrow an Arduino Mega board to make sure I have enough input ports. But the result is that, since there are too many wires, and it is hard to stick the wires with the tapes, and it is very often that some wires will fall, and some are not well connected. Also due to the conductivity and the resistance of the conductive tape, some tape are not sensitive. So the result is that, only nighteen keys survive. And during the process of connecting the wire to the board, it is very hard to clear up all the wires since there are too many of them, also it takes me a long time to figure out which key corresponds to which port to do the coding. For the trigger, I get to rubber gloves, since they are easy to wear even though they are hard to take off. And also the wires that I stick on they will not fall off easily since the they are well sticked on the gloves. But I only use the wires to touch the tapes, but not to use tape to connect with tape due to the resistence problem.

For the coding part, the basic idea is that, each port is connected to certain sound file that are all one-shot sound. So these are notes from C4 to C6, 11 notes in total, and I also have three keys for drum set and bass, two keys for mode switch including Japanese style and future electronic one. The water ripple effect is realize by pixel manipulation combined with the computer vision object tracking. The last part of the documentation is the code.

For the reflection, the design of the project fits the idea of a new interface, but the interaction is not sensitive enough due to the problem of connecting circuit based on condctive tape. So it is hard to really play on the instrument, and also people are hard to understand the function of the mask and the meaning of the ripples on the screen, so the delivery of the concept is not clear as I have imagined. This project is a trial for making a new interface for musical instrument, but I need to reconsider a better way of interaction next time. And also for the meaning of the project, I want to show people a new interface of a musical instrument, to let them play with it, and also some users may think of the concept of connection between others based on the processing image.
     

CODE for Processing:

import processing.serial.*;
import processing.sound.*;
import processing.video.*;

ThreadsSystem ts;//threads
SoundFile c1;
SoundFile c2;
SoundFile c3;
SoundFile e1;
SoundFile e2;
SoundFile f1;
SoundFile f2;
SoundFile b1;
SoundFile b2;
SoundFile a1;
SoundFile a2;
SoundFile taiko;
SoundFile rim;
SoundFile tamb;
SoundFile gong;
SoundFile hintkoto;
SoundFile hintpeak;
Capture video;
PFont t;

int cols = 200;//water ripples
int rows = 200;
float[][] current;
float[][] previous;
boolean downc1 = true;
boolean downc2 = true;
boolean downc3 = true;
boolean downe1 = true;
boolean downe2 = true;
boolean downf1 = true;
boolean downf2 = true;
boolean downb1 = true;
boolean downb2 = true;
boolean downa1 = true;
boolean downa2 = true;
boolean downtaiko = true;
boolean downtamb = true;
boolean downrim = true;
boolean title = true;
boolean downtitle = true;
boolean koto = true;
boolean peak = false;
boolean downleft = true;
boolean downright = true;

float dampening = 0.999;

color trackColor; //tracking head
float threshold = 25;
float havgX;
float havgY;

String myString = null;//serial communication
Serial myPort;
int NUM_OF_VALUES = 34; /** YOU MUST CHANGE THIS ACCORDING TO YOUR PROJECT **/
int[] sensorValues; /** this array stores values from Arduino **/

void setup() {
fullScreen();
//size(800, 600);

ts = new ThreadsSystem();//threads

cols = width;//water ripples
rows = height;
current = new float[cols][rows];
previous = new float[cols][rows];

setupSerial();//serialcommunication

String[] cameras = Capture.list();
printArray(cameras);
video = new Capture(this, cameras[11]);
video.start();
trackColor = color(255, 0, 0);

c1 = new SoundFile(this, "kotoc.wav");//loading sound
e1 = new SoundFile(this, "kotoE.wav");
f1 = new SoundFile(this, "kotoF.wav");
b1 = new SoundFile(this, "kotoB.wav");
a1 = new SoundFile(this, "kotoA.wav");
c2 = new SoundFile(this, "kotoC2.wav");
e2 = new SoundFile(this, "kotoE2.wav");
f2 = new SoundFile(this, "kotoF2.wav");
b2 = new SoundFile(this, "kotoB2.wav");
a2 = new SoundFile(this, "kotoA2.wav");
c3 = new SoundFile(this, "kotoC3.wav");
rim = new SoundFile(this, "rim.wav");
tamb = new SoundFile(this, "tamb.wav");
taiko = new SoundFile(this, "taiko.wav");
gong = new SoundFile(this, "gong.wav");
hintpeak = new SoundFile(this, "hintpeak.wav");
hintkoto = new SoundFile(this, "hintkoto.wav");

}

void captureEvent(Capture video) {
video.read();
}

//void mousePressed() {
// if(down){
// down = false;
// int fX = floor(havgX);
// int fY = floor(havgY);
// for ( int i = 0; i < 5; i++){
// current[fX+i][fY+i] = random(500,1000);
// }
// }

// sound.play();
//}

//void mouseReleased() {
// if(!down) {
// down = true;
// }
//}

void draw() {
background(0);

/////setting up serial commuicatioin/////
updateSerial();
//printArray(sensorValues);
//println(sensorValues[0]);
int fX = floor(havgX);
int fY = floor(havgY);

if(sensorValues[2] == 0){
if(downleft){
downleft = false;
if(koto){
koto = false;
peak = true;
//if(koto){
c1 = new SoundFile(this, "pc1.wav");//loading sound
e1 = new SoundFile(this, "pe1.wav");
f1 = new SoundFile(this, "pf1.wav");
b1 = new SoundFile(this, "pb1.wav");
a1 = new SoundFile(this, "pa1.wav");
c2 = new SoundFile(this, "pc2.wav");
e2 = new SoundFile(this, "pe2.wav");
f2 = new SoundFile(this, "pf2.wav");
b2 = new SoundFile(this, "pb2.wav");
a2 = new SoundFile(this, "pa2.wav");
c3 = new SoundFile(this, "pc3.wav");
rim = new SoundFile(this, "Snare.wav");
tamb = new SoundFile(this, "HH Big.wav");
taiko = new SoundFile(this, "Kick drum 80s mastered.wav");

}
hintpeak.play();
}
}
if(sensorValues[2] != 0){
if(!downleft) {
downleft = true;
}
}

if(sensorValues[4] == 0){
if(downright){
downright = false;
if(peak){
koto = true;
peak = false;
c1 = new SoundFile(this, "kotoc.wav");//loading sound
e1 = new SoundFile(this, "kotoE.wav");
f1 = new SoundFile(this, "kotoF.wav");
b1 = new SoundFile(this, "kotoB.wav");
a1 = new SoundFile(this, "kotoA.wav");
c2 = new SoundFile(this, "kotoC2.wav");
e2 = new SoundFile(this, "kotoE2.wav");
f2 = new SoundFile(this, "kotoF2.wav");
b2 = new SoundFile(this, "kotoB2.wav");
a2 = new SoundFile(this, "kotoA2.wav");
c3 = new SoundFile(this, "kotoC3.wav");
rim = new SoundFile(this, "rim.wav");
tamb = new SoundFile(this, "tamb.wav");
taiko = new SoundFile(this, "taiko.wav");
gong = new SoundFile(this, "gong.wav");

}
hintkoto.play();
}
}
if(sensorValues[4] != 0){
if(!downright) {
downright = true;
}
}

if(sensorValues[0] == 0){
//println("trigger");
println(title);
if(downtitle){
downtitle = false;
if(title){
title = false;
}
else if(!title){
title = true;
}
}
if(!downtitle){
downtitle = true;
}
}

if(sensorValues[19] == 0){//c1
//println(down);
//println(sensorValues[19]);
if(downc1){
downc1 = false;
println("yes");
println(downc1);
for ( int i = 0; i < 10; i++){
current[fX+i][fY+i] = random(255,500);
}
//ts.addThreads();
//ts.run();
c1.play();
}
}
if(sensorValues[19] != 0){
if(!downc1) {
downc1 = true;
}
}

if(sensorValues[26] == 0){//e1
if(downe1){
downe1 = false;
for ( int i = 0; i < 10; i++){
current[fX+i][fY+i] = random(255,500);
}
//ts.addThreads();
//ts.run();
e1.play();
}
}
if(sensorValues[26] != 0){
if(!downe1) {
downe1 = true;
}
}

if(sensorValues[31] == 0){//f1
if(downf1){
downf1 = false;
for ( int i = 0; i < 10; i++){
current[fX+i][fY+i] = random(255,500);
}
//ts.addThreads();
//ts.run();
f1.play();
}
}
if(sensorValues[31] != 0){
if(!downf1) {
downf1 = true;
}
}

if(sensorValues[20] == 0){//b1
if(downb1){
downb1 = false;
for ( int i = 0; i < 10; i++){
current[fX+i][fY+i] = random(255,500);
}
//ts.addThreads();
//ts.run();
b1.play();
}
}
if(sensorValues[20] != 0){
if(!downb1) {
downb1 = true;
}
}

if(sensorValues[9] == 0){//a1
if(downa1){
downa1 = false;
for ( int i = 0; i < 10; i++){
current[fX+i][fY+i] = random(255,500);
}
//ts.addThreads();
//ts.run();
a1.play();
}
}
if(sensorValues[9] != 0){
if(!downa1) {
downa1 = true;
}
}

if(sensorValues[15] == 0){//c3
if(downc3){
downc3 = false;
for ( int i = 0; i < 10; i++){
current[fX+i][fY+i] = random(255,500);
}
//ts.addThreads();
//ts.run();
c3.play();
}
}
if(sensorValues[15] != 0){
if(!downc3) {
downc3 = true;
}
}

if(sensorValues[23] == 0){//c2
if(downc2){
downc2 = false;
for ( int i = 0; i < 10; i++){
current[fX+i][fY+i] = random(255,500);
}
//ts.addThreads();
//ts.run();
c2.play();
}
}
if(sensorValues[23] != 0){
if(!downc2) {
downc2 = true;
}
}

if(sensorValues[16] == 0){//e2
if(downe2){
downe2 = false;
for ( int i = 0; i < 10; i++){
current[fX+i][fY+i] = random(255,500);
}
//ts.addThreads();
//ts.run();
e2.play();
}
}
if(sensorValues[16] != 0){
if(!downe2) {
downe2 = true;
}
}

if(sensorValues[11] == 0){//f2
if(downf2){
downf2 = false;
for ( int i = 0; i < 10; i++){
current[fX+i][fY+i] = random(255,500);
}
//ts.addThreads();
//ts.run();
f2.play();
}
}
if(sensorValues[11] != 0){
if(!downf2) {
downf2 = true;
}
}

if(sensorValues[12] == 0){//b2
if(downb2){
downb2 = false;
for ( int i = 0; i < 10; i++){
current[fX+i][fY+i] = random(255,500);
}
//ts.addThreads();
//ts.run();
b2.play();
}
}
if(sensorValues[12] != 0){
if(!downb2) {
downb2 = true;
}
}

if(sensorValues[17] == 0){//a2
if(downa2){
downa2 = false;
for ( int i = 0; i < 10; i++){
current[fX+i][fY+i] = random(255,500);
}
//ts.addThreads();
//ts.run();
a2.play();
}
}
if(sensorValues[17] != 0){
if(!downa2) {
downa2 = true;
}
}

if(sensorValues[7] == 0){//rim
if(downrim){
downrim = false;
for ( int i = 0; i < 10; i++){
current[fX+i][fY+i] = random(255,500);
}
//ts.addThreads();
//ts.run();
rim.play();
}
}
if(sensorValues[7] != 0){
if(!downrim) {
downrim = true;
}
}

if(sensorValues[8] == 0){//taiko
if(downtaiko){
downtaiko = false;
for ( int i = 0; i < 10; i++){
current[fX+i][fY+i] = random(255,500);
}
//ts.addThreads();
//ts.run();
taiko.play();
}
}
if(sensorValues[8] != 0){
if(!downtaiko) {
downtaiko = true;
}
}

if(sensorValues[28] == 0){//tamb
if(downtamb){
downtamb = false;
for ( int i = 0; i < 10; i++){
current[fX+i][fY+i] = random(255,500);
}
//ts.addThreads();
//ts.run();
tamb.play();
}
}
if(sensorValues[28] != 0){
if(!downtamb) {
downtamb = true;
}
}
////water ripples/////
loadPixels();
for ( int i = 1; i < cols - 1; i++) {
for ( int j = 1; j < rows - 1; j++) {
current[i][j] = (
previous[i-1][j] +
previous[i+1][j] +
previous[i][j+1] +
previous[i][j-1]) / 2 -
current[i][j];
current[i][j] = current[i][j] * dampening;
int index = i + j * cols;
pixels[index] = color(current[i][j]);
}
}
updatePixels();
float[][] temp = previous;
previous = current;
current = temp;

/////drawing threads///
ts.addThreads();
ts.run();

////head tracking///
video.loadPixels();
threshold = 80;

float avgX = 0;
float avgY = 0;

int count = 0;

// Begin loop to walk through every pixel
for (int x = 0; x < video.width; x++ ) {
for (int y = 0; y < video.height; y++ ) {
int loc = x + y * video.width;
// What is current color
color currentColor = video.pixels[loc];
float r1 = red(currentColor);
float g1 = green(currentColor);
float b1 = blue(currentColor);
float r2 = red(trackColor);
float g2 = green(trackColor);
float b2 = blue(trackColor);

float d = distSq(r1, g1, b1, r2, g2, b2);

float hX = map(x,0,video.width,0,width);
float hY = map(y,0,video.height,0,height);

if (d < threshold*threshold) {
stroke(255,0,0);
strokeWeight(1);
point(hX, hY);
avgX += x;
avgY += y;
count++;
}
}
}

// We only consider the color found if its color distance is less than 10.
// This threshold of 10 is arbitrary and you can adjust this number depending on how accurate you require the tracking to be.
if (count > 0) {
avgX = avgX / count;
avgY = avgY / count;

havgX = map(avgX,0,video.width,0,width);
//havgY = map(avgY,0,video.height,0,height);
// Draw a circle at the tracked pixel
fill(255,0,0,100);
noStroke();
textSize(50);
if(koto){
text("koto",havgX,havgY);
}
if(peak){
text("peak",havgX,havgY);
}
}

if(title){
textSize(200);
fill(255,0,0);
text("Interferit",width*0.3,height/2);
textSize(40);
text("Wear on the mask and the claws, using your enchanted vessel to interfere the world of pixels!",width*0.03,height*0.7);
//println(1);
}
if(!title){
fill(0);
}
}

float distSq(float x1, float y1, float z1, float x2, float y2, float z2) {
float d = (x2-x1)*(x2-x1) + (y2-y1)*(y2-y1) +(z2-z1)*(z2-z1);
return d;
}

//void keyPressed() {
// background(0);
//}

void setupSerial() {
printArray(Serial.list());
myPort = new Serial(this, Serial.list()[ 0 ], 9600);
// WARNING!
// You will definitely get an error here.
// Change the PORT_INDEX to 0 and try running it again.
// And then, check the list of the ports,
// find the port "/dev/cu.usbmodem----" or "/dev/tty.usbmodem----"
// and replace PORT_INDEX above with the index number of the port.

myPort.clear();
// Throw out the first reading,
// in case we started reading in the middle of a string from the sender.
myString = myPort.readStringUntil( 10 ); // 10 = '\n' Linefeed in ASCII
myString = null;

sensorValues = new int[NUM_OF_VALUES];
}

void updateSerial() {
while (myPort.available() > 0) {
myString = myPort.readStringUntil( 10 ); // 10 = '\n' Linefeed in ASCII
if (myString != null) {
String[] serialInArray = split(trim(myString), ",");
if (serialInArray.length == NUM_OF_VALUES) {
for (int i=0; i<serialInArray.length; i++) {
sensorValues[i] = int(serialInArray[i]);
}
}
}
}
}
“Who’s Ordering your Food” – Anica Yao – Marcela

Project Name: Who’s ordering your food?
Partner
: Xueping 
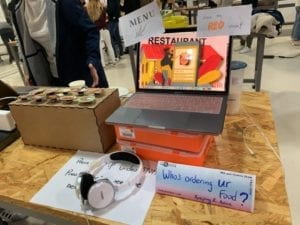
Final Creation

Project Photo
Final Show Ongoing ~

Codes: Arduino + Processing

Conception and Design:

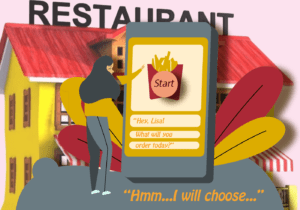
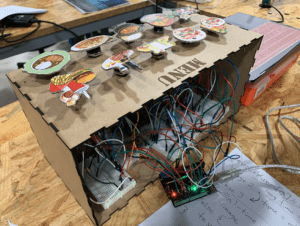
The interaction of our project consists of two parts: processing ( with a series of scenarios ) + Arduino ( a Menu made of buttons )

In this project, the users are allowed to explore by themselves. The final feedback/report they get is also based on what they choose. When we made the proposal ideas we wanted to make it an educational device informing people to have a healthy diet by keeping the balance among all the nutritions intakes. But thanks to Prof. Marcela, we do think that idea will only be accepted by a small range of audiences —— people who care about nutritional balance to gain a healthy diet. People have their own standard to choose a healthy diet. Otherwise, our concept was too narrow to make our device an inspiring one. 

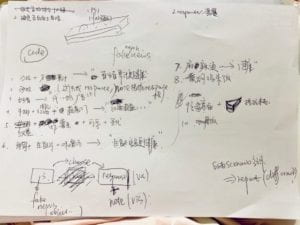
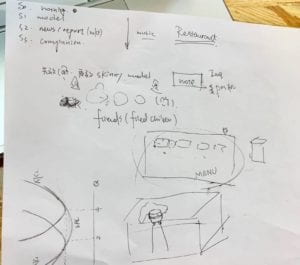
Brainstorm
Brainstorm

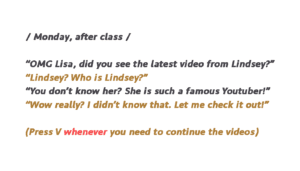
The three scenarios are created to make a comparison. In the first one, there’s no limit. The users can choose whatever they want in the menu. ( People want to try curry rice simply because it’s been a while not having it ). In the second one, there are three clips of weekly vlog filmed by a famous Youtuber ( I will put the link down below ). It indicates that people nowadays can be easily influenced by social media. Psychologically speaking, most people tend to follow what others do. When those famous Youtubers are promoting their healthy styles, the audience will follow suit, not considering whether the recipes suit them or not. Or the recipes themselves are not healthy at all. In our project, people need to press “v” to watch several clips. In the last one, there’re news/scientific reports popping up on the screen with the corresponding voice. It’s like we are surrounded in a world filled up with either real or fake information. We tend to believe the so-called “scientific facts” when they are actually not. The most important lesson we learned from the midterm project is to create an all-dimensional experience for the user, in which the audio is inevitable most time.  So here, from both visual and audio sides, we want to make it more a reality. The experience is like reading newspaper or checking daily news. When you look through that news, you can choose to read thoroughly or just skip it. But you can’t resist the information pouring onto you. That’s how we develop the third scenario. Finally, based on whether they’ve chosen a different dish or not during the process, we will give a feedback to the user. 

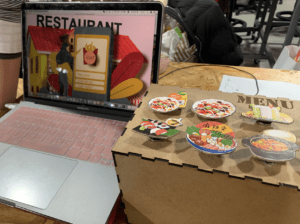
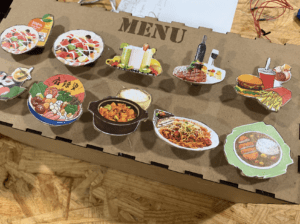
For the visual design, we made a menu with buttons on top so that it feels like a restaurant. We specially chose a similar cartoon style. We made some visuals (pictures and texts), but due to time constraints, we didn’t draw all the dishes. We definitely want to try next time to make it more aesthetic. 

We could have used more words but we think that there might be too much load or more like a lecture instead of an interactive experience where people are put into the “conversations” all the way. 

Fabrication and Production:

The most significant and challenging part of our production is to put all the scenarios in a single processing page. We use if statement to count the scenario number, delay() to make transitions and refresh the background in between. Also, it’s important to decide when to display the image or to play the sound. For example, it happens that the new image covers the old one but the sound continues to play. It’s important to put them under the correct conditions. 

During the user text, we only finished the third scenario then. And we received lots of helpful feedback from classmates and professors :
(1) Better to have clearer instructions. ( This is actually a tricky one. We do want to make it clear, but not too obvious. Or the experience will be responsive rather than interactive. So later we added some hints or notes.)
(2) The information given may be overwhelming? ( We thought of this problem. But that’s why we also added the voice. It also makes the scenario more realistic. Later people also told us that now it’s better because more visuals, more elements(sound, video, image), and more interactions are involved.)
(3) The menu can be better designed. ( We also think so. If we still have time, I want to make it more like a sheet or book or make more decorations on the box we have)
(4) Make it a little game. ( That’s also a very good starting point.)
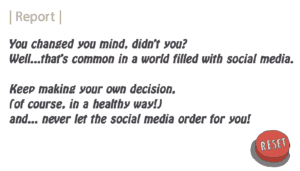
(5) Create a replay/reset button so that the user can play it again. ( Yes! later we added that on the report page).

All the feedback is very helpful for our following production decisions. We made some improvements:

We try to put the user into a conversation, where he or she is making choices not only for himself/herself but also for the girl, Lisa, in the story. When the user is making decisions for that girl, it also indicates that it’s not you but the social media that influences your food decision. Besides, the conversation like this can be part of daily life so the users may quickly familiarize themselves with what’s going on. We want the conversation to make the scenarios more of storytelling, rather than just a “lecture”.

For the fabrication part, we used the layer cutter to make the box. The dishes are made of cardboard with pictures atop.


Conclusions:

The goal of our project is to convey the information that we can be easily affected by social media in terms of food choice to get a healthy lifestyle. You are the receiver of all kinds of information, and you thought you were making your own decision. But think about it: Are you ordering your food? Or is there anyone else ordering for you? Are you really making independent decisions? This project is never to tell people the best nutritional balance to reach in order to keep healthy. Instead, all the people can get their personalized experience in this device. Based on our report at the end of the project, if you are someone who holds the original choice you’ve made, it’s a good thing, except that you choose the junk food three times. The latter will be reminded to have a healthier alternative. As we observed, most people easily changed their mind after they got that information. We hope this project will make them realize the invisible power of social media. 

Our project generally aligns with my definition of interaction that it is a process in which an actor receives and processes the information from another through a certain medium and then gives the results accordingly. It’s sufficient to describe a basic interaction. But to be a successful one, in my opinion, the experience should (1) self-explanatory, clear, and obvious (2) put the user in a continuous loop to make responses (3)  be multi-dimensional with visuals, audio and other factors involved so that the user will be more engaged. I think we still need to make our project more self-explanatory. It can be achieved through various forms of interaction like recognizing the users’ gestures, which may be more close to daily life. Or we can provide more hints rather than just texts. I think we did well in (2) and (3), but there’s still space for improvements.

Since the users need to stay focused on the scenario, I’m glad to see they are more than willing to navigate throughout. Although sometimes they got confused about what’s the next key to press, and that we didn’t have a very detailed, personalized report in the end ( we expected that the feedback is given based on every food combination. But due to technical constraints, we found it difficult to realize). some of our friends said that they really saw the difference and improvements we made after the user test.

The values we learned from our setbacks and failures are that we need to thoroughly think about the ideas we want to show rather than the particular techniques for interactions. But when we begin to think about the interactions, we easily neglect some details. For example, we made the video wrong size/format, or we forgot to put the bracket, etc. Therefore, we also need to spare time for these possible mistakes besides the main parts. 

Another thing we need to reflect on setbacks is how to convey the information more explicitly and quickly. So we designed a plan B for the 3rd scenario: we let the user chooses whether to go through every piece of news or simply get the abstract by skimming. The latter is meant to create a feeling of the explosion of information,  mimicking a realistic environment filled up with all kinds of information. It has all the news and big titles moving while the voiceover will be a combined soundtrack with varied voices telling different news or slogans. In this case, even if they are not patient to see the news one by one, they get the main ideas rather quickly. 

To conclude, we want to let people realize the influence of social media on their decision making. Studies show that when we order our food, we are affected or misled by many external factors. Social media is the major one in today’s world. If we just blindly follow whatever others eat or the so-called scientific report says, we are going to face some food safety issues. The prevailing pop culture including live streams and articles gains profits mostly by driving the traffic and catching people’s eyes. Some may be true facts, and some are really not. But consumers tend to believe whatever they see or hear. Following the social media blindly may lead to some disorders or obesity or heart-diseases. In our project, by asking people “who’s ordering your food”, we want to let people think twice about their food choice or decision making in general. 

Puppet – Eric Shen – Eric

Project name: Puppet

CONCEPTION AND DESGIN

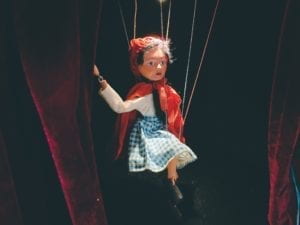
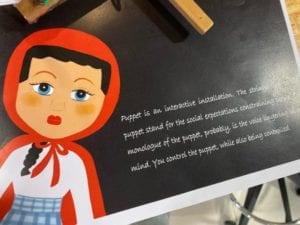
        Originally, our understanding of the interaction between the users and our project only focuses on showing our theme of social expectation. In order to better explain our theme, we want the user to be the forces in the society that force people behave in a certain way and impose the social expectation on others, while the puppet is the representative of the people who are being controlled and meet the social expectation. Therefore, the initial interaction that we thought of was to let users use the keyboard and the mouse to control the simulative image of the puppet in Processing to set a pose.  After that, the real puppet on the stage would first change several random poses, and finally stay at the pose that the user sets. For the purpose of using Arduino to make the real puppet move, we chose to use 4 servo motors to control the legs and the arms of the puppet. Our criteria for motors is that it can be easily attached with things and it can rotate within a certain angle in a precise way. Stepper motor was once under our consideration, but it’s hard to be attached with things. Another disadvantage of stepper motor is that each stepper motor needs power supply. If we use stepper motors, it needs a huge amount of power and if something goes wrong in the circuit, there would be potential danger. Due to the reasons listed above, we gave up using stepper motors. In order to make the users resonate with our a bit sad theme, we need to find a puppet that is not funny and childish. Finally, after a long time of searching, we decided to use this particular puppet.

The Puppet

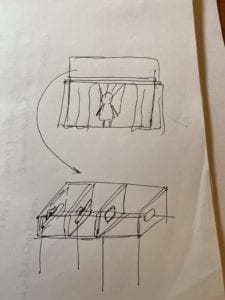
When selecting the material to build the stage, we first thought of using laser cut to create a delicate box. Yet, we also need to contain all the components including the Arduino, the puppet and the servo motors inside this box leading to the fact that this stage will be of a large size. If we chose to laser cut, it will use too much materials in the fabrication room. Therefore, eventually, we chose to use a carton box as the stage and the container of the components. 
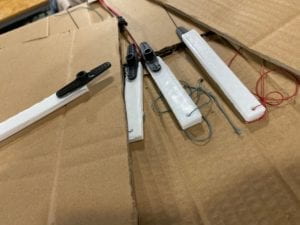
We also used 3D printing to make the parts attached to both the servo and the string connected to the puppet more stable. We first use the cardboard to build those, but it turned out that they were too easy to be bent and couldn’t stand the resistance of the string.

1
With cardboard
3
With 3D Printing
2
The basic concept

FABRICATION AND PRODUCTION

        According to our original plan, one of the most important steps in the process of creating the project was to make the  real puppet move accordingly with the digital puppet in Processing. After my partner and I both finished the coding of the Arduino and Processing, we started to test how the data from Processing could be sent to the Arduino. At first, I thought that I needed to figure out how to map the data that I had in Processing to the angle of the servo motors. Then I suddenly realized that I could just create another 4 new variables that stand in Processing and directly transfer them to Arduino to make the servo motors rotate, which turned out to be a success. 
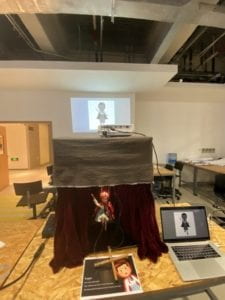
After we got over this most significant technical problem in our project, we sought advice from the fellows, they pointed out that it may be hard for the users to perceive and understand of our theme of social expectation through such a simple interaction. In addition, we present the exact same thing both on Arduino and Processing, which is not of much use, but even a bit unnecessary and redundant. They asked a question that we couldn’t answer: why would I interact with the computer to make the puppet move which does not make sense instead of just controlling it with physical interaction. In that way, the interaction would be more interesting and easier to understand. After getting the suggestion from the fellows, we reflected on our project. First, when I thought of the definition that I gave to a successful interactive project in the previous research, this final project that I was working actually contradicts the very definition that I gave before because the interaction with the project is mundane and the users would know clearly about how their interaction influents the puppet. This project is more like a display of things instead of being an interactive one. After due consideration, we decided that we would also make the curtain controlled by the Arduino so that the users can interact with it. The puppet shown in Processing would be black and white to be projected on the stage so that it can be interpreted as the shadow of the real puppet. 

        During the user test session, the technical basis of our project completely changed. After we explain the theme of the project, Professor Marcela said that our theme is intriguing and plausible, but with our original plan for the project, we couldn’t explain the theme with logic. The first suggestion that she gave us was similar to the suggestions from the fellows. We should not display the almost exact same thing both on Arduino and Processing and we should use the cross to interact with the project instead of merely using the keyboard and the mouse. In that way, this project makes more sense and the interaction would be more interesting and perceivable. Besides, she puts forward an interesting idea that we could use the webcam to capture the users’ face to replace the face of the puppet so that we can show the users that they are also being controlled while trying to control others and the logic of this theme is clear. Another useful advice that we got from this session was that we could add a voice of the puppet and make some lines for the puppet to make the theme clearer. 
We were transferring data from Processing to Arduino, but now we needed to switch to transferring data from Arduino to Processing. The sensor that a fellow recommended us to use was the accelerometer. And some weird things happened after I applied it to the project. When I was testing the each two servo motors with x-axis or y-axis, they work fine. But when I tested with all four servo motors together, the code ran well for a period of time, and then the Arduino Uno would be dead and the Arduino Uno couldn’t connect to the computer. This happened one day before the presentation. Professor Marcela and Tristan both came to help and examined the code and the circuit, they were both good. After we worked together trying to find the problem for a long time, they suggested me to either switch an accelerometer or just switch the sensor to tilt switch sensor. After I changed every components in the circuit, it still failed to run normally. Eventually, I gave up using the accelerometer, and used two tilt switch sensor in my project to control the movement of the arms and legs respectively. And the logic is, if the left arm rises up, the right arm would fall down, vice versa. Though the tilt switch sensor can only use digital output, but it provides stability for the rotation of the servo motors because the angle of each rotation is fixed. 
Another difficulty is to map the transferred data in Processing to a certain range so that the movement of the legs and arms can accord with the real puppet. After a lot of testing and calculation, we made it work. Another problem was that the animation in Processing was not smooth enough. The legs and the arms would look like jump to a certain position. Then, Tristan introduced me a function called lerp(); which solved the problem and I apply this method to control the movement of the string. 

The outlook
6
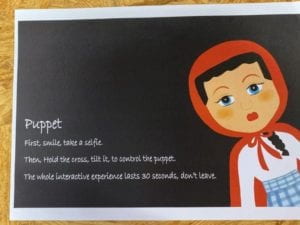
The instruction
2
The explanation

CONCLUSIONS:

        The goal of our project is to show users the theme of social expectation. In the society, there is a phenomenon that people are trying to impose their social expectation on others. But while they are giving out their social expectation on others, they themselves are also being controlled and meeting others’ social expectation of them. In my preparatory research and analysis, my definition of a successful interactive project was that the interaction between users and the project should straightforward so that the users can tell how their interactions affect the project. The project should have many forms of interaction instead of merely one type.  At the same time, the project should have a specific meaning. From my perspective, I think our project this time actually mostly align with my definition of a good interactive project. The audience can tell the logic behind the movement of the puppet with cross tilting. Besides, the meaning of our project which is about social expectation is really clear and has its explainable logic. The aspect that it doesn’t align the definition is that the interaction of our project only contains one forms of interaction which is tilting the cross if we don’t the process of taking a selfie into account. The users interaction is that they hold and tilt the cross, trying to figure out how it controls the puppet, while listening to the background music and the monologue of the puppet. The only thing that is not expected by us before is that the audience would neglect our projection on the wall because they focus too much on looking at the puppet inside the box. If we have more time, we will make the instructions more clear. Moreover, we would probably make the whole process of the interaction longer so that the user can have time to reflect on what is going on and figure out the theme by themselves. Another thing is, we should project the animation of Processing inside the stage in order to let the audience see what is going on in Processing and for the purpose of integrating Arduino and Processing better. From the process of building this project, I learned that things would always go as how you expect, just like what happens to the accelerometer, but what we can do is to be patient and find an alternative or find what is going wrong. 

The Whole Process

Code for Arduino

3
Code for Arduino

Code for Processing 

import processing.sound.*;
SoundFile sound;
SoundFile sound1;
import processing.video.*; 
Capture cam;
PImage cutout = new PImage(160, 190);

import processing.serial.*;

String myString = null;
Serial myPort;
int NUM_OF_VALUES = 2;   /** YOU MUST CHANGE THIS ACCORDING TO YOUR PROJECT **/
int[] sensorValues;      /** this array stores values from Arduino **/

PImage background;
PImage body;
PImage arml;
PImage armr;
PImage stringlr;
PImage stringar;
PImage stringal;
PImage legl;
PImage stringll;
PImage legr;
float yal=100;
float yll=0;
float yar=0;
float ylr=0;
float leftangle=PI/4;
float rightangle=-PI/4;
float leftleg = 570;
float rightleg = 570;
float armLerp = 0.22;
float legLerp = 0.22;
float pointleftx =-110;
float pointlefty =148;
PImage body2;
boolean playSound = true;
void setup() {
  size(850, 920);
  setupSerial();
  cam = new Capture(this, 640, 480);
  cam.start(); 
  background = loadImage("background.png");
  body=loadImage("body.png");
  arml=loadImage("arml.png");
  stringal=loadImage("stringal.png");
  armr=loadImage("armr.png");
  legl=loadImage("legl.png");
  stringll=loadImage("stringll.png");
  legr=loadImage("legr.png");
  stringar=loadImage("stringar.png");
  stringlr=loadImage("stringlr.png");
  body2 =loadImage("body2.png");
  sound = new SoundFile(this, "voice.mp3");
  sound1 = new SoundFile(this, "bgm.mp3");
  sound1.play();
  sound1.amp(0.3);
 
  
}


void draw() {
  updateSerial();
  printArray(sensorValues);
  if (millis()<15000) {
    if (cam.available()) { 
      cam.read();
    } 
    imageMode(CENTER);

    int xOffset = 220;
    int yOffset = 40;

    for (int x=0; x<cutout.width; x++) {
      for (int y=0; y<cutout.height; y++) {
        color c = cam.get(x+xOffset, y+yOffset);
        cutout.set(x, y, c);
      }
    }

    background(0);
    image(cutout, width/2, height/2);

    fill(255);
    textSize(30);
    textAlign(CENTER);
    text("Place your face in the square", width/2, height-100);
    text(15 - (millis()/1000), width/2, height-50);
  } else { 
    if (!sound.isPlaying()) {
      // play the sound
      sound.play();
     
      // and prevent it from playing again by setting the boolean to false
    } 
    imageMode(CORNER);
    image(background, 0, 0, width, height);
    image(legl, 325, leftleg, 140, 280);  
    image(legr, 435, rightleg, 85, 270);
    image(body, 0, 0, width, height);
    if (millis()<43000) {
      image(body, 0, 0, width, height);
    } else {
      image(cutout, 355, 95);
      image(body2, 0, 0, width, height);
 
      sound.amp(0);
    }
    arml();
    armr();
    //stringarmleft();
    image(stringal, 255, yal, 30, 470);
    image(stringll, 350, yll, 40, 600);
    image(stringar, 605, yar, 30, 475);
    image(stringlr, 475, ylr, 40, 600);

    //if(sensorValues[0]=90){
    //}
    //else if (){
    //}
    // use the values like this!
    // sensorValues[0] 
    int a = sensorValues[0];
    int b = sensorValues[1];
    float targetleftangle= PI/4 + radians(a/2);
     float targetrightangle= -PI/4 + radians(a/2);
     float targetleftleg= 570+b*1.6;
     float targetrightleg= 570-b*1.6;
     
     leftangle = lerp(leftangle, targetleftangle, armLerp);
     rightangle = lerp(rightangle, targetrightangle, armLerp);
     leftleg = lerp(leftleg, targetleftleg, legLerp);
     rightleg = lerp(rightleg, targetrightleg, legLerp);
     
float targetpointr = -100-a*1.1;
float targetpointl = -120+a*1.1;
float targetpointr1 = -50+b*1.3;
float targetpointr2 = -50-b*1.3;
yal= lerp(yal, targetpointr, armLerp);
yar = lerp(yar,targetpointl,armLerp);
yll= lerp(yll,targetpointr1,legLerp);
ylr = lerp(ylr,targetpointr2,legLerp);

    //delay(10);
  }
}

void arml() {
  pushMatrix();
  translate(375, 342);
  rotate(leftangle);
  image(arml, -145, -42, 190, 230);
  fill(255, 0, 0);
  noStroke();

  popMatrix();
}


void armr() {
  //fill(0);
  //ellipse(500,345,10,10);
  pushMatrix();
  translate(490, 345);
  rotate(rightangle);
  //rotate(millis()*PI/800);
  image(armr, -18, -30, 190, 200); 
  popMatrix();
}

void setupSerial() {
  printArray(Serial.list());
  myPort = new Serial(this, Serial.list()[ 11 ], 9600);
  // WARNING!
  // You will definitely get an error here.
  // Change the PORT_INDEX to 0 and try running it again.
  // And then, check the list of the ports,
  // find the port "/dev/cu.usbmodem----" or "/dev/tty.usbmodem----" 
  // and replace PORT_INDEX above with the index number of the port.

  myPort.clear();
  // Throw out the first reading,
  // in case we started reading in the middle of a string from the sender.
  myString = myPort.readStringUntil( 10 );  // 10 = '\n'  Linefeed in ASCII
  myString = null;

  sensorValues = new int[NUM_OF_VALUES];
}


void updateSerial() {
  while (myPort.available() > 0) {
    myString = myPort.readStringUntil( 10 ); // 10 = '\n'  Linefeed in ASCII
    if (myString != null) {
      String[] serialInArray = split(trim(myString), ",");
      if (serialInArray.length == NUM_OF_VALUES) {
        for (int i=0; i<serialInArray.length; i++) {
          sensorValues[i] = int(serialInArray[i]);
        }
      }
    }
  }
}