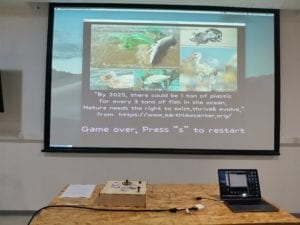
Final project individual reflection (Katie)

PROJECT TITLE – YOUR NAME – YOUR INSTRUCTOR’S NAME

Forest Box: build your own forest–Katie–Inmi

CONCEPTION AND DESIGN:

In terms of interaction experience, our idea is to create something similar to VR: users do physical interactions in the real world and resulted in changes on the screen. There are several options we explored in the designing process. Inspired by a work by Zheng Bo called 72 relations with the golden rod,  at first, we want to use an actual plant that attach multiple sensors onto it. To let the users explore different relations they can do to plants. For example, we want to attach a air pressure sensor onto the plant and whenever the someone blow to it, the video shown on the computer screen will change. And a pressure sensor that someone can step on it. 

But we ended up not choosing these options because the equipment room do not have most of the sensors we need. We then select the color sensor, touch sensor, distance sensor and the motion sensor. However, we did not think carefully about the physical interactions before hooking them up. The first problem is that the motion sensor does not work as the way we want: it only sense motion but cannot identify certain gestures. As a result it sometimes will conflict with the distance sensor, so we give it up. So we have a very awkward stage where we have three sensors hooked up and different videos running according to sensor values but have difficulty to link them together.

After asking Inmi for advice, the final solution we think of is to make a forest box that users can interact with and the visuals on the screen will change according to different kinds of interactions. If you place fire into the box, a forest fire video will be shown on the screen. if you throw plastics into the box, a video of plastic waste will be shown on the screen. if you pull off the trees, a video of forest being cut down will be shown on the screen. By this kind of interaction, we want to convey the message that every individuals’ small harm to earth can create huge damages. For the first scene, we use a camera with effects to attract user’s attention.


FABRICATION AND PRODUCTION:

The most significant steps are first: hook up the sensors, Arduino and Processing code and let them communicate. I think the most challenging part for me is to figure out the logic in my Processing code. I did not know how to start at first because there are too many conditions and results. I don’t know how the if statements are arranged to achieve the output I want. The very helpful thing is to draw a flow diagram of how each video will be played.
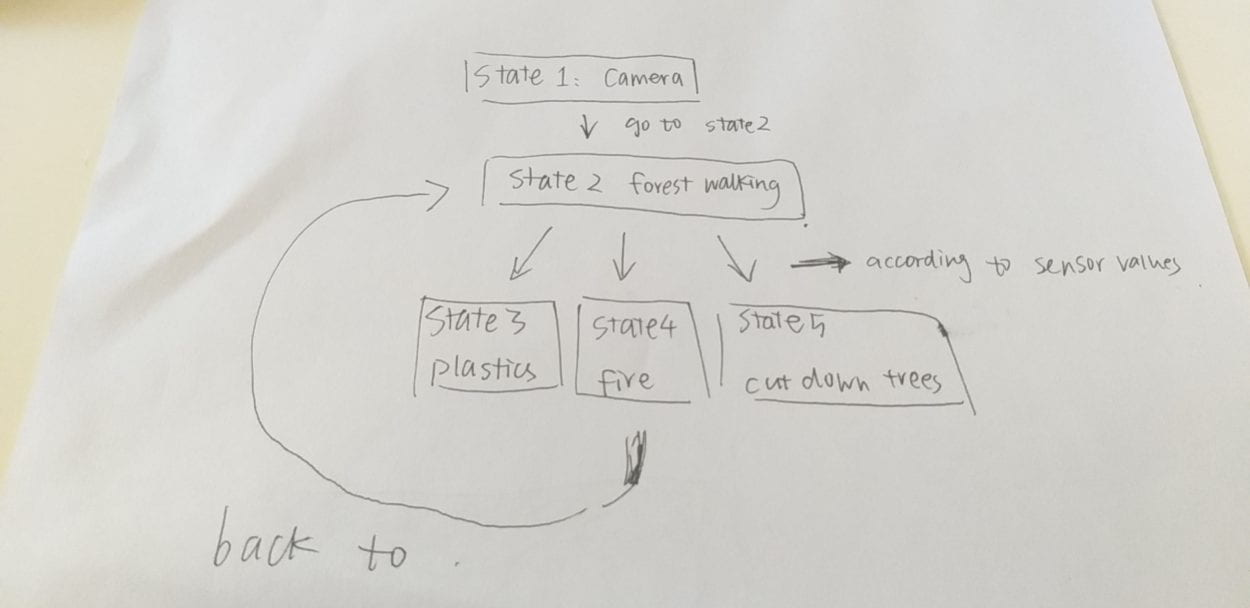
and then we need to define a new variable called state and the initial value is 1.
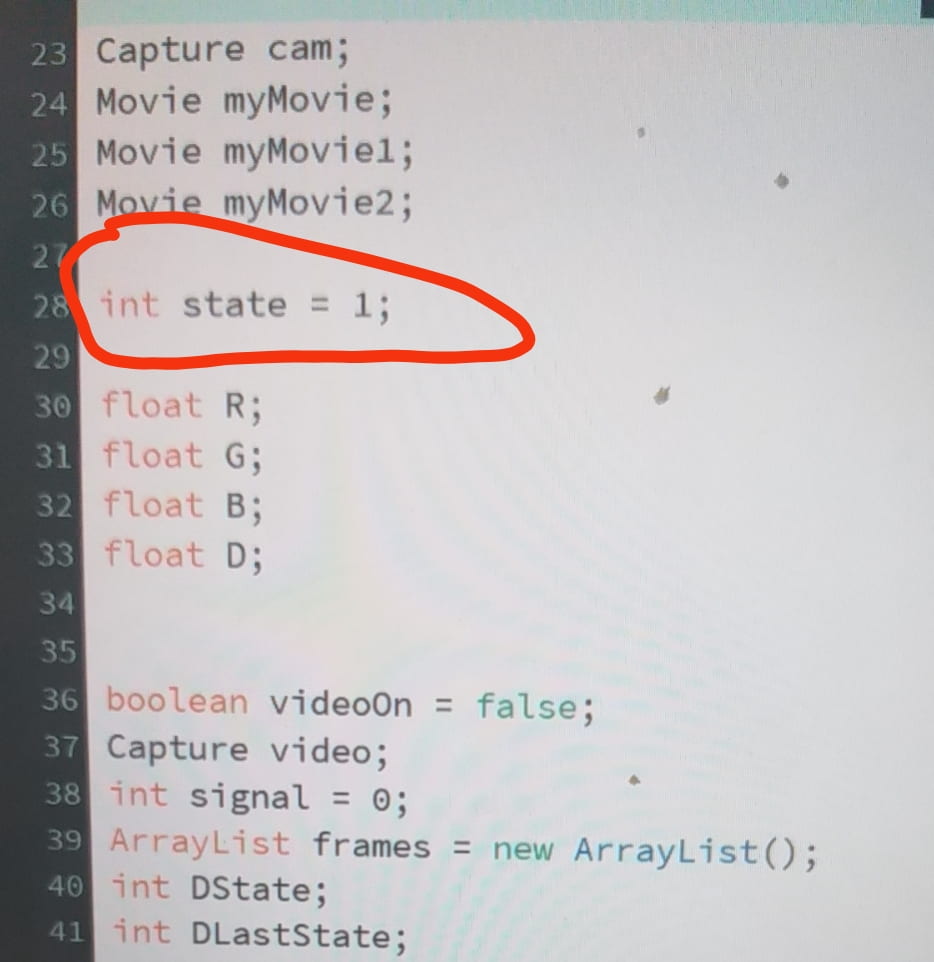
Then, the logic becomes clear and the work become simpler. I just need to write down what each state does separately and then connect them together. Although the code within one state can be very lengthy and difficult, the overall structure is simple and clear to me.

For example from state 1 to state 2:
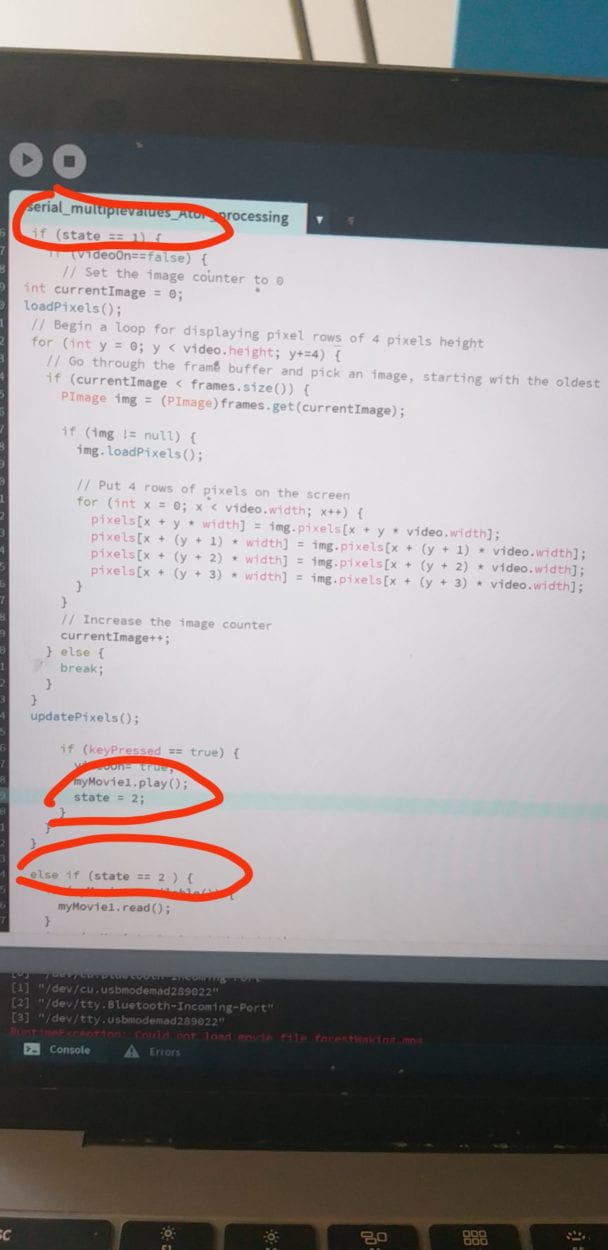
Another important thing is we want to switch from state 1 to two by the keypress interaction. However, the video of state 2 only plays when the key is pressed, when you release the key, the state will turn back to 1. To solve this problem, I create a Boolean to trigger the on and off of the video.

At first, we want different users to run from far to near to the screen, wearing different costumes representing plastics and plants. the user wearing which costume first approach the screen determines which video to play. However, during user testing, our users said first, the costume is of poor quality. Second, the process of running is not interactive enough. Our professor also said that there’s no link between what the users are physically doing: running, to what’s happening on the screen: playing educational videos.

So after thinking through this problem, we create a forest box to represent forest, and one can interact with different elements of the box.
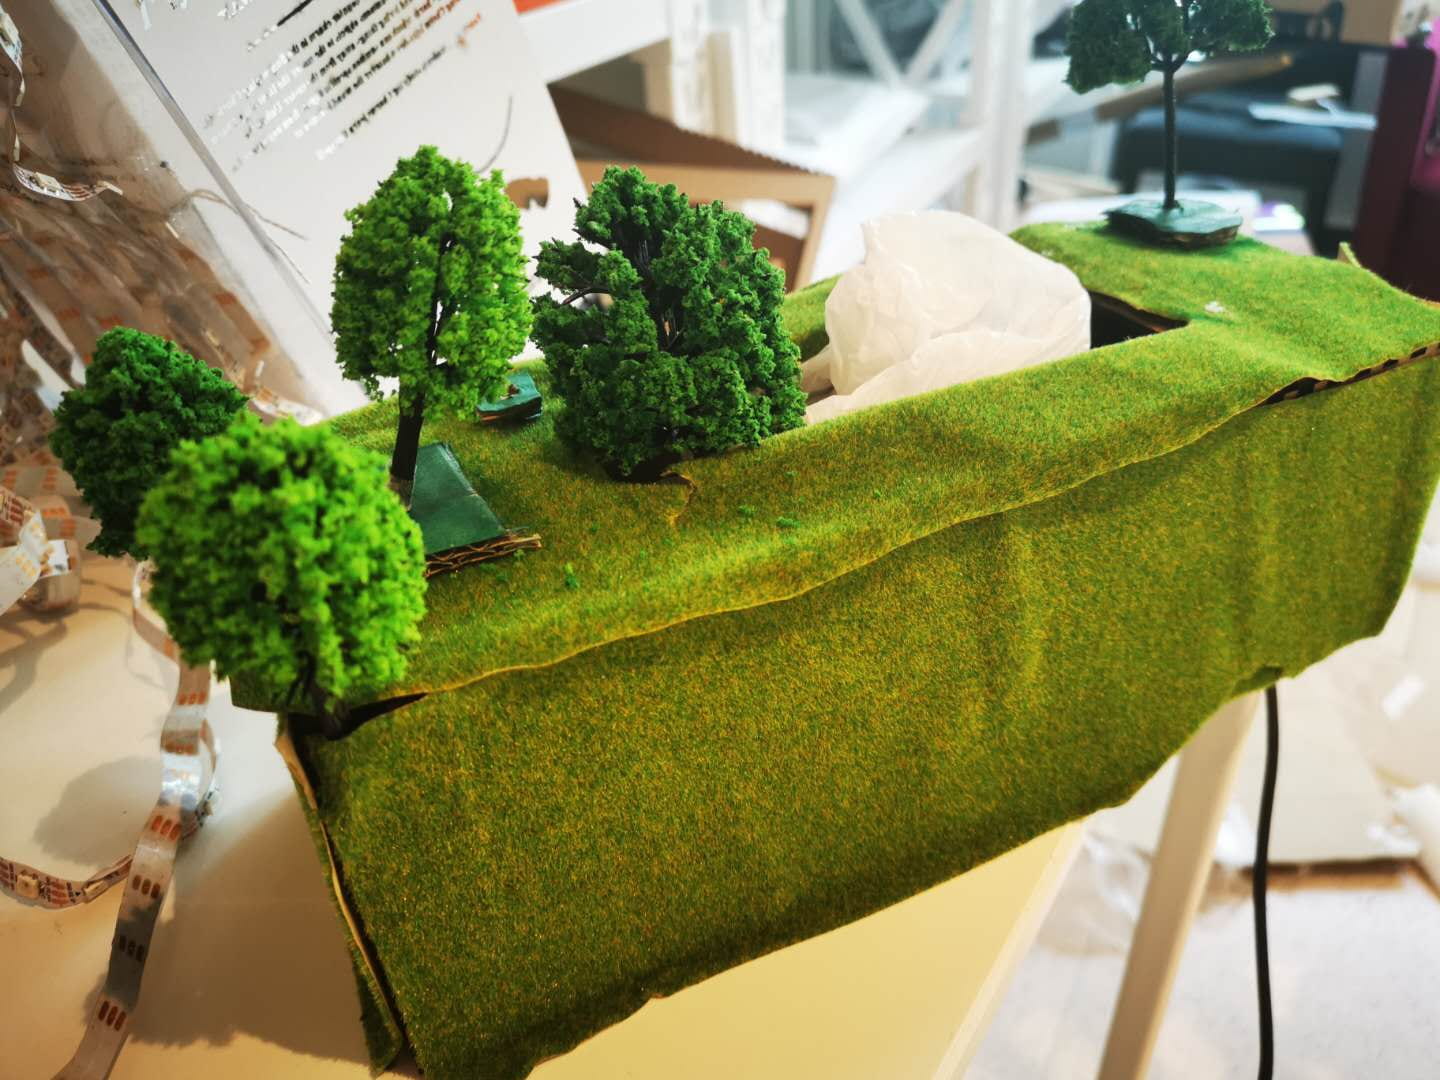
In this way, what the user is doing physically has some connections with what is shown on the screen.


CONCLUSIONS:

The goal of our project is to raise people’s awareness about climate issues, and reflect on our daily actions. The project results align with my definition of interaction in the way that output of the screen is determined by the input (users’ physical interaction). It is not align with my definition in the way that there is no “thinking” process between the first and the second input. We’ve already give the options they can do, so there’s no much exploration. I think our audience interact with our project the way we designed.

But there is a lot of things we can improve. First, we can better design the physical interaction with the forest box and let user to design the box the way they the want. For example, we can fill the box with dust and provide different kinds of plants and other decorations.  Different users can experience the act of planting a forest together. By placing multiple color sensors in different place on the box, the visuals will change according to the different trees being planted.  Second, we could first let plastics fill the surface of the box to indicate the plastic waste nowadays. If the user get rid of the plastics, the visuals on the screens will change, too.  Second, for the video shown on the screen, we can draw by ourselves.
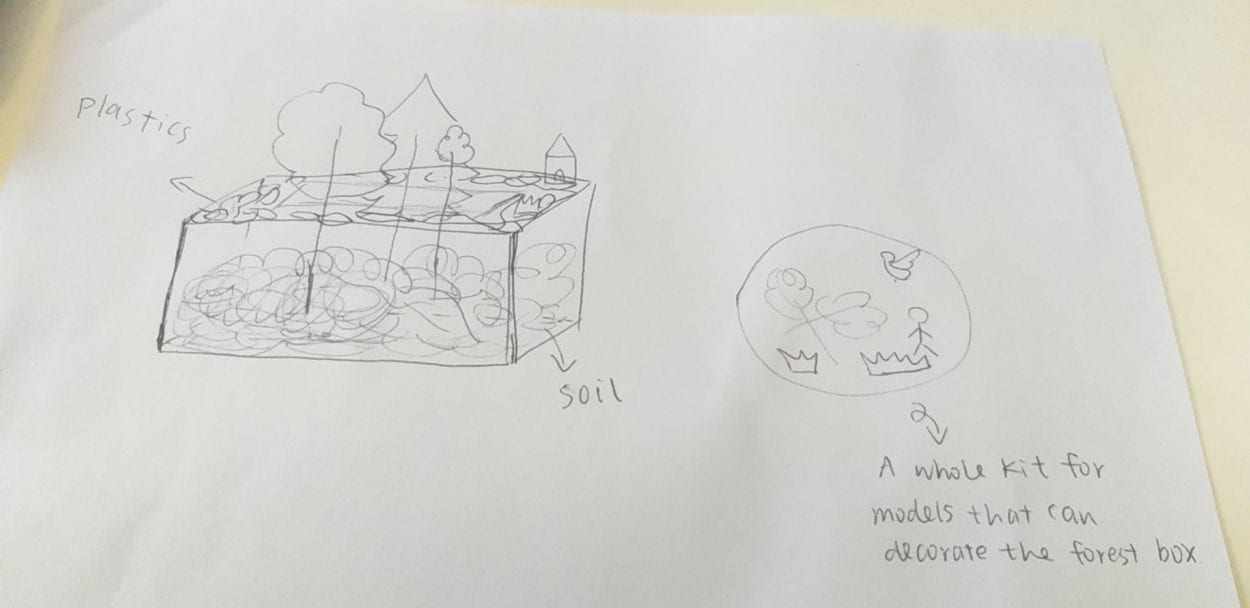
The most important thing I’ve learned is experience design. As I reflect on my project designing process, I realize for me now, it’s better to first think of an experience rather than the theme of the project. Sometimes to begin with a very big and broad theme is difficult for me to design the experience. But if you first think of an experience, for example, a game, then it’s easier to adapt the experience to your theme.

The second thing I’ve learned is coding skills. With more can more experience in coding, I think my coding logic improves. For this project, we have many conditions to determine which video to play, so there are a lot of “if statement”. I felt a mess at first, did not know how to start, then Tristan asked me to jump out of the “coding” for a second and think about the logic by drawing a flow diagram. After doing this, I felt much clearer of what I was going to do.

I think the climate issue is certainly a very serious one and everybody should care. Because  climate changes effect our daily lives. “Nature does not need humans. Humans need nature.”

Strike!- Zhao Yang (Joseph)- Inmi

PROJECT TITLE

Strike!- Zhao Yang (Joseph)- Inmi

CONCEPTION AND DESIGN

For the final project, my partner Barry and I decided to make an entertaining game. Basically, we chose to model an existing aircraft game. Since it’s classic and interesting, we don’t need to spend more time to introduce the mechanics of the game to the users so that we can spend more time focusing on how to accomplish a better game. For our project, we not only keep the original mechanics of the aircraft game but also add some other changes to the game. For the original game, the user needs to control the aircraft to attack the enemies and tries to avoid crashing into the enemies so that the aircraft can stay longer and get a higher score. If the aircraft doesn’t crash into the enemies or it destroys the enemies, it won’t lose their health points. However, we make some changes to this mechanics. In our game, if you let an enemy flee, your health points will also decrease. So the game encourages the user to try their best to attack the enemies. The reason why we make this change is to ensure that the game would end at some point and to increase the difficulty of the game. It is one of the creative parts of our final project. On the other hand, the way to interact with the original aircraft game is too limited. In the past, the only way to interact with the aircraft game is to click the buttons and use the joystick. In this way, the users only can interact with their fingers and hands. In that case, the users’ sense of engagement is not strong. Thus, in order to improve the aircraft game, we make changes to the ways of interaction. Based on our preparatory research, we found a project that uses Arduino and Processing. That project “tried to mimic the Virtual reality stuffs that happen in the movie, like we can simply wave our hand in front of the computer and move the pointer to the desired location and perform some tasks”. Here is the link of that project.

https://circuitdigest.com/microcontroller-projects/virtual-reality-using-arduino

In that project, the user can wear a device on his hand so that the computer could detect the motion of his hand. Then he can execute commands on the computer by moving and manipulating his hand. In my opinion, the interactive experience of this project can give people more sense of engagement. Hence, I think we can make a way to interact with our project to engage the user’s whole body. Then we came up with the idea that people can open their arms and imagine they are the aircraft itself and then tilt their bodies to control the movement of the aircraft. This is the way we expect people to interact with our project. Therefore, we chose to use the accelerometer sensor as the input of our project. This sensor can detect the acceleration on three axes. We chose the acceleration on Y-axis as the input in particular. If the user can wear the device on their wrist and wave their arm up and down, the acceleration on Y-axis will change. Then we can map this acceleration to Processing to control the movement of the aircraft. In this sense, it gives the user a sense that they are really flying. And this way to interact can reinforce the user’s sense of engagement. Moreover, the accelerometer sensor is quite small. So we can make a wearing device based on it very easily. And it’s convenient for users to wear it and take it off so that the users can enjoy the game more quickly. These are the reasons why we chose the sensor and why the sensor best suited to our project purpose. Honestly speaking, Kinect might have been another option. And it aligns with our idea that we expect people can engage their whole body to interact with our project. It’s actually our first choice of the input medium. However, it was not allowed to use the Kinect for the final project. So we have to reject this option.

FABRICATION AND PRODUCTION

Since we tried to model an arcade game, we decided to laser cut an arcade game case in our production process. By using the case to cover my computer, it can provide the user with the sense of playing an arcade game instead of playing a computer game. This case provides a better outlook for our project. On the other hand, another significant step in our production process is to make the accelerometer sensor as a wearing device. In this case, it would be more sensitive if the user wears it instead of just holding it in their hands. And here are the images of our design of the arcade game case.

During the user test, most of the feedback was positive. Only a few of the users suggested that we should add the functions to make the aircraft can move forward so that the game could be more interesting. Furthermore, at that time, we only had one sensor. We found a problem that by only wearing one sensor, the user could only move their right arm to control the aircraft. And it was a little confusing for the users to open their arms and tilt their bodies to control the movement of the aircraft. Even though they read the instruction, some of them were still confused about the way of interaction. If we didn’t explain to them, most of them couldn’t properly interact with our project. And these are several of the videos during the user testing process.

As a result, after the user test, we decided to add another sensor to control the aircraft to move forward. Besides, we changed the one-player mode and two-player mode to easy mode and expert mode. However, it still aligns with our original thought about two players. Because of the addition of another sensor to control the aircraft to move forward, the game becomes more difficult. It’s really hard for the user to use their right arm to control the aircraft to move left and right and flip their left hand to control the aircraft to move forward and backward at the same time. If you don’t want to challenge the expert mode alone, you can ask your friend to collaborate to control the movement of the aircraft. From my perspective, the adaption of adding another sensor is effective and successful. During the IMA End of Semester Show, by wearing two sensors, even though the users chose to play the easy mode, which can only move the aircraft left and right, it made more sense to them to open their arms and tilt their bodies to control the movement of the aircraft. And the users can easily follow our instructions without being confused. I think our production choices are pretty successful. They align with our original thought that the users can use their whole body to interact with our project. Moreover, the way of using the sensors makes the game more interesting and gives the user more sense of engagement.

CONCLUSIONS

In conclusion, the goal of our project is to make an entertaining and interesting game so that the users can have fun with it and spend their spare time playing it to relax. My definition of interaction is that it is a cyclic process that requires at least two objects which affect each other. In my opinion, our project quite aligns with my definition of interaction. The motion of the user’s body controls the movement of the aircraft in the game. Meanwhile, the scores and the image of the game immediately show to him. It aligns with the part that the objects affect each other. Moreover, the user has to focus on the game and keep interacting with it so that he can get a higher score. It aligns with the part of the cyclic process. In this sense, our project aligns with my definition of interaction successfully. Basically, all the people who have played our game align with our expectations of how they should interact. Just sometimes some of the users didn’t read the instructions that we provided to them, so they might be confused about how to interact. If we had more time, we could come up with more innovative ideas on the mechanics of the game. Since the mechanics of our game is quite similar to the original game, the user might not find much novelty on our game. If it is allowed, we would like to try to use the Kinect as the way of interaction because the direct detection of our motion can make the connection between the way of interaction and the game itself more clear. After all, our idea of engaging the whole body to interact fits the use of Kinect more than the use of the accelerometer sensor. I’ve learned a lot from our accomplishments in our final project. For instance, we have to test the game by ourselves, again and again, to ensure that the user can experience the best version of the game. We had to spend a lot of time debugging. Besides, in order to laser cut the arcade game case, I learned how to use illustrator. What’s more, the most important thing when creating an interactive project is that the user is always the first thing that we need to consider.

Code

https://github.com/JooooosephY/Interaction-Leb-Final-Project

Puppet-Leah Bian-Eric

Project name: Puppet

Conception and Design

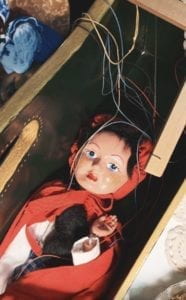
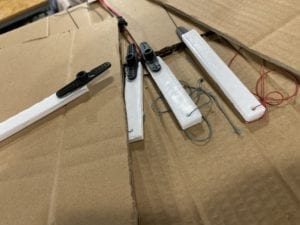
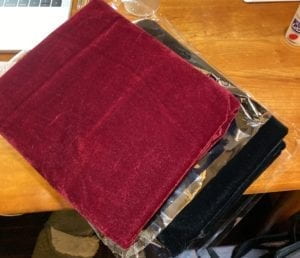
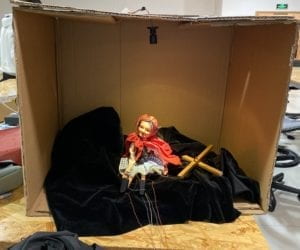
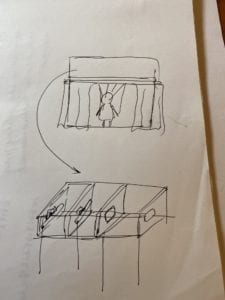
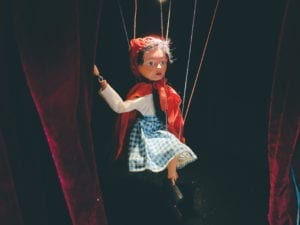
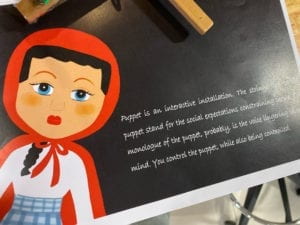
The final goal of our project was decided at the beginning, which is to show the theme of “social expectation”. The original thought was to let the user play the role of the various forces in the society that force us to behave in a certain way, and the puppet is the representation of ourselves, who are being controlled. Therefore, the original plan was to let the user set a pose for the puppet in Processing, and thus data of the pose would be sent to the Arduino part. The real puppet on the miniature stage would first change several random poses, and finally stay at the pose that the user set before. In the first week of the process, we started to prepare the materials needed for the project with the original plan in mind. The most important part in our project is the puppet. We tried to search for one that is not so funny or childish to make our theme more distinctive, and finally decided to buy the vintage puppet that has 30 years history. We expected that the final stage may have a quite large size. If we use laser cutting to build the stage, then the materials may be insufficient. Therefore, we finally decided to use cartons as replacement. To add some dramatic atmosphere of our stage, we bought some velvet, expecting to stick them to the stage surface. In addition, we bought a mini tracker lamp to be attached to the top of the stage. For the Arduino part, we decided to use four servos connected with strings to rotate the arms and legs of the puppet. To make it more stable, we decided to use 3D printing to print some components and stick them to the servos with hot glue. In addition, we used some red velvet to make the stage curtain. Since it requires professional skills, we sent the velvet to a tailor shop, and finally got a satisfying result.

0

0

0

0

Fabrication and Production

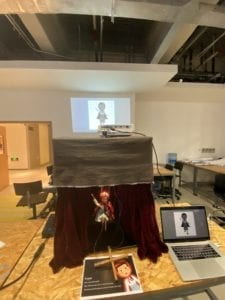
To create the image of the puppet in Processing, I tried to draw a cartoon version of the puppet by coding at the beginning. But I finally gave up since it was too complicated and the final result may even not be satisfying due to the limitation of coding. Therefore, I decided to draw the image in a digital painting app name as Procreate. I can draw different parts of the puppet’s body in different layers of the painting screen, and thus we can directly load the images into Processing and rotate them. We first chose to use keyboard and mouse interaction to let the user control the movement of the digital puppet, and we finally finished the code. However, when we shared our thoughts with the IMA fellows, they pointed out that it would be hard for the users to see our theme of social expectation with such a simple process. Besides, it may not make sense to control the puppet with Processing instead of directly controlling it. The digital puppet and the physical puppet are presented to the user at the same time, and it looks a bit competitive. From our own perspective, we also felt that the interaction in our project was a bit weak, and the theme seemed to be vague. Therefore, we modified the plan. We planned to make our stage curtain an automatic one. We could use the motor to twine the string connected to the front of the curtain, thus opening it. Besides, I changed the color of the image in Processing to black and white tone. We could cast it on the wall with projector and it would look a huge shadow hanging over the real puppet.

    However, our plan changed again after user testing. Professor Marcela also pointed out the problem that our theme seemed to be very vague to her, and we also shared our worries with her. She gave us several valuable suggestions. She suggested us to use the cross, which is part of the real puppet, to let the user control the movement of the puppet directly. Besides, she suggested that we could use webcam to capture the user’s face, and finally put their faces in the head of the digital puppet, so the logic could be clear that the user is actually also being controlled. In addition, we also received a suggestion that we can add some voice of the puppet, to let it say something. These suggestions were extremely precious to us, and we started to change almost everything of our project after user test.

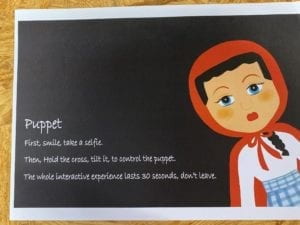
     First of all, we asked the fellows which sensor we can use to control the movement of the puppet directly. They suggested that we can use the accelerometer. The angle of the rise and fall of the puppet’s arms and legs would change with the angle that the user leans the cross. In addition, since it is hard to capture the users’ face when they are moving, Professor Eric suggested us to take a picture of the user at the beginning. He helped us with the coding and finally we made it like a process of asking them to take a selfie. I wrote a script and recorded my voice to be the puppet’s voice. The lines include, “What should I do?”, “What if they will be disappointed at me?”, “What if I cannot fit in?”. The last sentence is, “Hey friend, do you know, you are just like me.” After this last sentence, the image that the user’s face is in the head of the digital puppet will be shown to the user, so that we can show the logic that while we are controlling others, we are also being controlled. However, there were some problems with the Arduino part. The night before presentation, we were testing the accelerometer, hoping that everything could work well. However, we could not even find the port connected to the computer. Besides, in our previous testing, we found that the accelerometer is quite unstable and sensitive, making it hard to control the movement of the real puppet. Professor Marcela suggested us to change the accelerometer to tilt sensors, which are more stable. We took this advice and changed the code again. Tilt sensor functions as a button, if we lean it, a certain behavior could be triggered. In our case, we used two tilt sensors to control the movement of the arms and legs respectively. And the logic is, if the left arm rises up, the right arm would fall down, vice versa. Since tilt sensor only has a function as on or off, it is also easier for us to send the data to Processing. The digital image in Processing would change with the real puppet, following its poses. After we got everything done, I made a poster, on which I wrote the instructions and also the explanation of our project theme.

0

0

0

0

0

Conclusions

   Our project aligns well with my definition of interaction. In my preparatory research and analysis, I wrote my personal definition of a successful interaction experience. In my opinion, the process of interaction should be clear to the users, so that they can get a basic sense of what they should do to interact with the device. Various means of expression can be involved, such as visuals and audios. The experience could be thought-provoking, which may reflect the facts in the real life. My partner and I have created a small device as a game in our midterm project, so this time we decided to create an artistic one as a challenge. Our project aims at those who intentionally or compulsively cater to the social roles imposed on them by the forces in the society. We showed the logic that while we are controlling others while also being controlled by the others. In fact, it is hard to show a theme in an interactive artistic installation, and it was hard for us to find the delicate balance, the balance that we can trigger the thoughts of the user without making everything too heavy. The visual effect of our project is satisfying, and we also use music and voices to add more means of expression. The user’s interaction with our project is direct and clear. Instead of touching the cold buttons on the keyboard, they can hold the cross, listen to the monologue of the puppet, and thus build an invisible relation of empathy with the real puppet. After the final presentation, we have also received several precious suggestions. If we have more time, we would probably try to make the whole interactive process longer with more means of interaction, so that the user can be given more time to think more deeply about the theme. There are many ways to show our theme, but the results could be entirely different. We are given possibilities but may also get lost. The most important thing that I have learnt in this experience is to always be clear about what I am trying to convey and what the goals are at the beginning. Without a clear theme in mind, we are likely to lose directions, and the final work could be a mixture of various disordered ideas.

Video of the whole interactive experience:

Arduino Code:

#include <Servo.h>
Servo myservo1;
Servo myservo2;
Servo myservo3;
Servo myservo4;// create servo object to control a servo

int angleArm = 0;
int angleLeg = 0;
const int tiltPin1 = 2;
const int tiltPin2 = 4;
int tiltState1 = 0;
int tiltState2 = 0;

void setup() {
Serial.begin(9600);
myservo1.attach(3);
myservo2.attach(5);
myservo3.attach(6);
myservo4.attach(9);
pinMode(tiltPin1, INPUT);
pinMode(tiltPin2, INPUT);
}


void loop() {
//reasonable delay
delay(250);

tiltState1 = digitalRead(tiltPin1);
tiltState2 = digitalRead(tiltPin2);

if (tiltState1 == HIGH) {
angleArm = 90;
} else {
angleArm = -90;
}

if (tiltState2 == HIGH) {
angleLeg = 30;
} else {
angleLeg = -30;
}

// Serial.println(angleArm);
// Serial.println(angleLeg);

myservo1.write(90 + angleArm);
myservo2.write(90 - angleArm);
myservo3.write(90 + angleLeg);
myservo4.write(90 - angleLeg);

Serial.print(angleArm);
Serial.print(","); // put comma between sensor values
Serial.print(angleLeg);


Serial.println(); // add linefeed after sending the last sensor value
delay(100);
}


Processing Code

 
import processing.sound.*;
SoundFile sound;
SoundFile sound1;
import processing.video.*; 
Capture cam;
PImage cutout = new PImage(160, 190);
import processing.serial.*;
String myString = null;
Serial myPort;
int NUM_OF_VALUES = 2;   /** YOU MUST CHANGE THIS ACCORDING TO YOUR PROJECT **/
int[] sensorValues;      /** this array stores values from Arduino **/

PImage background;
PImage body;
PImage arml;
PImage armr;
PImage stringlr;
PImage stringar;
PImage stringal;
PImage legl;
PImage stringll;
PImage legr;
float yal=100;
float yll=0;
float yar=0;
float ylr=0;
float leftangle=PI/4;
float rightangle=-PI/4;
float leftleg = 570;
float rightleg = 570;
float armLerp = 0.22;
float legLerp = 0.22;
float pointleftx =-110;
float pointlefty =148;
PImage body2;
boolean playSound = true;
void setup() {
  size(850, 920);
  setupSerial();
  cam = new Capture(this, 640, 480);
  cam.start(); 
  background = loadImage("background.png");
  body=loadImage("body.png");
  arml=loadImage("arml.png");
  stringal=loadImage("stringal.png");
  armr=loadImage("armr.png");
  legl=loadImage("legl.png");
  stringll=loadImage("stringll.png");
  legr=loadImage("legr.png");
  stringar=loadImage("stringar.png");
  stringlr=loadImage("stringlr.png");
  body2 =loadImage("body2.png");
  sound = new SoundFile(this, "voice.mp3");
  sound1 = new SoundFile(this, "bgm.mp3");
  sound1.play();
  sound1.amp(0.3);  
}

void draw() {
  updateSerial();
  printArray(sensorValues);
  if (millis()<15000) {
    if (cam.available()) { 
      cam.read();
    } 
    imageMode(CENTER);

    int xOffset = 220;
    int yOffset = 40;

    for (int x=0; x<cutout.width; x++) {
      for (int y=0; y<cutout.height; y++) {
        color c = cam.get(x+xOffset, y+yOffset);
        cutout.set(x, y, c);
      }
    }
    background(0);
    image(cutout, width/2, height/2);
    fill(255);
    textSize(30);
    textAlign(CENTER);
    text("Place your face in the square", width/2, height-100);
    text(15 - (millis()/1000), width/2, height-50);
  } else { 
    if (!sound.isPlaying()) {
      // play the sound
      sound.play();
    } 
    imageMode(CORNER);
    image(background, 0, 0, width, height);
    image(legl, 325, leftleg, 140, 280);  
    image(legr, 435, rightleg, 85, 270);
    image(body, 0, 0, width, height);
    if (millis()<43000) {
      image(body, 0, 0, width, height);
    } else {
      image(cutout, 355, 95);
      image(body2, 0, 0, width, height);
 
      sound.amp(0);
    }
    arml();
    armr();
    //stringarmleft();
    image(stringal, 255, yal, 30, 470);
    image(stringll, 350, yll, 40, 600);
    image(stringar, 605, yar, 30, 475);
    image(stringlr, 475, ylr, 40, 600);
    int a = sensorValues[0];
    int b = sensorValues[1];
    float targetleftangle= PI/4 + radians(a/2);
     float targetrightangle= -PI/4 + radians(a/2);
     float targetleftleg= 570+b*1.6;
     float targetrightleg= 570-b*1.6;
     leftangle = lerp(leftangle, targetleftangle, armLerp);
     rightangle = lerp(rightangle, targetrightangle, armLerp);
     leftleg = lerp(leftleg, targetleftleg, legLerp);
     rightleg = lerp(rightleg, targetrightleg, legLerp);
     
float targetpointr = -100-a*1.1;
float targetpointl = -120+a*1.1;
float targetpointr1 = -50+b*1.3;
float targetpointr2 = -50-b*1.3;
yal= lerp(yal, targetpointr, armLerp);
yar = lerp(yar,targetpointl,armLerp);
yll= lerp(yll,targetpointr1,legLerp);
ylr = lerp(ylr,targetpointr2,legLerp);
  }
}

void arml() {
  pushMatrix();
  translate(375, 342);
  rotate(leftangle);
  image(arml, -145, -42, 190, 230);
  fill(255, 0, 0);
  noStroke();
  popMatrix();
}


void armr() {
  pushMatrix();
  translate(490, 345);
  rotate(rightangle);
  image(armr, -18, -30, 190, 200); 
  popMatrix();
}

void setupSerial() {
  printArray(Serial.list());
  myPort = new Serial(this, Serial.list()[ 11 ], 9600);
  myPort.clear();
  myString = myPort.readStringUntil( 10 );  // 10 = '\n'  Linefeed in ASCII
  myString = null;

  sensorValues = new int[NUM_OF_VALUES];
}

void updateSerial() {
  while (myPort.available() > 0) {
    myString = myPort.readStringUntil( 10 ); // 10 = '\n'  Linefeed in ASCII
    if (myString != null) {
      String[] serialInArray = split(trim(myString), ",");
      if (serialInArray.length == NUM_OF_VALUES) {
        for (int i=0; i<serialInArray.length; i++) {
          sensorValues[i] = int(serialInArray[i]);
        }
      }
    }
  }
}

Floating keys – Fay Li – Eric

CONCEPTION 

Our project was like a physical version of Piano Tiles and Guitar Hero. There were four boxes as four keys of the piano, each with a sensor inside. The player should follow the moving tiles on the screen and put his hand into the right boxes accordingly to reach a high score and complete the jingle bells melody. Compared to simply tapping the screen, we wanted players to have feel more engaged with the game through the physical process of interaction.

DESIGN,   FABRICATION, AND PRODUCTION:

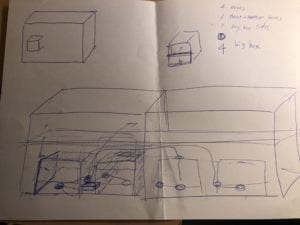
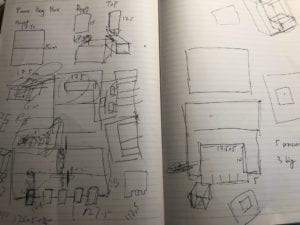
Our original design for the physical part was to put four small boxes in one big box, to make all the circuits and keys an integral part. But it was thus rejected by the TA the first time we went to fab lab, because it would use more than ten boards of wood, which was a lot. Later we decided only to make four small boxes with a big platform (built by two boards), which altogether would take six boards. And the idea was rejected again as six was still too much. Therefore, we had to give up the idea of using the wood board as the platform. We found a box in the cardboard room and cut it to the proper size and glued the boxes onto the board, which turned out working well though looked kind of weird.

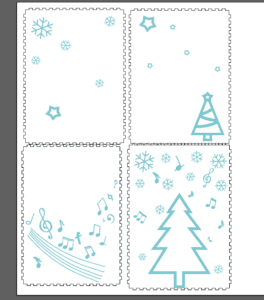
We left a small hole at the back of each box so the wires could come out more organized. I also added some decorations onto the top of the boxes to show the theme of music, and add some Christmas vibe to the project.

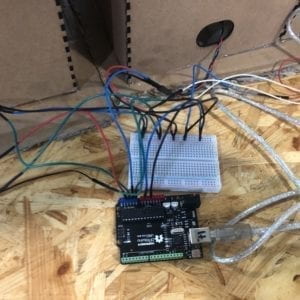
We also met some problems with the Arduino when building the circuit, though it was supposed to be the easiest part. We found that when connecting the Arduino to the computer, it didn’t show up in the port list, and the green light turned off, and Arduino became extremely hot. Later we found out that it was because we misconnected some of the wires. And the same mistake occurred several times throughout our production and even right before the presentation, and each time it took us long enough to figure out.

The coding was the hardest part of the project. We were able to complete the code with help from professors, TAs and many friends. Especially thanks to my partner James, who put a lot of effort into this. The project wasn’t fully functioning during the user test due to the same mistake I mentioned above and we didn’t figure it out before the user test, so we used four keys on the keyboard to replace the sensor to only test the code. We didn’t get many useful suggestions during the session, but Eric helped changed the code to make it work better.

Later we added more details to the game interface, such as the title screen, time bar, highest score record. And the game could be restarted as well.

CONCLUSIONS:

Though we still ran into some problems the day our presentation, the project overall interacted with the player well. They interacted with it by placing their hands into the right box and complete the melody, which aligned with my definition of interaction as being a reciprocal and cyclical process between the user and the machine. It also reached the goal that making the users feel more engaged with the game through physical interaction. The problem was that once the melody was completely played, the array reached its end and the game would crash (Eric helped fixed it after the presentation). If given more time, we could improve it by adapting the suggestions we received during the presentation, such as making it a two-player game, or making a vertical version so that the keys can really “flow”, or adding more songs to it… The project experience was very interesting and meaningful, as a team we overcame many difficulties and finally had a good outcome. And hopefully, the attempt of adding more interaction and making a physical version of a game can bring more fun and engagement to the players.

“Save Me From Plastic-Lifan Yu-Inmi Lee

 Brief introduction:

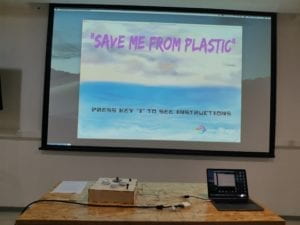
This game focuses on the environmental problem of ocean plastic pollution. We designed an interactive game that encourages people to use less plastic product and find ways to treat plastic wastes that do less harm to our environment (and ourselves)–stop dumping them into natural environment! 

 CONCEPTION AND DESIGN:

In general, when I think of how my users are to interact with my project, I would like them to move around, be actively engaged and achieve the winning result with combined effort.

First, to move around. When we thought of how users can interact with images of falling plastic trash pieces on the screen, we first thought about pushing buttons. But this can’t get users to move around. So, we decided that half of the screen should have a camera-captured real-time image as a background. This way users’ image actually appears on the screen along with images of plastic trash. Users thus can move around, changing their places in the image and interact with image of falling pieces of plastic that’s laid on top of the camera image. To determine whether, in users’ image, they successfully touched the plastic pieces, a threshold is set. When falling images move pass a place whose colors are darker than the color this threshold represents, these images disappear. Thus the results looks like when users wear dark-colored gloves and their images on the screen “touches” the falling trash with those gloves, it counts as they have “successfully blocked the plastic pieces from falling into the sea”. (Dark-colored clothes can also work) This is effective to encourage users to move around.

Second, to be actively engaged. This game is a continuous, quick-paced game. Plastic trash pieces fall from the sky continuously and the already existing pieces of plastic in the ocean move around all the time. Users have to be focused on the game in order no to let the fish die. At first, we did not add the already existing plastic pieces images in the ocean. However, this is problematic because if one player is very good at “catching” all the falling plastic pieces, the other player don’t need to control the fish at all. Then we added extra plastic pieces in the sea to encourage two users to actively play this game from the beginning.

Third, to win this game with combined effort. We once thought of making a one-player game. If more plastic pieces fall into the sea, the color of sea water will change and there will appear dead fish in the water. When the dead fish reaches a certain amount, game over. However, we thought of offering players another experience in the fish’s viewpoint. Thus we added the fish part.

We wish to raise environmental awareness by providing our users with information about plastic pollution in ocean. There was an option that we rejected was a candy box that automatically opens when players win. We once thought of putting on the candy wrappers some sentences of call to actions and scientific facts about current environmental conditions. Therefore, users are more willing to take in all those information. However, our motor didn’t work well in our device and we just didn’t add it to our project.

FABRICATION AND PRODUCTION:

In user testing, we received suggestions to add a video of ocean in the background of the “fish” part. We also received suggestions that we should provide users with some gloves with colors that rarely appear on clothes. In our code, we can write some lines that detect the color of these gloves so that as soon as they appear on at the same place with falling plastic pieces,  the plastic pieces will disappear. Back then, we didn’t add the already-existing plastic pieces in the ocean, so all players just focused on “blocking” plastic pieces. Nobody went to control the fish’s movements.

We later added a video of ocean in the background. However, this didn’t work very well because our video showed fish swimming. During presentation, some users reported that they get confused about which fish they are controlling—fish in the background video or the hand-drawn fish.

We bought bright pink gloves and black gloves, but we ultimately chose black gloves to provide to users. However, this turned out to be a wrong choice because one of our users wore black clothes and can very easily “catch” the falling plastic pieces images by stretching out her hands.

CONCLUSIONS:

We tried to use a fun and interactive game to raise environmental awareness among our users. My definition of interaction is that people and device can receive information from and provide feedback to each other. This process is better if this communication can go on and on if both sides keep interacting. My project allows users to receive information by seeing the falling plastic pieces and try to block them from falling into the sea. When one piece of plastic is blocked, other plastic pieces will still keep falling down. People can keep interacting until the game ends. Referring to the game itself, a camera is used to detect users’ movement information and decide whether their images on the screen actually “touched” the plastic pieces or not. According to different actions the users make–successfully caught the trash pieces or accidentally let them fall into the ocean—the game itself also gives different feedbacks. When a plastic piece fall into the sea, it will start moving randomly in the “sea area” and threaten the fish. If users don’t control the fish and hide away from plastic pieces, it will die. Different actions done by users can lead to the game’s winning or game ending. The whole process is an active, interactive process.

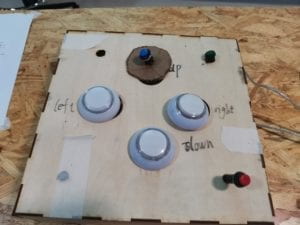
If we had more time, we would change our “keypress” into pushbuttons. We can place several neat little buttons on laser-cut boards in front of users with captions like “start” “restart” etc.

We can also use a camera that connects to the computer and hide the computer away. This way, we can change the distance of the camera and the user instead of placing a computer in front of users (which made their image appear to be very large and they can too easily “catch” the plastic pieces.) After this, our whole project can look more simple and neat.

We can also add some sound effects so that as soon as users “catch” a piece of plastic trash, a sound can be played.

Finally, the page that contain scientific data and call to action can be shown to users before the game starts instead of after the game ends, because users are usually too busy restarting the game instead of stopping and taking a look at those words.

I’ve learned that if I want to raise awareness, I should focus more on how to make everyone feel like “I really should care”. Our project simply stated the current disastrous situation of ocean animals, but our game didn’t show how this affects us and wasn’t touching enough to encourage people to care. Moreover, it would be better if we made the whole thing look more pretty that people will be very interested in interacting with it as soon as they see it.

I was glad that some people really liked the “blocking the falling plastic pieces” part. They thought it was interesting. One person even did research into plastic pollution after user testing and decided to buy less drinks contained in plastic bottles and use less plastic products. I wish if I have another chance in the future, I can refine the whole game and make it look more attractive, so that we can let more people know about this serious environmental issue in a fun way. Taking actions to slow down our environment worsening can’t wait another day. However, if I directly call for everyone to take actions, no one will be willing. This project we made can be of some help to interest people in this often-ignored environmental problem that actually decide whether we and ocean animals live or die.

PART OF OUR CODE

(the part when fish is alive.

code that decide the winning and losing of this game)  

//PART OF OUR CODE
//(the part when fish is alive & code that decide the winning and losing of this game)   

 if (ok==true) {


      for (int k=0; k<plasticList.size(); k++) {
        Plastic temp=plasticList.get(k);
        temp.display();
        temp.move();
      }


      if (fishY<=height/2+10) {
        fishY=height/2+10;
      }

      if (fishY>=height-40) {
        fishY=height-40;
      }

      if (fishX<=30) {
        fishX=30;
      }

      if (fishX>=width-30) {
        fishX=width-30;
      }

      if(sensorValues[0]==1){
      fishY-=fishSpeed;
      }

      if(sensorValues[1]==1){
      fishY+= fishSpeed;
      }

      if(sensorValues[2]==1){
      fishX-= fishSpeed;
      }

       if(sensorValues[3]==1){
      fishX+= fishSpeed;
      }


      image (img1, fishX, fishY, 100, 100);
    }

    for (int j=0; j<plasticList.size(); j++)//When fish touches plastic, it dies
    {
      Plastic nmsl=plasticList.get(j);
      float dis = sqrt((fishX-nmsl.x)*(fishX-nmsl.x)+(fishY-nmsl.y)*(fishY-nmsl.y))-nmsl.size*0.4;
      if (dis<=0) {
        ok = false;
      }
    }


    if (ok==false ) {//if a fish dies, game over, users lose the game
      image(img6, width/2, height/2, width, height);
   //   println("show game over");
    }


    if (key == 'c' && ok == false ) {//see the facts page
      image(img8, width/2, height/2, width, height);
     //  println("show facts");
    }


    if ( key=='s' && ok==false ) {//restart after losing the game
      ok=true;
      win = 0;
      start = 0;
      int l = plasticList.size();
      for (int i = l-1; i>=0; i--) {
        plasticList.remove(i);
      }

      int r = fallingplastics.size();
      for (int s = r-1; s>=0; s--) {
        fallingplastics.remove(s);
      }
    
    }

    if (win == 1 ) {//this means when users win, the fish is alive whatsoever
      //myPort.write('1');
      ok = true;
      fill(255, 34, 899);
      rect(0, 0, width, height);
      textSize(40);
      fill(376, 678, 222);
      text("You Won!!Press 's' to restart", width/3, height*2/3);
      textSize(45);
      fill(255);
      text("You won the game.", width/2,height/5);
      textSize(30);
      text("But there are countless fish that survive by chance like this", width/2, height/4);
      text("We play a crucial role in deciding their lives and deaths",width/2,height/3);
      text("Less Plastic, less disaster", width/2, height/2);
    }

    if (fallingplastics.size()>=fallingplasticsWinning && ok==true) {//After a certain amount of time, users win
      win = 1;
      fill(255, 34, 899);
      rect(0, 0, width, height);
      textSize(40);
      fill(376, 678, 222);
      text("You Won!!Press 's' to restart", width/3, height/2);
      fill(255);
      text("Save our ocean!", width/2, height/4);
      text("Less Plastic, less disaster", width/2, height/3);
    }

    if (keyPressed && key=='s' && win==1) {//restart the game after winning
      ok = true;
      win = 0;
      start = 0;
      int l = plasticList.size();
      for (int i = l-1; i>=0; i--) {
        plasticList.remove(i);
      }

      int r = raindrops.size();
      for (int s = r-1; s>=0; s--) {
        raindrops.remove(s);
      }
    }
  }
}


class Plastic {
 
 
  float x,y;
  float size;
  float speedX;
  float speedY;
  Plastic(float startingX, float startingY){
    x=startingX;
    y=startingY;
    size=random(50,150);

    speedX=random(-10,10);
    speedY=random(1,15);
  }

    void display(){
      image(img2,x,y,size,size);
  }
 

  void move(){
    x+=speedX;
    y+=speedY;
    if(x<=0||x>=width){
      speedX=-speedX;
    }
   
    if(y<=height/2||y>=height){
      speedY=-speedY;
    }
   
  }
 
}