Recitation 8: Serial Communication by Steve Sun

for this week we practised the serial communication between arduino and processing. 

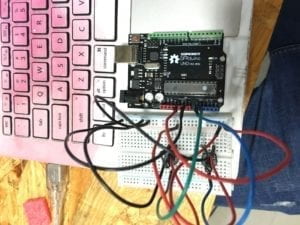
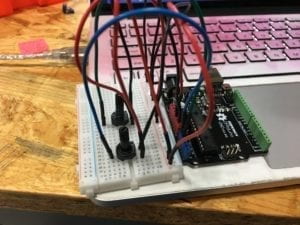
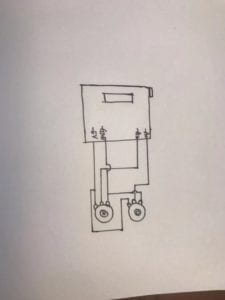
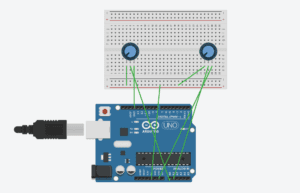
for the first part i was instructed to make a Etch A Sketch with arduino and processing. we used two potentiometers, each of which controls the x or y position of a circle on the screen. 

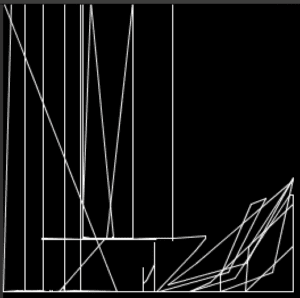
one thing to keep in mind is that for the example we downloaded, the processing part actually reads “serial.print()” in arduino. so that’s why when i used serial.write() things don’t work. also for the first version i am about to show, i wonder if i could make the elipse smaller and also shorten the delay time and make the animation actually look like a line…… for the second version i simply connects two sets of read value (x,y) using a line(). this way things connect with each other…… however this new verison is still a bit chuncky (if that make sense) due to the delay time but my computer just seems to refuse to change the default delay time smh.

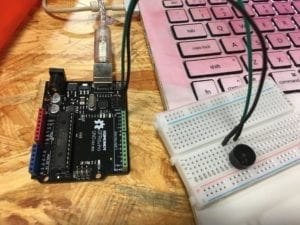
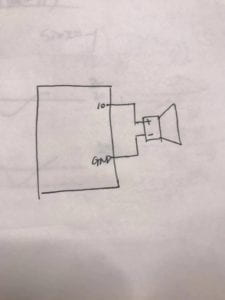
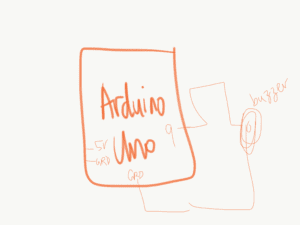
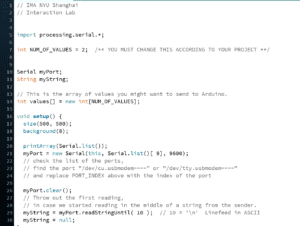
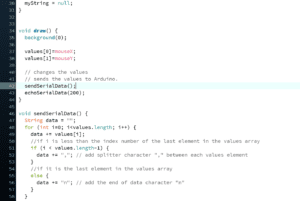
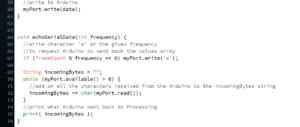
for the second part we didn’t have time to do it but i would imagine the process not being too hard. according to the video all there is to do is detect the mouseX and mouseY value, map them and send them to arduino where we use the tone() fuction and take the mapped x value as frequency and y value as duration. and only when key pressed and key is the space key can the two value be sent. the circuit would be simply a buzzer connected to a pin. 

Recitation 8 Serial Communication–Ketong Chen

 Exercise 1 Make a Processing Etch A Sketch

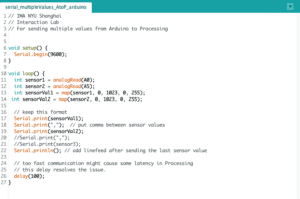
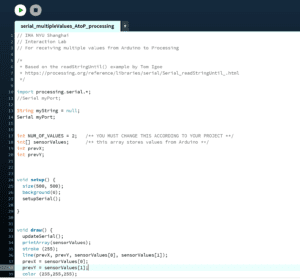
The first exercise was to make a processing Etch A Sketch. To make it, we need two potentiometers to each control the x values and the y values of the line. Also, we need to keep track of the previous x and y values to draw a line from there to the new x and y positions. Here is the sketch:

First, I use two potentiometers to control the position of the ellipse which is quite easy since we have covered it in class. Here is the video:

  Then I need to figure out how to draw a line and I have no idea at first. I know I have to keep track of the previous x and y values so I float prex and prey. And I make prex=sensorvalues[0] and prey=sensorvlues[1] to keep track of the previous values. So the line is: line(prex,prey,sensorvalues[0],sensorvalues[1]). And it worked, here are the video and code.

import processing.serial.*;

String myString = null;
Serial myPort;


int NUM_OF_VALUES = 2;   /** YOU MUST CHANGE THIS ACCORDING TO YOUR PROJECT **/
int[] sensorValues;      /** this array stores values from Arduino **/
float prex = 0;
float prey = 0;

void setup() {
  size(500, 500);
  background(255);
  setupSerial();
}


void draw() {
  updateSerial();
  printArray(sensorValues);
line(prex,prey,sensorValues[0],sensorValues[1]);
stroke(5);
prex=sensorValues[0];
prey=sensorValues[1];


  // use the values like this!
  // sensorValues[0] 

  // add your code

  //
}


void setupSerial() {
  printArray(Serial.list());
  myPort = new Serial(this, Serial.list()[ 3 ], 9600);
  // WARNING!
  // You will definitely get an error here.
  // Change the PORT_INDEX to 0 and try running it again.
  // And then, check the list of the ports,
  // find the port "/dev/cu.usbmodem----" or "/dev/tty.usbmodem----" 
  // and replace PORT_INDEX above with the index number of the port.

  myPort.clear();
  // Throw out the first reading,
  // in case we started reading in the middle of a string from the sender.
  myString = myPort.readStringUntil( 10 );  // 10 = '\n'  Linefeed in ASCII
  myString = null;

  sensorValues = new int[NUM_OF_VALUES];
}


void updateSerial() {
  while (myPort.available() > 0) {
    myString = myPort.readStringUntil( 10 ); // 10 = '\n'  Linefeed in ASCII
    if (myString != null) {
      String[] serialInArray = split(trim(myString), ",");
      if (serialInArray.length == NUM_OF_VALUES) {
        for (int i=0; i<serialInArray.length; i++) {
          sensorValues[i] = int(serialInArray[i]);
        }
      }
    }
  }
}

void setup() {
Serial.begin(9600);
}

void loop() {
int sensor1 = analogRead(A0);
int sensor2 = analogRead(A2);

// keep this format
Serial.print(sensor1);
Serial.print(“,”); // put comma between sensor values
Serial.print(sensor2);

Serial.println();

// too fast communication might cause some latency in Processing
// this delay resolves the issue.
delay(100);
}

Exercise 2 Make a musical instrument with Arduino

I aim to make the buzzer change sound with the movement of my mouse and stop making sound when press the key. I used the if statement to control but it seem to have a delay between the press of the key and the stop of the sound. I also used the tone function.

Here are the sketch and video:

code:

import processing.serial.*;

int NUM_OF_VALUES = 10;  /** YOU MUST CHANGE THIS ACCORDING TO YOUR PROJECT **/


Serial myPort;
String myString;

// This is the array of values you might want to send to Arduino.
int values[] = new int[NUM_OF_VALUES];
int x;
int y;

void setup() {
  size(500, 500);
  background(0);

  printArray(Serial.list());
  myPort = new Serial(this, Serial.list()[ 3 ], 9600);
  // check the list of the ports,
  // find the port "/dev/cu.usbmodem----" or "/dev/tty.usbmodem----" 
  // and replace PORT_INDEX above with the index of the port

  myPort.clear();
  // Throw out the first reading,
  // in case we started reading in the middle of a string from the sender.
  myString = myPort.readStringUntil( 10 );  // 10 = '\n'  Linefeed in ASCII
  myString = null;
}


void draw() {
  background(0);
  x = mouseX;
  map(x,0,600,31,4000);
  y = mouseY;
  map(y,0,600,31,4000);
   

  // changes the values
  for (int i=0; i<values.length; i++) {
    values[0] = x;  /** Feel free to change this!! **/
    values[1] = y;
  }
if(keyPressed){
     values[2]=0;
   }
     else{values[2]=1;
   }
   ellipse(x,y,20,20);
     // sends the values to Arduino.
  sendSerialData();

  // This causess the communication to become slow and unstable.
  // You might want to comment this out when everything is ready.
  // The parameter 200 is the frequency of echoing. 
  // The higher this number, the slower the program will be
  // but the higher this number, the more stable it will be.
  echoSerialData(200);
}

void sendSerialData() {
  String data = "";
  for (int i=0; i<values.length; i++) {
    data += values[i];
    //if i is less than the index number of the last element in the values array
    if (i < values.length-1) {
      data += ","; // add splitter character "," between each values element
    } 
    //if it is the last element in the values array
    else {
      data += "n"; // add the end of data character "n"
    }
  }
  //write to Arduino
  myPort.write(data);
}


void echoSerialData(int frequency) {
  //write character 'e' at the given frequency
  //to request Arduino to send back the values array
  if (frameCount % frequency == 0) myPort.write('e');

  String incomingBytes = "";
  while (myPort.available() > 0) {
    //add on all the characters received from the Arduino to the incomingBytes string
    incomingBytes += char(myPort.read());
  }
  //print what Arduino sent back to Processing
  print( incomingBytes );
}

#define NUM_OF_VALUES 10 /** YOU MUST CHANGE THIS ACCORDING TO YOUR PROJECT **/

/** DO NOT REMOVE THESE **/
int tempValue = 0;
int valueIndex = 0;

/* This is the array of values storing the data from Processing. */
int values[NUM_OF_VALUES];

void setup() {
Serial.begin(9600);
pinMode(10,OUTPUT);
}

void loop() {
getSerialData();
if(values[2] == 1){
tone(10,values[1],1000/values[0]);
}else{
noTone(10);
}

// add your code here
// use elements in the values array
// values[0] // values[1] }

//recieve serial data from Processing
void getSerialData() {
if (Serial.available()) {
char c = Serial.read();
//switch – case checks the value of the variable in the switch function
//in this case, the char c, then runs one of the cases that fit the value of the variable
//for more information, visit the reference page: https://www.arduino.cc/en/Reference/SwitchCase
switch (c) {
//if the char c from Processing is a number between 0 and 9
case ‘0’…’9′:
//save the value of char c to tempValue
//but simultaneously rearrange the existing values saved in tempValue
//for the digits received through char c to remain coherent
//if this does not make sense and would like to know more, send an email to me!
tempValue = tempValue * 10 + c – ‘0’;
break;
//if the char c from Processing is a comma
//indicating that the following values of char c is for the next element in the values array
case ‘,’:
values[valueIndex] = tempValue;
//reset tempValue value
tempValue = 0;
//increment valuesIndex by 1
valueIndex++;
break;
//if the char c from Processing is character ‘n’
//which signals that it is the end of data
case ‘n’:
//save the tempValue
//this will b the last element in the values array
values[valueIndex] = tempValue;
//reset tempValue and valueIndex values
//to clear out the values array for the next round of readings from Processing
tempValue = 0;
valueIndex = 0;
break;
//if the char c from Processing is character ‘e’
//it is signalling for the Arduino to send Processing the elements saved in the values array
//this case is triggered and processed by the echoSerialData function in the Processing sketch
case ‘e’: // to echo
for (int i = 0; i < NUM_OF_VALUES; i++) {
Serial.print(values[i]);
if (i < NUM_OF_VALUES – 1) {
Serial.print(‘,’);
}
else {
Serial.println();
}
}
break;
}
}
}


Recitation08-clover

When doing the step1, the first thing I found challenging is how to set the start point and the end point for the line. For the ellipse, I just need to put the end point in the new circle but I don’t know where to put the end point in the line();. I first created the start point then I don’t know how to link the end point with the start point. Then after looking at the code in the Arduino I noticed that the processing is to read the statistic from Arduino. Then I realize I only need to set xp=x; yp=y after the line(xp,yp,x,y); then it can draw the line controlling by parameters. Then I met the second question is that the line will draw out the canvas. I solve this problem by using the map to lower the range. x=map(sensorValues[0],0,1023,0,500);
y=map(sensorValues[1],0,1023,0,500) and now it can draw in the canvas. By doing this I learn the importance of the position of the xp=x; yp=y is really important. Because before when I put them in front of line(xp,yp,x,y);  this doesn’t work. Then I learn that the xp and yp is to read the changing location of the line and it should set after the line(xp,yp,x,y); to measure the end point of the line. Also, step1 strengthen the importance of map.

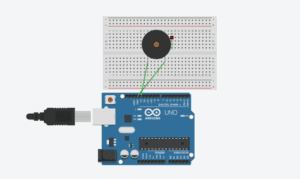
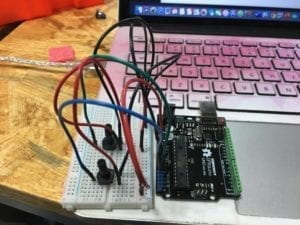
When doing step2, the first difficulty I meet is how to connect a buzzer. I search and I learn that one should be connect to 13 and the other should be connect to the ground. Second difficulty is how to change the code in the Arduino. I peeked helped and learn that I need to use a if statement to link the buzzer( if (values[1] == 1) {tone(13, values[0],values[2]);(make the buzzer rings)
} else {noTone(13);(make the buzzer not rings)})with the mouse and I need to set three values to let the mouse control the buzzer. Once the mouse pressed, the buzzer rings. Then I also need to change the code in processing to make it connect with the Arduino. If mouse pressed, it will jump to value[1]. During step2, I learned how to connect the processing with Arduino when there are multiple values changing and how to read the mouse Pressed and link it with the Arduino. I also enhance my understanding of how to set values and how to connect two if statements(one in Arduino and one in processing) to make the mouse link with Arduino.

This is the code and the video for step1 and step2.

import processing.serial.*;

String myString = null;
Serial myPort;
float x;
float y;
float xp;
float yp;
int NUM_OF_VALUES = 2;   /** YOU MUST CHANGE THIS ACCORDING TO YOUR PROJECT **/
int[] sensorValues;      /** this array stores values from Arduino **/
void setup() {
  size(500, 500);
  background(0);
  setupSerial();
  
  //rectMode(CENTER);
}
void draw() {
  //background(0);
  updateSerial();
  printArray(sensorValues);
  //rect(width/2,height/2,400,400);
  x=map(sensorValues[0],0,1023,0,500);
  y=map(sensorValues[1],0,1023,0,500);
  stroke(255);
  strokeWeight(1);
  ellipse(x,y,30,30);
 
  
  //line(xp,yp,x,y);
  xp=x;
  yp=y;
   ellipse(xp,yp,30,30);
  
  
  //// use the values like this!
   
  // //fill(sensorValues[0],sensorValues[1],sensorValues[2]);
     

  //// add your code

  //
}


void setupSerial() {
  printArray(Serial.list());
  myPort = new Serial(this, Serial.list()[ 1 ], 9600);
  // WARNING!
  // You will definitely get an error here.
  // Change the PORT_INDEX to 0 and try running it again.
  // And then, check the list of the ports,
  // find the port "/dev/cu.usbmodem----" or "/dev/tty.usbmodem----" 
  // and replace PORT_INDEX above with the index number of the port.

  myPort.clear();
  // Throw out the first reading,
  // in case we started reading in the middle of a string from the sender.
  myString = myPort.readStringUntil( 10 );  // 10 = '\n'  Linefeed in ASCII
  myString = null;

  sensorValues = new int[NUM_OF_VALUES];
}


void updateSerial() {
  while (myPort.available() > 0) {
    myString = myPort.readStringUntil( 10 ); // 10 = '\n'  Linefeed in ASCII
    if (myString != null) {
      String[] serialInArray = split(trim(myString), ",");
      if (serialInArray.length == NUM_OF_VALUES) {
        for (int i=0; i<serialInArray.length; i++) {
          sensorValues[i] = int(serialInArray[i]);
        }
      }
    }
  }
}

ellipse(the video for it)
import processing.serial.*;

String myString = null;
Serial myPort;
float x;
float y;
float xp;
float yp;
int NUM_OF_VALUES = 2;   /** YOU MUST CHANGE THIS ACCORDING TO YOUR PROJECT **/
int[] sensorValues;      /** this array stores values from Arduino **/
void setup() {
  size(500, 500);
  background(0);
  setupSerial();
  
  //rectMode(CENTER);
}
void draw() {
  //background(0);
  updateSerial();
  printArray(sensorValues);
  //rect(width/2,height/2,400,400);
  x=map(sensorValues[0],0,1023,0,500);
  y=map(sensorValues[1],0,1023,0,500);
  stroke(255);
  //strokeWeight(1);
  //ellipse(x,y,30,30);
 
  
  line(xp,yp,x,y);
  xp=x;
  yp=y;
   //ellipse(xp,yp,30,30);
  
  
  //// use the values like this!
   
  // //fill(sensorValues[0],sensorValues[1],sensorValues[2]);
     

  //// add your code

  //
}


void setupSerial() {
  printArray(Serial.list());
  myPort = new Serial(this, Serial.list()[ 1 ], 9600);
  // WARNING!
  // You will definitely get an error here.
  // Change the PORT_INDEX to 0 and try running it again.
  // And then, check the list of the ports,
  // find the port "/dev/cu.usbmodem----" or "/dev/tty.usbmodem----" 
  // and replace PORT_INDEX above with the index number of the port.

  myPort.clear();
  // Throw out the first reading,
  // in case we started reading in the middle of a string from the sender.
  myString = myPort.readStringUntil( 10 );  // 10 = '\n'  Linefeed in ASCII
  myString = null;

  sensorValues = new int[NUM_OF_VALUES];
}


void updateSerial() {
  while (myPort.available() > 0) {
    myString = myPort.readStringUntil( 10 ); // 10 = '\n'  Linefeed in ASCII
    if (myString != null) {
      String[] serialInArray = split(trim(myString), ",");
      if (serialInArray.length == NUM_OF_VALUES) {
        for (int i=0; i<serialInArray.length; i++) {
          sensorValues[i] = int(serialInArray[i]);
        }
      }
    }
  }
}

11.15 step1(the video for the line)


Step2:

// IMA NYU Shanghai
// Interaction Lab

/**
This example is to send multiple values from Processing to Arduino.
You can find the Processing example file in the same folder which works with this Arduino file.
Please note that the echo case (when char c is ‘e’ in the getSerialData function below)
checks if Arduino is receiving the correct bytes from the Processing sketch
by sending the values array back to the Processing sketch.
**/

#define NUM_OF_VALUES 3 /** YOU MUST CHANGE THIS ACCORDING TO YOUR PROJECT **/

/** DO NOT REMOVE THESE **/
int tempValue = 0;
int valueIndex = 0;

/* This is the array of values storing the data from Processing. */
int values[NUM_OF_VALUES];

void setup() {
Serial.begin(9600);
pinMode(13, OUTPUT);
// pinMode(9, OUTPUT);
}

void loop() {
getSerialData();

// add your code here
// use elements in the values array
// values[0] // values[1] // if (values[0] == 1) {
// digitalWrite(13, HIGH);
// } else {
// digitalWrite(13, LOW);
// }

if (values[1] == 1) {
tone(13, values[0],values[2]);
} else {
noTone(13);
}

}

//recieve serial data from Processing
void getSerialData() {
if (Serial.available()) {
char c = Serial.read();
//switch – case checks the value of the variable in the switch function
//in this case, the char c, then runs one of the cases that fit the value of the variable
//for more information, visit the reference page: https://www.arduino.cc/en/Reference/SwitchCase
switch (c) {
//if the char c from Processing is a number between 0 and 9
case ‘0’…’9′:
//save the value of char c to tempValue
//but simultaneously rearrange the existing values saved in tempValue
//for the digits received through char c to remain coherent
//if this does not make sense and would like to know more, send an email to me!
tempValue = tempValue * 10 + c – ‘0’;
break;
//if the char c from Processing is a comma
//indicating that the following values of char c is for the next element in the values array
case ‘,’:
values[valueIndex] = tempValue;
//reset tempValue value
tempValue = 0;
//increment valuesIndex by 1
valueIndex++;
break;
//if the char c from Processing is character ‘n’
//which signals that it is the end of data
case ‘n’:
//save the tempValue
//this will b the last element in the values array
values[valueIndex] = tempValue;
//reset tempValue and valueIndex values
//to clear out the values array for the next round of readings from Processing
tempValue = 0;
valueIndex = 0;
break;
//if the char c from Processing is character ‘e’
//it is signalling for the Arduino to send Processing the elements saved in the values array
//this case is triggered and processed by the echoSerialData function in the Processing sketch
case ‘e’: // to echo
for (int i = 0; i < NUM_OF_VALUES; i++) {
Serial.print(values[i]);
if (i < NUM_OF_VALUES – 1) {
Serial.print(‘,’);
}
else {
Serial.println();
}
}
break;
}
}
}

import processing.serial.*;

int NUM_OF_VALUES = 3;  /** YOU MUST CHANGE THIS ACCORDING TO YOUR PROJECT **/


Serial myPort;
String myString;

// This is the array of values you might want to send to Arduino.
int values[] = new int[NUM_OF_VALUES];

void setup() {
  size(500, 500);
  background(0);

  printArray(Serial.list());
  myPort = new Serial(this, Serial.list()[1], 9600);
  // check the list of the ports,
  // find the port "/dev/cu.usbmodem----" or "/dev/tty.usbmodem----" 
  // and replace PORT_INDEX above with the index of the port

  myPort.clear();
  // Throw out the first reading,
  // in case we started reading in the middle of a string from the sender.
  myString = myPort.readStringUntil( 10 );  // 10 = '\n'  Linefeed in ASCII
  myString = null;
}


void draw() {
  background(0);
values[0]= mouseX;
values[2]= mouseY;
if(mousePressed){
values[1]=1;
}
else{
  values[1]=0;
}


  // sends the values to Arduino.
  sendSerialData();

  // This causess the communication to become slow and unstable.
  // You might want to comment this out when everything is ready.
  // The parameter 200 is the frequency of echoing. 
  // The higher this number, the slower the program will be
  // but the higher this number, the more stable it will be.
  echoSerialData(200);
}

void sendSerialData() {
  String data = "";
  for (int i=0; i<values.length; i++) {
    data += values[i];
    //if i is less than the index number of the last element in the values array
    if (i < values.length-1) {
      data += ","; // add splitter character "," between each values element
    } 
    //if it is the last element in the values array
    else {
      data += "n"; // add the end of data character "n"
    }
  }
  //write to Arduino
  myPort.write(data);
}


void echoSerialData(int frequency) {
  //write character 'e' at the given frequency
  //to request Arduino to send back the values array
  if (frameCount % frequency == 0) myPort.write('e');

  String incomingBytes = "";
  while (myPort.available() > 0) {
    //add on all the characters received from the Arduino to the incomingBytes string
    incomingBytes += char(myPort.read());
  }
  //print what Arduino sent back to Processing
  print( incomingBytes );
}

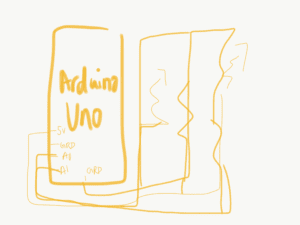
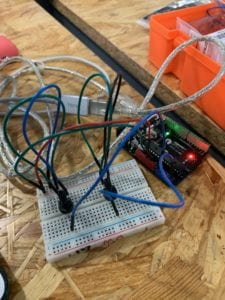
The circuit:
Recitation 8 Cathy Wang

import processing.serial.*;

String myString = null;
Serial myPort;


int NUM_OF_VALUES = 2;   /** YOU MUST CHANGE THIS ACCORDING TO YOUR PROJECT **/
int[] sensorValues;      /** this array stores values from Arduino **/
//int x=sensor1;
//int y=sensor2;
float newvalue1;
float newvalue2;

float px;
float py;

void setup() {
  size(500, 500);
  background(0);
  setupSerial();
}


void draw() {
  px = sensorValues[0];
  py = sensorValues[1];
  updateSerial();
  printArray(sensorValues);
  newvalue1= map(sensorValues[0], 0, 1023,0, width);
  newvalue2= map(sensorValues[1], 0, 1023,0, height);
  ellipse(newvalue1,newvalue2, 100, 100);
  ellipse(sensorValues[0], sensorValues[1], 100, 100);
  // use the values like this!
   sensorValues[0] 
  //stroke(255);
  //line(newvalue1, newvalue2, px, py);
  
  // add your code

  //
}


void setupSerial() {
  printArray(Serial.list());
  myPort = new Serial(this, Serial.list()[0], 9600);
  // WARNING!
  // You will definitely get an error here.
  // Change the PORT_INDEX to 0 and try running it again.
  // And then, check the list of the ports,
  // find the port "/dev/cu.usbmodem----" or "/dev/tty.usbmodem----" 
  // and replace PORT_INDEX above with the index number of the port.

  myPort.clear();
  // Throw out the first reading,
  // in case we started reading in the middle of a string from the sender.
  myString = myPort.readStringUntil( 10 );  // 10 = '\n'  Linefeed in ASCII
  myString = null;

  sensorValues = new int[NUM_OF_VALUES];
}


void updateSerial() {
  while (myPort.available() > 0) {
    myString = myPort.readStringUntil( 10 ); // 10 = '\n'  Linefeed in ASCII
    if (myString != null) {
      String[] serialInArray = split(trim(myString), ",");
      if (serialInArray.length == NUM_OF_VALUES) {
        for (int i=0; i<serialInArray.length; i++) {
          sensorValues[i] = int(serialInArray[i]);
        }
      }
    }
  }
}


import processing.serial.*;

String myString = null;
Serial myPort;


int NUM_OF_VALUES = 2;   /** YOU MUST CHANGE THIS ACCORDING TO YOUR PROJECT **/
int[] sensorValues;      /** this array stores values from Arduino **/
//int x=sensor1;
//int y=sensor2;
float newvalue1;
float newvalue2;

float px;
float py;

void setup() {
  size(500, 500);
  background(0);
  setupSerial();
}


void draw() {
  px = sensorValues[0];
  py = sensorValues[1];
  updateSerial();
  printArray(sensorValues);
  newvalue1= map(sensorValues[0], 0, 1023,0, width);
  newvalue2= map(sensorValues[1], 0, 1023,0, height);
  //ellipse(newvalue1,newvalue2, 100, 100);
  //ellipse(sensorValues[0], sensorValues[1], 100, 100);
  //// use the values like this!
  // sensorValues[0] 
  stroke(255);
  line(newvalue1, newvalue2, px, py);
  
  // add your code

  //
}


void setupSerial() {
  printArray(Serial.list());
  myPort = new Serial(this, Serial.list()[0], 9600);
  // WARNING!
  // You will definitely get an error here.
  // Change the PORT_INDEX to 0 and try running it again.
  // And then, check the list of the ports,
  // find the port "/dev/cu.usbmodem----" or "/dev/tty.usbmodem----" 
  // and replace PORT_INDEX above with the index number of the port.

  myPort.clear();
  // Throw out the first reading,
  // in case we started reading in the middle of a string from the sender.
  myString = myPort.readStringUntil( 10 );  // 10 = '\n'  Linefeed in ASCII
  myString = null;

  sensorValues = new int[NUM_OF_VALUES];
}


void updateSerial() {
  while (myPort.available() > 0) {
    myString = myPort.readStringUntil( 10 ); // 10 = '\n'  Linefeed in ASCII
    if (myString != null) {
      String[] serialInArray = split(trim(myString), ",");
      if (serialInArray.length == NUM_OF_VALUES) {
        for (int i=0; i<serialInArray.length; i++) {
          sensorValues[i] = int(serialInArray[i]);
        }
      }
    }
  }
}

import processing.serial.*;

int NUM_OF_VALUES = 3;  /** YOU MUST CHANGE THIS ACCORDING TO YOUR PROJECT **/


Serial myPort;
String myString;

// This is the array of values you might want to send to Arduino.
int values[] = new int[NUM_OF_VALUES];

void setup() {
  size(500, 500);
  background(0);

  printArray(Serial.list());
  myPort = new Serial(this, Serial.list()[0], 9600);
  // check the list of the ports,
  // find the port "/dev/cu.usbmodem----" or "/dev/tty.usbmodem----" 
  // and replace PORT_INDEX above with the index of the port

  myPort.clear();
  // Throw out the first reading,
  // in case we started reading in the middle of a string from the sender.
  myString = myPort.readStringUntil( 10 );  // 10 = '\n'  Linefeed in ASCII
  myString = null;
}


void draw() {
  background(0);

  // changes the values
  //for (int i=0; i<values.length; i++) {
  //  values[i] = i;  /** Feel free to change this!! **/
  //}
values[0]= mouseX;
values[2]= mouseY;
if(mousePressed){
values[1]=1;
}
else{
  values[1]=0;
}


  // sends the values to Arduino.
  sendSerialData();

  // This causess the communication to become slow and unstable.
  // You might want to comment this out when everything is ready.
  // The parameter 200 is the frequency of echoing. 
  // The higher this number, the slower the program will be
  // but the higher this number, the more stable it will be.
  echoSerialData(200);
}

void sendSerialData() {
  String data = "";
  for (int i=0; i<values.length; i++) {
    data += values[i];
    //if i is less than the index number of the last element in the values array
    if (i < values.length-1) {
      data += ","; // add splitter character "," between each values element
    } 
    //if it is the last element in the values array
    else {
      data += "n"; // add the end of data character "n"
    }
  }
  //write to Arduino
  myPort.write(data);
}


void echoSerialData(int frequency) {
  //write character 'e' at the given frequency
  //to request Arduino to send back the values array
  if (frameCount % frequency == 0) myPort.write('e');

  String incomingBytes = "";
  while (myPort.available() > 0) {
    //add on all the characters received from the Arduino to the incomingBytes string
    incomingBytes += char(myPort.read());
  }
  //print what Arduino sent back to Processing
  print( incomingBytes );
}


Recitation 8: Serial Communication by Ashley Zhu

Exercise 1: Making a Etch A Sketch

For this exercise, I used the AtoP function given in class to create the Etch a Sketch both using circles and lines. At first, I had trouble drawing the circles and moving the potentiometer to make my processing sketches because my potentiometer wasn’t connected well into my breadboard. Also, since there are 2 sensor values/serial prints to modify, I added an additional comma (in the original code file there was 3 serial print) which was why my processing wasn’t working. Then, I deleted the comma and then processing was reading my values from my Arduino and it worked! Then I just modified the circle to lines and added previous xy positions to the documents, and it was fun to play around with different sketches.  

It was more tricky than the first one because the lines would have to follow previous x y values before drawing the lines, and it was confusing to figure out the x,y values but eventually, it worked out.

Exercise 2: Make an instrument with Arduino

For the second exercise, it was to take Processing functions to send audio to the Arduino when the mouse moves. This exercise was more tricky because it was PtoA. The demonstration video helped a lot and I used the tone () function to execute this exercise.  Since I worked with audio for my midterm project using the tone () function, this one was easier to manipulate because I know to #include pitches.h file into my PtoA file. Then by modifying the notes that I wanted to play, and editing the Serial.list number and adding the if, then statement, I was able to move my mouse and play the music note. It was tricky to understand where to put certain values at first since we are working with more than 1 thing (arduino and processing) but with the help of some IMA fellows, I was able to finish it.