Final Project Essay by Yiwen Hu

PROJECT TITLE: Reconsidering human-nature Relationship

PROJECT STATEMENT OF PURPOSE *

Our project aims at making people rethink about human-nature relationship. We gained the inspiration first from the art gallery on the 1st floor called the 72-relations with a golden rog. We would like to make an interactive project that allows people to rethink the way they can interact with nature. A website called Way To Go narrows our idea. As shown in the website, we decide to project the users on the screen and encourage them to explore their way of interaction with nature. Feedback will be given as users interact with the nature in the screen to make them realize their impact on the nature.

PROJECT PLAN *

We will make our project like a screen-based VR. Users will be encouraged to interact with multiple sensors outside the screen but the effect will be shown visually on the screen.  In terms of the actions, we will finish our shooting by Nov.23 and edit it on Nov.24. On Nov.25-27, we will be working on the code in Arduino and processing. We need to first figure out which sensors we need for users to “interact with nature.” Then we will be working on projecting the users as well as the animation. On Nov.28-30 we will try to modify the code on our own based on the guidelines from the fellows, professors or learning assistants. By Dec.2, we will roughly get the whole project done and try to run it. For the rest of the week, we will be focusing on digital fabrication and modifying our code based on some feedback like user testing.

CONTEXT AND SIGNIFICANCE *

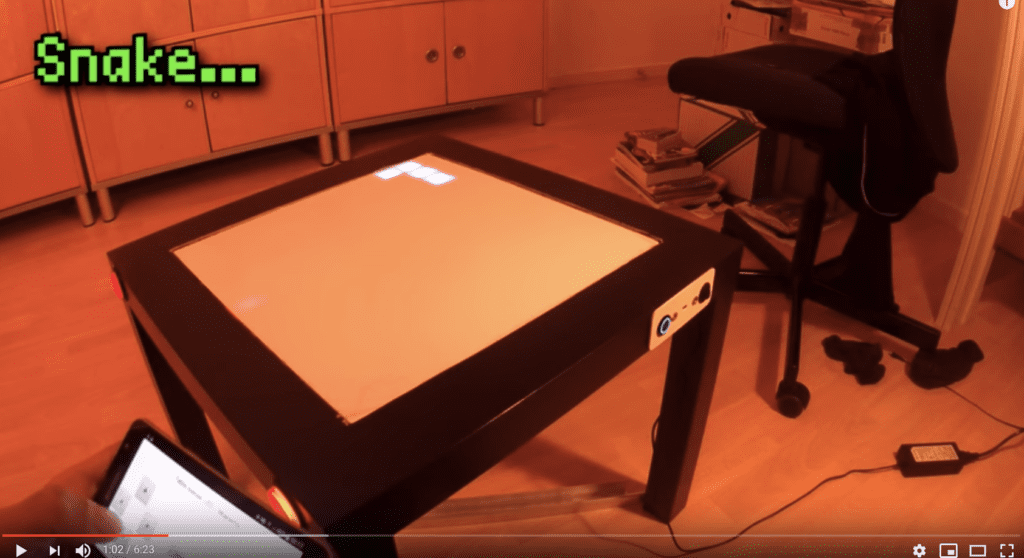
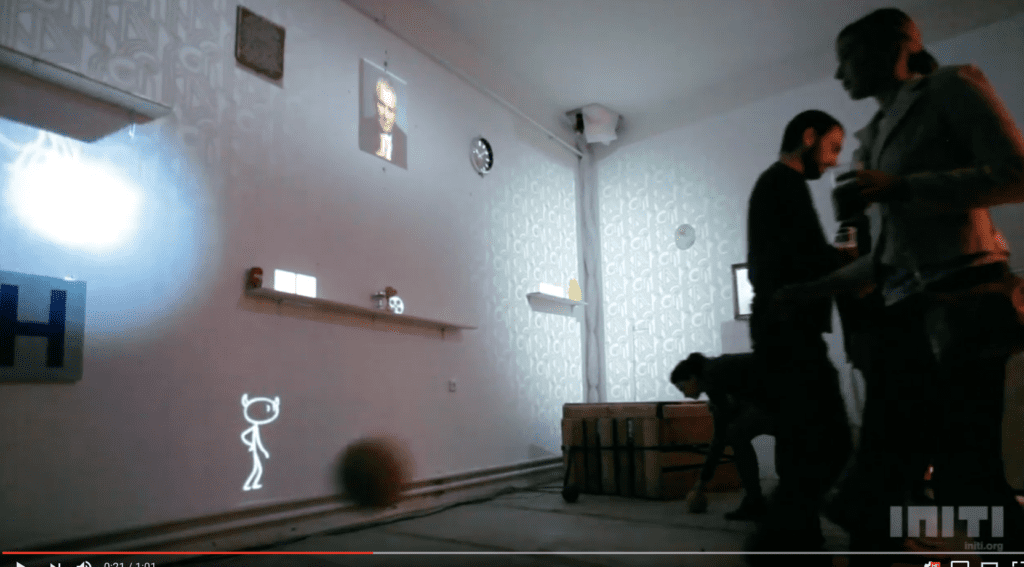
Besides the “way to go” website, several other research also inspired me in preparation for the final project. For example, the interactive IKEA LED table projects user’s physical interaction to a larger screen and therefore enhances the user experience. Or the interactive playground project where the users are encouraged to give input (throw) continuously. It’s also immersive. The idea of immersion is important in our screen-based VR where the user’s input and output will be amplified on the screen. Together with the feedback the user receives from their input, they’ll be encouraged to give more inputs, which aligns with our definition of interaction that interaction should be in a “continuous” one.  We will base our project on the “way to go” website, but intends to allow more interaction than simply “looking” nature and walking around in it.

Our project is intended for anyone because human-nature relationship concerns the whole human body. We particularly want people who don’t care about nature and consider nature as disposable resources to rethink what nature is and our relationship to it. After successful completion, we want the project prompts people to rethink about our relationship to nature and realize the impact we’ve made on nature. Subsequent projects will meaningfully build upon that concept and further encourages humans to reflect on their perception of nature. 

Reference

  1. http://a-way-to-go.com/
  2. Interactive IKEA LED table https://www.youtube.com/watch?v=ptxulCpz6po
  3. Interactive playground. https://www.youtube.com/watch?v=3bCCyGcdNB0

Essay for Final Project

Glowing Sound Visualizer

I have made several researches on sound visualizations, the most popular ways are using sand and water, there are also ways of using light and fire. But light is hard to control in terms of many conditions and the projection will be depending, using fire looks cool but it is too dangerous, using water is also hard to control since it will mess up the electronics if not paying attention, so I will do the visualization using sand. And this is realized by using Chaldni Plate, it is a plate that resonates with an amplifier, and when sand is spread on it, it will form certain pattern based on the sound frequency. Also I tend to use the glowing sand, to make the device glow when the plate resonates with the amplifier. To make it look even cooler, I am going to put in a photo frame to make an infinite mirror box, and the glowing pattern of sand will be refelcting in the box. At the same time, the device is going to be controlled by an interface made by processing, and I am also considering using interaction based on makey makey kit, building my own unique sensors to make it more interesting while being interactive. The problem is to figure out how the interaction will be and how the interface will look like. And I think the intended users might be families who needs artistic amplifiers to decorate there rooms or stages that need special light effect.

Firstly, I am going to finish the visualizer as soon as possible. I need to get a photo frame to be used as the plate to hold the sand, and it should be flat and well-balanced, then I need to get an amplifier to combine it with the frame and test whether the sand will change patterns based on different frequencies. This is the most important part which will directly influence the visual part of the project. After making sure the visualizer works, I need to work on the interface and the interaction part, these two should be related to make it understandable and also I need to make it interactive, which is also very important. I think I will do more research on music interfaces and more interesting ways of interacting with sound. The visualizer should be finished at most around the beginning of december, so that everything can be finished in time.

I think that visualizing sound in real life is very interesting and it might be inspiring when we actually see the sound instead of just hearing, offering a different way to feel sound will be an amazing experience. The interaction is direct, you change the sound frequency based on the interface, then the pattern of sand will change according to it, so the user will feel the sound not only by hearing it, but also seeing it. I’m inspired by Nagel Stanford from his video Cymatics about different ways of sound visualization, what I am doing it now is to re-create on one of the ways and adding more ways to feel it, like visual effects, and also make it more interactive instead of just playing specific notes for specific frequencies. If the project is completed successful, I think I will try to build upon making it more appliable, and is for those who want to have another way to feel sound in their life.

FINAL PROJECT ESSAY

Veggie-table

From my previous definition of interactivity, I decided that interactivity not only meant actual interaction, but also included the understanding of how a machine works and what its purpose is, as well as leaving the interaction with something being learned. That means a successful interactive project for me would have to be one that addresses a problem the user may have, and attempt to fix it.

The issue I try to tackle in this project comes from people’s diets, and the lack of vegetables or other healthy foods in some people’s daily food intake. The target audience would be people roaming around in grocery stores, buying their groceries. As some people walk by the vegetables section, they would not bat an eye, but my project would aim to draw people into the vegetable section, and encourage them to buy more vegetables.

The way that my project would work requires simple sensors from arduino, and visuals from processing. A person would walk through the vegetable isle and see a screen with a bunch of different vegetables laid in front of it. The screen would say “Pick one up and see what happens” and a sensor would sense when the if a certain vegetable is picked up. On the screen would display the vegetable’s nutrition facts, as will as a bar that would be filled up as the customer would pick up more and more vegetables. If the customer picks up a sufficient amount of vegetables, the screen would say “Congratulations! You now have a balanced diet!”

What my project basically aims to do is to give information about health and encourage better choices to be made in an interactive and aesthetically pleasing way. The way that most people find out about nutrition in grocery stores nowadays is by looking at the nutritional facts label at the back of the food packaging. Other than being boring and tedious to read, some people might not even know what those nutrients are good for, or what the recommended amount daily nutrients should be. Instead of reading the back of the food label, my project will display the health benefits or drawbacks of a vegetable or an unhealthy food on the screen, while encouraging the person buy more healthy foods rather than unhealthy foods. In order to make the project impact the audience, I plan to use live facial tracking on processing to place the persons head on top of a body. If the person gets more healthy foods, the body will get more fit, and more and more health benefits of eating well will be displayed, whereas the opposite would happen if the person would pick up more unhealthy foods. 

I plan to brainstorm visual ideas and sketch out the project until the 27th, and then spend until December 4th creating the processing visuals, and then combining it with arduino sensors with the different foods until the 7th, and lastly go through final testing and last minute changes before showing the final product. 

From what I’ve researched, there does not seem to be any physical form of my project idea, but there are only interactive websites which can visually display the health benefits and drawbacks of foods in a visually pleasing way for children. I feel like because I plan to make my project large and physical, as well as targeting older audiences rather than younger ones with harsher and more personal imagery, the impact my project will have on one’s diet will be greater than the simple online healthy food games that I’ve found.

Final Project: Essay by Yu Yan (Sonny)

Project Title:

Motion Painting

Project Statement of Purpose:

The enlightenment of our project is an interactive piece that uses motion detectors to catch people’s hand movements and draw corresponding images on the screen. By interacting with the piece, people can draw whatever they want using their movements such as pushing their arms and waving their hands, instead of just painting with a pen. Looking closely, how people move their hands is like they’re using magic to paint on the screen. This is also very interesting and creative. Our project is going to make some improvements on the basis of our enlightenment, which is mentioned above. Similarly, we also want to show people that sometimes you don’t necessarily need a pen or pencil to create a beautiful painting. There may be an inherent concept in many people’s mind that if you want to draw something, you have to use a pen or pencil or some pigments which would use up your physical strength really quickly. We want to break this concept by creating an interactive art piece that allows people to draw only with their motions. Since art can be in any forms you can think of, we want to let people create their own art interactively and creatively. So we would like to use motion sensors or distance sensors to detect people’s body movements and generate different forms and colors of images on the canvas according to different movements people make. We also intend to inspire people to think outside of the box and create new forms of art with their imagination.

Project Plan:

In order to make our Motion Painting, we would use Arduino to build the circuit for the sensors and use Processing to display people’s art piece on “motion painting”. We would also fabricate the appearance of sensors using 3D printer or Laser-cut. For Arduino, our initial thought is to use a motion sensor to detect people’s movements. To avoid getting confused, we would set a detectable range so that the sensor can only detect people’s hand and arm movements instead of the whole body movements. We also thought about using a couple of distance sensors to build this detector, but due to previous experience, the sensitivity of distance sensors may not satisfy our goal. So the sensor remains to be discussed and tested. In terms of Processing, we want to assign different values from Arduino with different figures shown on the screen. For instance, if people push their hands, Processing would generate different shapes of stars on the canvas; if they wave their hands, Processing would present different sizes of circles. The color of each figure is also changeable based on the speed of people’s movements. If they move faster, the color would be redder; if slower, it would be bluer. Our intended audience is people who are interested in interactive art pieces and willing to create interactive and creative work by themselves. We draw from our previous experience of visiting art exhibitions and learn that people prefer interactive art pieces when they go to an art exhibition and these kinds of art pieces are easily to engage and understand. So what we want to create is also an interactive art piece that is easily to engage and understand.

Our project timeline is basically as follows:

  • Nov. 22: Start coding for Arduino, setting up the circuit and testing the sensor.
  • Nov. 26: Start coding for Processing and combine it with Arduino.
  • Dec. 3: Finish the code for Arduino and Processing and test the circuit.
  • Dec. 4: Fabricate the controller (using 3D printer or Laser-cut).
  • Dec. 6: Finish the project.
  • Dec. 9: Finishing touches.

Context and Significance:

My preparatory research and the experience of midterm project both show that interactive art pieces should focus more on users’ experience. So this has become one of the goals we want to fulfill in our project. On the one hand, experience means communications between the art piece and the users, including different kinds of input and output.In the article called “Introduction to Physical Computing”, Igoe and O’sullivan show us how the computer sees us as a sad creature: “we might look like a hand with one finger, one eye, and two ears” (19). In order to change this, we need to add more ways of input when we communicate with the computer. They also mention that “we need to take a better look at ourselves to see our full range of expression” (Igoe and O’sullivan, 19). What we are capable of when communicating with computers is not limited to clicking the mouse or the keyboard. We should explore more kinds of experience in order to be more interactive with the art piece. On the other hand, experience also includes the simplicity of understanding the project. So for this project, we also focus on how to make people be aware of how to interact with our project and understand it as soon as they see it. Another goal we want to accomplish is to create a continuous communication between the art piece and the users.This aligns with my definition of interaction as well. My definition for interaction is “a continuous conversation between two or more corresponding elements”. It’s important for us to build a constant communication between the project and the users.

Since we are re-creating the art piece that inspires us, what our take from the art piece is the way of communication between the art piece and the users. However, we also make some improvements to it. Instead of generating random figures, we want to create different figures based on different motions people make. The audience of our project can be anyone. But it is especially intended for people who would like to create different forms of art and people who are interested in interactive art. Our project can work as a tool and also an enlightenment for them to create their own art piece. We want to put our project in an art exhibition so that it can inspire more people to create novel and creative art in whatever forms they can think of. Then the subsequent projects can be even more creative tool for people to create art. There is no limitation when creating an art piece. What limited us is only our imagination. People should give full play to their imagination in order to create new forms of art.

Reference:

Physical Computing – Introduction by O’sullivan and Igoe

Serial Communication – Sarah Chung

Project 1

For this project we re-created an “Etch-a-sketch” using two potentiometers (one controlling the Y axis and the other the X) to control the drawing.Using an outline of a code given in class I changed the AnalogRead so I was able to map the two sensors, I also modified my pin numbers etc. I also did the same for processing inputting and modifying things like the void setup size and defining the x and y accordingly. I also added the voidDraw to my processing.A challenge I encountered was modifying so that the line drawn previously was saved as the drawing continued.I was able to correct this and successfully complete the project.
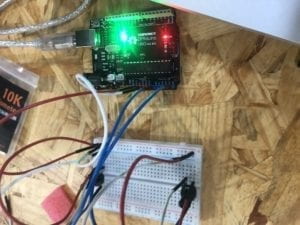
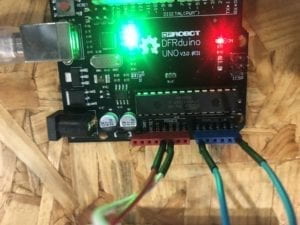
Arduino project 1 wiringArduino project 1 wiring

My code for Arduino

/*
AnalogReadSerial

Reads an analog input on pin 0, prints the result to the Serial Monitor.
Graphical representation is available using Serial Plotter (Tools > Serial Plotter menu).
Attach the center pin of a potentiometer to pin A0, and the outside pins to +5V and ground.

This example code is in the public domain.

http://www.arduino.cc/en/Tutorial/AnalogReadSerial
*/

// the setup routine runs once when you press reset:
void setup() {
// initialize serial communication at 9600 bits per second:
Serial.begin(9600);
}

// the loop routine runs over and over again forever:
void loop() {
// read the input on analog pin 0:
int sensorValue1 = analogRead(A0);
int sensorValue2 = analogRead(A5);
sensorValue1 = map(sensorValue1, 0, 1023, 0, 500);
sensorValue2 = map(sensorValue2, 0, 1023, 0, 500);
// print out the value you read:
Serial.print(sensorValue1);
Serial.print(“,”);
Serial.print(sensorValue2);
Serial.println();
delay(1); // delay in between reads for stability
}

My code for Processing

// IMA NYU Shanghai
// Interaction Lab
// For receiving multiple values from Arduino to Processing

/*
* Based on the readStringUntil() example by Tom Igoe
* https://processing.org/reference/libraries/serial/Serial_readStringUntil_.html
*/

import processing.serial.*;

String myString = null;
Serial myPort;

int posx2;
int posy2;

int NUM_OF_VALUES = 2; /** YOU MUST CHANGE THIS ACCORDING TO YOUR PROJECT **/
int[] sensorValues; /** this array stores values from Arduino **/

void setup() {
size(500, 500);
background(0);
setupSerial();
}

void draw() {
updateSerial();
printArray(sensorValues);
stroke(255);
line(sensorValues[0], sensorValues[1], posx2, posy2);

posx2 = sensorValues[0];
posy2 = sensorValues[1];

// use the values like this!
// sensorValues[0]

// add your code

//
}

void setupSerial() {
printArray(Serial.list());
myPort = new Serial(this, Serial.list()[ 3 ], 9600);
// WARNING!
// You will definitely get an error here.
// Change the PORT_INDEX to 0 and try running it again.
// And then, check the list of the ports,
// find the port “/dev/cu.usbmodem—-” or “/dev/tty.usbmodem—-”
// and replace PORT_INDEX above with the index number of the port.

myPort.clear();
// Throw out the first reading,
// in case we started reading in the middle of a string from the sender.
myString = myPort.readStringUntil( 10 ); // 10 = ‘\n’ Linefeed in ASCII
myString = null;

sensorValues = new int[NUM_OF_VALUES];
}

void updateSerial() {
while (myPort.available() > 0) {
myString = myPort.readStringUntil( 10 ); // 10 = ‘\n’ Linefeed in ASCII
if (myString != null) {
String[] serialInArray = split(trim(myString), “,”);
if (serialInArray.length == NUM_OF_VALUES) {
for (int i=0; i<serialInArray.length; i++) {
sensorValues[i] = int(serialInArray[i]);
}
}
}
}
}

etch a sketch video

Project 2

For this project we used a speaker to create a musical instrument that would make a sound when the mouse was pressed.This one was a bit more challenging for me as there were a lot of different elements coming together. We incorporated tones as well as mouse press. I encountered many troubles with this project, firstly I had a lot of trouble as my Arduino was not uploading to my board, after a quick reset this was solved and in the end was unable to ensure that for different parts of the screen distinct sounds would be outputted.

My code for Arduino 

// IMA NYU Shanghai

// Interaction Lab
// This code receives one value from Processing to Arduino
int valueFromProcessing;

void setup() {
Serial.begin(9600);
pinMode(9, OUTPUT);

}
//
//void draw() {
// if (mouseX > width / 2) {
// myPort.write(‘H’);
// } else {
// myPort.write(‘L’);
// }
//}

void loop() {
// to receive a value from Processing
while (Serial.available()) {
valueFromProcessing = Serial.read();
}
analogWrite(9, valueFromProcessing);

if (valueFromProcessing == ‘H’) {
//digitalWrite(8, HIGH);
tone(9, 3000);
} else if (valueFromProcessing == ‘N’) {
// digitalWrite(8, LOW);
noTone(9);
}
else if (valueFromProcessing == ‘M’) {
//digitalWrite(8, HIGH);
tone(9, 2000);
}
else if (valueFromProcessing == ‘L’) {
//digitalWrite(8, HIGH);
tone(9, 1000);
}
// something esle

// too fast communication might cause some latency in Processing
// this delay resolves the issue.
delay(100);
}

My code for Processing

// IMA NYU Shanghai
// Interaction Lab
// This code sends one value from Processing to Arduino

import processing.serial.*;

Serial myPort;
int valueFromArduino;

int High;
int Med;
int Low;

void setup() {
size(500, 500);
background(0);

printArray(Serial.list());
// this prints out the list of all available serial ports on your computer.

myPort = new Serial(this, Serial.list()[3], 9600);
// WARNING!
// You will definitely get an error here.
// Change the PORT_INDEX to 0 and try running it again.
// And then, check the list of the ports,
// find the port “/dev/cu.usbmodem—-” or “/dev/tty.usbmodem—-”
// and replace PORT_INDEX above with the index number of the port.
}

void draw() {
// to send a value to the Arduino
High = height;
Med = 2*height/3;
Low = height/3;
if (mousePressed && mouseY > 0 && mouseY < Low) {
myPort.write(‘L’);
} else if (mousePressed && mouseY > Low && mouseY < Med) {
myPort.write(‘M’);
} else if (mousePressed && mouseY > Med && mouseY < High) {
myPort.write(‘H’);
} else {
myPort.write(‘N’);
}
//if (mouseX > width/2) {
// myPort.write(‘H’);
//} else {
// myPort.write(‘L’);
//}
}

Video for project 2

Reflection

Although this recitation was particularly difficult, I found it interesting utilizing these two programs to make fun and random projects. Both of which required a lot of help from friends and fellows, however in the end I was able to get both projects to (kind of) work.