Recitation 9: Media Controller by Kat Van Sligtenhorst

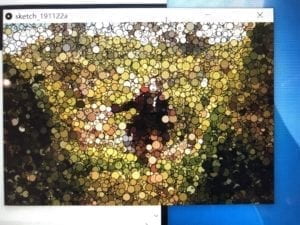
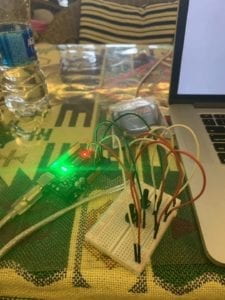
For this recitation, I wanted to use two potentiometers to change the size and location of an image in Processing. Here is my code for Arduino:

void setup() {
Serial.begin(9600);
}

void loop() {
int sensor1 = analogRead(A0);
int sensor2 = analogRead(A1);

Serial.print(sensor1);
Serial.print(“,”);
Serial.print(sensor2);
Serial.println();

delay(100);
}

And here is my code for Processing:

import processing.serial.*;

String myString = null;
Serial myPort;
PImage img;
int NUM_OF_VALUES = 2;
int[] sensorValues;

void setup() {
size(800, 800);
img=loadImage(“hongkong.jpg”);
setupSerial();
}

void draw() {
background(0);
updateSerial();
printArray(sensorValues);
float a = map(sensorValues[0],0,1023,0,800);
float b = map(sensorValues[1],0,1023,400,800);
image(img,a,200,b,b);
}

void setupSerial() {
printArray(Serial.list());
// myPort = new Serial(this, Serial.list()[1411], 9600);
myPort = new Serial(this, “/dev/tty.usbmodem1411”, 38400);
myPort.clear();
myString = myPort.readStringUntil( 10 );
myString = null;
sensorValues = new int[NUM_OF_VALUES];
}

void updateSerial() {
while (myPort.available() > 0) {
myString = myPort.readStringUntil( 10 );
if (myString != null) {
String[] serialInArray = split(trim(myString), “,”);
if (serialInArray.length == NUM_OF_VALUES) {
for (int i=0; i<serialInArray.length; i++) {
sensorValues[i] = int(serialInArray[i]);
}
}
}
}
}
While my final project is more focused on challenging users mentally rather than engaging them in physical motion and interaction, I still found Computer Vision for Artists and Designers to be a really interesting read. Christian Möller’s project, “Cheese,” was most useful to me because, if I were to incorporate the ideas of computer vision found in this text into my own project, it would be a really cool way to gauge users’ emotions as they went through the survey. He was focused on smiles, but if his “emotion recognition system” were also able to detect unease or discomfort, that would be an excellent addition to my project. The section on motion detection also gave me something to consider, as I could use this strategy to activate the live video feed whenever a user enters the voting booth. It’s fascinating that the reading mentions, “Techniques exist which can create real-time reports about people’s identities, locations, gestural movements, facial expressions, gait characteristics, gaze directions, and other characteristics,” all of which tie into China’s surveillance state. If I wanted to do a project further expanding on critiques of the Chinese government beyond the message of self-censorship, it would be really cool to give users the experience of all of the above, particularly for audiences in other countries that do not deal with quite so heavy surveillance in their day to day lives.

(I was having trouble uploading the screen recordings, so I will go back and add those later).

Credits:

Levin, G. “Computer Vision for Artists and Designers: Pedagogic Tools and Techniques for Novice Programmers”. Journal of
Artificial Intelligence and Society, Vol. 20.4. Springer Verlag, 2006.
Recitation 10–Workshops–Ketong Chen

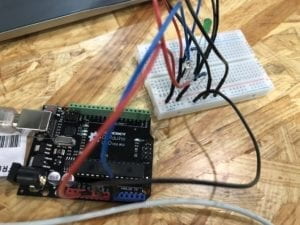
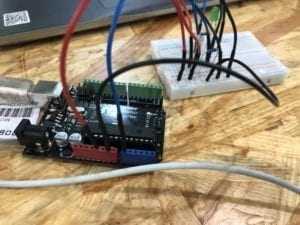
We have a workshop today and I chose to attend the serial communication because our final project needs Arduino to talk with processing to control the LED and the words in the processing.

We learn to use the map function and I use it to change the value of potentiometer from 0 to 1023 to 0 to 500 to keep the ellipse within the screen. And when the button is pressed, the size of the ellipse change.

Here is the video:

Here is the code:

void setup() {
Serial.begin(9600);
pinMode(9,INPUT);
}

void loop() {
int sensor1 = analogRead(A0);
int sensor2 = digitalRead(9);
//int sensor3 = analogRead(A2);

// keep this format
Serial.print(sensor1);
Serial.print(“,”); // put comma between sensor values
Serial.print(sensor2);
// Serial.print(“,”);
// Serial.print(sensor3);
Serial.println(); // add linefeed after sending the last sensor value

// too fast communication might cause some latency in Processing
// this delay resolves the issue.
delay(100);
}

import processing.serial.*;

String myString = null;
Serial myPort;


int NUM_OF_VALUES = 2;   /** YOU MUST CHANGE THIS ACCORDING TO YOUR PROJECT **/
int[] sensorValues;      /** this array stores values from Arduino **/


void setup() {
  size(500, 500);
  background(0);
  setupSerial();
}


void draw() {
  updateSerial();
  printArray(sensorValues);

  // use the values like this!
  // sensorValues[0] 

  // add your code
background(0);
 
  float posX = map(sensorValues[0],0,1023,0,500);
  int size;
  if (sensorValues[1]== 0){
    size = 50;
  }else{
    size = 100;
  }
   ellipse(posX, 300,size,size);
  
  
}


void setupSerial() {
  printArray(Serial.list());
  myPort = new Serial(this, Serial.list()[ 3 ], 9600);
  // WARNING!
  // You will definitely get an error here.
  // Change the PORT_INDEX to 0 and try running it again.
  // And then, check the list of the ports,
  // find the port "/dev/cu.usbmodem----" or "/dev/tty.usbmodem----" 
  // and replace PORT_INDEX above with the index number of the port.

  myPort.clear();
  // Throw out the first reading,
  // in case we started reading in the middle of a string from the sender.
  myString = myPort.readStringUntil( 10 );  // 10 = '\n'  Linefeed in ASCII
  myString = null;

  sensorValues = new int[NUM_OF_VALUES];
}


void updateSerial() {
  while (myPort.available() > 0) {
    myString = myPort.readStringUntil( 10 ); // 10 = '\n'  Linefeed in ASCII
    if (myString != null) {
      String[] serialInArray = split(trim(myString), ",");
      if (serialInArray.length == NUM_OF_VALUES) {
        for (int i=0; i<serialInArray.length; i++) {
          sensorValues[i] = int(serialInArray[i]);
        }
      }
    }
  }
}

Recitation 10 : Workshops – Lillie Yao

Serial Communications Workshop:

For this weeks recitation, I attended the serial communications workshop because I felt like I still sort of struggled with communication between Arduino and Processing.

During this workshop, we went over the Serial Communications folder and discussed multiple and one values between Arduino and Processing. We connected a potentiometer to Arduino for the oneValue exercise and added a button for the multipleValues exercise. 

Lastly, we connected a servo motor for the last exercise. We had some obstacles during this exercise but overall, this workshop helped me a lot with telling Arduino and Processing what to do.

For using the map value, it was fairly simple with the potentiometer because there was a maximum and minimum value for the potentiometer and a maximum/minimum value for the mouse pressed function. 

Arduino Code:

void setup() {
Serial.begin(9600);
pinMode(9, INPUT);
}

void loop() {
int sensor1 = analogRead(A0);
int sensor2 = digitalRead(9);
// int sensor3 = analogRead(A2);

// keep this format
Serial.print(sensor1);
Serial.print(“,”); // put comma between sensor values
Serial.print(sensor2);
//Serial.print(“,”);
// Serial.print(sensor3);
Serial.println(); // add linefeed after sending the last sensor value

// too fast communication might cause some latency in Processing
// this delay resolves the issue.
delay(100);
}

Processing Code:

import processing.serial.*;

String myString = null;
Serial myPort;

int NUM_OF_VALUES = 2; /** YOU MUST CHANGE THIS ACCORDING TO YOUR PROJECT **/
int[] sensorValues; /** this array stores values from Arduino **/
int previousSensorValues1;
int previousSensorValues2;
float posX;

void setup() {
size(600, 600);
background(255);
setupSerial();
}

void draw() {
//background(255);
updateSerial();
printArray(sensorValues);

float posX = map( sensorValues[0], 0, 1023, 0, 500);

ellipse(sensorValues[0],mouseY,50,50);

noFill();
line(previousSensorValues1,previousSensorValues2,sensorValues[0],sensorValues[1]);
previousSensorValues1 = sensorValues[0];
previousSensorValues2 = sensorValues[1];

// use the values like this!
// sensorValues[0]

// add your code

//
}

void setupSerial() {
printArray(Serial.list());
myPort = new Serial(this, Serial.list()[2], 9600);
// WARNING!
// You will definitely get an error here.
// Change the PORT_INDEX to 0 and try running it again.
// And then, check the list of the ports,
// find the port “/dev/cu.usbmodem—-” or “/dev/tty.usbmodem—-”
// and replace PORT_INDEX above with the index number of the port.

myPort.clear();
// Throw out the first reading,
// in case we started reading in the middle of a string from the sender.
myString = myPort.readStringUntil( 10 ); // 10 = ‘\n’ Linefeed in ASCII
myString = null;

sensorValues = new int[NUM_OF_VALUES];
}

void updateSerial() {
while (myPort.available() > 0) {
myString = myPort.readStringUntil( 10 ); // 10 = ‘\n’ Linefeed in ASCII
if (myString != null) {
String[] serialInArray = split(trim(myString), “,”);
if (serialInArray.length == NUM_OF_VALUES) {
for (int i=0; i<serialInArray.length; i++) {
sensorValues[i] = int(serialInArray[i]);
}
}
}
}
}

Young said that there wasn’t really an exercise for our workshop and to just write a few paragraphs on what we did during the workshop!

Recitation 9:Media controller- Andrew Xie

In this recitation, I chose to use a photosensitive resistor to control the brightness of the picture, but the effect was not obvious. The pictures are of Hobbits.

123

Code

PImage img;

void setup() {
size(600, 404);
PImage photo;
img = loadImage("hobbit.jpg");
tint(0,0,255,150);
point(mouseX,mouseY);

}

void draw() {
for (int i=0; i<100; i++) {
int size = int( random(1, 20) );
int x = int( random(img.width) );
int y = int( random(img.height) );
// get the pixel color
color c = img.get(x, y);
// draw a circle with the color
fill(c);
ellipse(x, y, size, size);
}
}

void mousePressed() {
point(mouseX,mouseY);
}

int photocellPin = 2; // 光敏电阻连接模拟端口【A2】

int ledPin = 13; // LED灯连接数字端口【D13】

int val = 0; // 存储光敏电阻值的变量

void setup() {

// 打开并设置串口

Serial.begin(9600);

// 设置数字端口ledPin用于输出

}

void loop() {

val = analogRead(photocellPin); // 读取光敏电阻的值

//在串口输出val的值 用于调试时使用

Serial.println(val);

if(val<=112){

digitalWrite(ledPin, HIGH);

}else{

digitalWrite(ledPin, LOW);

}

}

This article uses light and shadow to realize human interaction, which inspires me how to use multimedia in the project, such as using sound as a medium to trigger the interaction between the user and the machine.

Recitation 10: Workshops

For this recitation, I chose the object oriented programming workshop. We learned about object, class, and array, especially Arraylist.

For the exercise, I made an animation based on the code we wrote during the class and created a class for the Spiderman symbol. As the background, there are many of it moving and bouncing around. For interactivity, every time I click the mouse, it will add one more white symbol to the screen, and a pink one will be added every time the keyboard is pressed.  And I used map() function to make sure that the white symbol will only start at the center of the screen.

ArrayList<Spider> sList;

void setup(){
  size(1600,800);
 sList= new ArrayList<Spider>();
  for(int i=0; i<100; i++){
  sList.add(new Spider(random(width),random(height),color(random(100,255),random(0,50),random(0,85)),color(0)));
  }
}
void draw(){
background(0);
 for(int i=0; i<sList.size(); i++){
  Spider temp = sList.get(i);
   temp.display();
  temp.move();
 }
}
  void mousePressed(){
   float xx = map(mouseX,0,width,width/4,width/2);
float yy =map(mouseY,0,height,height/4,height/2);
   sList.add(new Spider(xx,yy,255,0));
 }
void keyPressed() {
  float x=random(width);
    float y=random(height); 
     sList.add(new Spider(x,y,255,#EA219A));
}
class Spider {
float x,y;
float size;
color clr;
float spdX;
float spdY;
color str;

Spider(float startingX,float startingY,color startingColor,color startingstr){
 x= startingX;
 y= startingY;
 size= random(50,100);
 clr=startingColor;
 str=startingstr;
spdX= random(0,6);
spdY= random(0,10);
}

void display(){
  fill(clr);
  noStroke();
  ellipse(x,y,size,size);
  stroke(str);
  strokeWeight(size/17);
  fill(255);
  arc(x-size/5,y-size/6,size/3,size/1.5,QUARTER_PI,PI,CHORD);
  arc(x+size/5,y-size/6,size/3,size/1.5,0,QUARTER_PI+HALF_PI,CHORD);
  
}
void move(){
  x+=spdX;
  y+=spdY;
 
if(x>=width || y>=height){
  spdX=spdX*-1;
  spdY=spdY*-1;
}
if(x<=0|| y<=0){
  spdX=spdX*-1;
  spdY=spdY*-1;
}
}

}