Recitation 10:Workshops —— Jiayi Liang(Mary)

In this week’s recitation, we have a workshop for map() and the fellows set up 3 more different workshops to further explore processing skills on different aspects. I choose the object oriented programming because I think the skill can really help me a lot on my final project. It helps me create lots of images in the similar format in a more effective way. Also, the skill is what I feel a little bit confused about during the lecture.

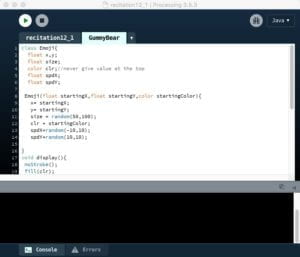
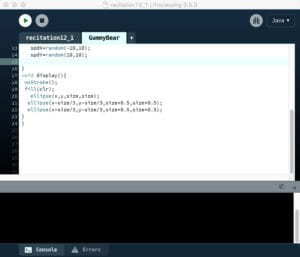
The basic principle object oriented programming is that you start two labels in a project. The second one is the framework. For example, I want to create a picture that is full of cartoon bears with different colors and positions. I use class() to write the code to create one bear. And then, in the first label, I write codes to display the bear by plugging in different exact numbers. This technique is quite useful and efficient, and also make the code displayed in a more clear layout.
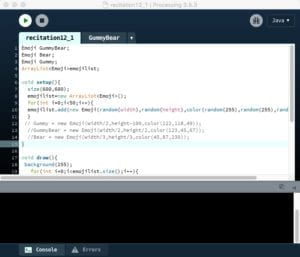
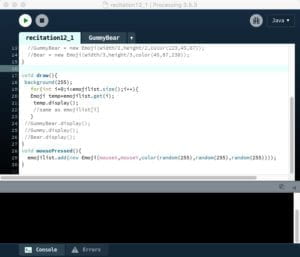
During the process, I faced one question that although I have declared some X and Ys in the code, it failed to recognize the X and Ys in the subsequent codes. Tristan taught us that because it is common to face problems like this, it is better for as to write things like float x or int y at the very beginning of the code. It is not only clear for us, but also helps to decrease the risk of such errors.

After the 1-hour practice, I manage to understand how the object oriented programming really works. The skills are really useful when I want to create different images for each person. I think I can also include arrays to make the process even much easier.
Recitation 10-Media Manipulation(Xinran Fan)

Recitation 

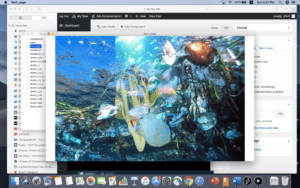
First I decide to begin with image which I think maybe a little bit easy, I firstly try to use blend. I download two pictures from internet, however, the code can not run for the size is not fitted, at the first I think is the size of the background picture and the former one and waste of a lot of time on it. Thank to an assistant, I find out it is the size of the canvas and the picture. However, the picture I choose is not so suit for such function which looks kind of blink.

PImage pollution = loadImage("pollution.jpg");
PImage turtle = loadImage("turtle.jpg");
size(1000,600);
pollution.resize(1000, 600);
turtle.resize(600, 600);
background(pollution);
//image(turtle,0,0);
blend(turtle, 200, 0, 500, 600,333, 0,300, 600, LIGHTEST);

Then I make a video including Pixels, audio and video;

import processing.sound.*;
import processing.video.*;
Movie myMovie;
SoundFile sound;
void setup() {
  size(480, 480);
   myMovie = new Movie(this, "ocean.mp4");
  sound = new SoundFile(this, "ocean.wav");
//define the state of the video
 myMovie.loop();
  sound.loop();
}
void draw() {
 
  myMovie.loop();
  if (myMovie.available()) {
    myMovie.read();
    myMovie.loadPixels();
//read the current frame of my video
int circleSize = 15;
  int w = myMovie.width;
  int h =myMovie.height;
  for (int y = 0; y < h; y+=circleSize){
    for (int x = 0; x < w; x+=circleSize) {
      int i =  x + y*w;
      fill( myMovie.pixels[i] );
      ellipse(x,y,circleSize,circleSize);
    }

  }
 
    myMovie.updatePixels();
//draw the current frame of the video
}

}

Recitation 10: Object Oriented Programming Workshop by Yu Yan (Sonny)

For this recitation, we first went through the content about “map()” function concerning what it is used for and how to use it. After this, we went separately to attend different workshops. I participated in the Object Oriented Programming workshop hosted by Tristan. 

During the workshop, we learned about two parts of an “object”, “class” and “instance”, and how to use them. By using “class”, we can make our code more concise and clear to read. We can also use “ArrayList” to create multiple objects. 

Exercise:

For exercise, I created a “class” called “Image” that generated two ellipses and one rectangle. I put them into random colors and set 20 of them off from the center of the canvas. For interaction, I used a “mouseMoved” function so that it can display the images based on the location of my mouse.

Here is the animation of my work.

Here is my code:

ArrayList<Image> images;

void setup(){
  size(1000,600);
  colorMode(HSB,360,100,100);
  images = new ArrayList<Image>();
  
  for(int i=0; i<20; i++){
    images.add(new Image(width/2, height/2,random(-5,5),random(-5,5),color(random(360),100,100)));    
  }
}

void draw(){
  background(270,100,100);
  
  for(int i=0; i<images.size(); i++){
    Image temp = images.get(i);
    temp.display();
    temp.move();
  }  
}

void mouseMoved(){
  images.add(new Image(mouseX,mouseY,random(-5,5),random(-5,5),color(random(360),100,100)));    
}

class Image{
  float x,y,spdX,spdY;
  color c;
  
  Image(float newX, float newY, float newSpdX, float newSpdY, color newC){
    spdX = newSpdX;
    spdY = newSpdY;
    c = newC;
    
    x = newX;
    y = newY;
  }
  
  void move(){
    x += spdX;
    y += spdY;
    if (x > width || x < 0){
      spdX *= -1;
    }
    if (y > height || y < 0){
      spdY *= -1;
    }
  }
  
  void display(){
    fill(c);
    ellipse(x,y,30,30);
    ellipse(x+40,y,30,30);
    rect(x,y,40,40);
  }
}

Recitation 10: Workshops by You Xu (Ian)

During week’s recitation, we first reviewed the basics about mapping function. It refreshed my mind, and I also applied the map function in my later exercise.

Among all the three workshops, I chose to attend the media manipulation workshop since I think I will need to use some dynamic image and video in my final project, and I am already very familiar with serial communication and OOP during my previous computer sciences courses.

During the workshop, I learned many new built-in functions related to image, video, caption, and pixels. They are all listed in the slides. Therefore, I tried to apply them to a very simple exercise. I chose my favorite short online video on Vimeo: Watchtower of Turkey by Leonardo Dalessandri.

Since I learned how to start, pause, and loop the video, I tried to use my mouse input to control the playing of the video. Moreover, I also tried to move the video screen around the canvas by using my mouse as well. These functions are amazing. I applied the map function to the position of the mouse as well to make sure the video will not go outside the canvas.

I believe it will be helpful to my final project when coding the dynamic user interface.

Work Cited

Dalessandri, Leonardo. Watchtower of Turkey.

Code:

import processing.video.*;
Movie movie1;
void setup(){
  size(640, 640);
  movie1 = new Movie(this, "01.mp4");
  movie1.play();
}
void draw(){
  colorMode(HSB);
  float c = map(mouseX+mouseY, 0, 1280, 0, 255);
  background(c, 120, 255);
  if (movie1.available()){
    movie1.read();
  }
  if(mousePressed){
    movie1.pause();
  }else{
    movie1.play();
  }
  float x = map(mouseX, 0, 640, 0, 640-480);
  float y = map(mouseY, 0, 640, 0, 640-270);
  image(movie1, x, y);
}

Recitation 10 Workshops – Stephanie Anderson – 006

Introduction:

This week during recitation, we first received a workshop about the map function, and then we were able to chose which workshop we wanted to go to. 

I chose to go to the Media Manipulation workshop while my final project partner, Salome, chose to go to the Object Oriented Programming workshop.  In regards to our final project, we are creating an interactive learning device (sort of like a game, but for the more desired outcome that you are able to learn from it), where we will be relying on media and images to teach people about how to sort their trash. I chose to go to this workshop, but I am focusing more on the design aspect of our interface and our project. Part of my responsibilities include designing the interface we will use for the project as well as designing the playing cards and other physical elements. From previous recitations and in-class assignments, I was having issues regarding how to call images and also how to play videos and manipulate image data. After the workshop, however, I feel I am more comfortable with the functions and how to write them. 

For my recitation project, I created a “Tom and Jerry” short 🙂

I used case() and switch() to make it more interactive, so that people had to press certain keys in order to make certain images appear. I thought this was fun also because the effect is a flip-book effect but also like a “jumping-old-timey-camera” which is more representative of the era from which Tom and Jerry were born.

Here is the video:

https://drive.google.com/open?id=1dTdVN7FLOc1goxONO67BEBH7_Vb6ynrv

Code:

PImage photo;
PImage photo1;
PImage photo2;
PImage photo3;
PImage photo4;
PImage photo5;

void setup() {
size(1000, 1000);
photo = loadImage(“TOM.jpg”);
photo1 = loadImage(“house.jpg”);
photo2 = loadImage(“bell.jpg”);
photo3 = loadImage(“knife.jpg”);
photo4 = loadImage(“tj.jpg”);
photo5 = loadImage(“mouse.jpg”);

println(“Press these keys on your keyboard: s , h , a, w, a, d, e , r, q , f, t, g”);
println(“hint: hold the keys down for full effect”);
//load image from your laptop
}
void draw() {
background(0);
//int image = 20;
map(0, 0, 255, 0, 1023);

}

void keyPressed(){
switch(key){
case’a’:
image(photo, 200, 400);
break;

case ‘s’:
image(photo1, 800, 800);
break;

case ‘d’:
image(photo2, 600, 200);
break;

case ‘e’:
image(photo2, 600, 400);
break;

case ‘r’:
image(photo2, 600, 600);
break;

case ‘f’:
image(photo5, 300, 800);
image(photo3, 100, 800 );
break;

case ‘g’:
image(photo4, 450, 450);
break;

case ‘h’:
image(photo5, 600, 800);
image(photo1, 800, 800);
break;

case ‘w’:
image(photo5, 600, 800);
image(photo1, 800, 800);
image(photo, 200, 400);
break;

case ‘q’:
image(photo5, 300, 800);
break;

case ‘t’:
image(photo, 100, 500);
image(photo3, 300, 500);
break;

}
}

Analysis:

The command of these functions will definitely be useful in our final projects when we are displaying our “cards” on the screen.