Recitation 3: Sensor by ChangZhen from Inmi’s Session

1. Build Circuits

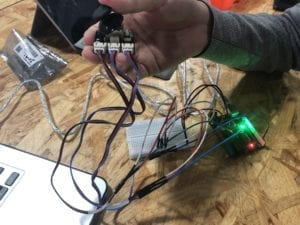
It’s the first time we’ve integrated sensor into circuit, which will acquire some level of autonomy. We chose infrared distance sensor to coordinate with servo.

Firstly, I tried to write the code on my own.
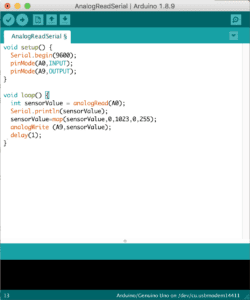
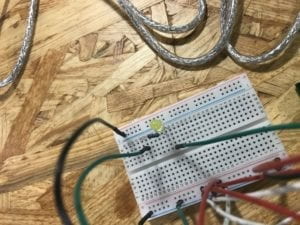
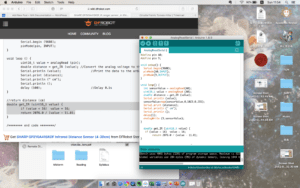
And the connection was wrong and didn’t work. We learnt that signal in/output is positive power, signal brings info that ought to continue toward the next pin (so it shouldn’t yet end into zero potential), and that for example, power from analogOut can even light small components like an LED. So we should ground the arduino board.
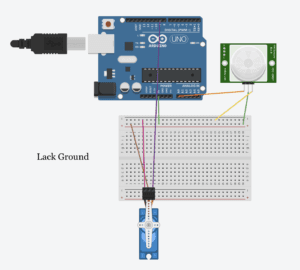
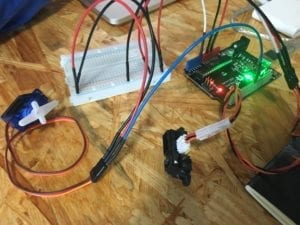
After correction.
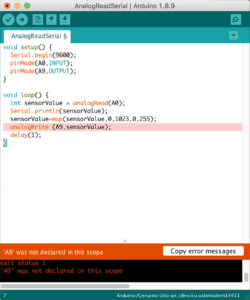
“A9” was not declared. I mistook analogIn “A num” mark with analogOut “~ num”. I should just introduce “9”.

Another problem was that I should copy the codes specially for servo and distance sensor. The code was wrong and too vague to say, analogRead (Sensor) or analogWrite (servo, value).
After copying and modifying the codes from templet, we ran the code smoothly. Professor Rodolfo (maybe him?) suggested that we should’ve saved the codes we had step by step instead of taking screenshot.
2. Answers to Questions

1) What did you intend to assemble in the recitation exercise? If your sensor/actuator combination were to be used for pragmatic purposes, who would use it, why would they use it, and how could it be used?

My basic idea of this combination was for the group project, a food dispenser for doglar. Doglar is multifunctional dog collar that senses the dog’s status with unknown high tech. If the dog is sensed to be hungry or thirsty, dispenser will be allowed to open. When dog approaches dispenser. Our design for the dispenser was a motor as it senses the dog to spin up the food case cape and feed it. Dog and owner will use it.

2) Code is often compared to following a recipe or tutorial.  Why do you think that is?

Only if code is specifically listing out what to do, will the components work well with my previous code as counter example. Also, code is serially read up to down.

3) In Language of New Media, Manovich describes the influence of computers on new media. In what ways do you believe the computer influences our human behaviors?

Human learn to cooperate with computer, make it an extension of human ability. Human entertain with computer, because it’s highly interactive. Computer gives art intelligence so makes human artist consider creatively how the art interacts with player and makes human player new fun.
Recitation 2: Arduino Basics–Zhao Yang

Overview

Last Friday, we had our second recitation class. In this class, we were required to build three circuits based on Arduino. My partner Barry and I succeeded in building all the required circuits and finished the optional one which was adapted from the third circuit. 

Matirials:

From Arduino Kit:

1 * Arduino Uno
1 * USB A to B cable
1 * breadboard
1 * buzzer
2 * LEDs
2 * 220 ohm resistors
2 * 10K ohm resistors
2 * pushbuttons
A handful of jumper cables

From cart:

2 * arcade buttons
1 * Multimeter (optional)

Circuit 1: Fade

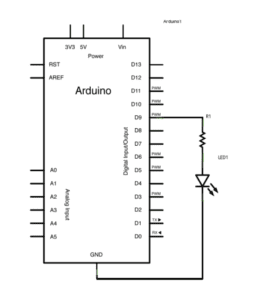
This is a very simple circuit, which is basically using the code to change the brightness of the LED. Maybe later we can add a sensor to make this circuit more interactive. 

Circuit 2: toneMelody

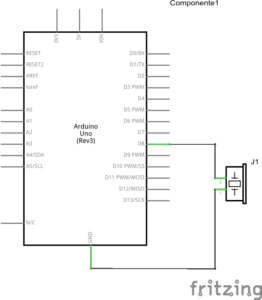
In this circuit, we can make the buzzer play a short melody by using Arduino. And every time we click the reset button on the Arduino board, the buzzer can replay the melody. Since the classroom was a little noisy when we first built the circuit, we didn’t record it right after we finished the circuit. Thus, we found a quiet place to take this video again. Furthermore, we found some example codes from the Internet which could make the buzzer play a real song and copied the code to test the codes. However, it’s a pity that the codes worked but we didn’t record it. Anyway, it’s pretty interesting to play some melodies by using Arduino. 

Circuit 3: Speed Game

Basically, this circuit was for playing a simple interactive game, which involved two players who competed for which one can click the button faster. Compared with the previous two circuits, this one was more complicated. In this game, if you are the winner, the LED on your side would turn on and the buzzer would play a melody to show that the game is over. At first, we met with a problem that the circuit only worked for player one. Even though player two won, the light didn’t turn on. After checking both the codes and the circuit, we couldn’t solve the problem. Fortunately, after changing the LED on player 2’s side, it worked. The LED we used at first was broken due to some reasons. Solving the problem made both of us happy. Anyway, even though it’s just a simple game, my partner and I still enjoy playing it. And here is the video when we played the game. 

Optional task:


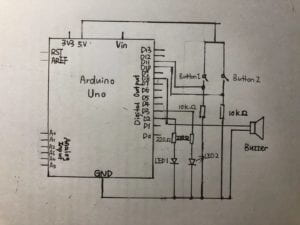
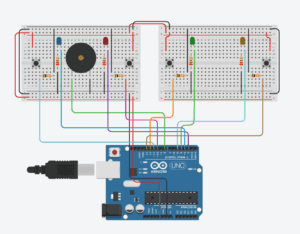
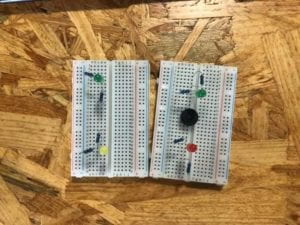
After finishing the third circuit, we followed the instruction and built the circuit for four players. Since the space of the breadboard was so limited, we connected two breadboards to build the final circuit. And the first image is the diagram of how all the components are connected. As for the codes for four players, I added two more variables for player 3 and player 4. Moreover, I also added two conditions to finish the game. By the way, the codes for the last circuit can be further improved since the codes always first read the input from the first button. In this case, every player has to click more than ten times to achieve the goal of clicking ten times to end the game. And here is the video about playing the game. 

Questions:

  1. The definition of interaction contains three parts: input, processing, and output. The first two circuits seem not interactive. But they are still two interactive product. The output for the first circuit is the brightness of the LED. The codes are processing to change the brightness of the LED. And the input is the parameters that we enter in the codes. Such simple interactive technology can be seen so many places in our daily lives. For instance, there are some speakers with buttons to control the volume and a LED which can glow. When you click the button to turn down the volume, you can hear that the volume is getting lower and the brightness of the LED is getting darker. In my opinion, we are actually surrounded by a lot of interactive technology in our daily lives. 
  2. The 10K resistor is used for protecting the button from a high voltage. 
  3. If I have 100,000 LEDs of any brightness and color, I would like to decorate them in a big room. At the same time, I would code them to make them change their brightness and color dependent on the music I play in that room. If I hold a party and play some loud music inside the room, the LEDs can become colorful which are suitable for the atmosphere for a party. If I want to play some smooth music and stay alone inside the room, the LEDs can become soft so that I can really relax in the room.  

Connor Schone – Interaction Lab Documentation #3

In the third lab, we had access to different types of sensors, which we used to better understand different possibilities of things to make with the arduinos, as well as how different types of sensors could function and be implemented in our daily lives. 

The first sensor we worked with was a vibration sensor and without any additions, which did not work very well. The circuit and code were fairly simple. But when we ran the code and started moving and tapping the sensor, there was no response from either the arduino LED or the computer monitor. We asked Eric to help us, and he told us to grab a different sensor. We used the second sensor with more success, but the readings it gave us were extremely variable. Eric then changed the ordering of the wires and resistor on our breadboard, which fixed the problem for the most part. 

Attempt 1:

Displaying 20190922_141615.jpg

Final circuit:

Displaying 20190922_141610.jpg

The second sensor we used was a joystick, which used a lot of cables. We were able to figure out where the 9 cables connecting to the joystick were supposed to go on the breadboard and arduino, but the process was long. 

Question 1:

In theory, a vibration sensor could be used to detect earthquake intensity, and maybe even predict future earthquakes by slight disturbances in the ground. 

Question 2:

Like a recipe from a cookbook, code uses its own language and format to convey to the reader (in the case of code, the computer) exactly what it needs to do to achieve the intended result.

Question 3:

Computers and interactivity impact daily life in many ways. For instance, when typing chinese characters on a computer, the computer reads the input as pinyin and has an algorithm where it predicts the intended sentence or phrase and converts it to characters. 

Connor Schone – Interaction Lab Documentation #2

In the second Interaction Lab workshop, we were able to successfully complete the following circuits: 

  1. Fading Light – A circuit using an arduino connected to a breadboard with an LED light and a single resistor via two wires. The circuit was relatively straightforward to build, and after plugging in the code from the website it worked  perfectly.  

Displaying 20190920_141316.jpg

  1. Button Pushing + Game – A circuit using an arduino connected to a breadboard with a speaker, two LEDs, multiple resistors, and over a dozen wires. On our first attempt, we had some trouble connecting the many wires correctly to the breadboard, and ended up having to start over. On our second try, we were much more systematic with planning the positioning of the wires on the breadboard, and ended with a successful game. 

Displaying 20190920_150140.jpg

Displaying 20190920_150038.jpg

Question 1:

In everyday life, technology like fading lights is everywhere, but often unnoticeable due to how pervasive and simple they are. These instances of technology can be both non-interactive and interactive. For instance, lights on top of buildings to prevent planes and helicopters from crashing into them, or lights with sensors on them lining the edge of runways to prevent planes from crashing into them.  

Question 2: 

Resistors reduce the number of volts passing through the circuit, and in the case of the push button, a 10k resistor was necessary. 

Question 3:

I would use most of them to line the sides of roads around the city along with sensors on the road itself so lights will illuminate the road as a car approaches. With the remaining LEDs, I would illuminate the bottom of a moped or car to make it glow in a cool way.  

Recitation 3: Sensors by Ian (You Xu)

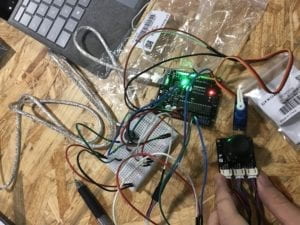
For recitation 3, we tried to use the Joystick module to create interactions. We used LED, buzzer, and Servo motor to make the interaction happen. Our process can be regarded as four major steps.

Step 1: Build the circuit and link Joystick module.

After reading the online document and compare it with the actual module we get, we quickly understood how it works.

After building the power and ground, we link “x” and “y” to analog pins and “z” to digital pin since “z” axis is a button. We test the input data of the Joystick by printing out the analog data to the serial monitor. When the Joystick is in the initial position, “x” is 502, ranging from 0 to 1023; “y” is 520, ranging from 0 to 1023; “z” equal to 0 when pressing the button.

Setup Joystick

Step 2: light-up LED when pressing the button.

At first, we want to make the buzzer beeping when pressing the button. When we finished the circuit by linking the buzzer to the digital output and uploaded the code to the Arduino board, it did not work. We opened the serial monitor and thought everything went well. Then we suddenly realized that it is not merely setting the digital output could make the buzzer sound. Instead, to test our circuit works or not, we replace the buzzer to a LED. Finally, the LED blinks while pressing the button.

Step.2 LED

Step 3: Make the buzzer work

We continued to think about what we can do for x and y-axis. Maybe try making the buzzer work, which we failed at the first attempt, is a good idea. Therefore, we add it to the Arduino. Then, we realized that we have sample code from Recitation 2 that we can reference. We apply the sample code, setting that when we move the Joystick to where x-axis data is larger than 1000, the buzzer is supposed to ring the preset melody. We spent some time working the coding part. But it is not so difficult so that we worked it out quickly.

However, there are some parts that we can improve due to the time limit. We can change the tune of the melody. Also, it cannot light up the LED and sound the buzzer at the same time.

Step 4: Rotate the Servo motor

Till this moment, we still did not have the chance to utilize the y-axis. We think it is a great idea to associate the user’s operation on the movement of the y-axis to the rotating angle of the Servo motor. Therefore, we tried a similar circuit build as step 3. Then we used the “map” function to map the analog input ranging from 0 to 1023 to the angle of Servo motor ranging from 0 to 180. It works, and it is super fun to play with it!

Complete circuit

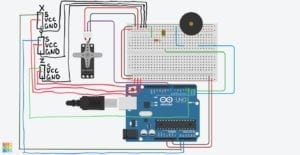
Our overall circuit diagram is like this. The hand drawing part is the Servo motor.

Circuit diagram

Question 1:

Combining these three parts we built together, we believe it is a functional prototype of a kind of assistant technology. With this, it can help disables to their daily lives more accessible, especially when going out. For instance, this circuit can be used as a control center on the wheelchair. When pressing the button, the torch is on, which makes disables’ mobility safer. When moving the Joystick along the x-axis, the buzzer beeping, making other passengers aware of him/her. Or use it to ask for help. Also, it can direct the wheelchair to a different direction just as easy as playing the game.

Question 2:

When we are trying to code, we referred to many tutorial and examples that are built-in or provided before. For instance, we used the sample code from Arcuino.cc to make the buzzer works. We use the basic serial and analog/digital read/out module everywhere. Based on these, we combine the modules we want to use together and add extra functions like the if-else statement. That’s how we follow the tutorials to make our project work.

Question 3:

As Lev Manovich explains in “The Language of New Media” that “the identity of media has changed even more dramatically than that of the computer” in terms of five representative areas, the development of computer also changes human behaviors a lot. The most significant influence, I believe, is the changing way for humans to interact with nonhuman objects. With the development of artificial intelligence and the Internet of Things, everything becomes interconnect and more reachable and accessible to human beings. Before the age of computer technology, we only use the object as tools that do not respond and send out information. Now, we give “life” to many things with the Internet and hardware by applying computer science. We interact with more items and objects that used to be “dead.” Now, they can “process” our “input” and give response as “output.” We are generally beginning to treat them as humans, and we are closer to all the human and nonhuman factors in the world we are living.