Recitation 4 Drawing Machines–Ketong Chen

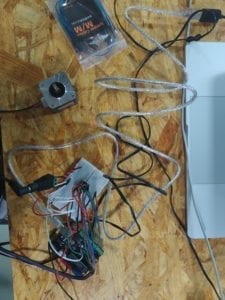
  With Haiyan, in this recitation, I built a drawing machine and have a better understanding of the H-bridge. We each complete the first two steps individually and then cooperate to make the machine work.

Materials:

Steps 1 and 2

1 * 42STH33-0404AC stepper motor
1 * L293D ic chip
1 * power jack
1 * 12 VDC power supply
1 * Arduino kit and its contents

For Step 3

2 * Laser-cut short arms
2 * Laser-cut long arms
1* Laser-cut motor holder
2 * 3D printed motor coupling
5 * Paper Fasteners
1 * Pen that fits the laser-cut mechanisms
Paper

Step 1 Build the circuit

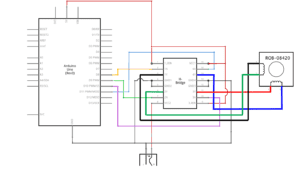
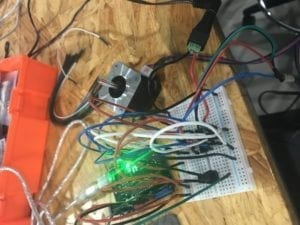
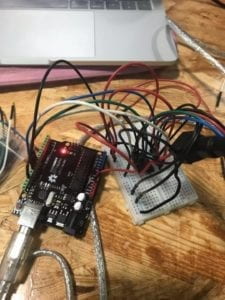
  We need to build the circuit with H-bridge to control the motor to let it rotate smoothly. Here is the diagram:H-bridge circuit diagram

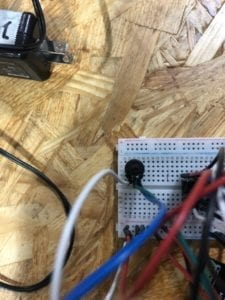
  Here I want to stress the mistake that I made. First, it is really important to keep the 12V and the 5V separate to each other. Thanks to the help of the assistant I did not fry my computer. Secondly, the use of the H-bridge needs to be paid attention to. The circuit did not work at the first because I plug it upside down. This semicircle indicates where the front of the IC is. The correct way to use is this:

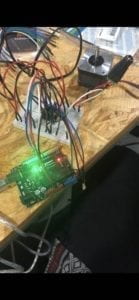
After copy the example code, the motor worked.
Step 2: Control rotation with a potentiometer

  In order to control the motor, I use the map function to connect the potentiometer with the motor which is simple. 

Step 3: Build a Drawing Machine

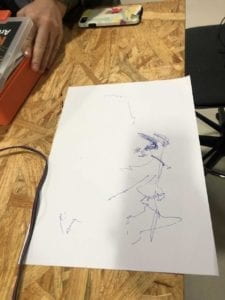
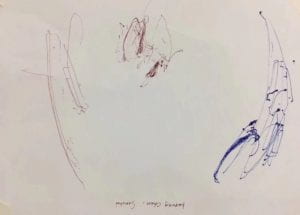
Here is our “masterpiece”.
Question 1:

What kind of machines would you be interested in building? Add a reflection about the use of actuators, the digital manipulation of art, and the creative process to your blog post.

Answer: I am interested in building a machine that allows people to know their physical state, such as when to sleep or when to do physical exercise. The machine can be built in the form of a bracelet to examine the body. My inspiration comes from the cases of sudden death of people who stay up late to work or study very often. Though they do not realize, their bodies need rest. With the machine, we can have a clear view of our body and save ourselves before it is too late.

Question 2:

Choose an art installation mentioned in the reading ART + Science NOW, Stephen Wilson (Kinetics chapter). Post your thoughts about it and make a comparison with the work you did during this recitation. How do you think that the artist selected those specific actuators for his project?

Answer: I like the blanket project which differs from the drawing machine I built. While the drawing machine needs to be controlled by human beings, the blanket can automatically find its “target” using the sensor in it. I think the artist may want to solve the problem that the blanket always be kicked off while we are sleeping. The interactive process is clear that when the person move or change gestures, the blanket follows.
Recitation 4: Drawing Machines by ChangZhen from Inmi’s Session

1. Drawing Machine

With You Xu.

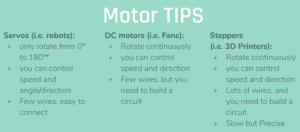
The form summarizes well the three crucial kinds of motors. One notable tip is that with the use of high volt power, it’s important to take measures to prevent current from flowing reverse.

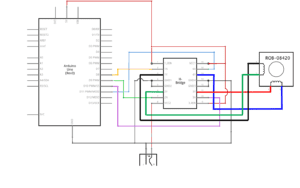
H bridge is divided to 4 parts.
Arduino sends signal to control current direction, from H bridge terminal 1, 2, 3, 4A.
Ground is a must, from GRN1, 2, 3, 4.
Output to motor through 1, 2, 3, 4Y.
VCC1, 2 are both powers for motor.
EN is to enable 1, 2, 3, 4A to transmit signal.

That’s the connection according to scheme. Before plugging in, 5v power from mac can already make the motor spin, because VCC permits power but weak. And then the it’s the recording of the drawing machine.

2. Answers to Questions

1) What kind of machines would you be interested in building?Add a reflection about the use of actuators, the digital manipulation of art, and the creative process to your blog post.

I am interested in making things move, like the mechanical mirror. In the past, we find computer screens the virtual world a dynamic painting. Now, we can make the reality a dynamic painting, since there’re actuators.

2) Choose an art installation mentioned in the reading ART + Science NOW, Stephen Wilson (Kinetics chapter). Post your thoughts about it and make a comparison with the work you did during this recitation. How do you think that the artist selected those specific actuators for his project?

I like Douglas Repetto’s Giant Painting Machine, 2006. It’s almost the same as this time’s, but it’s huge. The most common way to paint by machine is to print. But this project imitates human drawing. Thus it’s a really pretentious way of painting. For accuracy, a step motor is most liked used.

Recitation 4 Blog Post by Christina Bowllan

Blog Post

In this week’s recitation, the goal was to use an H-Bridge to control the stepper motor which all together would create a drawing machine. While I was intimidated at first because we were tasked with working alone, I gained confidence throughout the process despite some setbacks that occurred. 

Materials:

For Steps 1 and 2

1 * 42STH33-0404AC stepper motor
1 * L293D ic chip
1 * power jack
1 * 12 VDC power supply
1 * Arduino kit and its contents

For Step 3

2 * Laser-cut short arms
2 * Laser-cut long arms
1* Laser-cut motor holder
2 * 3D printed motor coupling
5 * Paper Fasteners
1 * Pen that fits the laser-cut mechanisms
Paper

The first step was to connect jumper cables from the H-Bridge to stepper motor and arduino board in order to make the stepper motor rotate. For the most part, I did well following the schematic, but I wasn’t clear at first when the instructors told us to not plug in 12V and 5V on the same line. I realized later if these power sources were on the same horizontal line,  we could damage the arduino board, or even worse, our computers! 

[My video for this one exceeds what word press can handle, but in this picture, you can see that all of the wires are attached correctly and the stepper motor is moving]

The next step was to attach a potentiometer onto the breadboard in order to control the rotation of the stepper motor and this is where things became complicated for me. The main problem was that the first time I plugged in the potentiometer, I connected all of the jumper cables on the same horizontal line, which meant my arduino board wouldn’t turn on. Then I realized that each prong of the potentiometer should have the jumper cables vertical so each of them are connected individually. However, even when I did this, I couldn’t control the stepper motor and the fellows around me were confused as well… AIYA! We thought that there could have been something wrong with the code, but I used the map function and wrote map(val, 0, 1023, 0, 200). Eventually, once we had switched H-Bridges and called over one of the professors, we  found out we were actually controlling the stepper motor all along, but the movement was slower than we anticipated, so we did not think it was working. 

[I can’t figure out why the picture is coming out blurry, but it shows how each of the jumper cables connected to the potentiometer are in their own slot vertically which is correct]

After all of this back and forth, finally my partner and I put together the drawing machine and the pen was moving pretty slowly, but it was moving, so we had accomplished the recitation task! 

Question 1:

What kind of machines would you be interested in building?Add a reflection about the use of actuators, the digital manipulation of art, and the creative process to your blog post.

Whenever I look at the revolutions on the stepper motor, it reminds me of the same movement of a skip it toy that we would use as kids. You would put a hoop around your ankle and, as you skipped, the ball attached to the string would have to go under your other foot. It sounds like a complicated game, but I would want to bring an interactive game like this back to life using the stepper motor. The stepper motor would be inside of the ball of the skip it machine in order to make the revolutions and we would use a potentiometer to control how fast the revolutions of the string were. Unlike the other skip it machine where your body momentum is what is moving the toy, in this game, the stepper motor is controlling the revolutions. Then, the cool new part would be, we would attach chalk or a sidewalk pen, and the speed and movement of the child would translate into art on the streets!

  Image result for skip it toy

Question 2:

Choose an art installation mentioned in the reading ART + Science NOW, Stephen Wilson (Kinetics chapter). Post your thoughts about it and make a comparison with the work you did during this recitation. How do you think that the artist selected those specific actuators for his project?

One art installation that I found interesting in this article was The Drumming and Drawing Subhuman. This art piece uses motors to move the arms of the robot up and down to make the sounds on the drums. I am not sure the name of the actuator, but I am sure the artist used a motor similar to ours in that it should be able to control the movement of the arms, while the potentiometer would regulate the speed in order to make different sounds which is expected in music. This reminded me of the drawing project we made in the class because we also used a interactive motor in order to manifest physical art that people could experience. 

Recitation 4: Drawing Machines by Ian (You Xu)

In this recitation, I tried to work individually by building the circuit. I encountered a few problems throughout the process, and I figured them out by myself.

Step 1:

As instructed by the “H-bridge circuit diagram,” it is quite easy to build up the circuit. However, I still encountered two problems.

First, when I tried to put the H bridge to the breadboard, I suddenly realized that it might have a certain direction. However, I forget which side should head up. I searched it online but failed to find it in the first attempt.  So I asked another student and got the answer.  After the recitation, I spent some time looking up the theory online and got to know how H bridge actually works.

Then, after finishing building the circuit, I tried to upload code to Arduino. However, when I link the Arduino board to the computer, the power of Arduino is not on. I tried to unplug the ground and power from Arduino to the breadboard, and it could be normally powered. I think there must be something wrong with the circuit that I build on the breadboard. Since all the wires are in a mess, I can hardly find out the problem. It turned out that I wrongly connect the power and ground together so that it caused a short circuit. Therefore, I think it would be better if I can use certain colors and link different components more reasonable next time.

Step 2:

After done with the circuit for step 2, I found out that the stepper motor did not respond to the potentiometer correspondingly. Therefore, I opened the serial monitor to get the analog input data from the potentiometer. Then I found out that the data from the potentiometer never changed and stayed 826.  I solved this problem by link it to another analog-in pin of the Arduino board. I guess there may be some problem with the poor contact somewhere.

Circuit

Step 3:

Since we are running out of the time, we did not have enough time to try drawing something meaningful with the drawing machine we built. But it actually works! Also, because I was in a rush, I did not map the input of the potentiometer to a certain range so that it may be easier to control. Maybe I can try to improve it in future works.

Question 1:

What kind of machines would you be interested in building? Add a reflection about the use of actuators, the digital manipulation of art, and the creative process to your blog post.

Answer: We are now familiar with components that can both sense the world (sensor) and also make changes to the world (motor). Therefore, I believe we can make many traditional static arts more dynamic. So I am interested in machines that are meant for human beings to think beyond themselves. We can achieve much more than before where we did not have digital manipulation in the forms of art. By applying these interactive technologies, the audience can feel more involves and more inspired in thinking.

Question 2:

Choose an art installation mentioned in the reading ART + Science NOW, Stephen Wilson (Kinetics chapter). Post your thoughts about it and make a comparison with the work you did during this recitation. How do you think that the artist selected those specific actuators for his project?

Answer: After reading “ART + Science Now,” I am deeply impressed by the project “Waves” by Daniel Palacios Jimenez. The mechanism of this project is similar to the work that I did for this recitation. The two projects may both use a similar motor and algorithm to make the project work. However, the purpose and outcome are completely different. My work during the recitation is a more practical project that is under human’s subjective control, which is useful stuff. “Waves” is art for the audience to feel, think, and reflect on themselves. It inspires people. As described, “waves” may “create complex sound and visual wave oscillations.” Therefore, with these purposes in mind, I believe that the artist was trying to find corresponding actuators that can make certain sounds and images. 

Group Research Project Individual Reflection-by Lifan Yu

My definition  of interaction:

Interaction is the process in which two people, devices, or a people and a device communicating with one another. This type of communication should include receiving  information, processing the received information and giving a feedback, response or creating a certain kind of action according to the analytical results made in the processing stage. This idea is shaped by Crawford’s words “interaction is a cyclic process in which two actors alternately listen, think, and speak” .

Also, to distinguish interaction from reaction, both of the two interacting units should go through these three processes mentioned. They are both actively engaged in a rather continuous communication. Two-way  feedback is indispensable.

(An example that aligns with my definition.)
Project: Guten Touch


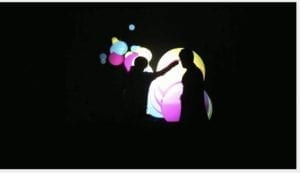
‘Guten Touch’ consists of two projected displays and a multitouch wall.
In one activity, people can stand in front of the wall and use their hands to touch the areas where the projected “foam balls” appear. They can “touch” the “foam balls” with their fingers and move their fingers to throw the foam balls anywhere. Players can even play a foam ball game called “Space Invaders” by throwing the foam balls.
In another activity people can participate in is creating vitual paintings. They can create colorful shapes using a brush or create digital pbjects on the screen using their hands. They can also move their artworks and see the dropping and bouncing of these virtual objects. (For example in the video, a person dumped a box of virtual objects into another virtual box he drew)

For the device, the sensors in the screen detect the pressure of people’s fingers on the screen. Thus figure out the directions in which the fingertips are moving towards. This is the information collecting and analyzing process. Then in response to this, the projected light spots can move under people’s fingertips. (or creating virtual shapes under people!s fingertips) This is the output process.

For people, seeing the location the projected virtual shapes is the imput process. Thinking about where they will move the shapes to is the processing process. Actually using their fingers to move the virtual objects is the feedback or output process. When they see the shapes actually move according to their own wills, a new round of imput, analyzing, output process begins. Also, when multiple players are engaged in this, players can also interact with each other.

The information giving and receiving process is continuous. Both the people and the device are fully engaged in every process that constitute “interaction”, constantly giving feedbacks.

(An example that don’t quite align with my definition.)
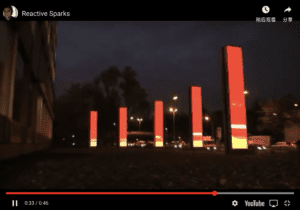
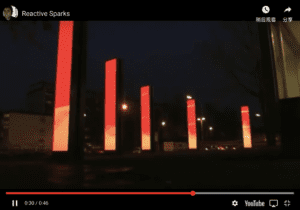
Project: Reactive Sparks by Markus Lerner

This is a an installation of seven double-sided vertical screens that is currently in front of the OSRAM main office in Munich, Germany. When cars pass the road in front of the screens, light-colored lines will appear on the screen. Meanwhile, the orange-color waves on the screen rise when the numbers of passing cars increase.

The screens receive information, process it by calculating the height of “waves”, and output the collected datas by visualizing the density of traffic using the height of waves on each screen. However the people in passing cars aren’t responding to the shapes on the screen. It lacks  two-ways feedback. It may be seen as a reactive or less interactive project.

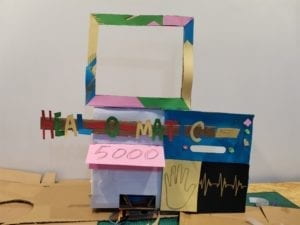
Group project: “Heal-o-matic 5000”


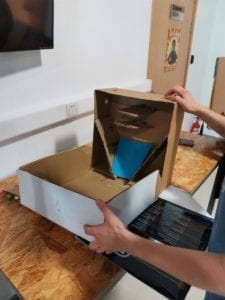
Our project is a medical device that can diagnose people with their illnesses. People put their hands on a specially designed sensor screen and their faces are scanned for their ID. The device will then diagnose people’s illnesses by analyzing the data collected by the sensors and the diagnosis will be appeared on the screen. Meanwhile the relevant medicine will be dispensed.

In our project, a person and a device is communicating. The person sends out information by putting their hand on the sensor. The device receives information by collecting the patient’s health data. It processes information by analyzing the data.  It outputs information by displaying diagnoses on the screen.

This device partly reflects interaction. However , after some careful thought, I started to doubt if it is actually a responsive art device.The back and forth process of information exchanging and reacting is somewhat in lack in our project. If interaction still exists in our project, it can be seen as an interactive device that has low levels of interaction.

References:
The Art of Interactive Design, Crawford, Page 1-5

Reactive Sparks by Markus Lerner (https://www.trendhunter.com/trends/moving-art-display-markus-lerners-reactive-sparks)

‘Guten Touch’ Blends Tech and Human Interaction created by Multitouch Barcelona (https://www.trendhunter.com/trends/guten-touch)