Week5: building drawing machine (Katie)

Materials:
For Steps 1 and 2

1 * 42STH33-0404AC stepper motor
1 * L293D ic chip
1 * power jack
1 * 12 VDC power supply
1 * Arduino kit and its contents

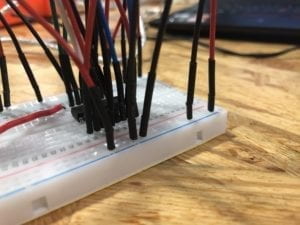
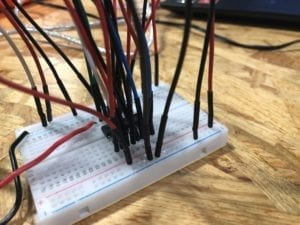
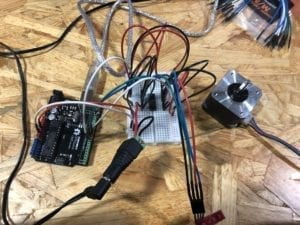
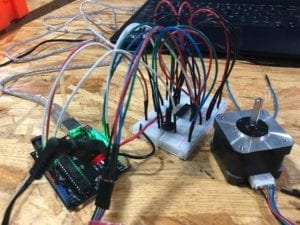
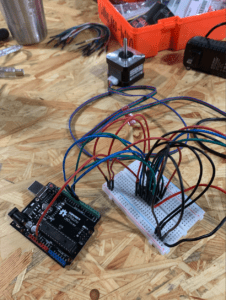
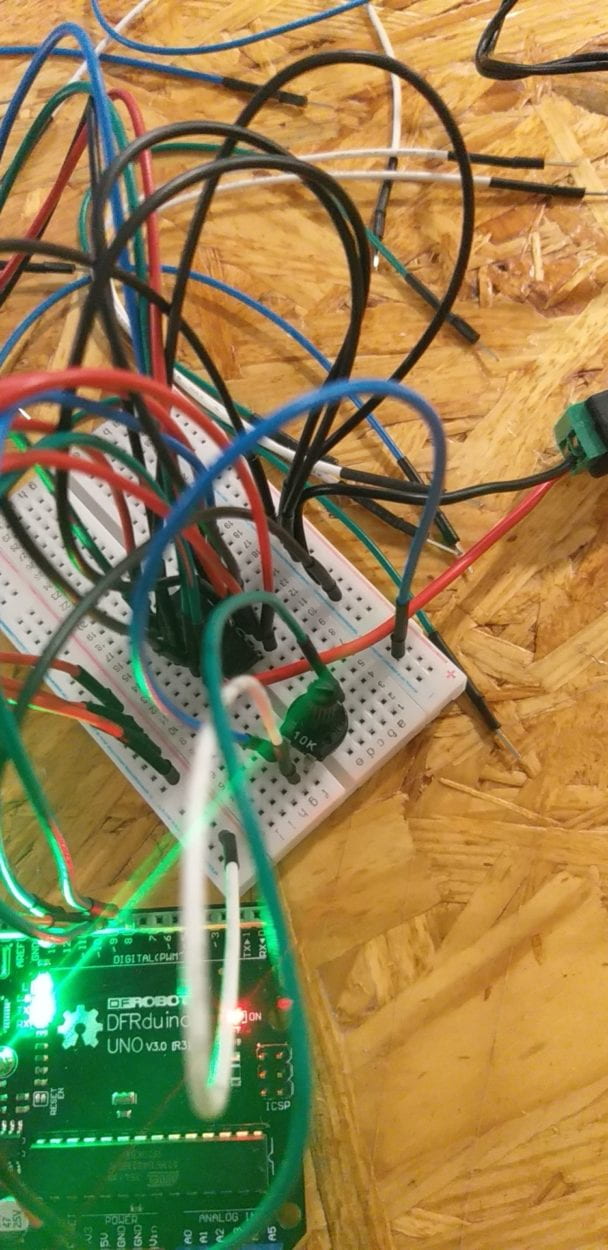
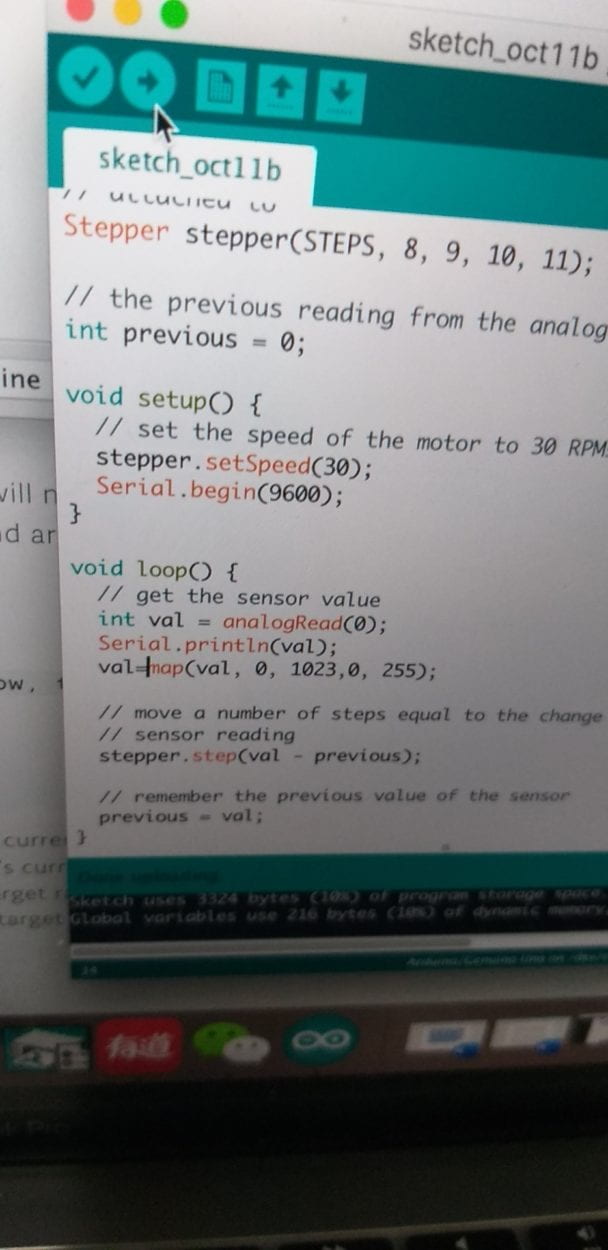
the thing to notice is that the side with the semicircle is the top side of the H-bridge.  Step one is easier but for step two, I encountered some problems. The first one is where to put the potentiometer and how to connect it. later I figured out for the side only have one pin, it should go to the ground on the ardurino board. For the side that has two pins, one should go to the positive side on the bread broad and one should go to the ground on the broad. The second problem is the potentiometer cannot correctly control the movement of the motor. So I opened up the serial monitor to check wether the potentiometer works. It turned out that it’s the feedback delayed. Whenever I turned it, the value would change after ten seconds. So I added a map function. And it worked well.
For step 3:

2 * Laser-cut short arms
2 * Laser-cut long arms
1* Laser-cut motor holder
2 * 3D printed motor coupling
5 * Paper Fasteners
1 * Pen that fits the laser-cut mechanisms

Q1:What kind of machines would you be interested in building?

The drawing machine is very fun. I am thinking about building a larger scale drawing machine that can paint grafitti on the wall with multiple colors.  Digital manipulation of art is very interesting because we used to separate “art” and “digital” , one is human and one is machine. The combination of the two which is the digital manipulation of art brings up many interesting features of the artwork.

Q2: Choose an art installation mentioned in the reading ART + Science NOW, Stephen Wilson (Kinetics chapter). Post your thoughts about it and make a comparison with the work you did during this recitation. How do you think that the artist selected those specific actuators for his project?

The robot drum player seems very appealing to me.  I have seen performance of my favorite singer cooperate with the robot player and conducted the show. Again is the human-machine contrast make this show interesting. This drum playing robots is different and similar to our drawing machine. The differences are first, they are robot shaped, second, they are playing drums. The similarities is both the drawing machine and the robots are to let machine to do something humans do, and the drawing machine can also be made in the shape of robot arms. The artist use different motor to achieve the move of the robot arm and fingers, to make the motion elegant, just like the human movement.
Recitation 4: Drawing Machine by Isabel Brack

Overview:

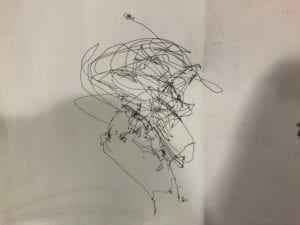
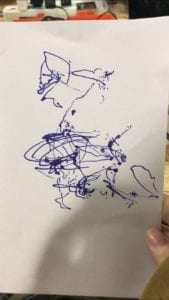
For this recitation we build a drawing machine, combining two stepper motor circuits, my partner and I each made in the first step and assembled the drawing machine with various fasteners and 3D printed parts. Our artwork resulted in picture following.

Art from drawing machine

Step 1:

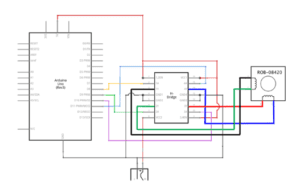
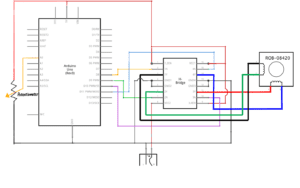
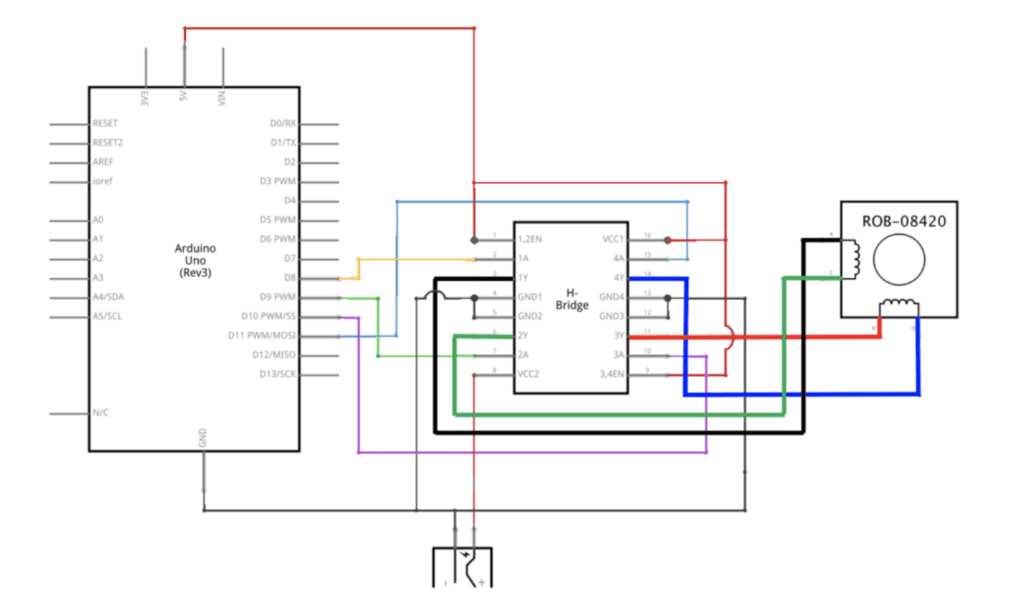
Schematic for H-bridge stepper motor circuit

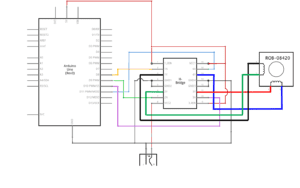
First, my partner and I individually built the first circuit, following the circuit diagram. Although I triple checked the wiring of the circuit my motor would not turn on when I uploaded the code. After asking a professor for help, he also double checked the wiring and found no problems, so we replaced each main part until the circuit worked. The H-bridge had been bent from the last use and would not connect to the breadboard properly, after the H-bridge was exchanged the circuit worked successfully. We used the sample code from arduino,stepper_oneRevolution. Below is the working stepper motor after the replacement of the h-bridge.

Step 2:

Step two required trial and error adding a potentiometer to the circuit was easy, connecting the middle pin to A0 and the other two pins to power and ground. Incorporating the mapping code was a bit more difficult. We used the code MotorKnob and altered it to include mapping the potentiometer to the motor using syntax: int izzy = map(val, 0, 1023, 0, 200);. We also changed the variables to be consistent with their new labels in this case “izzy” and “amy” and changed the #define STEP to #define STEP 200 to account for the steppers 200 steps. After the changes to the code were made the potentiometer successfully controlled stepper motor.

Step 3:

Putting together the machine itself was straight forward, fastening the different components together with paper fasteners. We had difficulty getting the pen close enough to paper to draw, and we eventually propped up a piece of paper on a notebook to get it to the correct height. After adjusting the height we also had to weigh the paper down so it doesn’t move with the pen (as it did on our first try). The potentiometer controls were a bit jumpy and not smooth for the most part while drawing, so in reality it was better for scribbling and abstract art than any precise and deliberate movement.

Question 1:

What kind of machines would you be interested in building?Add a reflection about the use of actuators, the digital manipulation of art, and the creative process to your blog post.

I think an interesting variation on the drawing machine we created would be to see a drawing machine that created pointillism style drawings. It would not only be interesting to see an interpretation on other piece that don’t use pointillism but also be interesting to create one’s own. Pointillism would require increased accuracy as if each point is placed even a bit off the drawing could look nothing like what is intended. To create a pointillism machine someone would need multiple actuators including 2-4 motors to control the positioning of the pen similarly to the drawing machine we made. I also think that controlling them from one source rather than four separate potentiometers would help the precision and accuracy. In addition to the motors controlling the position of the pen there would need to be an actuator controlling the downwards movement of the pen able to grip it and pull/ push it straight down to the paper and pull/push it back up off the paper. I think a linear actuator of some sort could provide the correct linear motion needed. To build this would require many steps setting up the motors that will position the pen and hopefully could be attached to a rod and bearing system to allow the pen to move in 2 directions horizontally and vertically. That would also help support the pen and eliminate the instability we say in our drawing machine. This project would be interesting to choose whether this are it computer program based and copy art into pointillism or if it should rather be used for creating new art completely.

Question 2:

Choose an art installation mentioned in the reading ART + Science NOW, Stephen Wilson (Kinetics chapter). Post your thoughts about it and make a comparison with the work you did during this recitation. How do you think that the artist selected those specific actuators for his project?

Matt Heckert and his Centripetal Sound Mechanics from  ART + Science NOW, Stephen Wilson (Kinetics chapter) tried to create an experience for his viewers to observe and have sensory involvement in a system of mechanics. The installation was especially interesting to me because I had never thought that a mechanical system was an experience that people should have. However, although art is always up to interpretation, I think that the experience of mechanical system is experienced by humans in other ways daily, as we reap the benefits of mechanics and technology with all the everyday items we use. But we never see the process or mechanics behind it. This sensory art installation was interesting as most people don’t witness mechanical systems in their everyday life, giving the audience a new experience. The actuators played a central role in his project as it created the sounds central to the installation. Heckert used motors in his design to control the movement of a metal ring up and down each metal structure simulating the sounds of a mechanical system and producing an experience for his audience. The actuator choice seemed quite deliberate as his goal was a vertical movement to push metal rings up and down each sculpture. In addition, mechanics was a central theme of his exhibition and motors and other mechanical actuators fit his message to his audience and his practical purpose. Compared to our recitation, the art installation was predesigned to produce a listing experience for his audience. Our drawing machine required physical participation to control the actuators and the art piece. In addition, the art we created in class was a more traditional visual style art, whereas his art piece encompassed multiple senses, which seemed to be a common theme in many of the articles featured pieces.

Recitation 4: Drawing Machines by Yu Yan (Sonny)

Introduction:

In this recitation, first, I built a circuit to control the stepper motor and then add a potentiometer into the circuit individually. After I finished these steps, I paired up with a partner to build a drawing machine using two stepper motors.

Materials:

For Steps 1 and 2

1 * 42STH33-0404AC stepper motor
1 * L293D ic chip
1 * power jack
1 * 12 VDC power supply
1 * Arduino kit and its contents

For Step 3

2 * Laser-cut short arms
2 * Laser-cut long arms
1* Laser-cut motor holder
2 * 3D printed motor coupling
5 * Paper Fasteners
1 * Pen that fits the laser-cut mechanisms
Paper

Step 1: Build the circuit

I followed the given diagram to build a circuit that can control the stepper motor. After I finished building the circuit, I tried to connect my Arduino board to my computer. However, the Arduino board didn’t work, and it was heating. So I asked my instructor for help. At first, we both thought I fried my Arduino board and it cannot work again. But after we checked how I connected the circuit, we found that I put some wires in a wrong place. There were two wires that were supposed to be connected to the power, but I accidently connected them to the ground. That’s why my Arduino board isn’t working after connecting to the computer. When I fixed this problem, my Arduino started to work and the stepper motor rotated smoothly.

This is a picture of a wrong circuit.

These are some pictures and video of the working circuit.

Step 2: Control rotation with a potentiometer

In this step, I changed the circuit by adding a potentiometer into it so that I can control the rotation of the stepper motor. I also made a few changes to the code to fit the motor and to match the movement of the knob with the rotation of the motor.

Here is how I changed the circuit and how the circuit worked.

Step 3: Build a Drawing Machine!

After completing the steps above, I paired up with another classmate and built a drawing machine together. We used some Laser-cut arms, 3D printed motor coupling and paper fasteners to build the machine.

Let’s see how the machine works!

Question 1:

What kind of machines would you be interested in building? Add a reflection about the use of actuators, the digital manipulation of art, and the creative process to your blog post.

I think I would be interested in building the kind of machines that are very entertaining and artistic. I’m thinking of a keyboard whose shape is like a semi-disco ball and people can use it to play certain music games or make your own music. Unlike traditional keyboard, this one is based on ergonomics which allows people to use it for a long time without hands getting tired or stiff. Besides, functioning like the launchpad, people can use it to create or compose their own music as well. By creating different drumbeat and instrument sounds when pressing different buttons, people can produce various kinds of musical pieces. It can also be an art piece decorating your house because it has a very nice and unique appearance. 

Question 2:

Choose an art installation mentioned in the reading ART + Science NOW, Stephen Wilson (Kinetics chapter). Post your thoughts about it and make a comparison with the work you did during this recitation. How do you think that the artist selected those specific actuators for his project?

I’m very interested in the project called Waves made by Daniel Palacios JimĂ©nez in 2006. The way it interacts with people is through motion sensing. When there is no motion, the elastic rope stays still. When there is much motion, complex and chaotic patterns and sounds would show up. I think it represents people’s physical actions directly and dramatically. By presenting sounds and visual waves using the elastic rope, it shows a strong and close interaction with people around. Comparing this project with the drawing machine that I just built, they both use rotatable motors to realize the output. However, while the drawing machine responds to people rotating the potentiometer, Waves respond to people’s motion, which contains much more physical interactions than simply rotating something. The output of these two machines differ as well. The output of the drawing machine is the movements of its arms, or the painting eventually. The output of Waves is the sounds and movements of the rope. In terms of how the artist selected those specific actuators, I think it depends on the effects he wants to show and the sense organs that he wants to interact. For Waves, the artist chooses visual and auditory effects in order to exaggerate people’s motion. This kind of effect can be more directly perceived through the senses, thus it is clearer to the audience. 

Recitation 4: Drawing Machines by Yiwen Hu

Overview

Based on the circuit building techniques we have learnt and practices so far, the exercise this time involves more complex circuit building skills and new components— stepper motor and integrated circuit H-bridge are introduced to produce interesting interaction. The project we are trying to make in the exercise is an automatically drawing pencil whose movements are mainly directed by two stepper motors.  We work individually in the first two steps to build up the supporting framework before working in pairs to build up the whole device.

Materials:

For Steps 1 and 2

1 * 42STH33-0404AC stepper motor
1 * L293D ic chip
1 * power jack
1 * 12 VDC power supply
1 * Arduino kit and its contents

For Step 3

2 * Laser-cut short arms
2 * Laser-cut long arms
1* Laser-cut motor holder
2 * 3D printed motor coupling
5 * Paper Fasteners
1 * Pen that fits the laser-cut mechanisms
Paper

Step 1: Build the circuit

Schematic

Process

I built the H-bridge first, an integrated circuit that has many transistors inside which can reverse the polarity of the motor to enable the motor to run forward or backwards. The type we used is L293D. The schematics looked confusing to me at first due to its complex structure, but as I studied it in detail and also with the help of learning assistant later (Great thanks to Jessia Chon and Eszter Vigh! ) I figured out the structure and working mechanism of it. The H-bridge could be divided into four identical electronic parts that work together to take in inputs (power) and generate outputs. VCC2 is for the connection of external battery to supply power to the stepper motor. The four feet the stepper motor has corresponds to the four divided part, each containing one power supply, one pin connection to the Arduino, one connection to the stepper motor and one connected to the ground. Each part’s structure is just the basic circuit structure we’ve been building in class. It became easier to build the circuits after I figured out how it worked. 

Here’s my work!

Step 2: Control rotation with a potentiometer

Process

This step was built on the first step and was quite simple. I just added a potentiometer to the circuit, with the middle feet connected to the pin and the two feet on the opposite respectively connected to the power supply and ground. In terms of the code, I added map() function to the existing one and adjusted the number of steps within the code to 200 since the stepper motor is a 200 stepper motor. 

Step 3: Build a Drawing Machine!

Process

After building an adjustable stepper motor using H-bridge and potentiometer individually, I worked in pairs with Feifan Li who had also finished step 1 and 2. The main task now was to combine our work together and establish the rest of the drawing machine to make it work! 

The first thing we did was to fix the stepper motor by the motor holder and fixed them together with a fastener. Then we installed the laser-cut long arms and short arms onto the motors and fixed the pencil between the arms. In the end we put a piece of paper under the pencil and piled up some papers under the white paper to ensure its contact with the pencil. After the device had been built up we did some checking work to ensure accuracy (burning computer was too costly!) before connecting it with our computers. 

It finally worked, but one motor seemed to be insensitive to movement and led to a drawing completed not so smoothly. We checked the through the code and circuits and found no problem. We though this was because the rotating disc was too rough for the motor to drive. But in general, we got the machine working!

step3video (I don’t know why it’s in this form…)

Response to Questions:

  1. What kind of machines would you be interested in building?Add a reflection about the use of actuators, the digital manipulation of art, and the creative process to your blog post.

I’d like to build an interactive musical instrument that is responsive to humans’ emotions. Specifically, the musical machine will scan the person in front of it and the underlying algorithms will examine the person’s face in detail to recognize his/her emotions by analyzing the facial expressions of that person. And it will produce corresponding music upon its interpretation of the person’s emotions (for example produce happy music when the person is upsetting) The actuator serves as a tool to respond to the users’ emotions and produce corresponding music based on the machines’ analysis. In this way it can be thought of a machine brain, or a purposeful digital creature that could understand and respond to a user to create interaction. The actuators are like our senses, and the underlying mechanisms are the thinking process of the respondent and the music/digital manipulation of art is an output. All are put together to create a conversation. 

2. Choose an art installation mentioned in the reading ART + Science NOW, Stephen Wilson (Kinetics chapter). Post your thoughts about it and make a comparison with the work you did during this recitation. How do you think that the artist selected those specific actuators for his project?

The Blanket Project by Canadian artist Nicholas Stedman surprises me with its integration of intelligence. Instead of waiting for input as what most projects I’ve seen and done so far, it takes initiatives to search people and therefore “consciously” search for interaction. It’s also responsive to input, which is people’s movement and adjusts its output correspondingly. The actuator it uses is tactile sensors. In comparison, the drawing machines we did this recitation was more mechanic. The input required some manual effort and the output is not within our control. It’s more like an effect we’ve made on the machine, instead of a responsive object that suits our need, like the blanket robotics.  I think the artist selected the tactile sensor from daily experience. When we are sitting on the blanket, the main contact between ourselves and the blanket is the body part. So there will definitely more information the computer can get from interpreting our body movements. And in that sense, the tactile sensor is the best choice.

Recitation 4: Drawing Machines – Lillie Yao

Introduction:

During this recitation, I used the Arduino, breadboard, and motor to connect and make a drawing device. This machine connected to two motors which were controlled by the user, to move the pen and make a drawing. During this project, I encountered many obstacles with the motor and h-bridge and which cables to connect to which part of the breadboard. In the end, I figured it out and got the machine to finally work and draw!

Materials:

For Steps 1 and 2

1 * 42STH33-0404AC stepper motor
1 * L293D ic chip
1 * power jack
1 * 12 VDC power supply
1 * Arduino kit and its contents

For Step 3

2 * Laser-cut short arms
2 * Laser-cut long arms
1* Laser-cut motor holder
2 * 3D printed motor coupling
5 * Paper Fasteners
1 * Pen that fits the laser-cut mechanisms
Paper

Step 1: Build the Circuit

This step was the most challenging for me because it was really confusing as to which cable to connect to which hole in the Arduino and breadboard. I learned that if you make just one Ground and one Positive, it will be a lot more organized when you look at the cables and a lot less confusing.

Step 2: Control Rotation with a Potentiometer

During this step, we had to connect a potentiometer to our already existing motor, which doesn’t sound like a hard thing to do. But for some reason, mine would not work with the potentiometer. I mapped and coded everything in Arduino correctly but it still wouldn’t work. In the end, a fellow came and solved it with just plugging it in…

Step 3: Build a Drawing Machine!

For this step, we just had to put two motors together and connect it to the machine that was put together with push pins. This was definitely the easiest step.

Question 1:

I would be interested in building some type of automatic device created in the lab but have it more geared towards being controlled by an electronic device; kind of like a 3D printer.

Question 2:

A project that I thought was very interesting was “The Table” by Raffaello D’Andrea,  Max Dean and Matt Donavan. I thought this project was cool because the table is trying to form a relationship with a human in the room and moving towards it. But as soon as the person leaves, the table stops moving. I think its really interesting to have a table try and form a relationship with a human being. This project didn’t really have a lot to do with our recitation project because in our project, we were in control of the motor with a potentiometer, but this project was self controlled by the actions of the people in the room.