Recitation 5: Processing Basics – Lillie Yao

For this project, I chose “A II (Construction A II) by LászlĂł Moholy-Nagy” I found his artwork in one of the links provided on our recitation cite. I chose this artwork because I liked how the shapes overlapped each other and the transparency changed within in each shape. I also wanted to challenge myself into re-creating this in Processing because I have never done something like this. 

Here is the original piece:

László Moholy-Nagy, A II (Construction A II), 1924. Oil and graphite on canvas, 45 5/8 x 53 5/8 inches (115.9 x 136.2 cm)

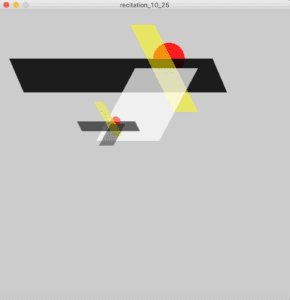
Here is my creation on Processing:

I found that the hardest part for me to grasp was where exactly to graph each point and where the right place to put a certain shape was. I also found it very tedious to move a shape up, down, left, or right.

Here is my code:

Overall, I found drawing and coding in Processing really fun and I was able to realize a lot of little details in my code and drawing. It was also really cool to me that I could recreate a piece of artwork! 

Recitation 4: Drawing Machines-Xinran Fan

introduction:

   First,  I’d like to tell you that this is the first time ,and unfortunately could not find a partner until near to the end of the class. So this blog prohaps look like a individual work.

Materials:

For Steps 1 and 2

1 * 42STH33-0404AC stepper motor
1 * L293D ic chip
1 * power jack
1 * 12 VDC power supply
1 * Arduino kit and its contents

For Step 3

2 * Laser-cut short arms
2 * Laser-cut long arms
1* Laser-cut motor holder
2 * 3D printed motor coupling
5 * Paper Fasteners
1 * Pen that fits the laser-cut mechanisms
Pape

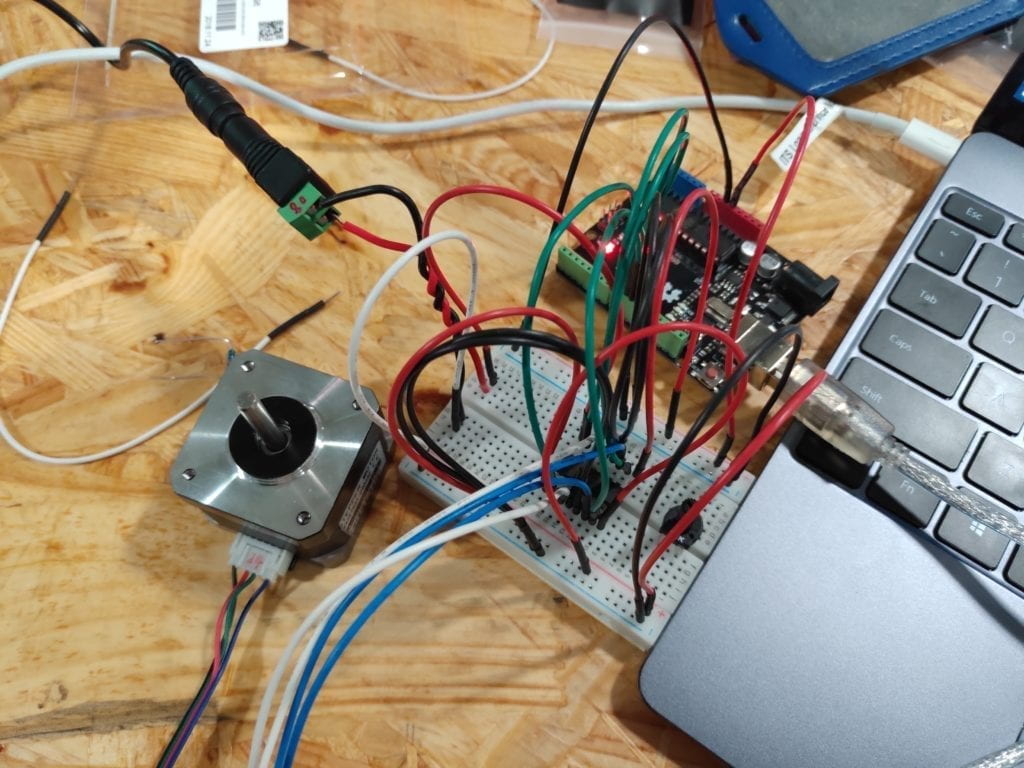
Step 1: Build the circuitH-bridge circuit diagram

I felt dizzy the first time I saw that image. It is the most complex circuit I have seen in the recitation. So the first thing I did is taking out the certain number of the similar color wires. Then I just build it according to the image. Though this actually is a non-thinking part, I am still on tenterhooks. After that, I asked an assistant for helping me check it (afraid of burning my computer),then copy the link…It didn’t run hot!

Step 2: Control rotation with a potentiometer
In the second step I really met a intractable trouble, my Potentiometer, which is should be 0~1023, but actually is only 540~645. That’s really puzzled me when I doing the map. There were more than one fellow came to help me to figured out what happened. we have tested many Potentiometers and at last found out that non of Potentiometers can get to the standard range…Because of that , I changed the the value in the map. Anyway, it did not have a big difference

Step 3: Build a Drawing Machine!
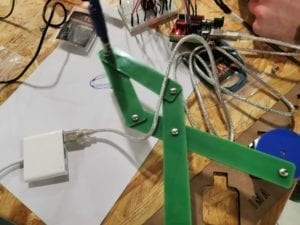
It was super easy to put the laser-cut arms together and used paper fasteners to fix them.Then I walked around to find someone build the last step with me. There comes Krabs when it near the end of of the class, but he haven’t known what the laser-cut arms used for! Though the class was over, we still insisted to have it down. I was so happy to see the pen begin to move itself!

Question 1:

what I want to create at the midterm project is a plants watering reminder which can let people communicate with their speechless friends. Using moisture sensors to sense the humidity of the soil and giving people light and sound to remind them water the plant . It can even give the suggestions on how much water we should add into the soil. The plant would move up and down when is soil is too dry, while if you put too much water into the soil, a servo will rotate a hand-shaped sign try to make you stop watering the plants.

Question2:

The interactive artwork Daniel Palacio Jimenez’s Waves. Motors in it rotate elastic strings to create complex sounds and visual vibration. It lead to the different shapes and movements, which make it looks like there is a solid object suspended in mid air when you takes the photos.

our  project  is actually controlled by people. In Waves, it seems that the movement is depend on sensing the movements of people. But they are both interactive, and result in an art work.

 

Vivien Hao—Recitation 4

  1. What kind of machines would you be interested in building? Add a reflection about the use of actuators, the digital manipulation of art, and the creative process to your blog post.

After building the circuits and add potentiometer for the drawing machine, I think I now have a clear understanding of how to use potentiometer. In order to include the uses of a potentiometer, I would like to build a machine that needs back and forth rotations with artificial manipulations. A project that requires that kinds of functions would be the project that I am currently working on—a music box that allows the player to manipulate it by twisting the potentiometer in whatever he prefers. An actuator is a device that can convert energy into motion. It can be used in devices like motors, switches, pumps, and valves. The digital manipulation of art means converting art into a form that could be manipulated digitally. For example, in the project that I am currently working on, we are trying to change the traditional and boring piano practices into something that could catch children’s attentions. If they twist the potentiometer in a way, then the music would play. If they twist it in a different way, then another music would play.

  1. Choose an art installation mentioned in the reading ART + Science NOW, Stephen Wilson (Kinetics chapter). Post your thoughts about it and make a comparison with the work you did during this recitation. How do you think that the artist selected those specific actuators for his project?

After reading through the brief explanations of those artworks, I really like the goal that “Time’s Up” is promoting in the project. The artists for “Time’s Up” are trying to raise people’s awareness about their dependence on the natural environment. Thus those people can also realize how important it is to be environmental friendly in their daily lives. In “Time’s Up”, the participants need to be fully involved with the project. They have to stand on the platform then they would be able to bend the gravity map. However, in the Drawing Machine exercise I did during this recitation, participants are less involved in the process. The only thing they would need to do is twisting the potentiometer. Since the artwork allows the participants to rotate on the platform, so I think they have chosen an actuator that allows movements and rotations. They might have chosen servo or potentiometer. Either one might work in this case.

IMG_1934

Recitation 4: Drawing Machines–Zhao Yang

Overview

Basically, in this recitation class, we were required to build a drawing machine by using an H-bridge to control stepper motors attached to the machine arms. We were first asked to build two circuits individually and work with a partner to finish the drawing machine. My partner, Barry, and I succeeded in building the final machine but I also met with some difficulties during the recitation class. 

Materials:

For Steps 1 and 2

1 * 42STH33-0404AC stepper motor
1 * L293D ic chip
1 * power jack
1 * 12 VDC power supply
1 * Arduino kit and its contents

For Step 3

2 * Laser-cut short arms
2 * Laser-cut long arms
1* Laser-cut motor holder
2 * 3D printed motor coupling
5 * Paper Fasteners
1 * Pen that fits the laser-cut mechanisms
Paper

Step one: 

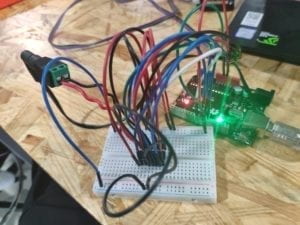
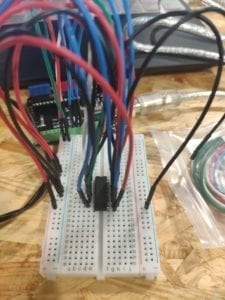
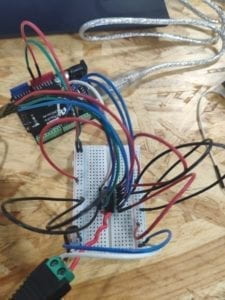
The goal of this circuit is to correctly connect the stepper motor by using the H-bridge and let the stepper motor automatically rotate one round. However, I almost spent one hour struggling with this simple circuit. The images above are the circuit that I first built. I thought I built all the circuits in the right way. But when I tried to upload the test code, the motor just didn’t work. Thus, I checked the circuit for at least twice, I still couldn’t find out what the problem was. Even though I asked my partner to help me with the circuit, he couldn’t find the problem either. At last, I just realized that I couldn’t waste more time on the first circuit so I plugged out all the wires and rebuilt it. After rebuilding the circuit depending on the diagram step by step, I finally make the circuit run correctly. And here is the video about the first circuit. 

Step two:

In this step, we needed to change a sample code and add a potentiometer to the circuit to control the stepper motor how much it would rotate. Due to the lack of enough time, I didn’t actually do this step by myself. I asked my partner to help me build the circuit and I wrote the code to control the rotation. To make sure we have enough time for the final step, we double-checked the circuit and the code. Fortunately, all the circuits worked well. Here is the video about controlling the rotation of the stepper motor. 

Step 3:

As for the third step, there was nothing to do with the electricity and the circuits. What we needed to do is to construct the drawing machine depending on the sample image. In fact, the last step was to enjoy the sense of the success of building the machine. We just rotate the potentiometer to create our abstract art. Here attached to the video of the process of drawing and an image of our masterpiece. 

Questions:

  1. I’m interested in building a machine that contains the functions of entertaining and exercising. For example, I want to build a gaming machine that encourages people to interact with and actually exercise when you interact with the machine. Since I find more and more people overlook the significance of keeping fit and exercising, this machine is a really good motivation for those people to actually do some exercise. Even for me, I don’t spend much time exercising in a week. But I have the willingness to lose weight. Thus, such a machine can really encourage me to move and when I do the exercise, I won’t feel boring. In terms of the digital manipulation of arts, I think it’s a really prevailing way to create art. For example, more and more people start drawing on the computer instead of drawing on the paper. We cannot stop or change such a trend of art. What we need to do is to get used to the new ways of arts and not forget the origin of the arts. 
  2. After reading this passage, I am impressed by the MovieCards by Mika Miyabara and Tatsuo Sugimoto. Basically, people can change the sequence of several cards. And each card has an image of a scene from a movie on it. In my opinion, the main purpose of this art installation is to encourage people to imagine their own stories about a movie by seeing those scenes. Compared with the work I did in the recitation, their work mainly focuses on people’s imagination but it’s an invisible process. Our work is more visible and controllable. 

Recitation 4: Drawing Machine by Barry Wang

Recitation 4:Drawing Machine

In this week’s recitation, we are learning to control the step motor. Moreover, we are combining the step motor with the H-Bridge to create a drawing machine. 

Materials:

For Steps 1 and 2

1 * 42STH33-0404AC stepper motor
1 * L293D ic chip
1 * power jack
1 * 12 VDC power supply
1 * Arduino kit and its contents

For Step 3

2 * Laser-cut short arms
2 * Laser-cut long arms
1* Laser-cut motor holder
2 * 3D printed motor coupling
5 * Paper Fasteners
1 * Pen that fits the laser-cut mechanisms
Paper

Step 1:  Hooking up the step motor:

The first step is to hook up the step motor. Since the step motor is controlled by the H-Bridge, the wiring is a bit complicated. One thing especially needs to pay attention is the direction of the H-Bridge. I need to make sure the semi-circle gap aligns with the picture in the diagram. Another important point is to separate the 12V and 5V power so that the Arduino doesn’t get burned. After hooking up the wire, we are using the sample code to make the motor turn a full circle.

Here is the circuit and the test video:

Step 2: Control the step motor with a potentiometer

Similar in the way of controlling a fan with a potentiometer, I connected the third pin to an ANALOG IN pin to read data from the potentiometer. Then I map the input to a value in the range of (0,200) to the output pin that is connected to the H-Bridge.

Here is the test video:

Step3: Building the Drawing Machine

With both my and my teammate’s step motor running, we put them together and assembled the mechanical arms. Boom! A drawing machine comes to work!

And our final painting!

Question 1:

I am interested in creating an interactive game. For example, a labyrinth controlled by a joystick. The users can tilt the labyrinth to roll a ball from the start point to the finish point.

The idea of using digital devices to create art is an interesting idea. It looks or sounds cool. But to create an exquisite piece of art requires a high level of controlling the movement of the digital parts. In our case, though the step motors work well, yet it is difficult to control such a machine.

Question 2:

I like the wooden mirror creation. This project is not very difficult to realize, yet creates a strong sense of aesthetic joy. The actuator used is the servo. Using the servo to flip the wooden block is easily controllable. And it provides an expected output. While in our project, though the step motor works fine, yet controlling it proves to be a difficulty.