Midterm Project Reflection- Yiwen Hu – Inmi Lee

Context and Significance

My previous research that inspires my understanding of interaction is the Firewall project created by interactive media artists Mike Allison and Aaron Sherwood at NYU Abu Dabi. This project features a membrane interface consisting of a sheet of spandex. It is sensitive to the depth the user pushes and produces fire-like visual effects and various music piece. The visual effect and the frequency as well as melody of music depend on the depth of the user’s push. The sensitiveness of the machine to the user’s input and the various output (effect) the machine produces play a key role in shaping my definition of interaction. In contrast, another project I researched— the “interactive wall” in which each button on the installation can be pushed and generates a certain color effect, features a one-to-one interaction that only has one input and one output. From what I have read in articles like The Art of Interactive Design, interaction is about a “conversation” rather than “reaction.” The contrast between two research projects deepens my understanding of interaction of a continuous conversation that involve actors who are responsive to each other.  Each actor in the conversation expects something different from the other actor and therefore makes the interaction back and forth. An excellent interaction, I think, could unite both actors together in such a way that the interactive machine become an extension of human body. 

We base our project on such concept of interaction as a continuous conversation involving responsive actors. This also lays foundation for the uniqueness of our project. We place significant attention to the variety of output as well as the sensitiveness of the installation’s response to the input in the hope of engaging the user and enhancing the interaction. Our idea originates from the launch pad which can generate corresponding visual and sound effects based on the keys the user presses. However, according to my definition of interaction, while the criteria of variety in output is satisfied, the level of input (press the button) is a little bit simple (like the interactive wall) and therefore limits the way of interaction. For me, I would think of how the digital input could be improved to analog input, like the one in the Firewall projects does (strength and speed of pushing something). Our project is a small musical instrument aiming at enhancing user’s experience of playing music and can be applicable to anyone who love music. 

Concept and Design

In order to make the interaction a “continuous conversation,” we decide to make the input an analog one and vary the output by creating various visual and sound effect. Our initial idea was an interactive musical instrument that resembles a launch pad but with more sensitiveness to the user’s input. We did some research and found something useful on the slides of Class 06 named “Physical Interaction, Sensors and Actuators” which listed a number of sensors to choose from. 
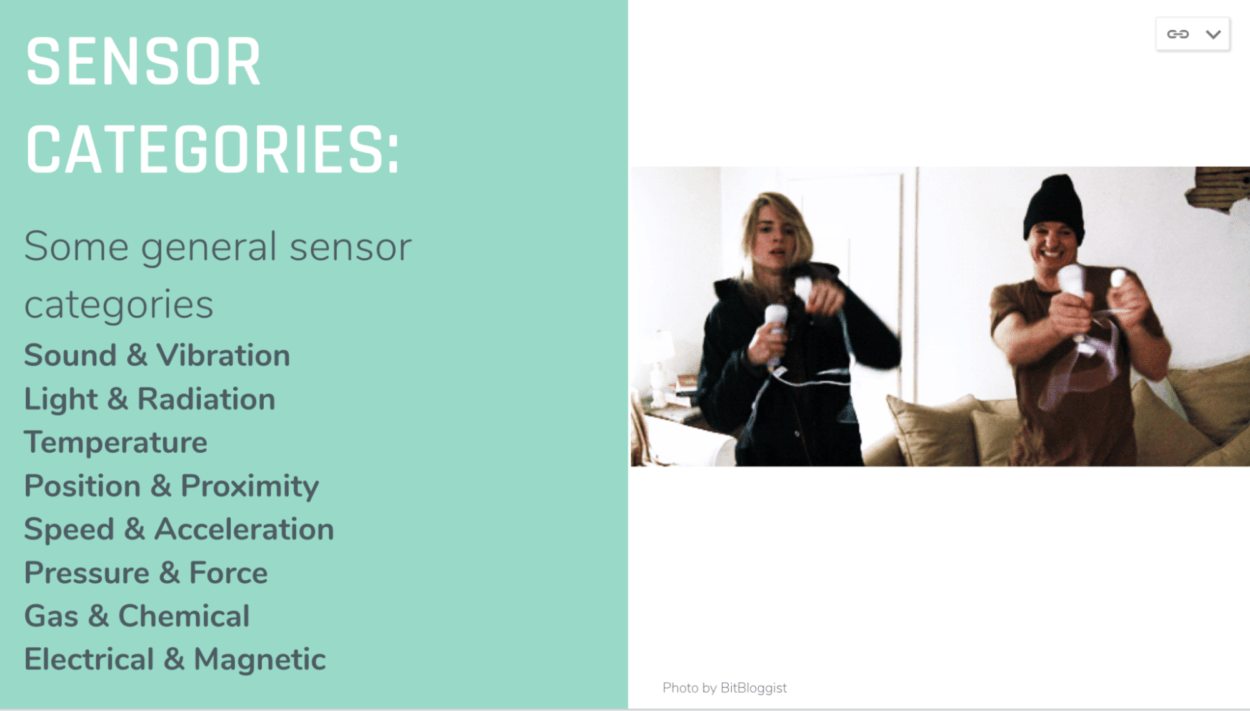
For sensors that can detect the variation of sound, light or temperature, we rejected them because we found it hard to distinguish user’s input from the surroundings. And since our output is LED light and sound, it’s hard to invest any meaning if we choose the input to be also light or sound. Some sensors may suit our purpose, like pressure, speed and position sensor. Inspired by launch pad and the Firewall installation, we finally chose the pressure sensor. Our tentative blueprint was to adjust the frequency of the music according to how hard the user pressed. 

Fabrication and Production

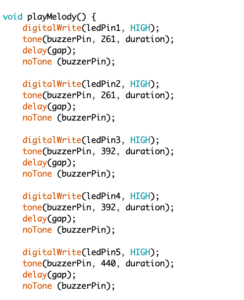
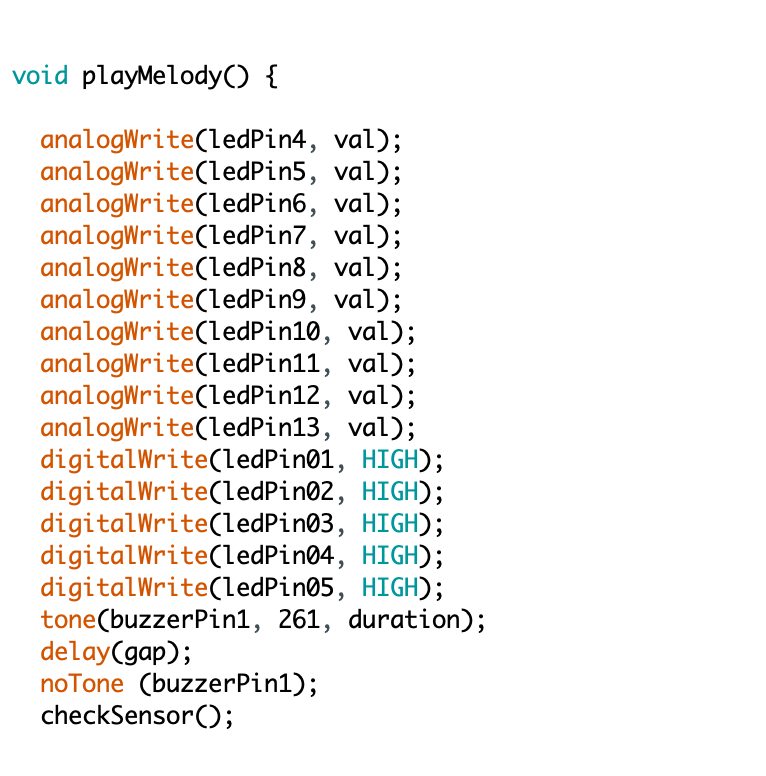
Our first attempt to build an interactive musical instrument whose output (frequency of music and light) was sensitive to the user’s input encountered technical problem. The first problem we met was the sequential light.  We designed the self-defined function “playMelody()”and wrote code according to the logic: when the function was called, lit up the first LED and at the same time played the first note; delay for a “gap” (a self-defined time variable) and then lit up the second LED while playing the second note…the following has the same logic. However, when we run the code, it turned out that all lights were lit up at the same time. We sought help from Professor Lee and Professor Marcela. After some debugging and experimenting, they helped me figure out the right way to achieve desired effect— that is, to add a “noTone(buzzerPin)” after each block of code, as shown below. It’s hard to know what’s exactly wrong since the logic is fine. We finally attributed that to the underlying contradiction between duration and gap and additional pause function was needed. This made me realize that computers didn’t understand human logic all the time and there was a lot to explore in computer language.
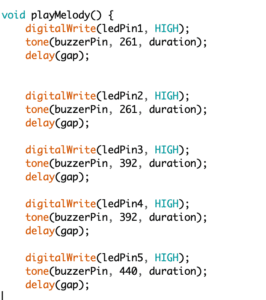
 

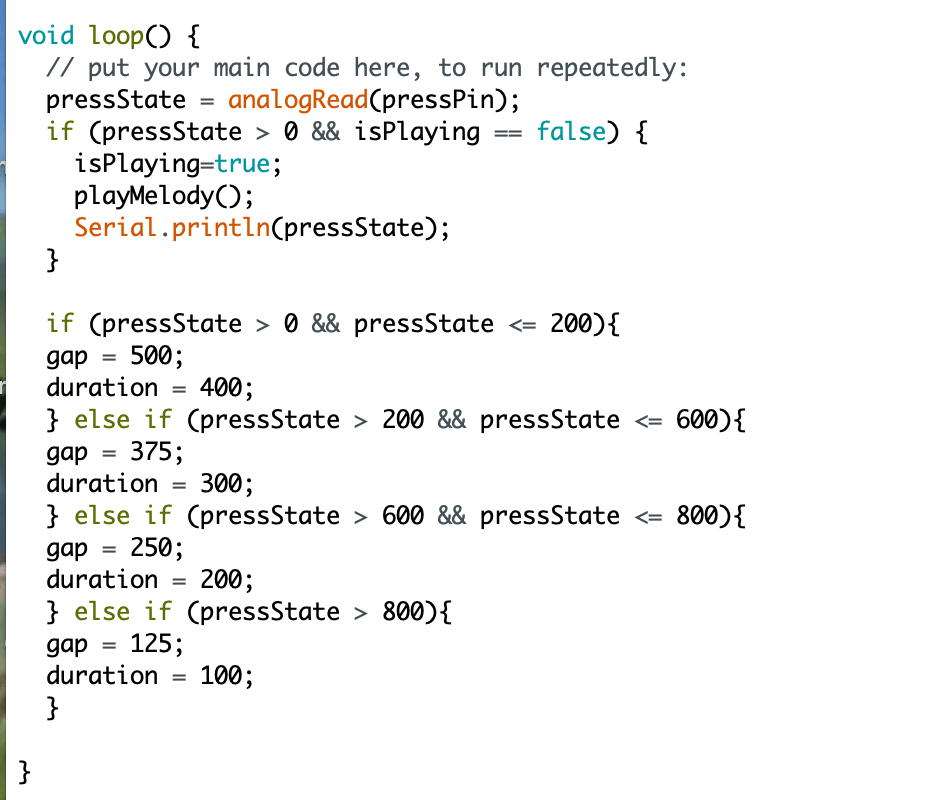
To link the input (press) and the frequency of the music, we created two  variables called gap and duration, which respectively corresponded to the interval between two notes and how long one note lasted. We changed the frequency of the melody by changing the values of the two variables. As shown above, we expected the value of gap and duration to change immediately as a result of change in how much the user pressed. However it didn’t work that way. Instead, it recorded the value of the user’s input once a time and run the whole playMelody() function with the certain value before replacing it with the new value. Below is one quick version of the melody, corresponding to a relatively large input.

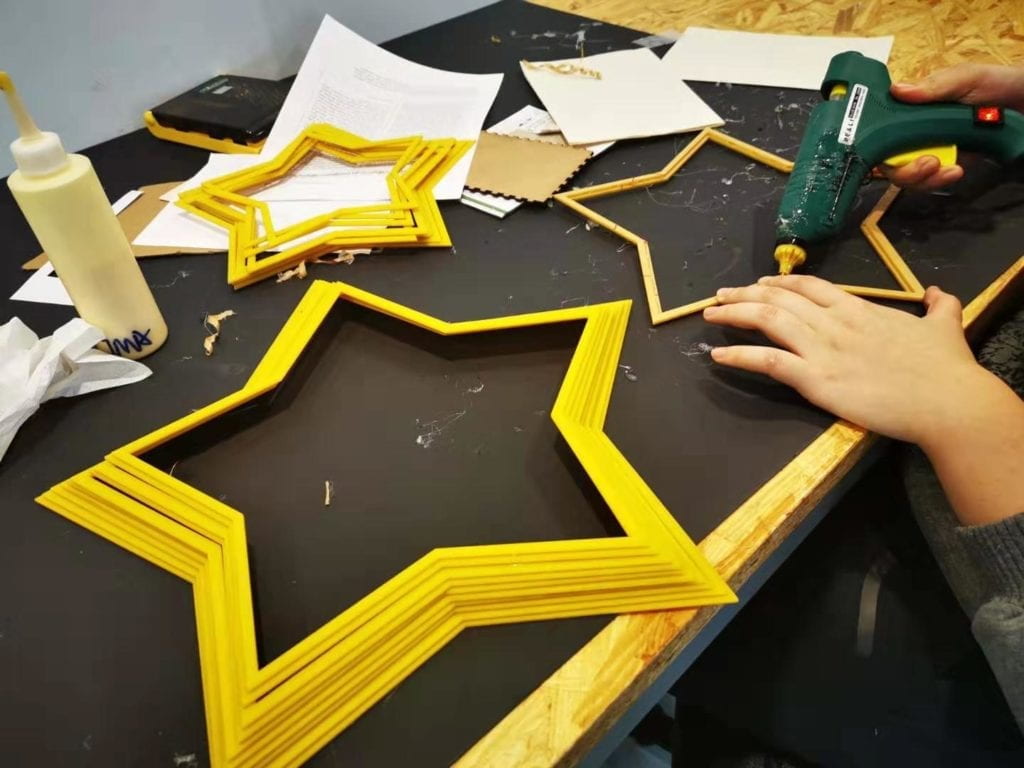
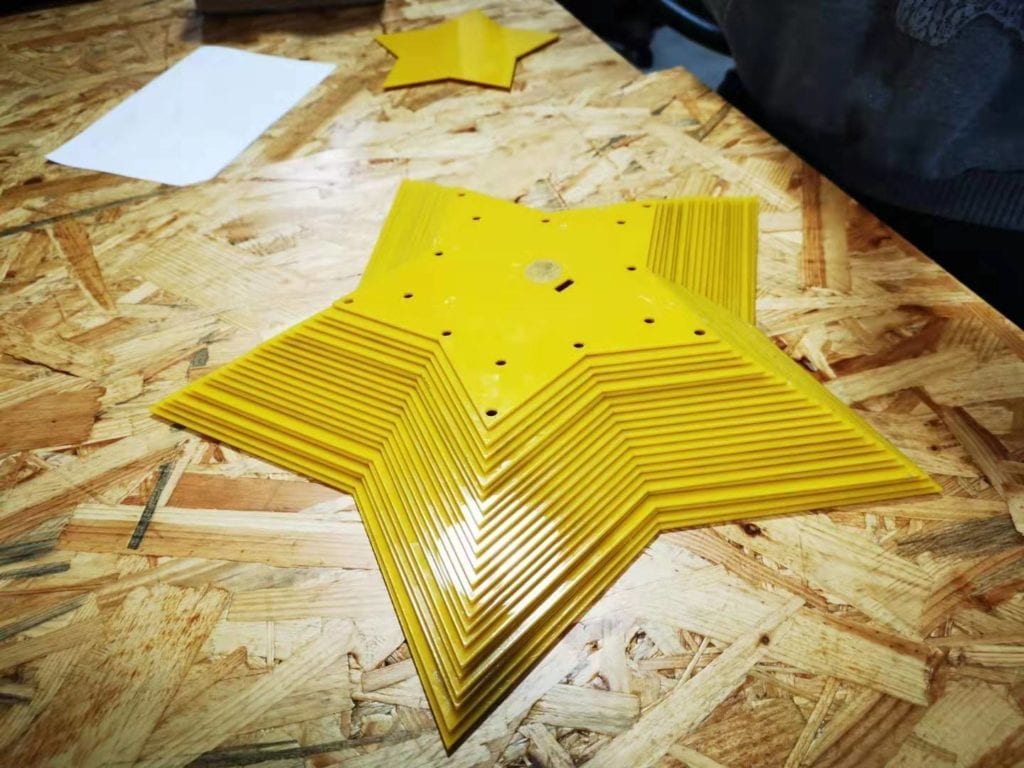
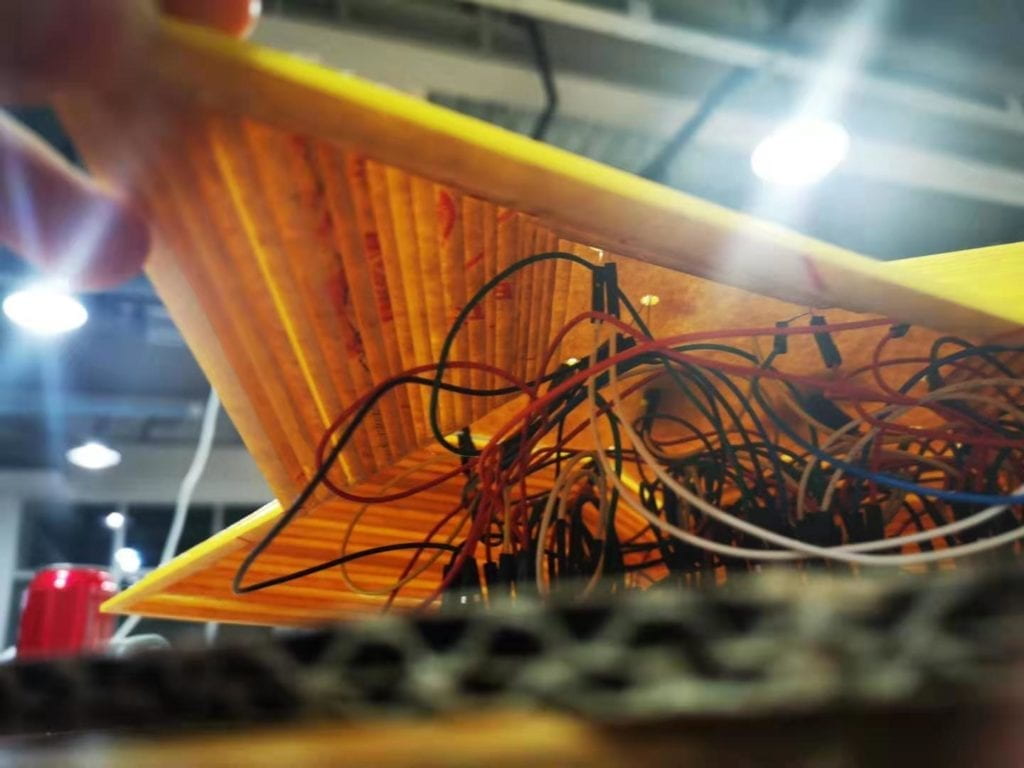
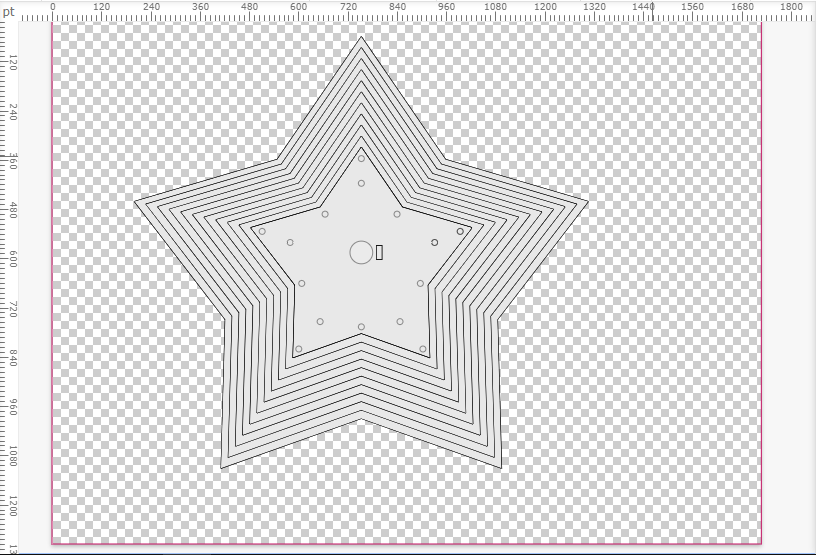
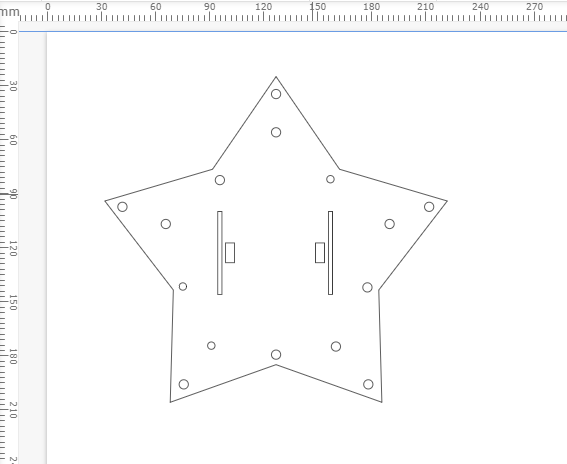
In terms of the physical part, we thought about a star picture because it matched our melody most. We imagined the user interface to be a star with various LEDs occupying the edges. We had 15 notes in the melody (including the pause) and after drafting we found that the 15 LEDs could be fit into a symmetric shape that looks like one star being wrapped inside another one. Since we also need to put the circuits underneath, we first thought of a cylinder one, but this may look ugly. Inspired by an upperclassman called Sheldon and with the help of many ima fellow like Cindy and Andy, we decided to create 22 (the number is determined by exact measurements of the height and width of our circuits) hollow stars with decreasing size using laser cut and piled them up using glue. I took several photos and videos of the process and results.
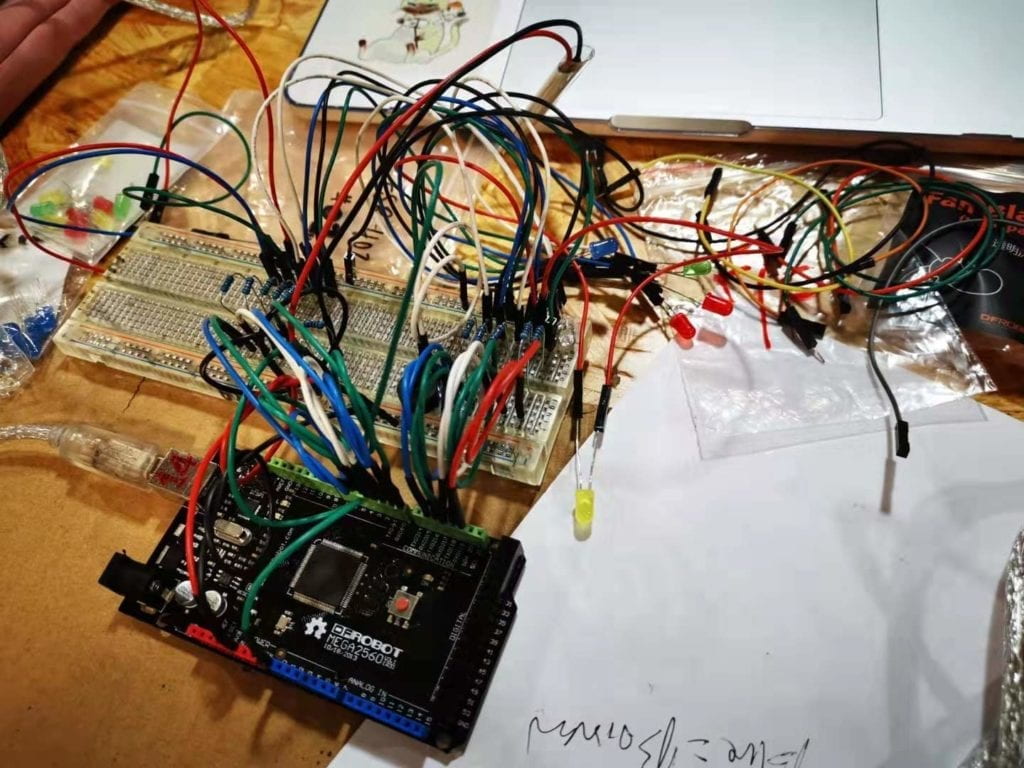
During the user test session, several peers came to interact with our project (incomplete but the basic interaction can be achieved). One common feedback we got from them was the confusing way to interact as well as the lack of immediate feedback of their input. The pressure sensor was a flat circle without indicator of interaction and the lack of immediate feedback (change in frequency) made it harder to tell the function of the pressure sensor. In addition, the pressure sensor we borrowed from equipment room was not stable and therefore negatively influenced the interaction. Here’s one clip from the user test session. The user in the video was confused about whether to remain pressing or not. 

Based on the feedback, we decided to change the sensor and the way of interaction as well. After brainstorming and research, we found one useful YouTube video called ” Musical instrument with Arduino and two SNS-US020 distance sensors” created by Tsvetan Usunov. Usunov used two ultrasonic sensors that can measure distance and varied the pitch and speed of the melody based on the detected distance. I quite appreciated the way he changed the pitch and frequency of the one single note to allow more possibility in creating melody. Based on what we have done and inspiration from the video, we came up with the idea of changing frequency as well as creating drumbeats to make the project more like a “star remix.” However, later we found that the buzzer had only one kind of sound and could not produce a drumbeat-like sound that could accompany the star melody. After brainstorming we decided to create two kinds of interaction— one varying the frequency and one varying the degree of shade. We borrowed two ultrasonic sensors and placed them on either side of the user interface (the top star panel), as shown below.
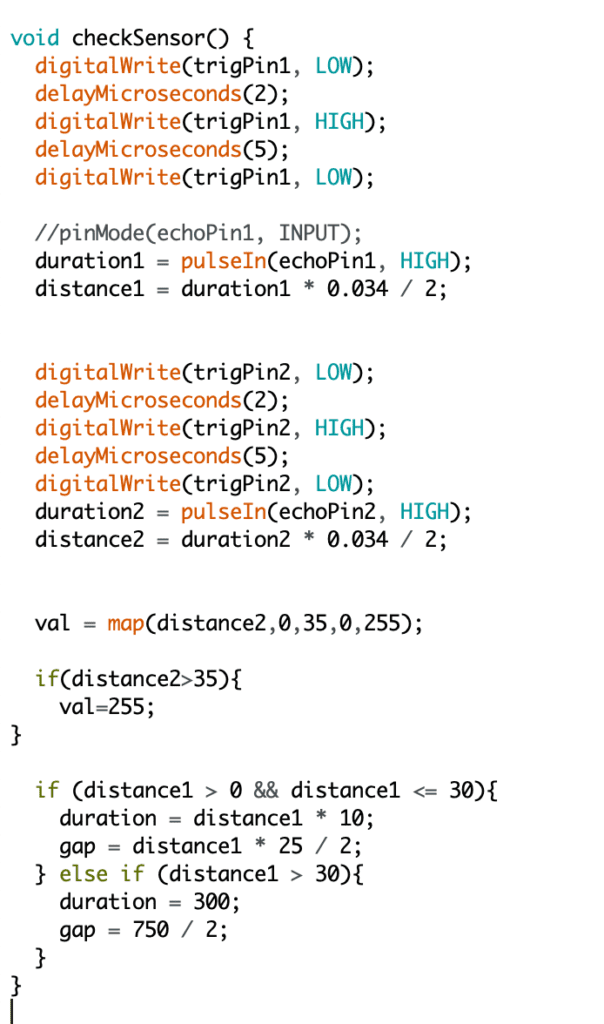
In terms of the coding, we struggled a lot about the immediate change of output in response to a changing input. In other words, we wanted the interactive device to be more sensitive to user’s input so as to make it more interactive. The first technical problem we encountered was to make the frequency of the melody sensitive to the user’s input. Moon helped us solve the problem by creating a new function called “checkSensor().” This function told the computer to measure distance every time a note had been played and therefore allowed the frequency (or more specifically, gap and duration) of the next note to change. In this way our desired effect can be achieved. Another sensor followed the same logic but had different function. We applied the map () function to transform the distance to the brightness of the lights. To enhance the sensitiveness, we established a mathematical relationship between distance and brightness as well as gap and duration. 
Due to technical limitation, we also changed our initial idea of sequential LED lights. Specifically, each note was assigned a specific value of frequency (gap and duration) and brightness before the “checkSensor()” function which reassigned the value to the next note. Such function limited the capacity to simultaneously change the brightness of all lights. Therefore, in need of consistency, we abandoned the initial idea of sequential lights and instead applied the same brightness to all LEDs at the same time. However, after we run the code we found that part of the lights worked and part of them didn’t. With the help of fellow Tristan, we found out that the Arduino Mega had limitations on the number of analog pins. Only 0-13 excluding 1 pins could be used to realize analog input while we had 15 lights on hand. Then I suddenly came up with the idea of combining analog input with digital to make more variation. My partner agreed and we changed the five lights in the inner circle to be digital output by creating blinking effects. In this way the visual effects were more varied and I think it enhanced the visual effects as well as interaction because the blinking frequency was the same as that of tone melody. That reminded me of an old Chinese saying, “there is a way out.” Sometimes through innovation the bad could be turned into something even better. Here’s part of the code and our final project!
Conclusion

The midterm project is a meaningful practical application of the idea of interaction I come up with after all the learning through articles, research and my own experience. This is a demanding task yet also a rewarding one, after overcoming all the difficulties with my partner and also with the help of others like professors and fellows. I want to express heartfelt gratitude to all the people who have been assisting us in doing the project. I particularly want to thank my partner Sonny who has always been creative, supportive and persistent during our collaboration. I really enjoy the process of combining our ideas together to advance the project as well as constantly designing new ways to approach a problem, whether theoretically or practically. Such a challenging experience not only develops my problem-solving skills, but also enhances my creativity. Most importantly, however, the experience strengthens my willpower and boosts my confidence in resolving tricky problems. In terms of the course itself, I think such intense practice greatly contributes to my understanding of interaction as well as the balance between creative ideas and technical plausibility. I think the result is satisfactory as it to a large extent meets my definition of interaction (also Sonny’s). The key part of a good interaction I define— sensitiveness as well as variation, are both met. There are tons of possible results of the output and user can create variation based on their input (how far the hands are away from the music box),  thus enabling a “continuous conversation.” However, I think one thing can be improved about our project is that it only has one kind of melody. Due to time limitation, we fail to think of a way to enable the user play with different melodies to create their own songs like that of launchpad. This is also difficult because the harmony between various melodies is hard to achieve. Such improvement will require deeper understanding of not only interaction but also music as well. Also I think the user context can be considered more carefully to invest more useful meanings into the project.

Reference

  1. Firewall installation. http://aaron-sherwood.com/works/firewall/
  2. Click Canvas, interactive wall. https://create.arduino.cc/projecthub/natthakit-kim-kang/click-canvas-an-interactive-wall-04332c?ref=tag&ref_id=interactive&offset=0
  3. The Art of Interactive Design. http://s3-ap-southeast-1.amazonaws.com/ima-wp/wp-content/uploads/sites/3/2017/08/05164121/The-Art-of-Interactive-Design-brief.pdf
  4. Class 06 – Physical Interaction, Sensors and Actuators. https://docs.google.com/presentation/d/1yjxn3s6a9HH3oNuHiq1GGzD27czUAztx2VuvvwRpGAI/edit#slide=id.g3ffe0327f8_0_22
  5. Musical instrument with Arduino and two SNS-US020 distance sensors. https://www.youtube.com/channel/UCBLijWZ1jr_6VrIlhp3fFtw
Midterm reflection-Xinran Fan

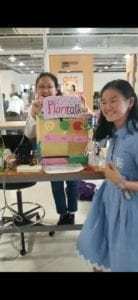
Take with plant-Azena-Inmi

INDIVIDUAL REFLECTION: 

Even begin to write this blog really need a lot of courage, this project is so complex that take us three nights to finish it all. And I even one day sleep in the safe at eight floor for that. From design to make the circuit to code, every step we meet so much obstacle, so it is really encourage that we final success to build this over project device!

  • CONTEXT AND SIGNIFICANCE
  1. My previous performance is about using the tech to directly express human’s emotion by painting color or sparkling light. So this time I also use sparkling light but with many different methods to show the  situation of the plant.
  2. The Wave in  the last doc remind me that not all the interactive device need human as the initiative role. And in my project the plant, which can not talk and move with the help of the this machine and become the initiative one while the human need to give the reaction. What’s more, the Recreational Machine with sparkling light, yelling cartoon  characters and  sound give me idea to mix the image, light, sound and movements together.
  3. The most special part of my device is list on the last question.
  4. Actually, at first we want to build a smart pot which can help you water( and water in a correct amount) which I know it is already exist, but under the suggestion of the professor we find out that it is quite impossible to build that as a interactive freshmen, so we give it up. 
  5. of course this “wave flower reminder” is for those people who always forget to water the flowers. And also I think it will attract those people who want to make the process of watering the plant more active and interactive with their speechless friends.                                                                                                                                  
  • CONCEPTION AND DESIGN:
  1. At first I was quite worry about if my device is not interactive enough, but when I saw the classmates water the plant and surprise about the change, I felt that even our project is not connect to a social problem, it is interactive. It can’t change quickly because it is plant who take the initial part, slow it is our speechless friends lifestyle, you can’t regard the slow as not interactive enough.
  2. material: one normal blank board and two small one; three LED light in different color; countless color papers, cardboard; a pair of speaker; a SD card reader; a mp3 sensor; a Moisture Sensor; an Infrared Distance Sensor; an Arduino; countless wires; two servos.
  3. I choose them because I want to build a system including the vision , audio, and motion, and they will change according to the static from Moisture Sensor. And the Infrared Distance Sensor under the suggestion from the user test that we do not want it to disturb us all day, just remind us when we came  close to them.
  4. About how to make the audio system, the professor and the fellow give us a lot of scheme, using many different material but at last we build this kind of device.

FABRICATION AND PRODUCTION:

  1. The significant part and of course the hardest part in our project is coding. I even have no idea how to start the first coding. The first code (about light) with the help of a kind boy’s help.
    int sensorPin = A0;
    int sensorValue = 0;
     
    void setup() {
        Serial.begin(9600);
    }
    void loop() {
        // read the value from the sensor:
        sensorValue = analogRead(sensorPin);
        Serial.print(“Moisture = ” );
        Serial.println(sensorValue);
        delay(1000);
    }
     
    void setup() {
      pinMode(9, OUTPUT);
    }
    void loop() {
      sensorValue = analogRead(0);
      if(sensorValue>200){
       analogWrite(2, 200);
      
      } else if (sensorValue<200 && sensorValue>40) {
       analogWrite(4, 200);
      } else {
        analogWrite(6,200);
      }

    Then I struggle myself to write the servos’ code into it.

    nt sensorPin = A0;
    int sensorValue = 0;
    #include <Servo.h>
     
    Servo myservo1; 
    Servo myservo2;
     
    int pos = 0;   
     
    void setup() {
      myservo1.attach(9);
      myservo2.attach(11);
        Serial.begin(9600);
         pinMode(2,OUTPUT);
         pinMode(4,OUTPUT);
         pinMode(6,OUTPUT);
    }
    void loop() {
        
        sensorValue = analogRead(sensorPin);
        Serial.print(“Moisture = ” );
        Serial.println(sensorValue);
     
          sensorValue = analogRead(0);
      if(sensorValue>200){
       analogWrite(2, 200);
         for (pos = 0; pos <= 180; pos += 1) { 
        myservo1.write(pos);              
        delay(15);                       
      }
      for (pos = 180; pos >= 0; pos -= 1) { 
        myservo1.write(pos);              
        delay(15);                       
      }
      
      } else if (sensorValue<200 && sensorValue>100) {
       analogWrite(4, 200);
      } else {
        analogWrite(6,200);
        for (pos = 0; pos <= 180; pos += 1) { // goes from 0 degrees to 180 degrees
        // in steps of 1 degree
        myservo2.write(pos);              // tell servo to go to position in variable ‘pos’
        delay(15);                       // waits 15ms for the servo to reach the position
      }
      for (pos = 180; pos >= 0; pos -= 1) { // goes from 180 degrees to 0 degrees
        myservo2.write(pos);              // tell servo to go to position in variable ‘pos’
        delay(15);                       // waits 15ms for the servo to reach the position
      }
      }
        delay(1000);
    }

    After that we add the distance sensor’s code and the audio code. Though hearing quite easy but it taken most of our time and the code is in an incredible length.                                                                  #include <SoftwareSerial.h>
    #define PIR_MOTION_SENSOR 8 //Use pin 2 to receive the signal from the module
    #define pin A5

    #define LED 13// this LED will light up when the sensor detects movement
    int sensorPin = A0;
    int sensorValue = 0;
    #include <Servo.h>
    #include <SoftwareSerial.h>

    Servo myservo1;
    Servo myservo2;

    int pos = 0;

    //int num = random(1, 12);
    int num = 1;

    SoftwareSerial mp3(2, 3); // modify this with the connector you are using.
    boolean someoneThere = false;
    boolean someoneWasThere = false;
    void setup() {

      myservo1.attach(9);
      myservo2.attach(11);
      Serial.begin(9600);

      pinMode(5, OUTPUT);
      pinMode(4, OUTPUT);
      pinMode(6, OUTPUT);

      mp3.begin(9600);
      Serial.begin(9600);
      delay(100);
      if (true == SetPlayMode(0x00))
        Serial.println(“Set The Play Mode to 0x00, Single Loop Mode.”);
      else
        Serial.println(“Playmode Set Error”);
      PauseOnOffCurrentMusic();
      randomSeed(analogRead(0));
      pinMode(PIR_MOTION_SENSOR, INPUT);
      pinMode(LED, OUTPUT);
      SetVolume(0x1F);

    }

    void loop() {

      sensorValue = analogRead(A0);
      Serial.print(“Moisture = ” );
      Serial.println(sensorValue);

      sensorValue = analogRead(0);

      if (isPeopleDetected()) { //if it detects the moving people?

        digitalWrite(LED, HIGH);

        // someone there is now true

        someoneThere = true;

        Serial.println(num);

        SetMusicPlay(00, (uint8_t) num);

        delay(3000); // this delay is for the MP3 file

      } else {

        someoneThere = false;

        someoneWasThere = false;

        // Serial.println(“no one”);

        digitalWrite(LED, LOW);

        //PauseOnOffCurrentMusic();

      }

      if (someoneThere == true && someoneThere != someoneWasThere) {

        Serial.println(“someone is there!”);

        someoneWasThere = true;

      }

    }

    //Set the music index to play, the index is decided by the input sequence

    //of the music;

    //hbyte: the high byte of the index;

    //lbyte: the low byte of the index;

    boolean SetMusicPlay(uint8_t hbyte, uint8_t lbyte)

    {

      mp3.write(0x7E);

      mp3.write(0x04);

      mp3.write(0xA0);

      mp3.write(hbyte);

      mp3.write(lbyte);

      mp3.write(0x7E);

      delay(10);

      while (mp3.available())

      {

        if (0xA0 == mp3.read())

          return true;

        else

          return false;

      }

    }

    // Pause on/off the current music

    boolean PauseOnOffCurrentMusic(void)

    {

      mp3.write(0x7E);

      mp3.write(0x02);

      mp3.write(0xA3);

      mp3.write(0x7E);

      delay(10);

      while (mp3.available())

      {

        if (0xA3 == mp3.read())

          return true;

        else

          return false;

      }

    }

    //Set the volume, the range is 0x00 to 0x1F

    boolean SetVolume(uint8_t volume)

    {

      mp3.write(0x7E);

      mp3.write(0x03);

      mp3.write(0xA7);

      mp3.write(volume);

      mp3.write(0x7E);

      delay(10);

      while (mp3.available())

      {

        if (0xA7 == mp3.read())

          return true;

        else

          return false;

      }

    }

    boolean SetPlayMode(uint8_t playmode)

    {

      if (((playmode == 0x00) | (playmode == 0x01) | (playmode == 0x02) | (playmode == 0x03)) == false)

      {

        Serial.println(“PlayMode Parameter Error! “);

        return false;

      }

      mp3.write(0x7E);

      mp3.write(0x03);

      mp3.write(0xA9);

      mp3.write(playmode);

      mp3.write(0x7E);

      delay(10);

      while (mp3.available())

      {

        if (0xA9 == mp3.read())

          return true;

        else

          return false;

      }

    }

    //return distance (cm)
    double get_IR (uint16_t value) {
      if (value < 16)  value = 16;
      return 2076.0 / (value – 11.0);
    }

    /***************************************************************

      Function: Detect whether anyone moves in it’s detecting range

      Return:-boolean, true is someone detected.*/

    boolean isPeopleDetected() {

      uint16_t value = analogRead (pin);
      double distance = get_IR (value);
      int moistureSensor = analogRead(A0); //moisture

      Serial.println(distance);
      int sensorValue = digitalRead(PIR_MOTION_SENSOR);

      //put here the value of the moisture sensor

      //if (sensorValue == HIGH) //if the sensor value is HIGH?
      if (distance < 50 && moistureSensor > 620) {
       
        analogWrite(5, 200);
        analogWrite(4, 0);
        analogWrite(6, 0);
        for (pos = 0; pos <= 180; pos += 1) {
          myservo1.write(pos);
          delay(15);
        }
        for (pos = 90; pos >= 0; pos -= 1) {
          myservo1.write(pos);
          delay(15);
        }
        num = 2;
        return true;//yes,return true


      } else if (distance < 50 && moistureSensor < 590) {
       
        analogWrite(6, 200);
        analogWrite(5, 0);
        analogWrite(4, 0);
       
        for (pos = 0; pos <= 180; pos += 1) {
          myservo2.write(pos);
          delay(15);
        }
        for (pos = 90; pos >= 0; pos -= 1) {
          myservo2.write(pos);
          delay(15);
        }
        num = 1;
        return true;//yes,return true


      } else if (distance < 50 && moistureSensor < 620 &&  moistureSensor > 590) {

        analogWrite(4, 200);
        analogWrite(5, 0);
        analogWrite(6, 0);

      } else {

      }
      return false;//no,return false

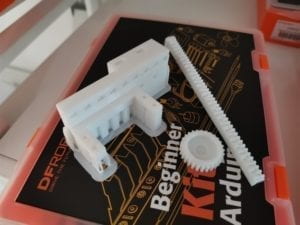
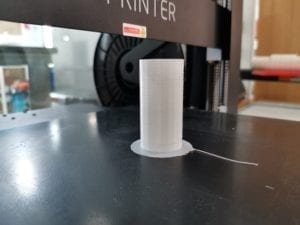
    }                                                                                                                                       During coding many time I want to give it up, but thanks to my partner, she really did s good job in it. What’s more the 3D-printer was also drive me crazy, we fail four time to print the first piece, and we have grind the piece so long time to get them fit each other.

  2. We receive mane useful advice in the user test, like make a lighter hand, add an Infrared Distance Sensor. THat’s all really helpful.
  • CONCLUSIONS:
  1. This project take the plants’ situation-the humidness as its input, the electricity waves in the circuit as the processing, the showing on the light , sound and motion as the output. This device approximately get my exception.
  2. To improve that, I hold I can make it more steady to support and size of the pot while itself can smaller and delicate.
  3. This experiment taught me that though it might looks impossible to realize you idea I the first step, but all the object in the world is a continuums, just try every effort on the next step and you will finally make it.
  4. from

    to

  5.  

Recitation 5: Processing Basics by Xinran Fan

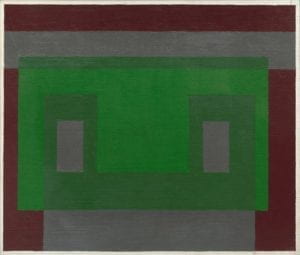
In today’s recitation we are going to practice using the processing to draw. I chosen an image drawn by Josef albers from  Bauhaus School of Arts.

I chose it for it just use some simple cube construct a sense of cyberpunk. The character look like a green robot, while stare at you by a lackluster grey eyes.

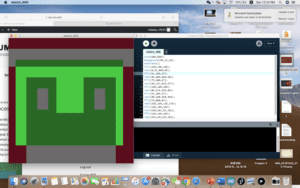
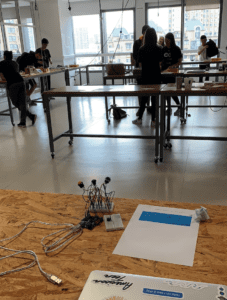
At the first I thought it will be very simple. To begin with, I draw the image in the chart to make sure about the wide and height. Then I set up the canvas size into 600×600 as I learned in the class. Then I used fill to set color. The first problem I met is setting the color, this image use a special dark mix color which hard to reappear. In addition, I used rect function. At that time I realized the main challenge  using the processing to draw something is bear the boring. Using the processing to draw is not like draw by CNC version, each brushstroke and color shape are separate into single coordinate. I really felt sleepy when I measured the cube one by one. I once asked the teacher if I can just draw a stroke and paint the Blank between the stroke and the frame, but get an unpleasant reply. After that, I fought the cube with a black stroke, I checked the reference and use noStroke to fix it.This is the final draft, though the color  still too bright. What’s more, because we can get the accurate coordinate for unavoidable error, my image looks thiner to the original one.
I must say that using processing it is not a ‘drawing’ process for”drawing” is an artistic process. Holding the brush is not only the painter but also the god, by the hand of random. But when using the processing , all the step is too correct to let the freedom exist, meanwhile is too correct to let the art live been the brush.

But we should  permit that precessing also can produce a wonderful art. And once you want to build a complex model as an agency to achieve your goal.

Midterm Project Reflection–Ketong Chen–Inmi

CONTEXT AND SIGNIFICANCE

  According to our previous group project research, we had an idea to design a dancing machine which can help people learn how to dance. The device includes continuous interactive action, you can get an output (the movement of the device) every time you input (see the movement of others). And it has a meaningful aim that is to make people more comfortable and confident to learn dancing. Inspired by it, I want my midterm project meaningful and can solve some real problems. Thanks to my partner Tya, she came up with an idea that we both agree with, which I will explain later. During the past few weeks, I have seen many interactive projects and analyze some of them:

Ethical Things – The mundane, the insignificant and the ‘smart’ (things) https://www.creativeapplications.net/objects/ethical-things-the-mundane-the-insignificant-and-the-smart-things/

the Blanket Project by Nicholas Stedman from  ART + Science NOW, Stephen Wilson (Kinetics chapter)

They both solve some real problem and by analyzing them, I found their idea align with my definition of interaction before —— a cyclic process that requires at least two objects (both animate and inanimate are accepted) individually has its input-analyze-output. Simply, each part included in the process need to be able to react when receiving different types of signal, no matter the relationship is easy or complex. Based on this, I also want to add that the whole process should be meaningful instead of some interesting but meaningless movement. About our midterm project, we made a device which aims to help people focus on their food and friends instead of staring at their cell phone. The device will serve your food only when you place your cell phone in the appointed place. If you use your phone while eating, it will take away your food as a punishment. The idea is not new. During the user testing session, someone told us that in a restaurant from their hometown, the customers can get a discount if they give their phones to the waiter. Compared with it, our project is more interactive since it includes immediate feedback every time you take away your phone from the appointed place or pit it back. The interesting interactive process also appeals to people to put away their phones. Our project is intended for those people who can not help checking their phones when eating and willing to make changes to enjoy the time without cell phones.

CONCEPTION AND DESIGN:

   Since the main task of our project is to encourage people to put their phones at the appointed place while eating, the most important thing we should consider is how to make it clear about where to put the phones. To figure this out, we choose to use laser cutting to create the shape of the phone to remind people what to do. However, due to the size of the Arduino breadboard, we can not make the device thinner to stimulate the plate so it confuses the user what to expect. We hope that using advanced technology it can be made more like a plate so people know what to expect. We first use cardboard to build the whole project but after several tests, we find it hard for it to take the weight of the cell phone, so we change into the wooden board. Also, since we use the FSR sensor to sense the pressure, we have to make sure all the force the phone gives the board could be accurately put on the sensor. To do that, we first considered rubber but later I found sponge more stable and effective. We stick a piece of sponge between the sensor and the board and it works! We also decided to use DC motors to make the wheels and H-bridge to change the direction the wheels rotate.

FABRICATION AND PRODUCTION:

   During the process making the process, we met countless difficulties, I will just mention some really hard ones. In the beginning, we tried to use the tip122 and diode to build the circuit with DC motor. We thought it should be easy since we have covered it in class. But when four motors connected, it had troubles. Only one of four worked. After many times checks, I found that I plugged the diode in the wrong way so it stops the current. I was so excited it worked! But soon after that, we notice that it is hard to change the direction it rotates, we need to use the H-bridge. So we start from the beginning. We referred to the use of the H-bridge in the class note and successfully make four motors work. As for the FSR sensor, we googled the circuit and connect it to the Arduino board.

Image result for fsr sensor arduino circuit

As for the code, I was confused about how to let the motor rotate when the sensor senses the pressure and rotate in the opposite direction when the pressure is zero. I tried to write a few times but fail. Luckily, my partner knows a lot about coding and she helped me to have a better understanding of the code and we control it successfully. Here is the code:

int outValue = 0;

void setup() {
// put your setup code here, to run once:
pinMode(8, OUTPUT);
pinMode(9, OUTPUT);
pinMode(10, OUTPUT);
pinMode(11, OUTPUT);

pinMode(2, OUTPUT);
pinMode(3, OUTPUT);
pinMode(4, OUTPUT);
pinMode(5, OUTPUT);
Serial.begin(9600);
}

void loop() {
// put your main code here, to run repeatedly:
int phone = analogRead(A0);
Serial.println(phone);
if (outValue < 20 and phone > 60)
{
outValue += 1;
digitalWrite(8, HIGH);
digitalWrite(9, HIGH);
digitalWrite(10, HIGH);
digitalWrite(11, HIGH);
delay(20);
digitalWrite(8, LOW);
digitalWrite(9, LOW);
digitalWrite(10, LOW);
digitalWrite(11, LOW);

}
if (outValue > 0 and phone < 60)
{
outValue -= 1;
digitalWrite(2, HIGH);
digitalWrite(3, HIGH);
digitalWrite(4, HIGH);
digitalWrite(5, HIGH);
delay(50);
digitalWrite(2, LOW);
digitalWrite(3, LOW);
digitalWrite(4, LOW);
digitalWrite(5, LOW);

}

}

During the user testing session, people all knew they should put their phone on the appointed place, but most of them were confused about the meaning of doing it. So to make our aim more clear, we put some candies in the “plate”(actually it looks like a car) to indicate the food and is much more better.

The first version:

The final version:

CONCLUSIONS

Our goal of the project is to encourage people to put away their phones while eating and focus on their food and friends to better enjoy their lives. From my perspective, our project aligns with my definition of interaction since the input is to put down the phone or take away while the output is the movement of the “plate”. However, through the observation of the audience interact with our project ultimately, we found that they understood the goal of the project but put their hands instead of their phones to “cheat” to get the candy. So if we have more time, we will figure out a way to allow the sensor to only recognize the phone. Also, we need to make it more appealing to people so they are willing to put their phone at the appointed place. During all the failures, I learned to be more patient and do not be afraid to ask for help and try again. I am also encouraged by our success for it gives me the confidence to learn new things.


Simon : Midterm Project – Lillie Yao

CONTEXT AND SIGNIFICANCE:

For my midterm project, my partner and I decided to do a fun interactive game. Although this game and the concept of this game already exists, my partner and I still tried to challenge ourselves and re-create our own version of it. We brainstormed some ideas before actually deciding on our project, “Simon.” We chose this because it incorporated buttons, speakers, and LED lights that we could use all together and create one machine. Although this is sounds like a simple project, it was certainly challenging to accomplish. My previous group project didn’t really have that much inspiration for my midterm project but our basic understanding of interaction did carry through.

My definition of interaction is where there is a constant loop between the user and the machine. Likewise, when there is an input, there must be an output; if there isn’t an input, we programmed the game to keep running. “Simon” is obviously a recreation of the “Simon” game where it plays certain lights in a random order and it is up to the user to remember the order. We changed some aspects of the game as in when the user accidentally puts the wrong order, the game will replay the sequence that just went wrong; basically giving the user another chance.

Our project is intended for all ages. Originally I thought it would be more geared towards younger children since it would be a good game that gives them something to do. But I realized after we created this game, that many different students my age, around 18-20 also really enjoyed playing this game and it attracted their attention. I feel like this game is suitable for anyone no matter how old they are.

CONCEPTION AND DESIGN:

During User testing, my partner and I realized a lot of issues with our project when other students gave us input. For example, a lot of people felt that we should make our buttons so that they didn’t have to hold them each time it was being pressed since it was hard to switch around. I would agree because in the beginning, our game looked like a bunch of wires jumbled up together and the user couldn’t tell what they were supposed to do unless they were told to.

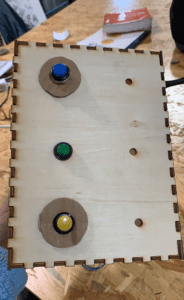
With that being said, we decided to laser print a box so that our buttons and LED lights could sit on top and the cables and everything else was hidden underneath. We selected laser printing because it would be more logical to create a box that way than to 3D print. We chose the wooden design just because we thought it would look more simple and clean that way. 

Another option for us was to 3D print a box but we were told that it was not suggested to since we wanted a hollow box and it would most likely not come out the way we wanted to. To play it safe, we just went with the laser cutting because it was fast and better for our design.

  • FABRICATION AND PRODUCTION:

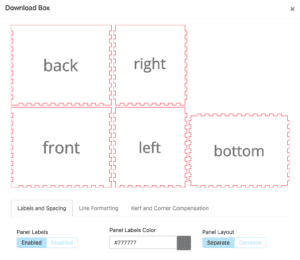
During the fabrication process, we had to make a pdf version of what we hoped to be laser printed. This was challenging because both my partner and i have never done this before. At the same time, it was hard for us to measure the diameter of the buttons and LED lights to fit in the top of our box. After piecing it all together, we realized that the measurements were wrong so we had to improvise and cut out cardboard to place on top of the holes and hot glue around the LED lights.

  • CONCLUSIONS:

 The goal of our project was to create an interactive game that required an input in order to have an output. The result of our project basically sums up my definition of interaction because the game continues to play by itself unless there is an input and therefore an output will be played. Our audience reacted as expected, they were first trying to test out our game and it ultimately took a few tries. My partner and I made the mistake of not putting an explanation to the surface of our game so that our audience would at least know how to start the game. If we had more time, we would have made instructions or some type of recording that would give the user a queue to start and finish as well as directions.

After creating this game. I realized that there are so many different ways to show interaction. Overall, I am really happy with the outcome of our project because this is the most challenging machine that I have built/programmed. I have also learned that your first product will never be perfect and that there is always room to improve, even when you think that you’ve done your best.