Christina Bowllan Recitation 6 Blog Post

For this week’s assignment, I combined our in-class and homework assignment. As you can see, whenever I moved the keys, the box would move around the screen and, at the same time, it would expand and contract while changing colors. [Sent you a video of it] 

  1. In order to do this, I first had to establish the variables that we would use before void setup. So, you can see that I defined “x,y,c” which related to the size and placement of the rectangle and also told Processing that we would be incorporating speed and an expanding/contracting element with the boolean function.  
  2. The next step was to set the parameters of our sketch: the size of the screen was 600 units by 600 units, “x and y” told us where the rectangle is on the screen and c is the initial size of the rectangle.
  3.  In void draw (), this function allowed us to run the lines of code in a loop. The first thing we established was we wanted the border of the rectangle to change colors randomly, so we used the float function in order to do this. Also, within the draw function, we wanted to tell processing that the rectangle should contract and expand, so we used an “if else” statement and the symbols “–” and “++” to do this. This part also relates with the part of code because void setup(), because the boolean statement is where we established what statement will be true or false; You have to do this because in order for the rectangle to expand and contract, processing needs to know what to do when the statement is true, and if is it not, have a condition for that as well. 
  4. Lastly, in order to make the rectangle move around the screen, we used the keyPressed() code. As you can see, in order to make the box go up, for example, I connected the keyboard upper key with going up, hence keyCode=UP, and then in order to make the box itself go up, I used the syntax “y-speed”.

CODE

int x;
int y;
int c;
int Speed;
boolean rectIsShrinking = false;

void setup (){
size(600,600);
x = width/2;
y= height/2;
c= 100;
Speed = 15;

}
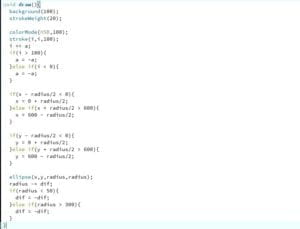
void draw() { // draw() loops forever, until stopped
background(0);
float r= random(255);
float g= random(255);
float b= random(255);
stroke(r,g,b); //random color of border
strokeWeight(5); //width of border
noFill();//no color inside of rect
rect(x,y,c,c); //size of rect and position
if (rectIsShrinking) c–;
else c++ ;

if (c == 0 || c == 150) rectIsShrinking = !rectIsShrinking;

}

void keyPressed() {
if (keyCode==UP) {
y= y-Speed;
}
if (keyCode==DOWN){
y= y+Speed;
}
if(keyCode==LEFT){
x= x+Speed;
}
if(keyCode==RIGHT){
x=x-Speed;
}
}
Recitation 6: Processing Anime by ChangZhen from Inmi’s Session

·Animate Recitation 5

From top left to bottom right, the arc around the clef’s circle at its bottom will change. The color of the big circle face in the lower layer will randomly change as the player keypresses any letter in the word “music”.

void setup() {
size(700,700);
background(255);
// background rainbow
colorMode(HSB, 100); // set upper bound color parameter 100
for (int i = 0; i < 655; i++) {
for (int j = 0; j < 660; j++) {
stroke(i/7, j/7, 100);
point(i+23, j+18);
}
}

stroke(#4D1946);
strokeWeight(5);
noFill();
rect(20,20,660,660,20);

strokeWeight(20);
stroke(50);
arc(350,350,600,600,0,PI,OPEN);

stroke(100);
arc(350,350,600,600,PI,2*PI,OPEN);

strokeWeight(5);
stroke(90);
fill(#5A256F);
arc(350,350,584,584,0,PI,OPEN);

stroke(70);
arc(350,350,584,584,0.99*PI,2.01*PI,OPEN);
}

void draw() {
noFill();
// top downward neath
strokeWeight(15);
stroke(50);
line(320,150,370,410);
// mid up
strokeWeight(30);
stroke(20);
bezier(300,450,220,350,570,350,380,510);
// mid down
strokeWeight(20);
stroke(10);
bezier(380,510,350,520,240,530,210,410);
// top
strokeWeight(15);
stroke(90);
bezier(360,45,300,60,320,140,320,150);
// left down upward
strokeWeight(35);
stroke(70);
bezier(210,410,200,250,520,230,360,60);
// bottom above
strokeWeight(15);
stroke(30);
bezier(370,410,420,640,370,690,300,660);

// bottom circle
fill(30);
noStroke();
circle(300,620,90);
// circle highlight
int kakdo = mouseX + mouseY;
noFill();
stroke(60);
strokeWeight(10);
arc(300,620,80,80,0,kakdo*PI/width,OPEN);
}

void keyPressed() {
if (key == ‘m’ || key == ‘u’ || key == ‘s’ || key == ‘i’ || key == ‘c’)
{
int b = int(random(50, 100));
noStroke();
fill(82,30,b);
circle(350,350,400);
fill(82,60,b);
circle(350,350,250);
}
}

·Additional Work

1. Create Static Image

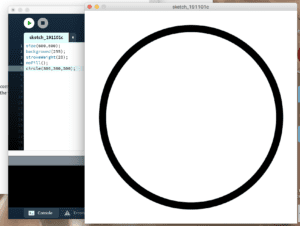
2. Make the Circle Contract and Expand

int d = 50;
int speed = 5;

void setup() {
size(600, 600);
}

void draw() {
background(255);
strokeWeight(50-d/10);
circle(300, 300, d);
d = d+speed;
if(d==500 || d==50) {
speed = -speed;
}
}

Step2

3. Add Changing Color to Stroke

int d = 50;
int speed = 5;
int h = 0;

void setup() {
size(600, 600);
colorMode(HSB, 359, 99, 99);
}

void draw() {
background(359);

stroke(h);
h += 1;
stroke(h,70,100);

strokeWeight(50-d/10);
circle(300, 300, d);
d += speed;

if(d>=500 || d<=50) {
speed = -speed;
}

if(h>=359) {
h = 0;
}
}

/* If (there’s no colorMode()) {

color will tentatively be 0~255, **(r, g, b)  ||  **(grey) }

Since here’s colorMode(HSB, 0~359, 0~99, 0~99),

**(grey)’s domain will be 0~359 black to white. */

Step3

4. Key and Mouse Interaction

int d = 100;
int speed = -3;
int h = 0;
float x = 300;
float y = 300;
float vtc = 0;
float hrz = 0;
float ran = 0;
float dom = 0;

void setup() {
size(600, 600);
colorMode(HSB, 359, 99, 99);
}

void draw() {
background(359);

// Arts
stroke(h);
h += 1;
stroke(h,70,100);
strokeWeight(10-d/10);
circle(x, y, d);
d += speed;
if(d>=100 || d<=20) {
speed = -speed;
}
if(h>=359) {
h = 0;
}

// Move
ran = random(-1,1);
dom = random(-1,1);
x += hrz+ran;
y += vtc+dom;

// Check
if (x > 600) {
x = 600;
hrz = 0;
vtc = 0;
}
if (y > 600) {
y = 600;
hrz = 0;
vtc = 0;
}
if (x < 0) {
x = 0;
hrz = 0;
vtc = 0;
}
if (y < 0) {
y = 0;
hrz = 0;
vtc = 0;
}
if (mousePressed) {
x=300;
y=300;
hrz = 0;
vtc = 0;
}
}

void keyPressed(){
if(key == CODED) {
if(keyCode == UP) {
vtc += -1;
}
if(keyCode == DOWN) {
vtc += 1;
}
if(keyCode == LEFT) {
hrz += -1;
}
if(keyCode == RIGHT) {
hrz += 1;
}
}
}

Special keys go with keyCode, unlike if(key == ‘a’, ‘s’, ‘d’, and ‘w’).

Put into keypressed() {} so that only when keypressed will the code part run.

I use velocity and acceleration to describe the object’s move.

Recitation 6: Processing Animation – Lillie Yao

Recitation Exercise: For this weeks recitation, we had to work individually to add some sort of animation into a project that involved interaction. I chose to add onto the project that I created during last weeks recitation.

I coded so that the background would change colors every time I pressed the mouse button on my computer. At first, I couldn’t get the mousePressed() command to work because I just added it to the bottom of my code that I previously had. I realized that I needed to put all of my previous code into void draw() in order for the mousePressed to command to run and put size(600,600) inside void setup(). After I did that, my code ran and worked perfectly.

My code:

void setup(){
size(600,600);
}

void draw() {
fill(255,0,0,220); // big red circle
noStroke();
ellipse(350,100,65,65);

fill(0,0,0,220); //big black rectangle
noStroke();
quad(20,100,440,100,470,170,50,170);

fill(255,255,0,130); // big yellow rectangle
noStroke();
quad(270,30,320,30,410,210,360,210);

fill(255,255,255,180); // big white rectangle
noStroke();
quad(280,120,410,120,330,270,200,270);

fill(0,0,0,150); //small black rec
noStroke();
quad(160,230,280,230,290,250,170,250);

fill(255,0,0,130); // small red circle
noStroke();
ellipse(240,230,20,20);

fill(255,255,0,100); // small yellow rectangle
noStroke();
quad(195,190,215,190,255,260,235,260);

fill(0,0,0,100); // small black trap rectangle
noStroke();
quad(230,235,260,235,235,280,205,280);
}

void mousePressed() {
int r = int(random(0,255));
int g = int(random(0,255));
int b = int(random(0,255));
background(r,g,b);
}

Additional homework:

Step 1/2:

In this step, we had to code a circle shape that increased and decreased in size. I coded it so that the circle would get bigger and smaller when I pressed the “Up” and “Down” key. I don’t have the exact code as I kept adding to the original to create up to Step 3.

Step 3:

In this step of the assignment, I had to make the circle change multiple colors smoothly. I had the most trouble doing this because I couldn’t figure out where to put the code and what commands to use. I experimented with float and colorMode. I had problems because the circle would not change rainbow colors (instead grayscale) and it wasn’t moving smoothly either. In the end, I ended up only using colorMode and just declaring a color outside of the void setup() function. It was very interesting to use colorMode, float, and declaring the color function because I have never used that before. Although colorMode was hard to figure out, it definitely made my code much simpler than before.

My code:

int y = 0;
color c = color(0,150,255);
void setup(){
size(600,600);
colorMode(RGB);
}

void draw(){
background(255);
noFill();
// float c = random(0,255);

ellipse(width/2, height/2,y,y);
strokeWeight(18);
if (key == CODED) {
if (keyCode == UP) {
y–;
stroke(c–);
} else if (keyCode == DOWN) {
y++;
stroke(c++);
}
}
}

Recitation 6: Processing Animation by Ian (You Xu)

Recitation

For the recitation, based on my work for the last recitation, I want to make some animation by clicking the mouse. I found there are some quadrangles in certain positions on the canvas. Therefore, I want to make them rotate while clicking. I started with an easier task which makes one block of shape appear and disappear by every click of the mouse. I shared some major progress I made during the process of achieving it.

void mousePressed() or if(mousePressed)

First all, I put the code under corresponding void setup and void draw function. Then I modified the code for drawing the first shape on the topic. I set the algorithm that in every loop of draw function, when the mouse is pressed (I use if(mousePressed) here), if the shape is drawn last time, then do not draw this time, vise Versa. Then I tried to run the code, and I found the problem.

As the video shows, when clicking the mouse once, the shape is flashing. I soon realized the problem that in class, we discussed the difference between void mousePressed() and if(mousePressed). Since I use if(mousePressed) here, within the time of every click, the code may have been executed multiple times, making the shape flashing. And this is not what I want. Therefore, I moved this block of code under the function of void mousePressed(). Then, the code will only be executed once for every click.

Creating a list

Then, I started to code for rotating the quadrangles in the middle of the canvas. Since I want the quadrangle to rotate certain angles every time, I recalled what I learn about Python’s “list” data type. I want to store all the rotating angles into a list so that I can call it easily without writing it every time. However, when I tried to declare a list variable, processing responded to me with an error message. Therefore, I searched online for the correct use of the list data type in Java. I learned at https://www.w3schools.com/java/java_arraylist.asp about the declare, add an item, access item for a list and applied it to my work. By using for loop, I added 10 different angles with equal intervals into the list.

ArrayList<Float> angleList = new ArrayList<Float>();

  for(int i = 0; i <= 20; i++){

    angleList.add(PI*i/10);

  }

rotate() and translate ()

Then I was trying to make the quadrangle rotate. By checking the reference, “rotate()” is straightforward to use. However, when I first put the angle into the rotate function, I met two unexpected problems. The first one is that when I clicked once, the majority of the shapes rotate. I then realized the rotate function makes all the following drawings rotate. So, I add a line of code that “rotate(-angleList.get(rotate_1));” to rotate the rest of the shapes back to the normal place. However, this time, when I click the mouse, the quadrangle disappeared.

I tested it for different angles, then I realized that the quadrangle is rotating around the (0, 0) instead of the center of the shape so that it went outside of the canvas. Then I recalled the “translate()” function we discussed in class but I was not sure how it could be useful at that time. I then figured it out by translating the origin point to the center of the shape, then rotate it. After that, I translated it back so that it would not affect other drawings.

Note: I only code for one quadrangle since for others, it only repeats the steps above without additional difficulty level.

Homework Assignment

Scale()

Step 1 is very straight forward to me. However, when doing step 2, I intuitively want to use scale() function. I tried to use “scale(1.1)” and assumed that while every loop of the draw function is executed, the circle will expand to 1.1 times than before. However, it did not perform in this way. The circle remained still. Then I realized since every time it will draw a new circle so that the magnification did not change. So I abandoned using scale() and applied another variable to update the diameter within every draw loop.

HSB

By applying the hint, I set the color mode to HSB. However, the color is always black when I adjust the value of H. Then I looked it up online and did some research about how H, S, and B will affect the color. In Erik D. Kennedy’s “The HSB Color System: A Practitioner’s Primer,” it describes that “Hue = “Color of the Rainbow”, Saturation = “Richness”, and Brightness = Brightness, Duh.” The website also gives some examples. Based on it, I realized that I need to set S and B to a higher value and make H changing to fulfill the requirement of the assignment. Step 4 is straight forward as well since we had some similar practices during class.

Interesting function:

rotate()

translate ()

ArrayList<Float>

colorMode(HSB)

void mousePressed()

code for recitation: link to google drive

code for assignment: link to google drive

Recitation 6: Processing Animation – Zhao Yang

In class:

During this recitation class, we were required to make an interactive animation by Processing. Here it is what I made. 

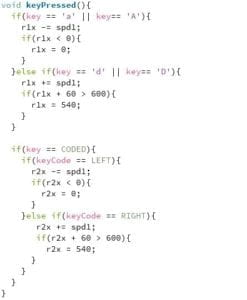
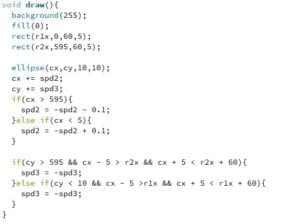
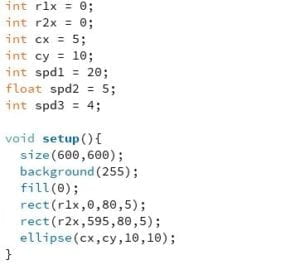
Basically, it’s an interactive marble game requiring two players. Each player controls one board through the keyboard. Their goal is to keep the ball on the canvas. If the ball touches the board, it will be reflected. If not, it will fly off the screen. And the codes are attached. 

Setup function:

KeyPressed function:

Draw function:

Homework:

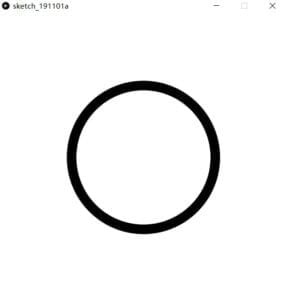
Step1:

Step2:

Step3:

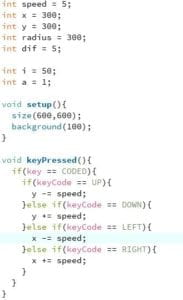
Step4:

Code:

In this recitation class, I learned that the logical structure of the code is really significant. Since when I coded my interactive animation, I spent a lot of time coding the control of two boards, I found that the sequence of the code could make the final output different. Thus, when we code our project, we need to always figure out the logical structure of the code first. Otherwise, the output could be different from what you expected. For example, for the exercise in class, I wrote the function of drawing three shapes in the setup function. And then I wrote the code to change the position of the boards in keyPressed() function. However, in this way, when I pressed LEFT or RIGHT, the previous shape was still there so that there exist so many overlapping rectangles. This is not what I wanted. Thus, I wrote them in the draw() function. Since the draw() function is a loop, it can refresh the screen after executing it. Finally, I got what I expected at first. 

The list of the functions that I used:

  1. setup()
  2. draw()
  3. keyPressed()
  4. colorMode()