Final Project Essay by Eric Shen

Project Title: 

        Puppet

Project Statement of Purpose: 

        In this project, we will put a marionette that is controlled by servos on a mini stage with curtains and other decorations.  The shadow of the marionette  that is drew by Processing would be cast on the wall behind the stage with a projector. The movement of the joints of the marionette drew by the Processing can be controlled by users with a mouse.  Data of these gestures would be passed from Processing to Arduino. The real marionette on the stage would first quickly and randomly change a series of postures, and finally stops at the pose set by the user in Processing before. We will add other details for decorations in oder to amplify the visual impact of this project on users. 

         In order to make this project, we have to address challenges like figuring out the actual mechanism of a real marionette in order to code the servo motors that are used to control the movement, making it clear about what different variables in both Arduino and Processing stand for to make the control of the movement more precise and coming up with ideas about how to let the audience understand the underlying purpose of the project by using some visual or audio hints. Through interacting with this project, we hope that the audience would identify with the puppet. We consider the puppet as a representative of those people who try to create a social image about their true self without worrying about any social expectations or stress in life but eventually fail and become what the social expectation from others want them to be. 

Project Plan:

        From Nov. 21st -24th, we will first collect information and do more research on our project. This includes watching more videos about marionette and getting a real marionette to first figure out the mechanism of the marionette and how to arrange the servo motors based on the mechanism. Moreover, we need to make an exact plan to follow which involves the details for the aesthetics and draw a draft of the expected effect of our project. From Nov. 20th -30th, we will first get all the material prepared. Then we need to complete the coding in both Arduino and Processing and test whether they can work separately. According to the process of doing the project,  we need to make some adjustment to the original plan to cope with unexpected situations. From Dec 1st-10th, the plan is assembling all the Arduino and Processing together, and then adding details for aesthetics of our project. If it is possible, we will ask several students to have a user test of our project and then collect feedbacks from them in order to make some final adjustments. 

Context and Significance:

        My research and analysis on the exhibit called “Rechnender Raum” in the Chronus exhibition, triggered my thought to use strings as an mechanism of movement. To begin with,  my definition of interaction would be: a cyclic process in which at least two characters take reciprocal actions that contain physical input and output to each other. User’s using mouse to control the position of the marionette can be considered as physical input. The marionette controlled by servos and the marionette drew by Processing would both react to user’s input which can be considered as output. The intended audience are those people who meet the social expectations in their real life, whether they are willing or not because the marionette can be considered as a representative of those people. Therefore, we hope that our project can lead to people’s reflection on whether or not they should meet social expectations at the cost of losing their true self. The subsequent projects can use multiple marionettes that use the same mechanism controlled by servos and Processing to create a complete story. The projects can either be for children to create their own fantasy stories or for adults to use it as a tool to reveal some thought provoking social phenomenon. 
Final Project Essay—— Leah Bian

Project Title: Puppet

In “The Future of Design: When you come to a fork in the road, take it”, the author discusses the significance of human-centered design. It requires a deep understanding of people and involves careful observations and analyses to determine needs. When working on the project proposal, I applied the main concept of human-centered design to our project. We first came up with the theme of puppet, which always represents those who are controlled and follow commands. We further developed the theme by extending it to the concept of social image. Based on this theme, we developed our design by thinking about how we can utilize Arduino and Processing to express this idea. We found that the Arduino servo is a perfect choice to control the movement of the marionette, and Processing can be used for the interaction, letting the user control the marionette in an indirect way. We then came up with our further plan and recorded it in the proposal. A miniature stage with stage curtains and lighting will be set, on which we will place a marionette. The marionette will be connected to the Arduino servos on the roof with strings, so that it can change poses. On the wall behind the miniature stage, we will cast the Processing image with a projector. In Processing, we will draw the shadow of the puppet. The users can control the moveable joints of the puppet by the mouse. Data of these gestures would be passed from Processing to Arduino. The real marionette on the stage would first quickly and randomly change a series of postures, and finally end up with the pose set by the user in Processing before. In addition, we will try to enhance the artistic appeal of the installation with music, lighting and so on. The potential challenges include how to accurately pass the data of the puppet’s poses from Processing to Arduino; how to connect servos with the puppet smoothly with the correct mechanism; and how we can convey the heavy topic in an implicit way.

After submitting the proposal, we made a plan to make our tasks clear. From Nov. 21 to Nov. 24, we will first collect general information. We will get a marionette to figure out how the mechanism works and how we can modify it to connect it with servos. In addition, we will make final decisions about how the image in Processing will look like to convey our theme; what else we can do to add aesthetic values; what the materials that may involve are… We will draw a draft of the final work as well. From Nov. 24 to Nov. 30, we will get the code done. During that week, we will also start to prepare the materials (start to do 3D printing). If necessary, we will make some modifications to the original plan. From Dec.1 to Dec. 10, we will assemble all the materials together and add some detailed decorations to enhance the aesthetic values, such as lighting, music, background settings and so on. We will invite some peers and IMA fellows to test our project, and collect suggestions from them to make final modifications.

In my preparatory research and analysis, I wrote my personal definition of a successful interaction experience. In my opinion, the process of interaction should be clear to the users, so that they can get a basic sense of what they should do to interact with the device. Various means of expression can be involved, such as visuals and audios. The experience could be thought-provoking, which may reflect the facts in the real life. Our project aligns with my definition of interaction well. It aims at those who intentionally or compulsively cater to the social roles imposed on them by the forces in the society. The user plays the role of the forces that decide our social images, while the puppet on the stage represents ourselves, who are constrained by the social expectations. The “struggle” that the puppet has before it stops with its final pose represents our mental struggles when pondering whether to meet social expectations. However, we ultimately make the passive or initiative choice that satisfies the forces just as what the puppet does. We expect that the user can be inspired by this artistic installation, gain new thoughts, or have reflection. The marionette on stage may be clownish, but it is more than that. We hope that we can find the balance between entertainment and artistic expression, and finally convey our theme to the audience.

Reference: 

“The Future of Design: When you come to a fork in the road, take it”:

https://jnd.org/the_future_of_design_when_you_come_to_a_fork_in_the_road_take_it/

Recitation 8 Documentation

Exercise 1: Make a Processing Etch A Sketch

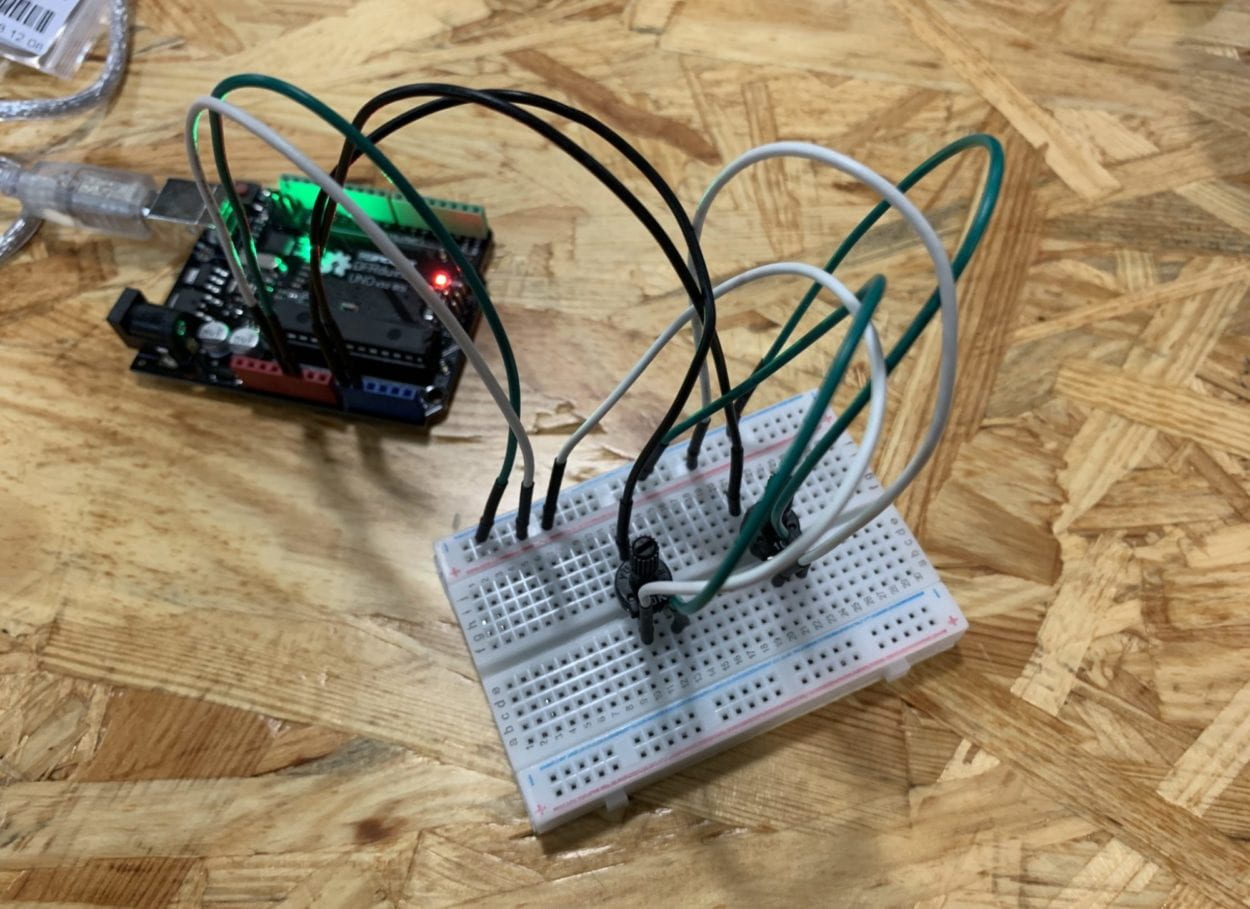
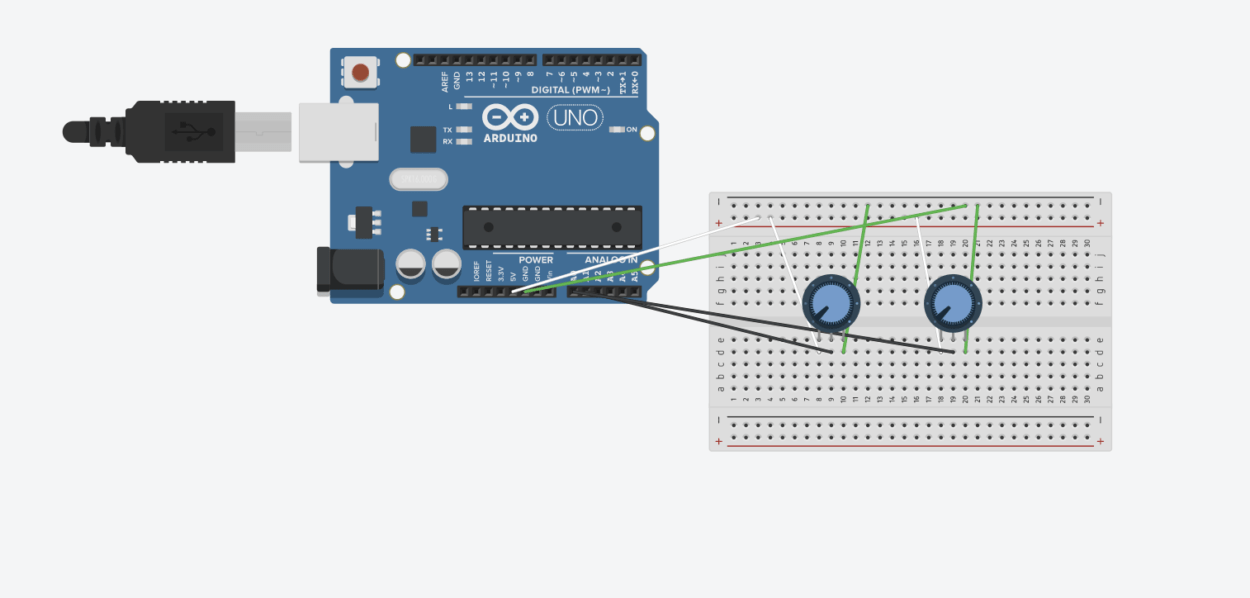
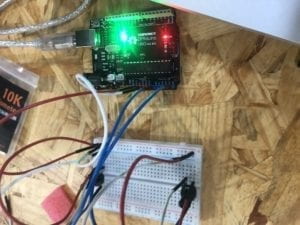
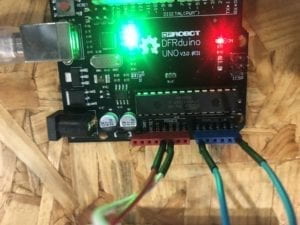
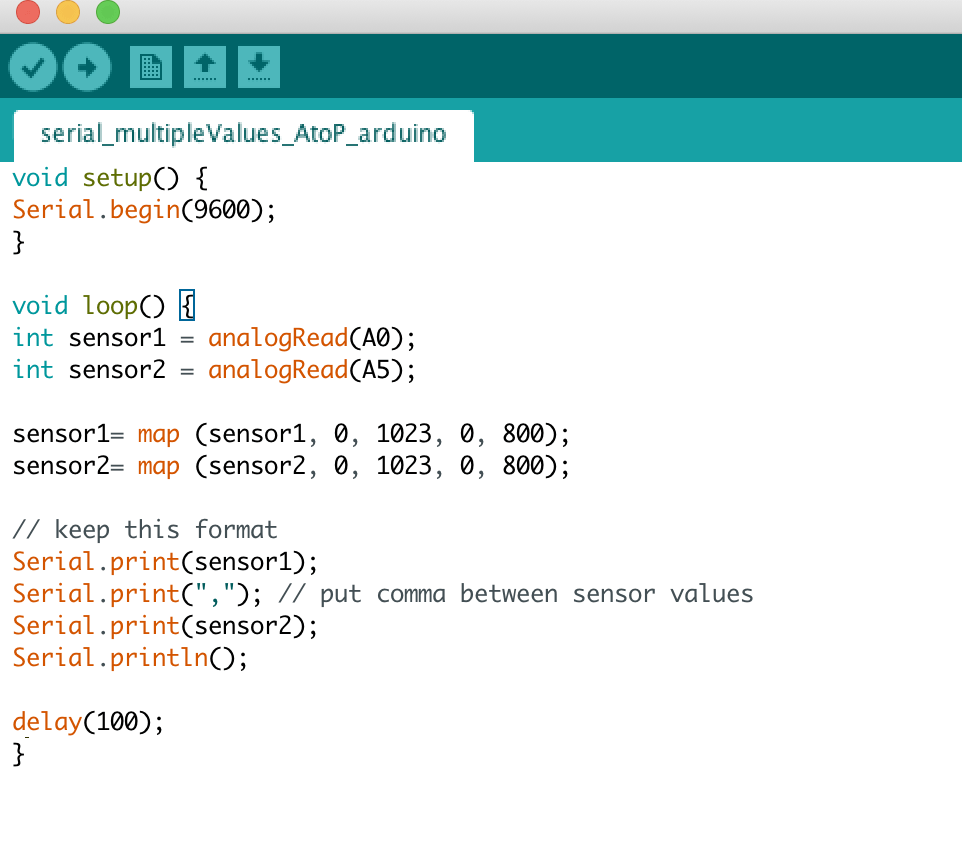
 For exercise 1, we were to use serial communication within Arduino and Processing to send two analog values from Arduino to Processing, first building a circuit with two potentiometers that would read the x and y values of the Etch A Sketch. One of the potentiometers would have to read the “x” values, while the other potentiometer would read the “y” value, in order to create the drawing by turning the potentiometers. Utilizing the serial_multipleValues_AtoP file from class, I modified the code slightly so as to make sure the mapped values would correspond to the correct potentiometers. The circuit was fairly easy to assemble, with the most challenging part being the connection between Arduino and Processing. I had trouble getting the line to be stable, but discovered it was due to loose wiring between the potentiometers on the breadboard.

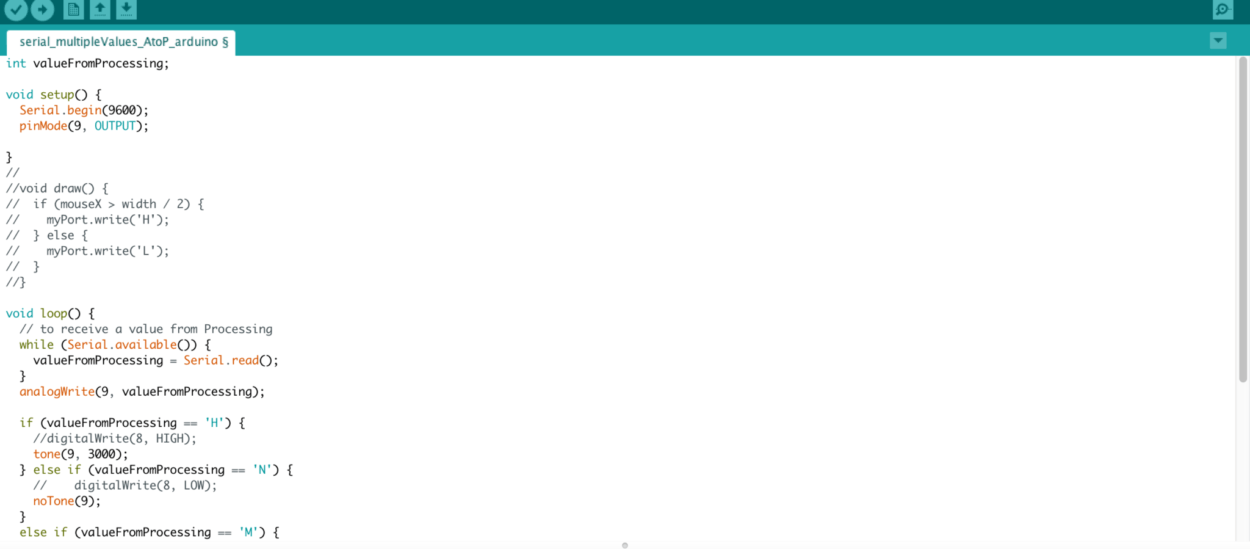
Arduino Code:

Processing Code:

import processing.serial.*;

int NUM_OF_VALUES = 2;
int[] sensorValues;

int prevX;
int prevY;

String myString = null;
Serial myPort;

void setup() {
size(800,800);
background(0);
setupSerial();
}

void draw() {
updateSerial();

printArray(sensorValues);
stroke(250,250,250);
line(prevX, prevY,sensorValues[0],sensorValues[1]);
prevY = sensorValues[1];
prevX = sensorValues[0];
}

void setupSerial() {
printArray(Serial.list());
myPort = new Serial(this, Serial.list()[4], 9600);
// WARNING!
// You will definitely get an error here.
// Change the PORT_INDEX to 0 and try running it again.
// And then, check the list of the ports,
// find the port â€œ/dev/cu.usbmodem—-” or â€œ/dev/tty.usbmodem—-”
// and replace PORT_INDEX above with the index number of the port.

myPort.clear();
// Throw out the first reading,
// in case we started reading in the middle of a string from the sender.
myString = myPort.readStringUntil( 10 ); // 10 = ‘\n’ Linefeed in ASCII
myString = null;

sensorValues = new int[NUM_OF_VALUES];
}

void updateSerial() {
while (myPort.available() > 0) {
myString = myPort.readStringUntil( 10 ); // 10 = ‘\n’ Linefeed in ASCII
if (myString != null) {
String[] serialInArray = split(trim(myString), ",");
if (serialInArray.length == NUM_OF_VALUES) {
for (int i=0; i<serialInArray.length; i++) {
sensorValues[i] = int(serialInArray[i]);
}
}
}
}
}

Exercise 2: Make a musical instrument with Arduino

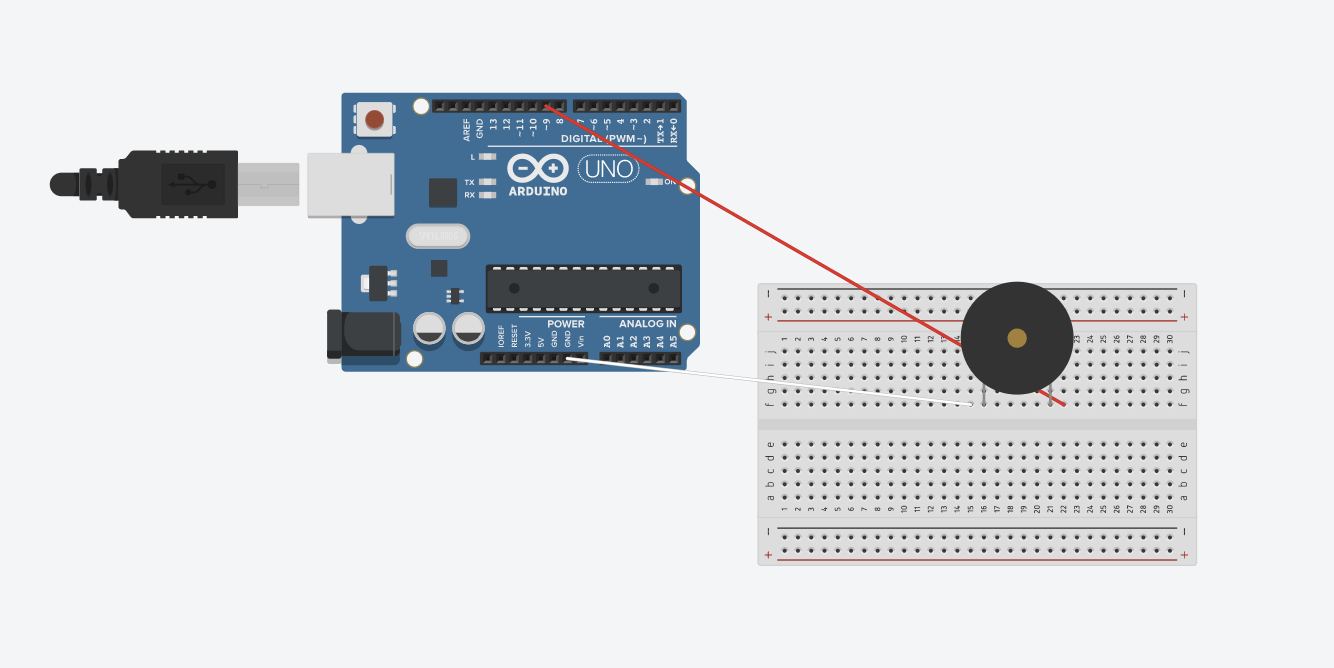
For exercise 2, we were to send values from Processing to Arduino using a buzzer that would play a sound if pressed. We were to map the position of the mouse in respect to the buzzer’s tone. We can use the multiple values from Processing to Arduino for our code, modifying for the duration and frequency of the values. 

import processing.serial.*;

Serial myPort;
int valueFromArduino;

int High;
int Med;
int Low;

void setup() {
  size(500, 500);
  background(0);

  printArray(Serial.list());
  // this prints out the list of all available serial ports on your computer.

  myPort = new Serial(this, Serial.list()[4], 9600);
  // WARNING!
  // You will definitely get an error here.
  // Change the PORT_INDEX to 0 and try running it again.
  // And then, check the list of the ports,
  // find the port "/dev/cu.usbmodem----" or "/dev/tty.usbmodem----" 
  // and replace PORT_INDEX above with the index number of the port.
}


void draw() {
  // to send a value to the Arduino
  High = height;
  Med = 2*height/3;
  Low = height/3;
  if (mousePressed && mouseY > 0 && mouseY < Low) {
    myPort.write('L');
  } else if (mousePressed && mouseY > Low && mouseY < Med) {
    myPort.write('M');
  } else if (mousePressed && mouseY > Med && mouseY < High) {
    myPort.write('H');
  } else {
    myPort.write('N');
  }
  //if (mouseX > width/2) {
  //  myPort.write('H');
  //} else {
  //  myPort.write('L');
  //}
}


Essay for Final Project

Glowing Sound Visualizer

I have made several researches on sound visualizations, the most popular ways are using sand and water, there are also ways of using light and fire. But light is hard to control in terms of many conditions and the projection will be depending, using fire looks cool but it is too dangerous, using water is also hard to control since it will mess up the electronics if not paying attention, so I will do the visualization using sand. And this is realized by using Chaldni Plate, it is a plate that resonates with an amplifier, and when sand is spread on it, it will form certain pattern based on the sound frequency. Also I tend to use the glowing sand, to make the device glow when the plate resonates with the amplifier. To make it look even cooler, I am going to put in a photo frame to make an infinite mirror box, and the glowing pattern of sand will be refelcting in the box. At the same time, the device is going to be controlled by an interface made by processing, and I am also considering using interaction based on makey makey kit, building my own unique sensors to make it more interesting while being interactive. The problem is to figure out how the interaction will be and how the interface will look like. And I think the intended users might be families who needs artistic amplifiers to decorate there rooms or stages that need special light effect.

Firstly, I am going to finish the visualizer as soon as possible. I need to get a photo frame to be used as the plate to hold the sand, and it should be flat and well-balanced, then I need to get an amplifier to combine it with the frame and test whether the sand will change patterns based on different frequencies. This is the most important part which will directly influence the visual part of the project. After making sure the visualizer works, I need to work on the interface and the interaction part, these two should be related to make it understandable and also I need to make it interactive, which is also very important. I think I will do more research on music interfaces and more interesting ways of interacting with sound. The visualizer should be finished at most around the beginning of december, so that everything can be finished in time.

I think that visualizing sound in real life is very interesting and it might be inspiring when we actually see the sound instead of just hearing, offering a different way to feel sound will be an amazing experience. The interaction is direct, you change the sound frequency based on the interface, then the pattern of sand will change according to it, so the user will feel the sound not only by hearing it, but also seeing it. I’m inspired by Nagel Stanford from his video Cymatics about different ways of sound visualization, what I am doing it now is to re-create on one of the ways and adding more ways to feel it, like visual effects, and also make it more interactive instead of just playing specific notes for specific frequencies. If the project is completed successful, I think I will try to build upon making it more appliable, and is for those who want to have another way to feel sound in their life.

Serial Communication – Sarah Chung

Project 1

For this project we re-created an “Etch-a-sketch” using two potentiometers (one controlling the Y axis and the other the X) to control the drawing.Using an outline of a code given in class I changed the AnalogRead so I was able to map the two sensors, I also modified my pin numbers etc. I also did the same for processing inputting and modifying things like the void setup size and defining the x and y accordingly. I also added the voidDraw to my processing.A challenge I encountered was modifying so that the line drawn previously was saved as the drawing continued.I was able to correct this and successfully complete the project.

Arduino project 1 wiringArduino project 1 wiring

My code for Arduino

/*
AnalogReadSerial

Reads an analog input on pin 0, prints the result to the Serial Monitor.
Graphical representation is available using Serial Plotter (Tools > Serial Plotter menu).
Attach the center pin of a potentiometer to pin A0, and the outside pins to +5V and ground.

This example code is in the public domain.

http://www.arduino.cc/en/Tutorial/AnalogReadSerial
*/

// the setup routine runs once when you press reset:
void setup() {
// initialize serial communication at 9600 bits per second:
Serial.begin(9600);
}

// the loop routine runs over and over again forever:
void loop() {
// read the input on analog pin 0:
int sensorValue1 = analogRead(A0);
int sensorValue2 = analogRead(A5);
sensorValue1 = map(sensorValue1, 0, 1023, 0, 500);
sensorValue2 = map(sensorValue2, 0, 1023, 0, 500);
// print out the value you read:
Serial.print(sensorValue1);
Serial.print(“,”);
Serial.print(sensorValue2);
Serial.println();
delay(1); // delay in between reads for stability
}

My code for Processing

// IMA NYU Shanghai
// Interaction Lab
// For receiving multiple values from Arduino to Processing

/*
* Based on the readStringUntil() example by Tom Igoe
* https://processing.org/reference/libraries/serial/Serial_readStringUntil_.html
*/

import processing.serial.*;

String myString = null;
Serial myPort;

int posx2;
int posy2;

int NUM_OF_VALUES = 2; /** YOU MUST CHANGE THIS ACCORDING TO YOUR PROJECT **/
int[] sensorValues; /** this array stores values from Arduino **/

void setup() {
size(500, 500);
background(0);
setupSerial();
}

void draw() {
updateSerial();
printArray(sensorValues);
stroke(255);
line(sensorValues[0], sensorValues[1], posx2, posy2);

posx2 = sensorValues[0];
posy2 = sensorValues[1];

// use the values like this!
// sensorValues[0]

// add your code

//
}

void setupSerial() {
printArray(Serial.list());
myPort = new Serial(this, Serial.list()[ 3 ], 9600);
// WARNING!
// You will definitely get an error here.
// Change the PORT_INDEX to 0 and try running it again.
// And then, check the list of the ports,
// find the port “/dev/cu.usbmodem—-” or “/dev/tty.usbmodem—-”
// and replace PORT_INDEX above with the index number of the port.

myPort.clear();
// Throw out the first reading,
// in case we started reading in the middle of a string from the sender.
myString = myPort.readStringUntil( 10 ); // 10 = ‘\n’ Linefeed in ASCII
myString = null;

sensorValues = new int[NUM_OF_VALUES];
}

void updateSerial() {
while (myPort.available() > 0) {
myString = myPort.readStringUntil( 10 ); // 10 = ‘\n’ Linefeed in ASCII
if (myString != null) {
String[] serialInArray = split(trim(myString), “,”);
if (serialInArray.length == NUM_OF_VALUES) {
for (int i=0; i<serialInArray.length; i++) {
sensorValues[i] = int(serialInArray[i]);
}
}
}
}
}

etch a sketch video

Project 2

For this project we used a speaker to create a musical instrument that would make a sound when the mouse was pressed.This one was a bit more challenging for me as there were a lot of different elements coming together. We incorporated tones as well as mouse press. I encountered many troubles with this project, firstly I had a lot of trouble as my Arduino was not uploading to my board, after a quick reset this was solved and in the end was unable to ensure that for different parts of the screen distinct sounds would be outputted.

My code for Arduino 

// IMA NYU Shanghai

// Interaction Lab
// This code receives one value from Processing to Arduino
int valueFromProcessing;

void setup() {
Serial.begin(9600);
pinMode(9, OUTPUT);

}
//
//void draw() {
// if (mouseX > width / 2) {
// myPort.write(‘H’);
// } else {
// myPort.write(‘L’);
// }
//}

void loop() {
// to receive a value from Processing
while (Serial.available()) {
valueFromProcessing = Serial.read();
}
analogWrite(9, valueFromProcessing);

if (valueFromProcessing == ‘H’) {
//digitalWrite(8, HIGH);
tone(9, 3000);
} else if (valueFromProcessing == ‘N’) {
// digitalWrite(8, LOW);
noTone(9);
}
else if (valueFromProcessing == ‘M’) {
//digitalWrite(8, HIGH);
tone(9, 2000);
}
else if (valueFromProcessing == ‘L’) {
//digitalWrite(8, HIGH);
tone(9, 1000);
}
// something esle

// too fast communication might cause some latency in Processing
// this delay resolves the issue.
delay(100);
}

My code for Processing

// IMA NYU Shanghai
// Interaction Lab
// This code sends one value from Processing to Arduino

import processing.serial.*;

Serial myPort;
int valueFromArduino;

int High;
int Med;
int Low;

void setup() {
size(500, 500);
background(0);

printArray(Serial.list());
// this prints out the list of all available serial ports on your computer.

myPort = new Serial(this, Serial.list()[3], 9600);
// WARNING!
// You will definitely get an error here.
// Change the PORT_INDEX to 0 and try running it again.
// And then, check the list of the ports,
// find the port “/dev/cu.usbmodem—-” or “/dev/tty.usbmodem—-”
// and replace PORT_INDEX above with the index number of the port.
}

void draw() {
// to send a value to the Arduino
High = height;
Med = 2*height/3;
Low = height/3;
if (mousePressed && mouseY > 0 && mouseY < Low) {
myPort.write(‘L’);
} else if (mousePressed && mouseY > Low && mouseY < Med) {
myPort.write(‘M’);
} else if (mousePressed && mouseY > Med && mouseY < High) {
myPort.write(‘H’);
} else {
myPort.write(‘N’);
}
//if (mouseX > width/2) {
// myPort.write(‘H’);
//} else {
// myPort.write(‘L’);
//}
}

Video for project 2

Reflection

Although this recitation was particularly difficult, I found it interesting utilizing these two programs to make fun and random projects. Both of which required a lot of help from friends and fellows, however in the end I was able to get both projects to (kind of) work.