Recitation Two: Nate Hecimovich

Recitation 2: Arduino Basics

Partner: Dominick Nardone 

Circuit One: Fade

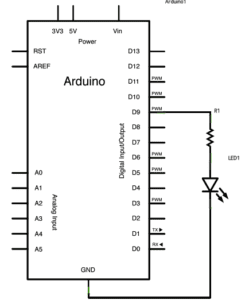
For this circuit we went built the circuit given to us in the recitation picture using simply a resistor and an LED and copying the fade code from Arduino.  It was overall and easy circuit to construct and code resulting in a LED that would flash brightly then fade.

Circuit Two: Tone Melody

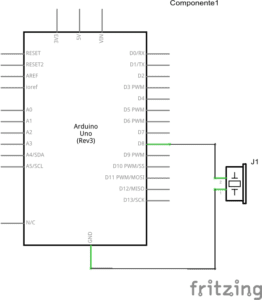
For this simple circuit all we needed to do was attach a speaker to an output slot on the Arduino and insert the code that played the melody from one of the premade options in the program.  I found myself curious about what note makes what sound in the code and how many sounds were possible to create.

Circuit Three: Speed Game 

This circuit was far more complicated than the other two and we had to consult the tinker cad website for the exact design.  For this we needed buttons, resistors, LEDs, a speaker, and more than a couple wires.  However, we were able to build a working circuit after copying the code given to us.

Circuit Four: Four Player Speed Game 

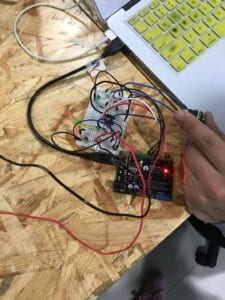
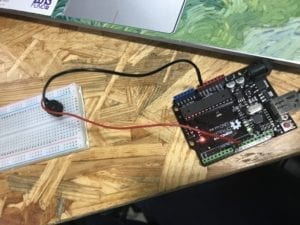
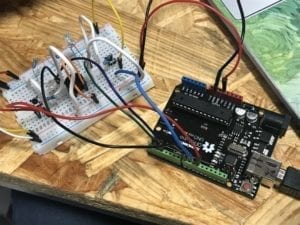
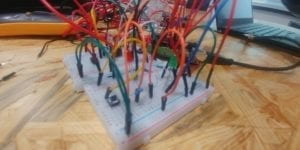
For this circuit we merely attempted to recreate the already existing one we had on another bread board and connect the two with a wire from positive to ground and visa versa connecting the two boards.  Tom worked on the coding by adding to more outputs for each LED as well as two more inputs for the buttons.  However, we were unable to get our game to work as only two of the LEDs functioned correctly while the other two did not light up.
Questions:

  1.  For the most part I interact with technology in the stupid way referenced in this weeks reading.  I do not often use full body movements or advanced communication methods to interact with my technology.  Instead, I tap and tap and tap on keys in my computer and on the screen of my phone.  For this class however I was able to interact in a new way by building the circuits myself yet the tapping on the button was still the input method.
  2. If I had 100,000 LEDs of any brightness or color I would put myself in a very dangerous and precarious situation.  One one hand I would really wanna mess with people and make fake runways near airports promoting pilots to land their aircraft on highways or in back yards creating chaos on an never before seen scale.  Knowing this to be my intention and realizing this would end in a life in prison I would probably sell said LEDs for money to pay back my student loans or wreck havoc on NYUSH until more financial aid was granted.
Isaac Schlager Recitation 2 Documentation (Eric Parren)

Circuit 1 Schematic, Photo, and Demonstration

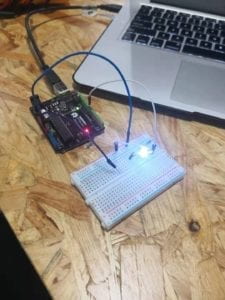
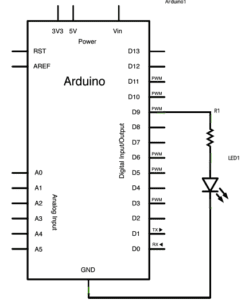
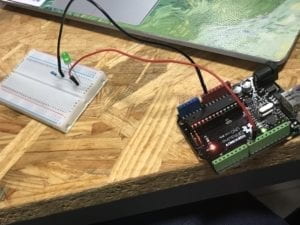
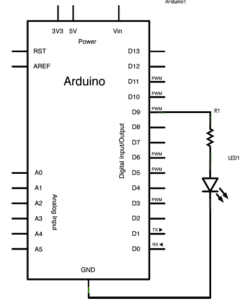
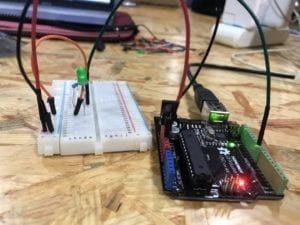
The circuit’s purpose was to have a fading light come from an LED. This involved using the Arduino, an LED, and a 10k ohm resistor. To make this circuit work productively, we used the “Fading” example for code and then had a power source connected to D9 input. From there we used a breadboard and had the power cable going from the Arduino to a 10k ohm resistor and then running through an LED lights before returning to ground in the Arduino. Once we uploaded the code to our arduino, the fading of the LED worked perfectly and we has no issues. This made us both eager to tackle the next circuit and see if we can use other Arduino programs with lights successfully.

Circuit 2 Schematic, Photo, and Demonstration

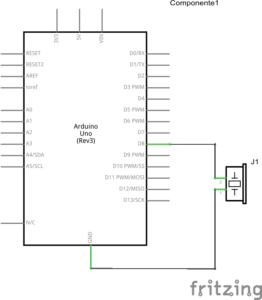
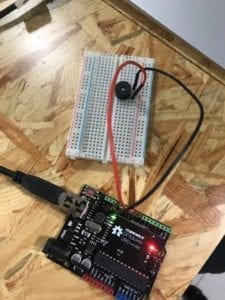
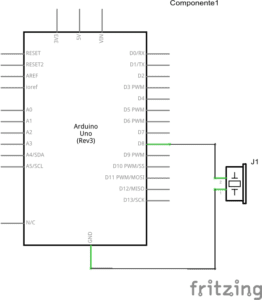
This next circuit’s purpose was to play a melody through a buzzer/ speaker. Our power source came from input D8 on the Arduino and ran into a buzzer/ speaker. From there, the circuit was connected back to ground on the Arduino. To run our code we went to the toneMelody example in the digital section and uploaded it to our Arduino. From there we were able to hear the melody being played and were lucky that we ran did not run into any issues with this circuit as well.

Circuit 3 Schematic, Photo, and Demonstration

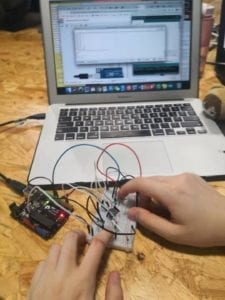
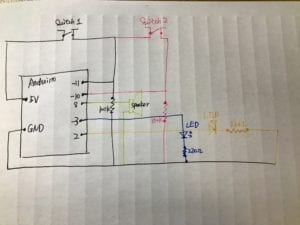
In the 3rd and final circuit, we were tasked with creating a game in which two people could see who could tap a button faster within a given number of taps. If completed correctly, the Arduino program was to let us know when to begin and whoever was the winner had an LED light that was to light up if they won.To begin the circuit, we had a 5 volt input as our power source. We also had one input each from D10 and D11 that each connected to its own set of one switch and 220 ohm resistor before going to ground. We also had two inputs from D3~ and D2 that each ran through its own set of one LED light and a 10k ohm resistor before running back to ground as well. The D8 input had a wire that ran from the input to the speaker and from the speaker back to ground. We also had a code that was given to us on the projector that we were to copy and paste into a new Arduino file. With this uploaded, we were able to go to the serial monitor, where words that appeared on the screen would count us down to mashing the buttons. Initially, we forgot to look at the serial monitor when testing our circuit so we looked through each connection an extra time to made sure we were building it correctly. Once we figured this out, we began running the code and the entire circuit and game worked perfectly. We realized that we should always run our code first to see if it works before taking apart the circuit again.

The text “Physical Computing” really put into context for me how I interact with technology on a daily basis. I can now look at things, such as scanning my identification card while I’m entering school and know that those machines are in a digital space. The reading also narrowed down my view of what a computer and computing is, mostly because beforehand I also had the idea that computers looked like a screen, keyboard, and mouse. Now that I know that different methods of transduction and how things are more complicated than simply digital/ analog, input/ output I can see that the order in which things are processed, whether they are parallel or serial matter as well. One thing I found fascinating and that I will definitely keep in mind while I am creating projects in this class is the advice that was given when it came to brainstorming ideas. Despite all the complexities behind programming and making circuits and/ or microcomputers, it is important to look at you idea through its very basic connection and to not overanalyze or try to perfect what you have at first. This is something I have always been prone to do, especially being a social science major and writing tons of papers. I realize that I have to start basic and work my way up. Higher levels of abstraction can actually be a distraction when you begin working on a project because you do not want your ideas to become convoluted. I define interaction as communication between objects, whether they be living or not. I think that many of the parts of a circuit are interactions, just like I think moving an analog stick is an interaction. Circuits and computers are created by a team of things and when one thing goes wrong or has trouble, the entire thing is in jeopardy.

Question 2:

To be honest, I can assume all I want that 100,000 LEDs could lead to a very bright, visible light, but depending on how high in the sky I want them and the weather, they could be difficult to see. Initially, I thought of how practical this light would be at an airport or a shoreline to prevent crashes, but personally I would want to put all of the lights in the sky where they could light up different positive messages to the people below. I would want to put them on some sort of balloon or another device in the air and have they blink in different languages. Then again, I would know exactly what is powering them so I feel like that would inhibit my power sources for this project. If need be, I could make this project stationary as well as place it somewhere where people are in need and try to cheer them up with some sort of light show.

Recitation 2: Arduino Basics by Karen Zhang

Partner: Anna Shi

Introduction:

In the second week’s recitation, we started to learn how to use Arduino and used Arduino to build circuits. Based on last week’s recitation, my partner and I found the first two circuits were pretty easy for us. We finished them one time, but the third one was too difficult and we made lots of mistakes. The third circuit wasted us so much time, and we do not have time to build the fourth circuit.

Circuit 1: Fade

Since we had the schematic and we had practiced building circuits before, we only tried once and the first circuit worked. However, there were still two things that we needed to think carefully. First, make sure all the components are connected to the breadboard. Second, remember to upload Arduino’s code on your laptop! These two things are really simple but easy to forget.

Circuit 2: toneMelody

Like the first circuit, we did encounter any problems. Based on the first circuit, we made a few changes to it, then put our speaker on the breadboard. The speaker started to make its noise.

Circuit 3: Speed Game

The third circuit was much much more difficult than the first two. First of all, we encountered a problem with resistors. We did not know which resistor on the schematic was 220 ohm or 10k ohm. We started to look at the number and color of loops on the resistor to differentiate them, so we spent a lot of time trying to figure out the resistors. But we found out later, by logging into the website and clicking the resistor, we could found out which resistor was on which part. Then, we quickly built our circuit but it did not work. By checking it again and again, we found we might accidentally put the LED light in the wrong place. The longer leg of LED should connect to the hole on the breadboard next to it. And we used so many wires, the wires also caused us a problem to find and fix the problem. Finally, we thought the circuit could work now. But the answer was no! We found Player 2 always won, we tried again and again, something was wrong with Player 1. We asked the instructor for help, we examined it for a long time. Then, the instructor suggested we could change the button and gave it a try. Then we did, and it worked! Plus, the schematic may not be right. 

Question 1:
Reflect how you use technology in your daily life and on the circuits you just built. Use the text Physical Computing and your own observations to define interaction.

When I think about technology in my daily life, the first thing I come up with in my mind is my smartphone. It helps me to access to multiple things I do in my daily life. And I use my laptop to finish all my homework. Technology is strongly involved in our daily practices. In this week’s reading “Introduction to Physical Computing”, physical computing entails the “creation of a conversation between the physical world and the virtual world of the computer.” Physical computing can create interactions between the physical world and the virtual world. By using physical computing, we find we can create the fading light, the sound from the speaker, and even a game that you can play with your friend.

Question 2:
If you have 100,000 LEDs of any brightness and color at your disposal, what would you make and where would you put it?


As a social science student, I think we should give LEDs to children worldwide who don’t have enough light to study at night. But I understand this is Interaction Lab. As my friend proposes, I think I want to build a house with all LEDs of any brightness and color and make my own exhibition in many cities 🙂

Recitation 2: Arduino Basics by Gloria (Yixuan Liu)

Date:  February 22, 2019

Partner:  Molly

Materials:

1 * Arduino Uno
1 * USB A to B cable
1 * breadboard
1 * buzzer
2 * LEDs
2 * 220 ohm resistors
2 * 10K ohm resistors
2 * pushbuttons
2 * arcade buttons
A handful of jumper cables
1 * Multimeter

Circuit 1: Fade

Circuit 1 Diagram
Circuit 1

Given the detailed instruction, we finished this circuit quickly. First, we connect wires with the Arduino board according to the number of pins given by the instruction, then we connected the resistor and the LED on the breadboard, after checking the difference between the two legs of the LED. Then we uploaded the codes for Fade in Arduino IDE, the LED lighted and faded.

Circuit 2: Tone Melody

Circuit 2 Diagram
Circuit 2 

We finished building this circuit quickly since it is quite similar to the previous one. However, the buzzer had no reaction. We cut off the power and found out the problem, which is that we did not press the buzzer to the very bottom. After fixing that, the buzzer played the melody.

Circuit 3: Speed Game

Circuit 3 Diagram
Circuit 3

At first, we spent a long time figuring out how this circuit is connected because there were so many wires in it. Then, we started to put wires into the Arduino board, and set those components on the breadboard. Finally, we connected the Arduino board and the breadboard, and removed redundant wires. However, the circuit had no reaction. After checking the wires, we found out that there was a short-circuit. After removing the problematic wire and executed the code, the computer only recognized the buzzer and player 1’s button. We changed the LEDs since they may be burnt by the short-circuit, and the computer recognized those two LEDs. With the help of a fellow, we change one number of a Digital pin and changed the corresponding number in the codes, and the computer finally recognized the button of player 2. Opening the Serial Monitor, the number of pressing the buttons and the result can be recorded.

Question 1:

Reflect how you use technology in your daily life and on the circuits you just built. Use the text Physical Computing and your own observations to define interaction.

In my daily life, I use technology to not only make my life convenient but also express myself. Taking my laptop, for instance, it stores all the important notes and slides that I need, collects, calculates, and analyzes a huge amount of data that I want, and shows me other parts of the world without letting me move a step. What is more, I use photoshop, iMovie, and many other software to show my life in a more aesthetic way.

For the circuits I just built, technology was used to make interesting connections among the Arduino board, components, and the laptop, which were totally separate before. It was also used to create the interaction between people and the machine by executing certain codes which can create a conversation between these two actors. For example, thanks to technology, the computer can recognize the circuit people built and monitor the speed game. Technology translated the human language into the form that can be understood by computers.

According to the text Physical Computing, interaction is an iterative process to create a conversation between computer and people, letting them listen, think and speak to each other to complete a task jointly. For me, interaction means an activity, in which players’ action has an impact on each other, and they respond to each other.


Question 2:

If you have 100,000 LEDs of any brightness and color at your disposal, what would you make and where would you put it?

If I have 100000 LEDs, I would decorate a park, using a system containing sensors. I would put them on the running track in the park. The speed of LEDs’ flashing would be decided by the speed of people who run by.


Recitation 2: Arduino Basic by Sheldon Chen

The recitation this week focuses on building fading lights, buzzers that sing awfully, and finally the button pressing game that has crazy wires. Specifically, I guess the goal of which is helping us learn the usage of different pins on the Arduino, building complicated circuitry, as well as building our confidence by letting us modify code in an unknown language.

The first circuit was about building a lighting up and fading loop for the LED. In this circuit, we use the PWM to simulate the change in voltage. And it didn’t take us too long before the circuit was built.

However, problems start to arise when we were dealing with the second circuit. In our several trials at the beginning, we weren’t able to have the buzzer singing. At first, we thought the buzzer was broken, but as soon as we switch the wires to the 3.3V, the buzzer was able to make noise again. Eventually, we found that we didn’t move the wire from pin 9 to pin 8, which is responsible for outputting in this circuit. And finally, the buzzer could sing awfully.

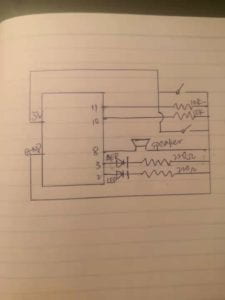
The third circuit was a speed game, where we are expected to use the circuit to see which player can hit the button for 10 times quicker. The faster player would have a LED lit up indicating his winning. And this is a very complicated circuit, with different components connected to different pins on the Arduino, different slots on the bread board, things were pretty messy. We could merely do nothing but to follow the schematic. It took us some time before having the circuit working, as we made several mistakes, such as the orientation of the button and the LED. Though we eventually made the circuit working, when the player one wins the match, the corresponding LED couldn’t light up. It wasn’t until the recitation ended that we discovered we used the wrong resistor on the route of the LED.

Schematic
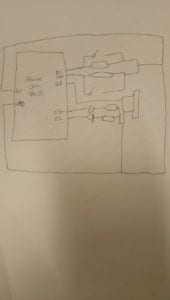
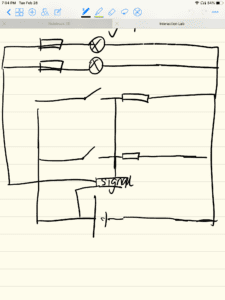
Schematic drawn by myself

The final, giant four-player speed game was another mess. After the code was modified and the circuit being rebuilt, we could only dictate the player one and two’s activity, while the clicks of player three and four keep showing 0, and the code was alright after double-checking. Before we turn totally desperate, someone from other groups reached out to us. It turns out we have misconnected some of the pins while assembling the circuit. It started to work after we reassemble the whole circuit.

Answer to question 1:

In my daily life, the technology that I’m having most interaction with is my iPhone, iPad and mac. And in most cases, I interact with them using fingers and eyes. Sometimes, I could use my voice to command Siri on these devices. What’s more, the iPhone has a step counter. In other words, I’m not merely a monster with eyes and fingers only in the eye of my iPhone. A great example of interaction I can think of, is the Kinect by Microsoft. Instead of using a controller, you can use your body to interact with the console, which is much better than iPhone does. In the speed game, we could only have basic interaction happening, which is using our finger to press the button and our eyes to view the result. The interaction being discussed in the text is about having more parts of our body involving in inputting message to the computer, as well as more parts of our body capable of receiving the output from the computer. In such a way, the interaction between users and computers could be more diverse, and let users really focus on what to interact, instead of how to interact.

Answer to question 2:

If I can own 100,000 LEDs, I would like to put them in different arrays, and the arrays are so dense that the resolution is very high. In this way, I can use the LED array as a giant secondary monitor for my laptop.