Recitation10-clover

What I learned:

1.Map can do many things, not only changing the range of the sensor value from Arduino but also can change the range of the value in processing. It is really useful if I want all my images don’t go out the canvas.

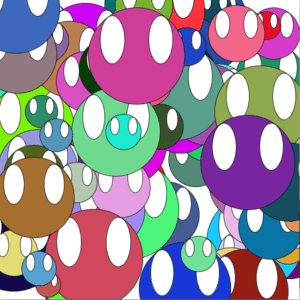
2.I learn how to create many balls using  the add function.

ballList.add(new Ball(random(-10,10), random(-10,10),color(random (255))));

also the  Ball temp = ballList.get(i);     temp.display();     temp.move(); to make the ball spread out and move.

3. The class is a great thing. I can change on another file no need to worry about affecting other function in the original file.

The code for processing:

My interaction is when pressing the Key UP, the ball will appear and spread out.

Ball cloverBall;
Ball cindyBall;
float x;
ArrayList<Ball> ballList = new ArrayList<Ball>(); 

void setup(){
  size(1600,900);
  ballList = new ArrayList<Ball>(); 
  
  for(int i=0; i<100; i++){
  ballList.add(new Ball(random(-10,10), random(-10,10),color(random (255))));
  x=map(x,0,1023,0,width);
  }
  //cloverBall = new Ball(random(-10,10), random(-10,10),color(random (255)));
  //cindyBall = new Ball(5,0,color(0,0,200));
  
  
}
void draw(){
  background(255,255,150);
  if (key == CODED) {
    if (keyCode == UP) {
     for(int i=0; i<ballList.size(); i++){
    Ball temp = ballList.get(i);
    temp.display();
    temp.move();
    } 
    
  }
  }
}
class Ball{
  float x,y;
  color c;
  float spdX, spdY;
  float r;
  Ball(float newSpdX, float newSpdY, color newColor){
    r=50;
    spdX= newSpdX;
    spdY= newSpdY;
    c=newColor;
    
    x=width/2;
    y=height/2;
    
  }
  void move(){
    x= x + spdX;
    y= y + spdY;
    
  }
  void display(){
    fill(c);
    ellipse(x,y,r,r);
  }
  
}
The video recitation10
Recitation 10 Workshops – Stephanie Anderson – 006

Introduction:

This week during recitation, we first received a workshop about the map function, and then we were able to chose which workshop we wanted to go to. 

I chose to go to the Media Manipulation workshop while my final project partner, Salome, chose to go to the Object Oriented Programming workshop.  In regards to our final project, we are creating an interactive learning device (sort of like a game, but for the more desired outcome that you are able to learn from it), where we will be relying on media and images to teach people about how to sort their trash. I chose to go to this workshop, but I am focusing more on the design aspect of our interface and our project. Part of my responsibilities include designing the interface we will use for the project as well as designing the playing cards and other physical elements. From previous recitations and in-class assignments, I was having issues regarding how to call images and also how to play videos and manipulate image data. After the workshop, however, I feel I am more comfortable with the functions and how to write them. 

For my recitation project, I created a “Tom and Jerry” short 🙂

I used case() and switch() to make it more interactive, so that people had to press certain keys in order to make certain images appear. I thought this was fun also because the effect is a flip-book effect but also like a “jumping-old-timey-camera” which is more representative of the era from which Tom and Jerry were born.

Here is the video:

https://drive.google.com/open?id=1dTdVN7FLOc1goxONO67BEBH7_Vb6ynrv

Code:

PImage photo;
PImage photo1;
PImage photo2;
PImage photo3;
PImage photo4;
PImage photo5;

void setup() {
size(1000, 1000);
photo = loadImage(“TOM.jpg”);
photo1 = loadImage(“house.jpg”);
photo2 = loadImage(“bell.jpg”);
photo3 = loadImage(“knife.jpg”);
photo4 = loadImage(“tj.jpg”);
photo5 = loadImage(“mouse.jpg”);

println(“Press these keys on your keyboard: s , h , a, w, a, d, e , r, q , f, t, g”);
println(“hint: hold the keys down for full effect”);
//load image from your laptop
}
void draw() {
background(0);
//int image = 20;
map(0, 0, 255, 0, 1023);

}

void keyPressed(){
switch(key){
case’a’:
image(photo, 200, 400);
break;

case ‘s’:
image(photo1, 800, 800);
break;

case ‘d’:
image(photo2, 600, 200);
break;

case ‘e’:
image(photo2, 600, 400);
break;

case ‘r’:
image(photo2, 600, 600);
break;

case ‘f’:
image(photo5, 300, 800);
image(photo3, 100, 800 );
break;

case ‘g’:
image(photo4, 450, 450);
break;

case ‘h’:
image(photo5, 600, 800);
image(photo1, 800, 800);
break;

case ‘w’:
image(photo5, 600, 800);
image(photo1, 800, 800);
image(photo, 200, 400);
break;

case ‘q’:
image(photo5, 300, 800);
break;

case ‘t’:
image(photo, 100, 500);
image(photo3, 300, 500);
break;

}
}

Analysis:

The command of these functions will definitely be useful in our final projects when we are displaying our “cards” on the screen. 

Recitation 10

Workshop

I attended the workshop on Object Oriented Programming organised by Tristan. This workshop went over the class category in Processing and when to use them. 

We made an example in order to create an emoji: 

float x;

ArrayList<Emoji> emojiList;

void setup() {
size(600,600);

emojiList = new ArrayList<Emoji>();
for(int i=0; i<100; i++) {
emojiList.add( new Emoji(random(width), random(height), color(random(255), random(255), random(255)) ));
}}

void draw() {
background(255);
for(int i=0; i<emojiList.size(); i++) {
Emoji temp= emojiList.get(i);
temp.display();
}}

void mousePressed() {
emojiList.add( new Emoji(mouseX, mouseY, color(random(255), random(255), random(255))) );
float x = map(mouseX,0,width,width/4,3*width/4);
}

And in another class file called Emoji: 

class Emoji {
float x,y;
float size;
color clr;

Emoji(float startingX, float startingY, color startingColor) {
x= startingX;
y= startingY;
size= random(50,200);
clr = startingColor;
}

void display() {
fill(clr);
ellipse(x,y, size,size);
fill(255);
ellipse(x-size/4, y-size/6, size/4, size/2);
ellipse(x+size/4, y-size/6, size/4, size/2); }
}

The void mouse pressed was added in order to display a new emoji each time I click on the Canva, a new emoji appears:

We made an in class example using the map () function, in order to display the emojis only in a limited space on the canvas, no matter where we pressed on the canvas. 

For the exercise, I made a project which I will use in my final project of a fuse, so a line which would decrease in size from one side under a time constraint of one minute. I added an ‘if’ statement in order to make the line stop shrinking once its reached the other point (the position 0): 

Fuse f;

void setup() {
size(1000,800);
background(0,0,50);
f = new Fuse(width-290, height-250); //new Fuse
}

void draw() {
background(0,0,50);
f.display();
f.shrink();
}

and the Fuse class: 

class Fuse {
float x, y, fuseWidth, speed;
long iLength, itime;

Fuse(float tempX, float tempY) {
x= tempX;
y= height-250;

iLength = 600;
itime = millis() ;
speed = – iLength/6000.0;}

void display () {
stroke(255);
strokeWeight(10);
line(x-fuseWidth, y, x, y);}

void shrink () {
fuseWidth = speed * (millis()- itime) +iLength ;
if(fuseWidth<0) {
fuseWidth=0;
}} }

The result is as follows: 

Recitation 10: Workshops

Intro

This week we had workshops to help us with our projects. I chose the media manipulation workshop. In my project we are going to have images pop up by the press of a button so I did the same in my video recreation. The video I chose to recreate is the first section of the BTS dance “Fake Love”. They walk in a line to the left, so I had images move toward the left by the press of buttons. 

Here is the original video

Here it is in Processing

fake love but make it processing

From this workshop I was able to practice integrating images into the keyPressed() function. This will be important to my project, so it was very helpful. I hope to play with the code further so I can make it as efficient as possible. 

Processing Code

PImage photo1;
PImage photo2;
PImage photo3;
PImage photo4;
PImage photo5;
PImage photo6;
PImage photo7;

 void setup() {
size(1500,600);
  background(0);
  photo1 = loadImage("hi tae.jpg");
  photo2 = loadImage("yoongles.jpg");
  photo3 = loadImage("hobi.jpg");
  photo4 = loadImage("kook.jpg");
  photo5 = loadImage("jin.jpg");
  photo6 = loadImage("jim.jpg");
  photo7 = loadImage("joon.jpg");
}
void draw() {

if(keyPressed) {
  photo7.resize(200,200);
  photo6.resize(200,200);
  photo5.resize(200,200);
  photo4.resize(200,200);
  photo3.resize(200,200);
  photo2.resize(200,200);
  photo1.resize(200,200);
}
}
void keyPressed() {
 
  println(key);
    if (key == 'a' || key == 'A') {
   image(photo1, 1200, 300);
    }
  if (key == 'q' || key == 'Q') {
   image(photo2, 1000, 300);
  }  
  if (key == 'w' || key == 'W') {
    image(photo3, 800, 300);
  }  
  if (key == 'e' || key == 'E') {
    image(photo4, 600, 300);
  }
    if (key == 'r' || key == 'R') {
    image(photo5, 450, 300);
    }
      if (key == 't' || key == 'T') {
    image(photo6, 250, 300);
      }
        if (key == 'y' || key == 'Y') {
    image(photo7, 100, 300);
        }

}

Recitatin 10-Elysia

For last week’s recitation, i attended the serial communication and map workshop. Both sessions was really helpful in helping me further understand how those functions work. In the map workshop, the instructor explained how the map function works. It has 5 items, the name of the value that you want to change, the bottom limit of the original value, the top limit of the original value, the bottom limit of the mapped value, and the top limit of the mapped value. They also provide examples of how to use it.

For serial communications, the instructor showed some examples of how to send values from processing to Arduino and vice versa. As an excercise, we made a circle in which the color of the circle is determined by the value that we got from arduino. The fill itself will be randomized. The position of the X coordinate will also be affected by the value from processing. The whole code looks like this:

// IMA NYU Shanghai
// Interaction Lab
// For receiving multiple values from Arduino to Processing

/*
* Based on the readStringUntil() example by Tom Igoe
* https://processing.org/reference/libraries/serial/Serial_readStringUntil_.html
*/

import processing.serial.*;

String myString = null;
Serial myPort;

int NUM_OF_VALUES = 2; /** YOU MUST CHANGE THIS ACCORDING TO YOUR PROJECT **/
int[] sensorValues; /** this array stores values from Arduino **/

void setup() {
size(500, 500);
background(0);
setupSerial();
}

void draw() {
  updateSerial();
printArray(sensorValues);
background(0);
float posx= map (sensorValues[0],0,1023,0,255);
ellipse(posx,mouseY,50,50);
if (sensorValues[1]==1){
fill(random(255));
}

// use the values like this!
// sensorValues[0]

// add your code

//
}

void setupSerial() {
printArray(Serial.list());
myPort = new Serial(this, Serial.list()[ 3], 9600);
// WARNING!
// You will definitely get an error here.
// Change the PORT_INDEX to 0 and try running it again.
// And then, check the list of the ports,
// find the port “/dev/cu.usbmodem—-” or “/dev/tty.usbmodem—-”
// and replace PORT_INDEX above with the index number of the port.

myPort.clear();
// Throw out the first reading,
// in case we started reading in the middle of a string from the sender.
myString = myPort.readStringUntil( 10 ); // 10 = ‘\n’ Linefeed in ASCII
myString = null;

sensorValues = new int[NUM_OF_VALUES];
}

void updateSerial() {
while (myPort.available() > 0) {
myString = myPort.readStringUntil( 10 ); // 10 = ‘\n’ Linefeed in ASCII
if (myString != null) {
String[] serialInArray = split(trim(myString), “,”);
if (serialInArray.length == NUM_OF_VALUES) {
for (int i=0; i<serialInArray.length; i++) {
sensorValues[i] = int(serialInArray[i]);
}
}
}
}
}