Recitation 2. Arduino Basics by Yijia Chen

Partner: Zhiqiu Wang

Circuit 1: Fade

Components:

1 * Arduino Uno

1 * USB A to B cable

1 * breadboard

1 * LED

1 * 220-ohm resistor

Hook-up Wires
Process:

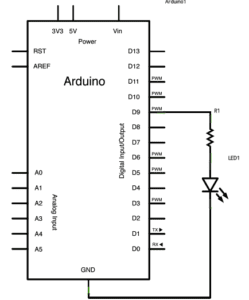
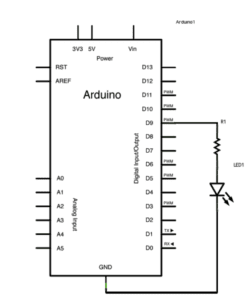
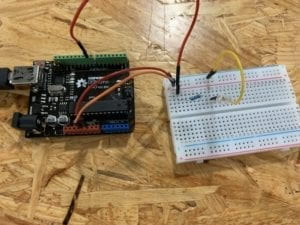
The process of building up the circuit went well since we had already done this practice in class. However, we still rely on the diagram provided at a great degree to help connect each component. During the process, we found two jumper cables that connect both sides of the breadboard and were not sure what they are for. To solve the puzzle, we asked another pair and got the answer that they served as the connection between two sides thus no matter which side the component was connecting, it was included in the circuit. In this circuit, these two jumper cables can be omitted because one side’s ports were enough for connecting.

Circuit 2: Tone Melody

Components:

1 * Arduino Uno

1 * USB A to B cable

1 * breadboard (optional)

1 * buzzer

Hook-up Wires
Process:

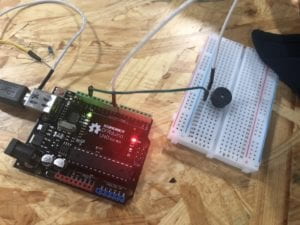
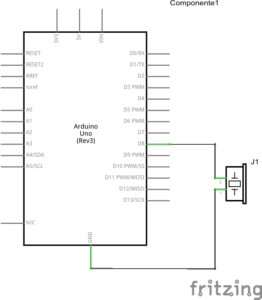
The process went smoothly because this circuit itself is a simple one. Even the breadboard can be omitted. Yet we still chose to include the breadboard into our circuit because it provided more stable connection and the hook-up wires and the buzzer were more easily to be connected.

Circuit 3: Speed Game

Components:

1 * Arduino Uno

1 * USB A to B cable

1 * breadboard

2 * LED

2 * 220-ohm resistor

Hook-up Wires

2 * 10K ohm resistors

2 * pushbuttons

1 * buzzer
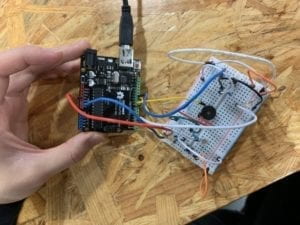
Process:

Before building up the circuit, we met some problems with distinguishing resistors with different ohm. We tried to find a way to simply tell the differences without using multimeters. We had a vague memory about what the professor said before about the different color on the resistors but was not sure which color represented the resistors with lower ohm. Essentially, through some search, we found out that resistors that have two orange lines out of five while the 10k ohm resistor only have one.

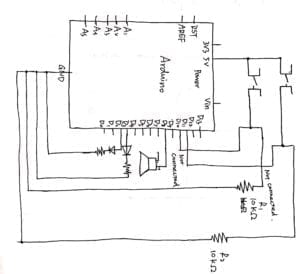
We also met some difficulties while trying to place all the components in the right position and also connect them properly. It took us several minutes to figure out how the current flowed in the circuit. Also when connecting jumper cables, we lost several times when placing wires into ports. Finally, we successfully built the circuit and played two times with the device.

Question 1

Reflect how you use technology in your daily life and on the circuits you just built. Use the text Physical Computing and your own observations to define the interaction.

It seems impossible nowadays to live without technology. The technology that most familiar to me is my communication tool——my phone, as well as computers since I use it to help me record notes from classes and finish homework. Before taking IMA classes, I only enjoy the benefit from technology development but haven’t truly engaged in creating any technological device. While building the circuits, my partner and I also relied on the guidance and diagram, which are also the accomplishment of others, to a great degree. However, it’s a different approach from just using technology. In my opinion, there are three ways to approach technology, using it, combining and understanding it, and creating it. In the process of building the circuits, we moved on to the second level of approaching technology and utilize the principles to engage in the technology rendered us first-hand experience upon exploring this area.

According to Physical Computing, interaction is “an iterative process of listening, thinking, and speaking between two or more actors” (“facts”). When putting in the context of physical computing, the three stages——listening, thinking, and computing of interaction are just like input processing and output of computers. In my opinion, computers serve as tools for people to interact with each other rather than being an object itself. Computers enable interaction to take place without the limitations of time and distance.

Question 2

If you have 100,000 LEDs of any brightness and color at your disposal, what would you make and where would you put it?

I would install them in the theater. Each part of these LEDs are connected to a specific pitch and when Musicals are playing, the corresponding LEDs will light up and their color can change according to the music, to give the audience a better experience.

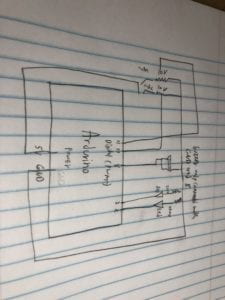
Recitation 2: Arduino Basics by Jonathan Lin

Questions

  1. The image of the computer has changed drastically throughout the decades. Back then, computers were these hulking machines that only spoke in text, but that was when Steve Jobs and Bill Gates revolutionized what a computer was. They made it something anyone could use, regardless if you knew how to code or not. This class is really awesome because it lets me glimpse into the olden days. I am not clicking an icon to make my LED blink or my buzzer beep. I am using code and building the circuit required to make all these things interact-able. In a tiny way, I am rediscovering what all these great minds before me have.
  2. If I had 100,000 LEDs I would make the roads of our dorms just a bit nicer. I know students like to go out during nighttime for street food, and the long driveway can get pretty dark at night. Therefore if I was able to light up the entire road leading to our dorm’s back gate it would be amazing. I could even fidget with the colors depending on the day. Maybe there could be some green and red on Christmas, or even  pink on Valentine’s Day. 

Materials/Diagram of Circuit 3

1 * Arduino Uno
1 * USB A to B cable
1 * breadboard
1 * buzzer
2 * LEDs
2 * 220 ohm resistors
2 * 10K ohm resistors
2 * pushbuttons
2 * arcade buttons
A handful of jumper cables
1 * Multimeter (optional)

Tasks

In a groups of two, build circuit 1, circuit 2, and circuit 3

Circuit 1: Fade (Success)

Thanks to the experience of last Recitation, my partner and I quickly sped through this first one with no problems. We quickly placed our 4 wires and then proceeded to find the code in examples. We uploaded it and the light faded as you see below. 

Circuit 2: toneMelody (Success)

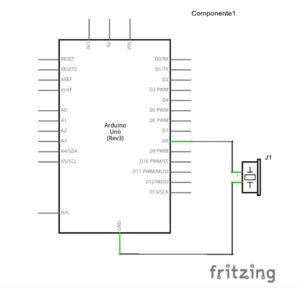
At first we thought this was going to be more complicated, but we quickly figured out we only actually needed two wires to connect to the speaker. After powering the speaker we found the code, uploaded it and we heard this amazing jingle!

Circuit 3: Speed Game (Success)

This one took a bit longer, but we figured it out by working slowly. We first analyzed the model, and then slowly but surely all the pieces came together. After finishing the circuit, we just copy and pasted the code given and it worked. We only had one misstep which was when my partner and I misplaced a resistor leg, but that issue was resolved relatively quick with the help of a fellow. 


Recitation 2: Arduino Basics by Ellie(Meng Yihan)

Partner: Mimi(Cai Shuyang)

Circuit 1: Fade

Components: 1 * Arduino Uno

1 * USB A to B cable

1 * breadboard

1 * LED

1 * 220-ohm resistor

1 * Multimeter

A handful of jumper cables

Diagram:

https://wp.nyu.edu/shanghai-ima-interaction-lab/category/recitations/

Process: 1. connect the Arduino with USB. 2. Plug in the LED and resistor in the right holes according to the given diagram and picture. 3. Double check the circuit and make sure there is nothing wrong. 4. Connect the Arduino to PC and run the procedure.

Problems encountered: nothing went wrong.

Picture:

Video:

Circuit 2: toneMelody

Components: 1 * Arduino Uno

1 * USB A to B cable

1 * breadboard

1 * buzzer

A handful of jumper cables

Diagram:

https://wp.nyu.edu/shanghai-ima-interaction-lab/category/recitations/

Process: 1. connect the Arduino with USB. 2. Connect the buzzer to the breadboard and connect the breadboard to Arduino with power and ground cables according to the given diagram and picture. 3. Double check the circuit and make sure there is nothing wrong. 4. Connect the Arduino to PC and run the procedure.

Problems encountered: on our first try, we connected the circuit right but failed to get the buzzer buzz when we tried to upload the codes. We asked Young for help and were told that we did not choose the right port. We fixed that and the circuit went well.

Picture:

Circuit 3: Speed Game

Components: 1 * Arduino Uno

1 * USB A to B cable

1 * breadboard

1 * buzzer

2 * LEDs

2 * 220-ohm resistors

2 * 10K ohm resistors

2 * pushbuttons

A handful of jumper cables

1 * Multimeter

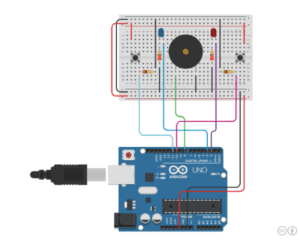
Diagram:

Process: 1. connect the Arduino with USB. 2. Connect all the necessary components to the breadboard according to the given diagram and picture. 3. Connect the Arduino with the breadboard with power and ground cables 4. Double check the circuit and make sure there is nothing wrong. 5. Connect the Arduino to PC and run the procedure.

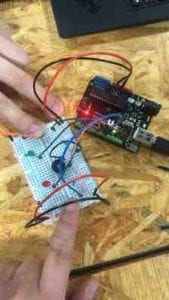
Problems encountered: 1. On our first try, we found that the LED on Arduino was not shining as usual. We replace the USB and Arduino itself but could not figure out the problem. Then we reached Nick for help. With his presence, we connect it again and this time, the green LED gave out light. (but we still do not know why it would not shine. Maybe it was because we did not plug the USB tightly into the computer.) 2. After we fixed our first problem, another one popped up. We found that every time we push the button, the red LED on Arduino kept shining. Nick told us that it was because there is something wrong in the circuit that created a short circuit. We checked our circuit again and found that it was because we connected the button improperly, making two cables both connect to the power. We fixed that and it succeeded.

Picture:

Video:

Question 1: In our daily, we are surrounded by the interactions. For example, we press the bottom, the light would be on. Phones, one thing that we couldn’t live without, contain a lot of interactions. For example, Siri. If you shout to your phone,Hey Siri ! Then Siri would reply and interact with by answering your questions and executing the work you want it to do. In the circuit, interaction can be presented as you build up the circuit and input the code to it, then it will follow the instruction. In my opinion, interaction is a serious of reaction happened between human and human or human with other objects. Once a signal is set up at any side, the other side must have reactions to response to it. That is my opinion about interaction.

Question 2: Recently, I have been suffering from practicing piano and figuring out where I do wrong. So I think maybe using the LEDs to help me would be a great idea. First, it could serve as a reminder of where the player has got wrong. attach one LED to each key and use the sound sensor to see if the key is giving sound. Then program the music score into electric signals that could connect to each key. The program goes like this: if the sound is not the same as the music score, the circuit will be connected and the LED will give light to remind the player that he/she has made a mistake.  Moreover, each LED could also be programmed with a chord when practicing accompaniment. Another possible use for these LEDs is that they could be used to make the process more interesting by assigning different colors of LEDs to different keys.

Recitation 2: Arduino Basics by Liyang Zhu (Tom)

Circuit 1: Fade

Code: https://www.arduino.cc/en/Tutorial/Fade

Circuit 2: toneMelody

Code: https://www.arduino.cc/en/Tutorial/toneMelody

Circuit 3: Speed Game

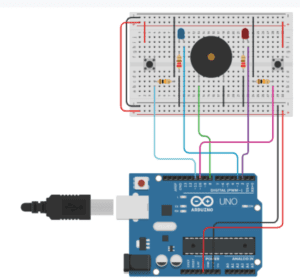
The code and design for this circuit can be found here: https://www.tinkercad.com/things/6MzvN5rlZlr-race-the-led-spring19

Circuit 4: Four-player Speed Game

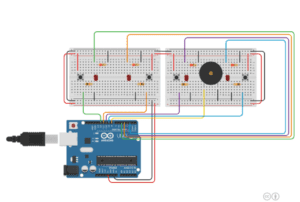
In this case, we copied most part of the circuit in the 2-player speed game.

The project on tinkercad: :https://www.tinkercad.com/things/fYISm1rWIUo-speed-game-4p/editel?sharecode=FNybhlM0WVxUFk2Kq_Lx_GX2MI_ng5ty5hPAk13_ZqI=

Problems we met when building Circuit 4

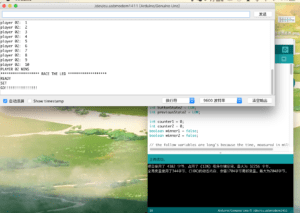
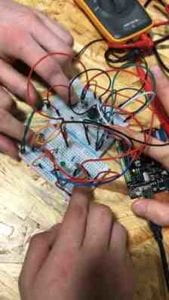
When building the circuit 4, we made our breadboard too messy. The LED is reversed, so it can’t be lit. Also, when I rewrote the code, I didn’t notice the conditions in the second if statement. So the behavior of LED is a bit strange in our final result. With the help of the professor, we finally found where the problem lies.

Questions

  1. Interaction takes place everywhere in our daily life. For example, it happens when I type on my computer, and the corresponding character appears on the screen; it also happens when I swipe my NYU card on the gate, and the gate opens in response.
    In my own opinion, interaction is very similar to algorithms. Algorithms usually include input, process, and an output; and interaction is the process of “receive information, process information by physical computing, and give feedback.” By building a circuit, I create a simple interaction. I was able to design internal logic (how is information processed), as well as the behavior of the circuit (how the circuit perceives the environment and gives feedback).
  2. If I have 100,100 LEDs, I will use them to build a grid of LED. This grid can be seen as a huge screen (though low in resolution). With certain programs, the grid can display interesting pattern and animation. It would be a perfect light show!

Recitation 2, Zhenming Wang

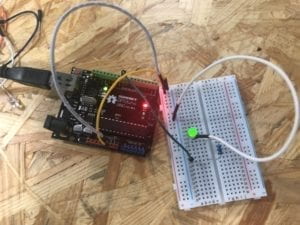
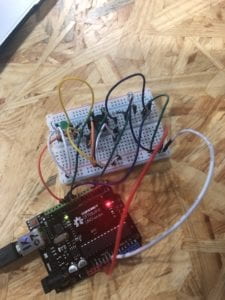
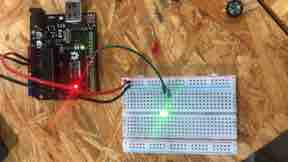
This is our Fade circuit

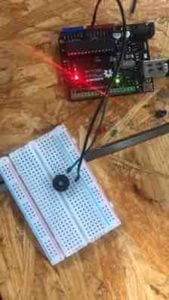
This is our tone melody circuit.

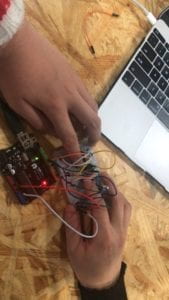
This is our speed game 

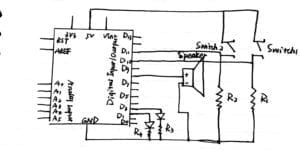
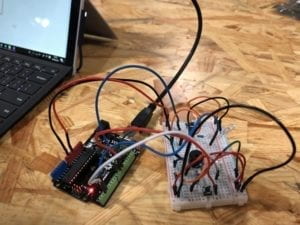
This speed game circuit would be the most complicated circuit we had built since taking Inter lab. It requires well understanding of how Arduino works, including the Analog In part and the connections between different components. We spent some time to understand how the circuit worked and it took a while, however, we succeeded at last. Generally I would say, right now the hardest part for us to understand is how to connect the Analog part into the circuit. We still need time to get used to it.

The answers to the two questions:

Question 1: As it’s mentioned in the text Physical Computing, the interaction between computer and users  need to be achieved through three parts:  Input, Processing and Output. This is very true, since human users and computers don’t share the same kind of language, we need our actions and commands to be understood by computers and thus achieving the goals of interactions. In nowadays cases, Input can be sensors which for example capturing the movements of  the users, keyboard itself is also a way of inputting information into computers. The processing part is done by the CPU of a computer, which plays the same roles as human’s brains. Output can be compicated, it can be a line of letters showing on the screen, or it can be sound or illustratiions produced by the computer after processed.  To conclude, interaction means the communications or the ‘iterative process of listening, speaking and thinking between two or more actors’. 

Question 2: I would make a giant screen, and there will be a touching pad for visitors to interact with it. Any people that put their hands on the pad, their will be a heart popping from the screen, the heart doesn’t necessarily means happy, it can be any emotions people want to express. I want to place this device at the civic square of my hometown, Shenzhen, and the name of it would be Heart of Our City, it represents everyone living in this young city, and it’s pulsing everyday, with passion and love for every people and every day.