“The Labyrinth” Final Project – Jennifer Cheung – Young Chung

 Partner: Jonathan Lin

Slides: https://docs.google.com/presentation/d/157TcDINGDDBCXFQA7j2hS8LGTQBwk2NKFEYD5TLOgdk/edit?usp=sharing

Concept and Design

In the initial stages of designing our maze game, the interaction between the user and game was emphasized on using heart rate sensors to determine a faster speed with a higher heart rate. In moving the players within the maze, we decided to simply use a joystick, since it would easily control the X and Y axis. However, after receiving class feedback, we determined that using a joystick would not make the game challenging  or unique enough, since people are already so accustomed to using joysticks in many other games. We decided to go along with advice that Malika gave us to use a Dance Dance Revolution foot pad to control the players, since it would simulate walking within the maze.
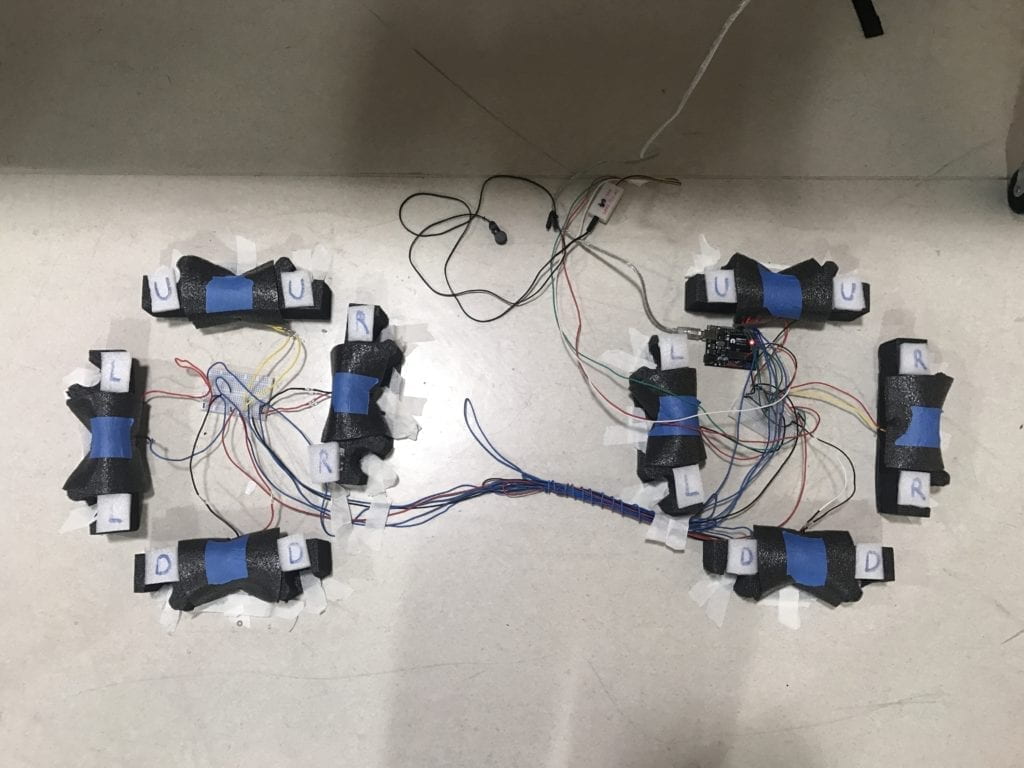
Foot pad setup

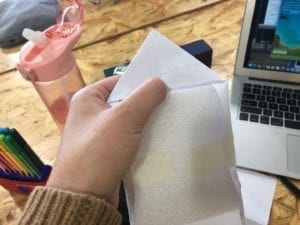
Since we did not have access to an actual DDR pad, I made a similar one out of arcade buttons encased with packaging foam conveniently found in the cardboard room and secured with wire. I chose to use foam because it would safely encase the buttons and prevent them from breaking when people step on them. While it was not the most aesthetically pleasing construction, the material was easily customizable to fit the needs of the project. Using cardboard, 3D prints, or laser cut boxes would not have been as successful, because they are not as forgiving to people’s forceful stomps. 

Fabrication and Production
Maze Design
Instructions

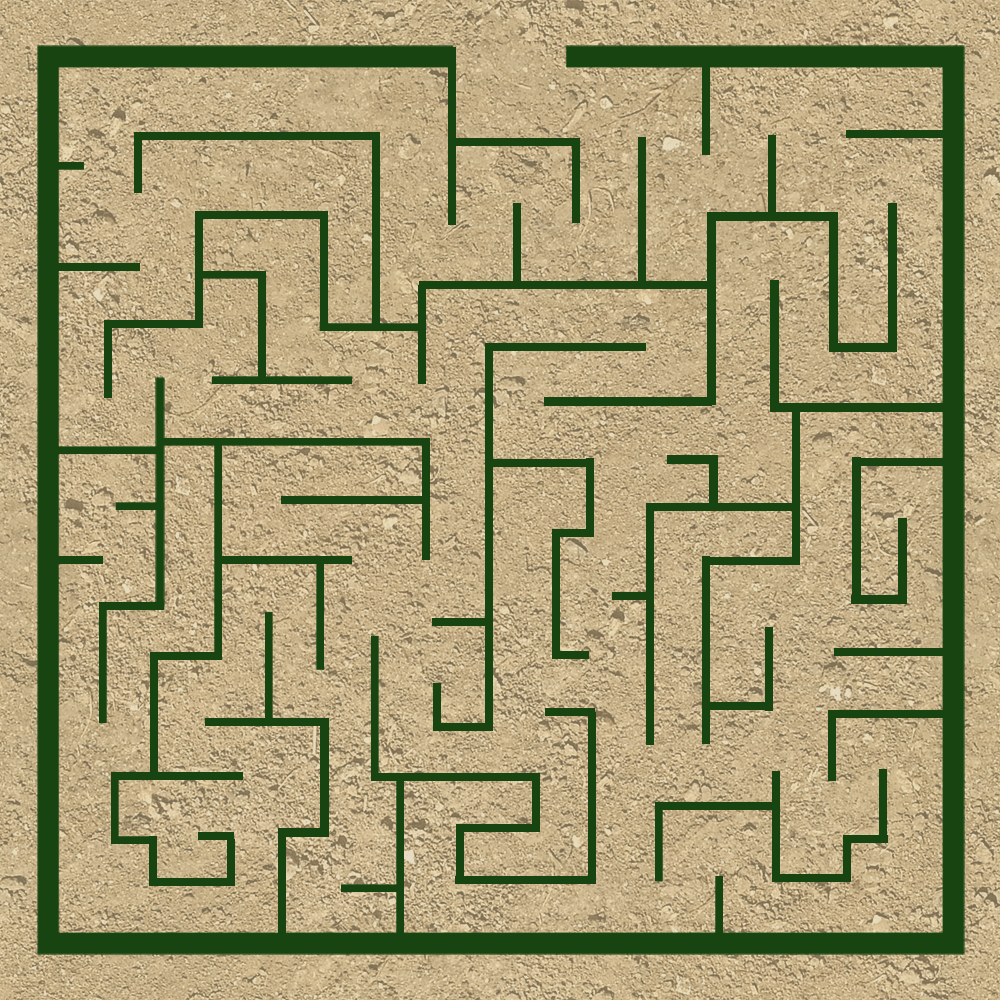
I took over design and production, while Jonathan covered code. I began by designing a maze from scratch in Photoshop. I didn’t want to use a preexisting maze because I needed to make the game fair for both players and thus needed to put their characters in different parts of the maze to start, since they compete against each other and cannot start in the same location. Once the maze was done, we tested the playability with the computer keyboard first. A video summarizing the myth of the Labyrinth and instructions were added in the beginning of the game so that users would be able to get the full idea of the context and how to play the game.
Schematic

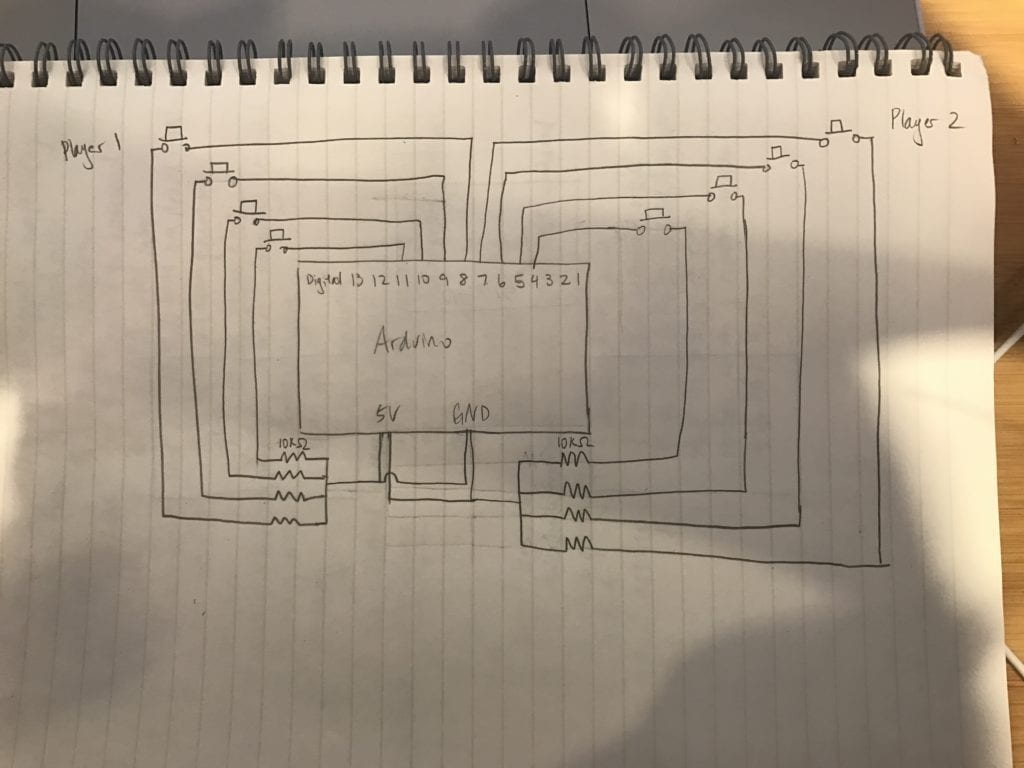
Then, we moved onto constructing the foot pads. Jonathan thought of making an additional function for the Minotaur to sprint by using pressure sensors, so for user testing, we had Player 1 (the Runner) controlled with buttons and Player 2 (the Minotaur) controlled with pressure sensors. However, we discovered that using pressure sensors were not as effective as buttons in moving the players, because the foam encasing the pressure sensors weakened the force of the foot steps. Additionally, coding would’ve been too much of a hassle to get the same result, so we decided to scrap the pressure sensors and sprinting function and use buttons for both players. The footpads were mostly effective, but when people would step too aggressively, wires had a high chance of disconnecting, so sometimes the game would not work properly in the middle of the game.

Additionally to the interactive foot pads, we added a heart rate sensor to Player 1 (the Runner) who would be able to run faster by getting their heart rate up. However, the nature of the long and unstable wire attachments made it difficult for the player to efficiently apply this function to the game. The wires would often disconnect, and the player would be too focused on moving within the maze to remember to get their heart rate up to go faster. 
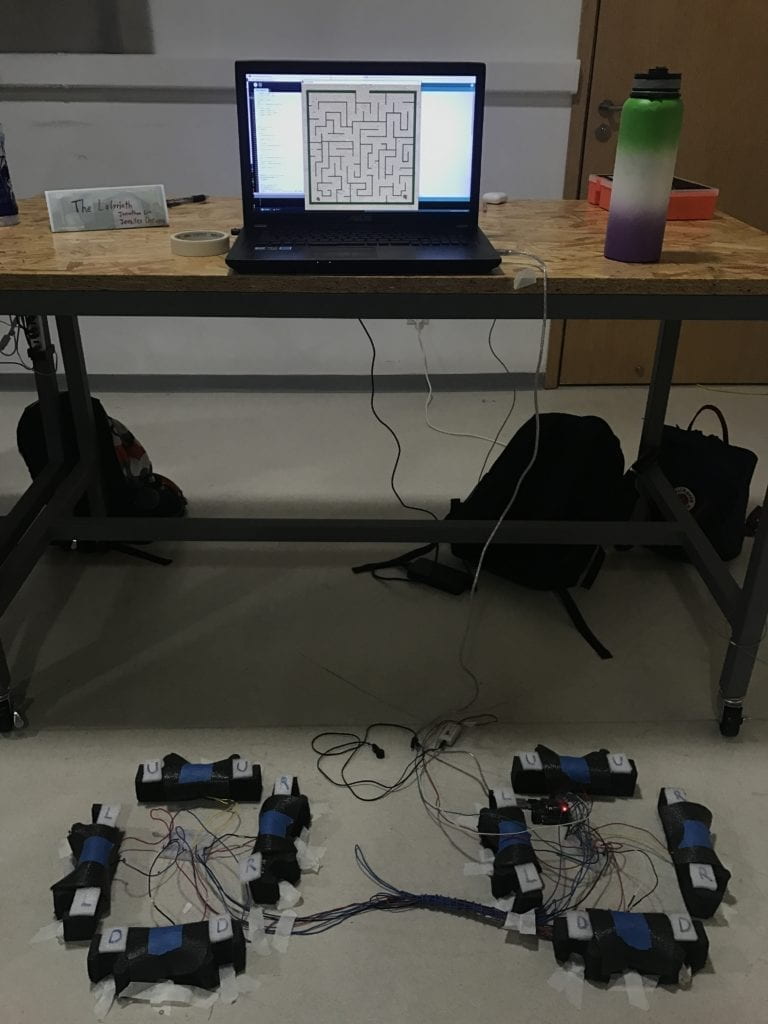
IMA Show Setup

Conclusions

Our goals in this project were to create a fun, engaging game that also educated users of the myth of the Labyrinth. Our project aligns with interaction because users control their players’ movements in a cyclical cause-effect relationship by stepping on the foot pads. It does not align with interaction in some other ways, because our attempts to make it more interactive with the addition of the heart rate sensor were not that effective since people did not really make use of this function. Ultimately, players interacted with the game by engaging their bodies and mind to control their movements around the maze, making it a fun experience for both players. If I had more time, I would have wanted to make the heart rate sensor a bigger part of the game. Instead of only having one used within the maze, both players would use it at the start of the game, so they could first get their heart rate up then focus on playing the game. I’ve learned that it takes good communication and clear goal setting to reach a solid finished product, since both collaborators need to be on the same page to jointly create good output. Our project not only engages the body and mind at the same time, it also seeks to educate others on Greek mythology and inspire them to further explore more of the genre. It was a valuable learning experience for me to combine both my visual design in creating the maze, as well as functional design in creating the foot pads.
U-MAZE, Malika Wang, Professor Young

U-MAZE, at first named E-MAZE, is basically a game where the player controls a ball to roll around in the maze and color the floor it passes. The original design was just like a game app on the phone where the ball colors the floor and when all of the floors are colored, you win. During the first discussion session, we were inspired to make the background floor into the image of the player. Hence the new name, U-MAZE. This may increase the interactivity of the game and make solving the maze into a process of self-recognition.

Nathan and I couldn’t decide at first what to use as the input (the Arduino part). So we did the user test session entirely on the computer, testing the Processing part. We got two repetitive valid suggestions. First of all, the color of the ball should stand out from the background image so that the player wouldn’t lose track of the ball. Secondly, instruction should be provided to tell the player that they are expected to click the mouse to take a selfie at the beginning of the game.

After the user test session, we made changes accordingly. For the first one, we decided to make the ball change its color smoothly like one of the recitation homework asked us to do with a bubble. The second one was trickier. Our game takes a selfie of the player at the beginning of the game and makes it the background of our game. If we add instruction in the Processing window, the instruction will be screenshot as well, making the background “ugly”. Finally, we came up with the idea of adding a sound instruction, literally telling the player when to do what. This plan actually proved to be popular in the final presentation.

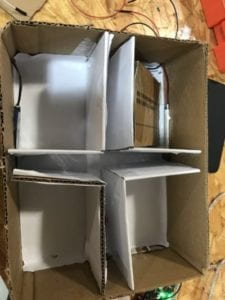
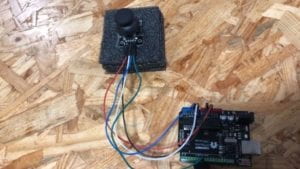
When deciding what to use as the input, Nathan and I took three valid attempts. The first one was the six-axis accelerometer and compass, which turned out to be too tricky to serve as a simple UP-DOWN-LEFT-RIGHT input. The second one was the joystick. It kinda explains itself so I won’t introduce it here. The third one was this: 

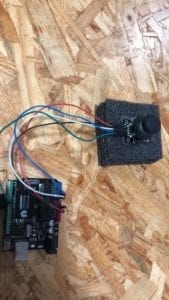
the box with a cross-road that each end has a pressure sensor detecting the movement of the dice rolling in it. We designed it in that it resembled the idea of a ball rolling in a maze. But the pressure sensors were not sensitive enough to detect a slight hit by the rolling dice. We had to give it up and went with the obvious choice – the joystick. We thought it might be too easy and therefore not fun to play with, but the result turned out to be good. Players said that the joystick was a self-explanatory input and not confusing, which is key to interactive projects. 

We did make some modification to the joystick though. We made a “handle” or a “station” for the player to better get a hold on the joystick.

We added more maps of mazes to the game before the final presentation so that each time the game restarts, the maze will not be the same as the one before.

Here is a video of me playing the game.

This is my last semester at NYU Shanghai. I don’t regret taking this course, even though the workload was kinda big. I love coding and programming and writing games. It is such a proud moment when someone plays my game and “wow”s. I do hope that I can continue programming. It perfects my mind as well as makes it relax. Many thanks to my partner Nathan, who listened to my nonsense rambling when coding. Many thanks to my Professor Young and Eric and Christian who helped us in the process of our project. We couldn’t do it without your help. 

Ball of Confusion- Citlaly Weed – Young

The title is a little more deep and needs some explanation:

you are a ball and the game you are playing sounds like Mario and looks almost like Mario, but it is not Mario you are then confused. However, the name is up to interpretation so another could be that the Ball that is confused is our planet. I did not want to just name in “Hey you are a ball jump, be active in not destroying our planet/ people.”

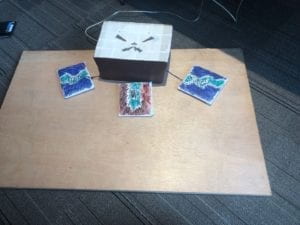
Anyways, I understood that much of the interaction that users were going to have would be pressing on the pressure sensors to move their character and focusing on how to get all the triangles. Using foam to cover the pressure sensors was one thing, but I also ended up decorating the foam to function as telling the user what each sensor was responsible for what direction. I also made them look like feet so it was it did not just become a cover-up for the sensors, but to look like tentacles so the user felt like they were stepping on corruptions feet. I also extremely unnecessary details like the box and the feet had triangles all without the body of the box and within/ around the tentacles. Andy also helped me out by allowing to use a giant plank of wood as our base. This help keeps the pressure sensor in place. There really was no need for any type of 3D printing; however, once I realized we could have used a laser cut box it was too late. A week beforehand I wanted to make sure we had something laser cut something, but the trouble with that is you can not see into the future to see what we needed. I printed a box with instructions, but we ended up putting instructions on the processing screen so my little box became useless. I just wish I realized we needed what I made in cardboard but as a neater laser cut monster.

In the beginning, we tried to use vibration sensors to sense when a person stomped or jumped. However, it was quickly clear that the vibration sensors were not sensitive enough. Eric then recommended that we used pressure sensors, but when I asked at the borrowing place if they had pressure sensors they said they did not. Nick then suggested we could make our own by using two layers of metal and one layer of foam with a hole in the middle so when the two metals touch the output is just like a pressure sensor. Again, we learned that making your own pressure sensor was difficult. The next day Olivia asked the borrowing people and they said they did have pressure sensors, so Olivia borrowed three. One was smaller so the outputs were not matching with the other pressure sensors so we exchanged the less sensitive pressure sensor with a bigger one so the outputs would be the same. During the User Testing, the sensors worked great and they never gave us any real trouble.  The only thing was that people wanted the triangles to move and that the ball/ and gravity move faster or smoother. Also, Nick suggested putting labels on the sensors. We took all these suggestions and did them. And they were pretty successful since during the final presentation I did not have to explain why and what people were trying to catch and also I did not have to tell them what direction each sensor was. Also, I think the big change from the darker Mario background I edited to the original happy background was a good transition from the game to the end screen. Also, The links I added to the end of the game were not just educational, but were links to websites you could either donate or volunteer.

The goal was to get young adults to be more active in change. The ‘game’ was to stimulate through physically going after the bad guys of the world and the end page was where they can explore options in actually being active. My definition of interaction is that there are all different types no matter how big or small. Such as multivariable interaction like conversations versus someone trying to see the light go off in the refrigerator both stimulate a person brain somehow. This type of interaction takes the inputs and the determination of whoever is controlling the ellipse responding with it moving on the screen. Oaudiencecne reaction was pretty good to the playing of the ‘game’, but when the end came to the title screen I wish they would have spent more time on the websites they clicked or played again to click on a different website. If my abilities or time could not restrict me then I would have tried out making each level for one issue in the world and that you can not move on until you are educated on a subject or maybe even donate (but I am not trying for force people to pay money). I got to research a lot about things like Flint Michigan, or child labor in India, the current politics surrounding the rainforest, etc. Some that I had to understand was what I first envisioned to be my final project could not be a reality because of my lack of experience. However, that did not stop me to learn how to make my own classes in processing and how to code collision detection. Olivia and I tried our best, so the end product was still very fulfilling because we did something out of our comfort zones and it actually worked! Before this class, I would have never thought I could make something even close to this so thank you Young for teaching us I really appreciate it. The rubric says I need to do a final say “Why should anybody care?”

Mine is: our planet is dying and so are the people on it. Most of those people have no control over it especially things like war and global warming. So I hope that people as privileged as us can decide to help those less fortunate than us because we were born with it [privladge] to help.

U-Maze, Zhenming Wang, Professor Young

Our U-Maze, is an interactive game that combines Arduino and Processing, user can control a digital ball to go through a maze, in the meantime unfold the under layer of the maze, which is a photo taken of the user at the beginning of the game. The concept of the game, was originally motivated by a mobile maze game, where player basically doing similar thing except there is no under layer, but the ball would left color on the road it has passed. The idea of adding the player’s photo was our own inspiration, since it would be really fun to add a part of taking photos at the beginning, both improves the interaction and gives our project a deeper meaning. The process of solving the maze, is in the meantime unfolding the figure of yourself, it’s like a process of self-recognition.

During the user-test session, our project as a prototype received some useful advice, for example the ball would possibly be overspread by the color of the background underlayer, bringing players difficulty in locating their positions. We made adaption to the project, as we changed the color mode of the ball, making it twinkling, changing its color among a ranges of cool colors. Another is that, Professor suggested us to make the phyical input of our project creative, rather than simply adopting joystick as an input to control the ball. We tried hard on that, as we tried to use a box, with the inner space being limited to a cross-road, where a real tiny ball can move from four directions by players leaning the box, with four pressure sensors at the end of each sides to detect in which direction the player hopes the ball to move. However, it turned out that the sensor was not sensitive enough to detect single hit, thus the design could not meet our expectation and unfortunately failed. We finally decided to use joystick as the input, it might be simple but it’s also quite visual and easy to get on hand.

Before our final presentation, we added several new changes to the project, including sound that guiding the player to take photos at the beginning and a click when the ball hit a wall. We also added several new maps so that everytime the game started, it could be a different challenge. Our project turned out to be very successful, our audience liked it very much and we felt happy and content.  

Being in IMA and Interlab this semester was really a nice experience, as I’ve got in touch with new things, Arduino, Processing, etc. I’ve also known nice people, Professor Young, who’s really an earnest professor and is always ready to provide us help; Malika, my workmate, who gave me a lot of help and spent a lot of effots in making the project.  Thanks to everyone that helps me this semester when I met difficulties. 

Recitation 11: Workshops, Celine Yu

Recitation 11: 

For this week’s recitation, my partner, Kenneth and I, decided that we would split ourselves into separate workshops so that we could gather a large sum of knowledge from various categories of interaction and coding. While Kenneth attended Serial Communications, I went to the Media Manipulation workshop next door. There, my instructor, Leon, gave us a brief preview of the class and proceeded to ask students what kind of things they wished to learn from the workshop. When it came to me, I was not unable to vividly describe my aspirations and visions for the class, for Kenneth and I were still in the midst of planning our final project. Which is why, for the workshop, I refrained from creating a specific product for the final, and instead, decided that I would keep my options open. I would perform this action by learning the various effects I could use to manipulate video and live feed, for I knew, that they were going to be possible aspects Kenneth and I would use in our final.

Process: https://github.com/cy1323/CelineYu/blob/master/Recitation%2011

I first imported the video library from the Processing’s Sketch and followed previous lectures by setting Movie myMovie above setup and draw. Then, similar to image manipulation, I sourced the video in the data folder by implementing: “new Movie (this, nye.mp4)” and made sure that it would play upon loading with “myMovie.play.” After setup, I followed the order and moved onto void draw(). Here, with reminders from the teachers present, I let Processing determine if whether or not the video was ‘available’ with an if() function at the beginning of void draw(). Up until this point, I had used information that had already been taught during previous lectures.

I wanted to implement as many effects I could understand within the short period of time I was given, regardless of the product’s final appearance. I wanted the video to move depending on the position of my mouse. I set up the code as I had done a numerous amount of times before, but for some reason, the code did not work. This is where I was reminded that I needed to use the push and pop matrix functions when dealing with positions within Processing. Soon after, I was able to create a moving masterpiece. After the positioning, I thought I would create an attempt at manipulating timeStamps within a video, an aspect that was mentioned and portrayed during the workshop. Following the teacher’s procedures and close evaluation, I ‘floated’ timeStamp = myMovie.time(), and had it called for action through the usage of println (timeStamp); I then manipulated this timeStamp variable through if and else if functions that would tint the video whenever I desired. For example, I set the tint to (100, 255, 0) when timeStamp was over and above 10 (seconds) and then tinted the video red whenever Processing read that the timeStamp was below 10. I also wanted to manipulate the speed, size, and shape of the video through the timeStamp variable but was not able to achieve this due to time constraints.

Video: Screen Recording 2019-05-08 at 11.30.48 PM

Reflection: Overall, I believe that I learned a list of new things from Recitation 11, most significantly, the easy usage of timestamps to my advantage and desire. I do believe, that if I had come to the workshop with a more definite plan and wish, I could have achieved even greater results that further benefit my final project and coding experience in the long run. Nonetheless, I am happy and satisfied with the work I have done this week, and am, therefore, looking forward to how I could implement these new lessons into the final project parallel to my definition of interaction.