Project Name: Intereferit
For this project, I work alone, and the final work is a new interface for musical instrument.
Based on the previous research I had done before the production started, the project would be related to music. The keyboard MIDI player I had found and the website of The International Conference on New Interfaces for Musical Expression, AKA NIME, gave me a lot of inspirations on making a musical instrument. As what had been mentioned by professor Eric during class, conductive tape could be an interesting way of interaction, so I finally thought of making a musical instrument that is only based on interaction built by conducive tape. The concept of utilizing conductive tape is by making a circuit based on the tape, the sensor part connects to an input port on Arduino board, the trigger part connects to the ground.
After thinking about the way of interaction, I started thinking about how the interface would look like. I am very interested in Japanese history, and I have been playing a Japanese game that is related to the Japanese Warring States Period in recent days, so I was inspired by it and wanted to make the interface related to something about the history. There are family lines for each family during the Warring States Period, and these lines all look differently from each other and has its own meaning. Oda family and Tokugawa family are the two most famous family during that period as these two families are the two that had united the whole country, and I like these two families very much, so I want to adapt their family lines into my project. And this is the reason why my final project is the combination of their two family lines.
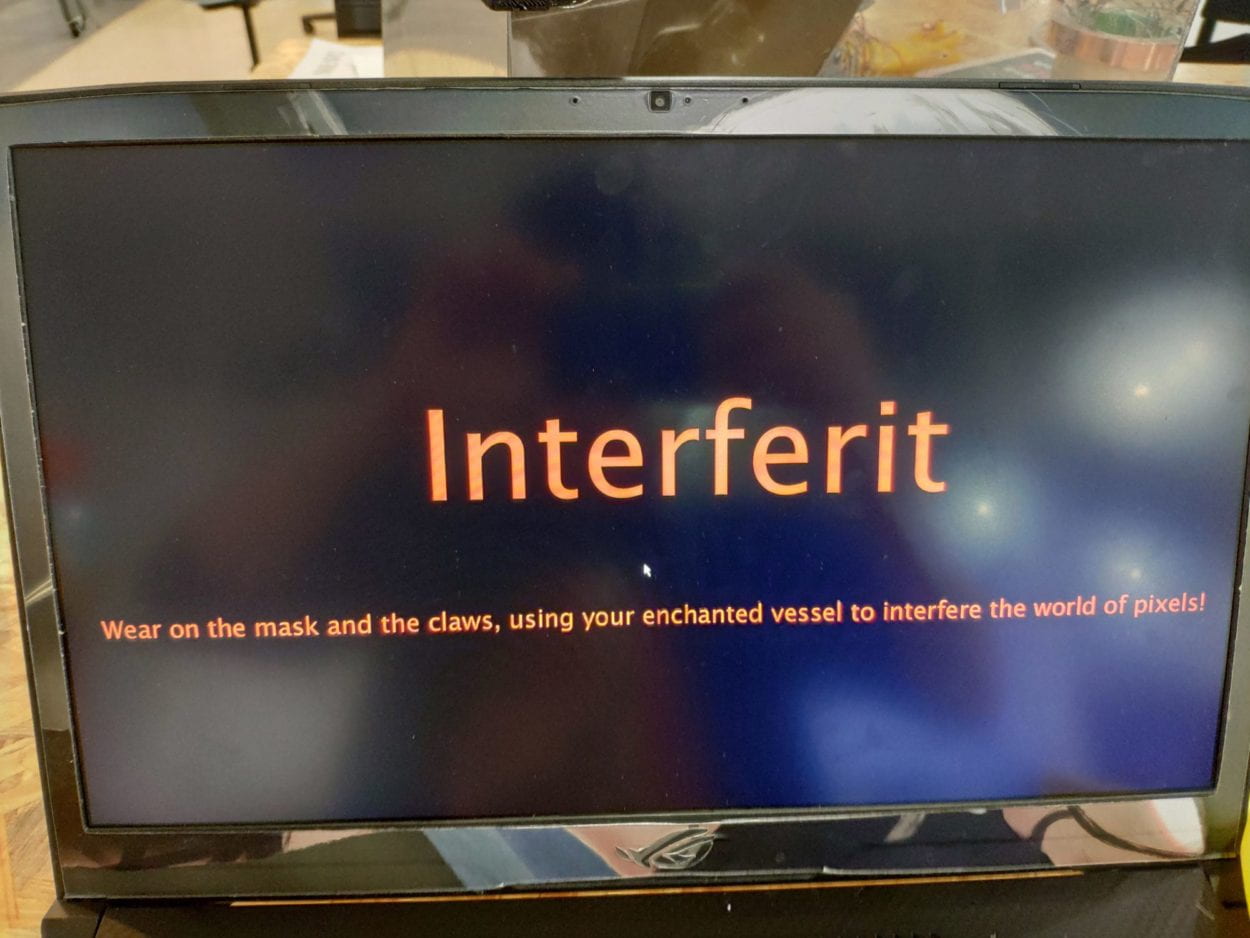
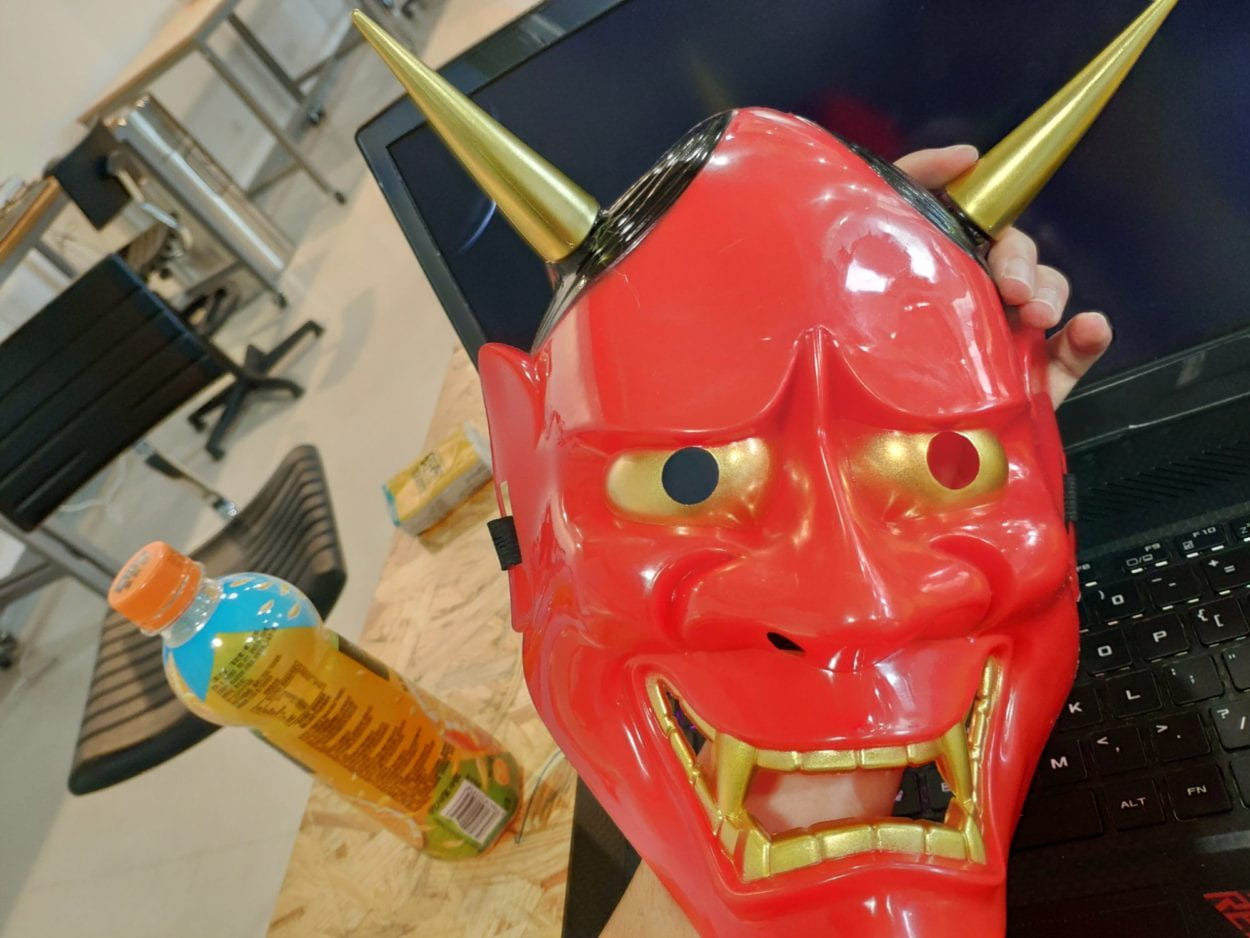
The idea of the whole project is not only a musical instrument, but it is also about connection. For the physical interaction part, the two family lines indicate the actual connection of the two family in history. Then for the virtual interaction part, I want to make visualization of the instrument, that when the user is playing the instrument, there will be effects on the screen, and these effects will be passed on in some way to the next user to make connection with others. So I think of water ripples effect, as water ripples will be triggered and be passed on since they will last for some time in real life when a water ripple is triggered. For the effect of water ripples in processing, the water ripples will be realized by pixel manipulation, that the RGB value will be passed to other pixels when a water ripple is triggered at one pixel, to make it look like spreading. And I am thinkging of the way of how to control where to trigger the water ripples on the screen, so I have thinked about color tracking by using camera capture. The concept is that, if the object is in certain RGB value and if I set a condition to only track those pixels and make them visible, the result will be like as if I am doing object tracking. So I get a traditional Japanese ghost mask which is red, not only to fit the Japanes style and realize the tracking function, but also to fit the concept that, we are the ghost in the vision of the camera, and we will bring intereference to the pixels.
Now talking about the reason why I name the project Intereferit, it is a word combined with interefere and inherit, intereference means we will interefere the pixels and these intereference, or as to say the water ripples will be passed on to the next user on the screen, which is inherit.
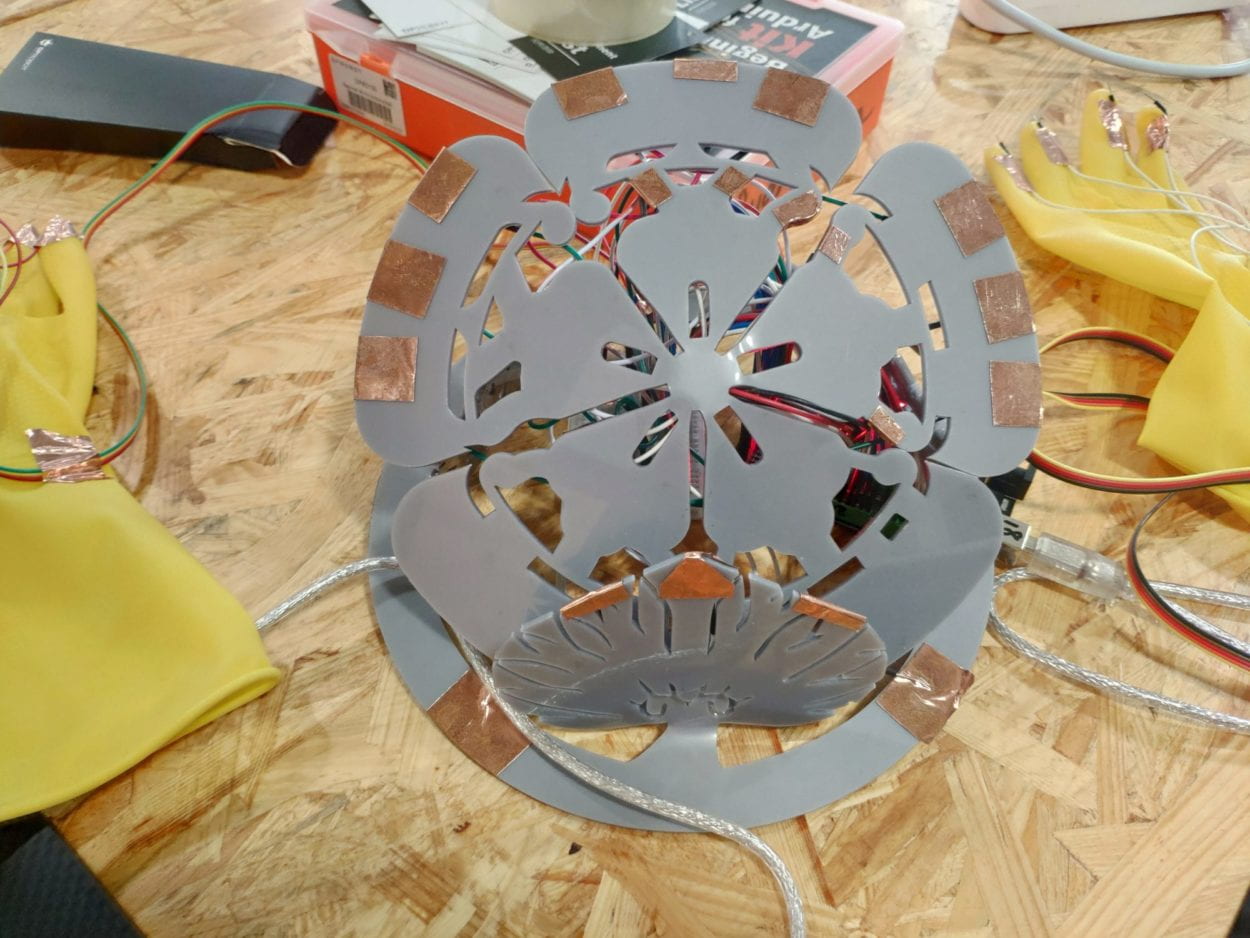
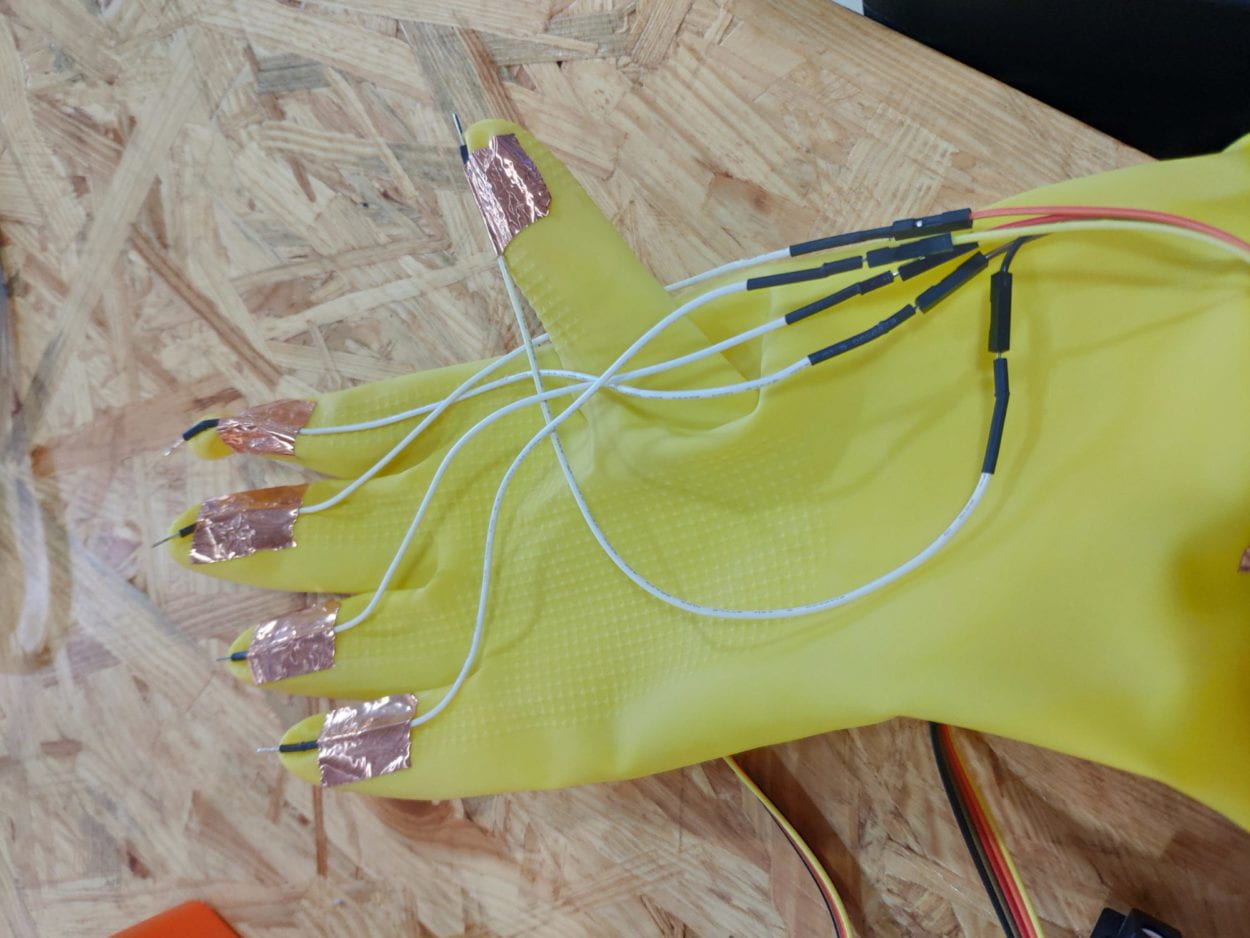
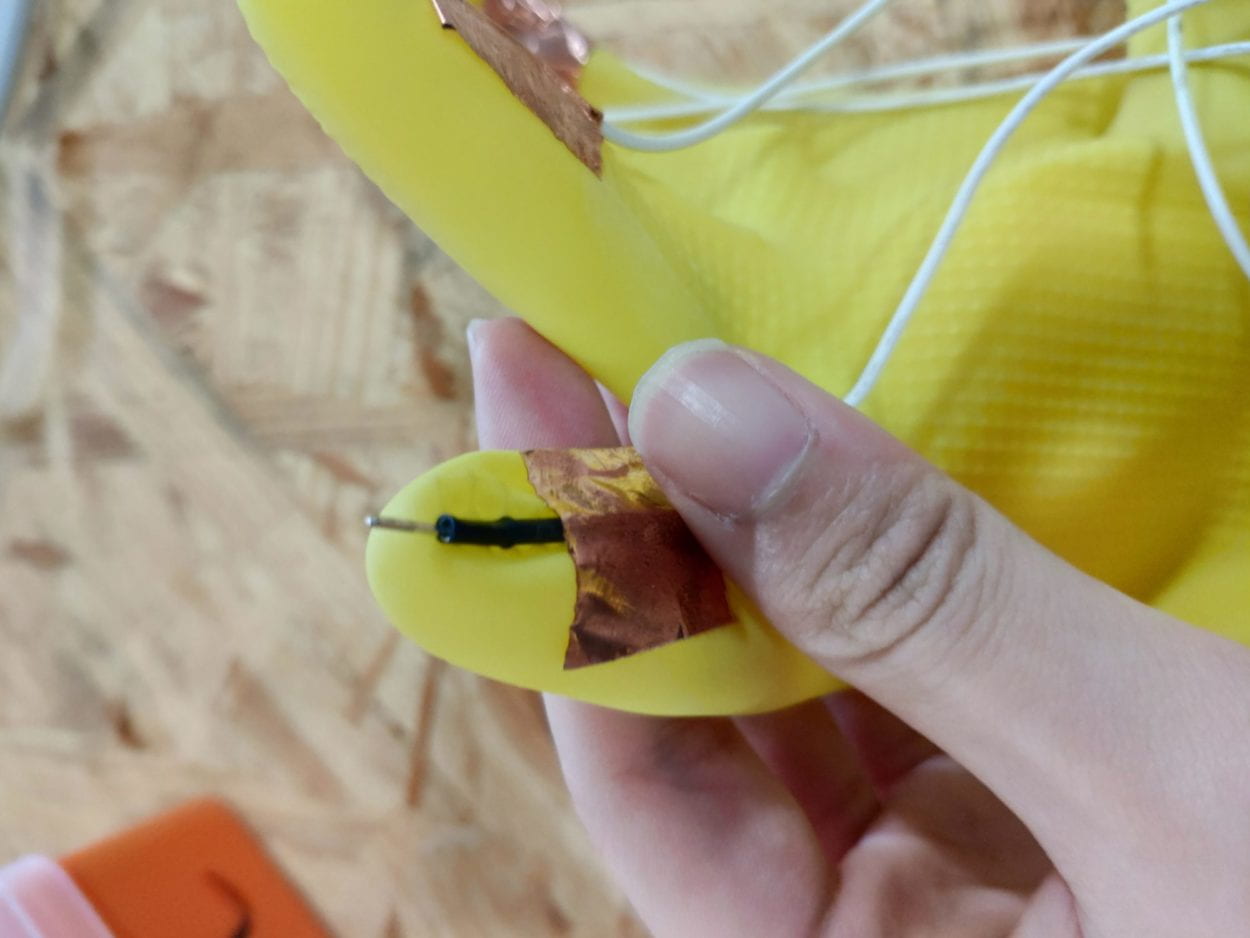
For the production part. The physical component, firstly, the musical instrument. I get the picture of the two family lines online, but find out that there are so many gaps in these pictures that if I am going to laser cut these two pictures will be resulting in have a lot of scattered parts. So I have to connect these parts to make them together, I have been struggled for this part, I want to connect these parts in AI, but I barely know how to draw in AI, so I waste hours figuring out the problem and result in nothing. I finally finish the work with Photoshop and then inport the file into AI to do the laser cutting. I want to make the family lines bended to make the physical part looks stereoscopic, but not just two flat pictures to tap on, and this fits the idea of a new interface that is designed by me. Since the icon should be bended in different direction, so wood can not be used to do the cutting as it can only be bended in one way, so I use acrylic board to make the icons. And I use the thermal spray gun in the fab lab to do the bending job, I heat the part where I need to bend, and then when it is hot enough, it will be bended due to the property of plastic, and then I can modify the angle to make it look like how I want it to be. Then I use AB gum to stick the two icons together to finish the physical part. Then I need to stick the tape onto it, to make the keys to tap on for the interaction. I first stick thirty tapes on the instrument to make thirty keys, and each is connected to a wire connected to the breadboard. I also borrow an Arduino Mega board to make sure I have enough input ports. But the result is that, since there are too many wires, and it is hard to stick the wires with the tapes, and it is very often that some wires will fall, and some are not well connected. Also due to the conductivity and the resistance of the conductive tape, some tape are not sensitive. So the result is that, only nighteen keys survive. And during the process of connecting the wire to the board, it is very hard to clear up all the wires since there are too many of them, also it takes me a long time to figure out which key corresponds to which port to do the coding. For the trigger, I get to rubber gloves, since they are easy to wear even though they are hard to take off. And also the wires that I stick on they will not fall off easily since the they are well sticked on the gloves. But I only use the wires to touch the tapes, but not to use tape to connect with tape due to the resistence problem.
For the coding part, the basic idea is that, each port is connected to certain sound file that are all one-shot sound. So these are notes from C4 to C6, 11 notes in total, and I also have three keys for drum set and bass, two keys for mode switch including Japanese style and future electronic one. The water ripple effect is realize by pixel manipulation combined with the computer vision object tracking. The last part of the documentation is the code.
For the reflection, the design of the project fits the idea of a new interface, but the interaction is not sensitive enough due to the problem of connecting circuit based on condctive tape. So it is hard to really play on the instrument, and also people are hard to understand the function of the mask and the meaning of the ripples on the screen, so the delivery of the concept is not clear as I have imagined. This project is a trial for making a new interface for musical instrument, but I need to reconsider a better way of interaction next time. And also for the meaning of the project, I want to show people a new interface of a musical instrument, to let them play with it, and also some users may think of the concept of connection between others based on the processing image.

CODE for Processing:
import processing.serial.*;
import processing.sound.*;
import processing.video.*;
ThreadsSystem ts;//threads
SoundFile c1;
SoundFile c2;
SoundFile c3;
SoundFile e1;
SoundFile e2;
SoundFile f1;
SoundFile f2;
SoundFile b1;
SoundFile b2;
SoundFile a1;
SoundFile a2;
SoundFile taiko;
SoundFile rim;
SoundFile tamb;
SoundFile gong;
SoundFile hintkoto;
SoundFile hintpeak;
Capture video;
PFont t;
int cols = 200;//water ripples
int rows = 200;
float[][] current;
float[][] previous;
boolean downc1 = true;
boolean downc2 = true;
boolean downc3 = true;
boolean downe1 = true;
boolean downe2 = true;
boolean downf1 = true;
boolean downf2 = true;
boolean downb1 = true;
boolean downb2 = true;
boolean downa1 = true;
boolean downa2 = true;
boolean downtaiko = true;
boolean downtamb = true;
boolean downrim = true;
boolean title = true;
boolean downtitle = true;
boolean koto = true;
boolean peak = false;
boolean downleft = true;
boolean downright = true;
float dampening = 0.999;
color trackColor; //tracking head
float threshold = 25;
float havgX;
float havgY;
String myString = null;//serial communication
Serial myPort;
int NUM_OF_VALUES = 34; /** YOU MUST CHANGE THIS ACCORDING TO YOUR PROJECT **/
int[] sensorValues; /** this array stores values from Arduino **/
void setup() {
fullScreen();
//size(800, 600);
ts = new ThreadsSystem();//threads
cols = width;//water ripples
rows = height;
current = new float[cols][rows];
previous = new float[cols][rows];
setupSerial();//serialcommunication
String[] cameras = Capture.list();
printArray(cameras);
video = new Capture(this, cameras[11]);
video.start();
trackColor = color(255, 0, 0);
c1 = new SoundFile(this, "kotoc.wav");//loading sound
e1 = new SoundFile(this, "kotoE.wav");
f1 = new SoundFile(this, "kotoF.wav");
b1 = new SoundFile(this, "kotoB.wav");
a1 = new SoundFile(this, "kotoA.wav");
c2 = new SoundFile(this, "kotoC2.wav");
e2 = new SoundFile(this, "kotoE2.wav");
f2 = new SoundFile(this, "kotoF2.wav");
b2 = new SoundFile(this, "kotoB2.wav");
a2 = new SoundFile(this, "kotoA2.wav");
c3 = new SoundFile(this, "kotoC3.wav");
rim = new SoundFile(this, "rim.wav");
tamb = new SoundFile(this, "tamb.wav");
taiko = new SoundFile(this, "taiko.wav");
gong = new SoundFile(this, "gong.wav");
hintpeak = new SoundFile(this, "hintpeak.wav");
hintkoto = new SoundFile(this, "hintkoto.wav");
}
void captureEvent(Capture video) {
video.read();
}
//void mousePressed() {
// if(down){
// down = false;
// int fX = floor(havgX);
// int fY = floor(havgY);
// for ( int i = 0; i < 5; i++){
// current[fX+i][fY+i] = random(500,1000);
// }
// }
// sound.play();
//}
//void mouseReleased() {
// if(!down) {
// down = true;
// }
//}
void draw() {
background(0);
/////setting up serial commuicatioin/////
updateSerial();
//printArray(sensorValues);
//println(sensorValues[0]);
int fX = floor(havgX);
int fY = floor(havgY);
if(sensorValues[2] == 0){
if(downleft){
downleft = false;
if(koto){
koto = false;
peak = true;
//if(koto){
c1 = new SoundFile(this, "pc1.wav");//loading sound
e1 = new SoundFile(this, "pe1.wav");
f1 = new SoundFile(this, "pf1.wav");
b1 = new SoundFile(this, "pb1.wav");
a1 = new SoundFile(this, "pa1.wav");
c2 = new SoundFile(this, "pc2.wav");
e2 = new SoundFile(this, "pe2.wav");
f2 = new SoundFile(this, "pf2.wav");
b2 = new SoundFile(this, "pb2.wav");
a2 = new SoundFile(this, "pa2.wav");
c3 = new SoundFile(this, "pc3.wav");
rim = new SoundFile(this, "Snare.wav");
tamb = new SoundFile(this, "HH Big.wav");
taiko = new SoundFile(this, "Kick drum 80s mastered.wav");
}
hintpeak.play();
}
}
if(sensorValues[2] != 0){
if(!downleft) {
downleft = true;
}
}
if(sensorValues[4] == 0){
if(downright){
downright = false;
if(peak){
koto = true;
peak = false;
c1 = new SoundFile(this, "kotoc.wav");//loading sound
e1 = new SoundFile(this, "kotoE.wav");
f1 = new SoundFile(this, "kotoF.wav");
b1 = new SoundFile(this, "kotoB.wav");
a1 = new SoundFile(this, "kotoA.wav");
c2 = new SoundFile(this, "kotoC2.wav");
e2 = new SoundFile(this, "kotoE2.wav");
f2 = new SoundFile(this, "kotoF2.wav");
b2 = new SoundFile(this, "kotoB2.wav");
a2 = new SoundFile(this, "kotoA2.wav");
c3 = new SoundFile(this, "kotoC3.wav");
rim = new SoundFile(this, "rim.wav");
tamb = new SoundFile(this, "tamb.wav");
taiko = new SoundFile(this, "taiko.wav");
gong = new SoundFile(this, "gong.wav");
}
hintkoto.play();
}
}
if(sensorValues[4] != 0){
if(!downright) {
downright = true;
}
}
if(sensorValues[0] == 0){
//println("trigger");
println(title);
if(downtitle){
downtitle = false;
if(title){
title = false;
}
else if(!title){
title = true;
}
}
if(!downtitle){
downtitle = true;
}
}
if(sensorValues[19] == 0){//c1
//println(down);
//println(sensorValues[19]);
if(downc1){
downc1 = false;
println("yes");
println(downc1);
for ( int i = 0; i < 10; i++){
current[fX+i][fY+i] = random(255,500);
}
//ts.addThreads();
//ts.run();
c1.play();
}
}
if(sensorValues[19] != 0){
if(!downc1) {
downc1 = true;
}
}
if(sensorValues[26] == 0){//e1
if(downe1){
downe1 = false;
for ( int i = 0; i < 10; i++){
current[fX+i][fY+i] = random(255,500);
}
//ts.addThreads();
//ts.run();
e1.play();
}
}
if(sensorValues[26] != 0){
if(!downe1) {
downe1 = true;
}
}
if(sensorValues[31] == 0){//f1
if(downf1){
downf1 = false;
for ( int i = 0; i < 10; i++){
current[fX+i][fY+i] = random(255,500);
}
//ts.addThreads();
//ts.run();
f1.play();
}
}
if(sensorValues[31] != 0){
if(!downf1) {
downf1 = true;
}
}
if(sensorValues[20] == 0){//b1
if(downb1){
downb1 = false;
for ( int i = 0; i < 10; i++){
current[fX+i][fY+i] = random(255,500);
}
//ts.addThreads();
//ts.run();
b1.play();
}
}
if(sensorValues[20] != 0){
if(!downb1) {
downb1 = true;
}
}
if(sensorValues[9] == 0){//a1
if(downa1){
downa1 = false;
for ( int i = 0; i < 10; i++){
current[fX+i][fY+i] = random(255,500);
}
//ts.addThreads();
//ts.run();
a1.play();
}
}
if(sensorValues[9] != 0){
if(!downa1) {
downa1 = true;
}
}
if(sensorValues[15] == 0){//c3
if(downc3){
downc3 = false;
for ( int i = 0; i < 10; i++){
current[fX+i][fY+i] = random(255,500);
}
//ts.addThreads();
//ts.run();
c3.play();
}
}
if(sensorValues[15] != 0){
if(!downc3) {
downc3 = true;
}
}
if(sensorValues[23] == 0){//c2
if(downc2){
downc2 = false;
for ( int i = 0; i < 10; i++){
current[fX+i][fY+i] = random(255,500);
}
//ts.addThreads();
//ts.run();
c2.play();
}
}
if(sensorValues[23] != 0){
if(!downc2) {
downc2 = true;
}
}
if(sensorValues[16] == 0){//e2
if(downe2){
downe2 = false;
for ( int i = 0; i < 10; i++){
current[fX+i][fY+i] = random(255,500);
}
//ts.addThreads();
//ts.run();
e2.play();
}
}
if(sensorValues[16] != 0){
if(!downe2) {
downe2 = true;
}
}
if(sensorValues[11] == 0){//f2
if(downf2){
downf2 = false;
for ( int i = 0; i < 10; i++){
current[fX+i][fY+i] = random(255,500);
}
//ts.addThreads();
//ts.run();
f2.play();
}
}
if(sensorValues[11] != 0){
if(!downf2) {
downf2 = true;
}
}
if(sensorValues[12] == 0){//b2
if(downb2){
downb2 = false;
for ( int i = 0; i < 10; i++){
current[fX+i][fY+i] = random(255,500);
}
//ts.addThreads();
//ts.run();
b2.play();
}
}
if(sensorValues[12] != 0){
if(!downb2) {
downb2 = true;
}
}
if(sensorValues[17] == 0){//a2
if(downa2){
downa2 = false;
for ( int i = 0; i < 10; i++){
current[fX+i][fY+i] = random(255,500);
}
//ts.addThreads();
//ts.run();
a2.play();
}
}
if(sensorValues[17] != 0){
if(!downa2) {
downa2 = true;
}
}
if(sensorValues[7] == 0){//rim
if(downrim){
downrim = false;
for ( int i = 0; i < 10; i++){
current[fX+i][fY+i] = random(255,500);
}
//ts.addThreads();
//ts.run();
rim.play();
}
}
if(sensorValues[7] != 0){
if(!downrim) {
downrim = true;
}
}
if(sensorValues[8] == 0){//taiko
if(downtaiko){
downtaiko = false;
for ( int i = 0; i < 10; i++){
current[fX+i][fY+i] = random(255,500);
}
//ts.addThreads();
//ts.run();
taiko.play();
}
}
if(sensorValues[8] != 0){
if(!downtaiko) {
downtaiko = true;
}
}
if(sensorValues[28] == 0){//tamb
if(downtamb){
downtamb = false;
for ( int i = 0; i < 10; i++){
current[fX+i][fY+i] = random(255,500);
}
//ts.addThreads();
//ts.run();
tamb.play();
}
}
if(sensorValues[28] != 0){
if(!downtamb) {
downtamb = true;
}
}
////water ripples/////
loadPixels();
for ( int i = 1; i < cols - 1; i++) {
for ( int j = 1; j < rows - 1; j++) {
current[i][j] = (
previous[i-1][j] +
previous[i+1][j] +
previous[i][j+1] +
previous[i][j-1]) / 2 -
current[i][j];
current[i][j] = current[i][j] * dampening;
int index = i + j * cols;
pixels[index] = color(current[i][j]);
}
}
updatePixels();
float[][] temp = previous;
previous = current;
current = temp;
/////drawing threads///
ts.addThreads();
ts.run();
////head tracking///
video.loadPixels();
threshold = 80;
float avgX = 0;
float avgY = 0;
int count = 0;
// Begin loop to walk through every pixel
for (int x = 0; x < video.width; x++ ) {
for (int y = 0; y < video.height; y++ ) {
int loc = x + y * video.width;
// What is current color
color currentColor = video.pixels[loc];
float r1 = red(currentColor);
float g1 = green(currentColor);
float b1 = blue(currentColor);
float r2 = red(trackColor);
float g2 = green(trackColor);
float b2 = blue(trackColor);
float d = distSq(r1, g1, b1, r2, g2, b2);
float hX = map(x,0,video.width,0,width);
float hY = map(y,0,video.height,0,height);
if (d < threshold*threshold) {
stroke(255,0,0);
strokeWeight(1);
point(hX, hY);
avgX += x;
avgY += y;
count++;
}
}
}
// We only consider the color found if its color distance is less than 10.
// This threshold of 10 is arbitrary and you can adjust this number depending on how accurate you require the tracking to be.
if (count > 0) {
avgX = avgX / count;
avgY = avgY / count;
havgX = map(avgX,0,video.width,0,width);
//havgY = map(avgY,0,video.height,0,height);
// Draw a circle at the tracked pixel
fill(255,0,0,100);
noStroke();
textSize(50);
if(koto){
text("koto",havgX,havgY);
}
if(peak){
text("peak",havgX,havgY);
}
}
if(title){
textSize(200);
fill(255,0,0);
text("Interferit",width*0.3,height/2);
textSize(40);
text("Wear on the mask and the claws, using your enchanted vessel to interfere the world of pixels!",width*0.03,height*0.7);
//println(1);
}
if(!title){
fill(0);
}
}
float distSq(float x1, float y1, float z1, float x2, float y2, float z2) {
float d = (x2-x1)*(x2-x1) + (y2-y1)*(y2-y1) +(z2-z1)*(z2-z1);
return d;
}
//void keyPressed() {
// background(0);
//}
void setupSerial() {
printArray(Serial.list());
myPort = new Serial(this, Serial.list()[ 0 ], 9600);
// WARNING!
// You will definitely get an error here.
// Change the PORT_INDEX to 0 and try running it again.
// And then, check the list of the ports,
// find the port "/dev/cu.usbmodem----" or "/dev/tty.usbmodem----"
// and replace PORT_INDEX above with the index number of the port.
myPort.clear();
// Throw out the first reading,
// in case we started reading in the middle of a string from the sender.
myString = myPort.readStringUntil( 10 ); // 10 = '\n' Linefeed in ASCII
myString = null;
sensorValues = new int[NUM_OF_VALUES];
}
void updateSerial() {
while (myPort.available() > 0) {
myString = myPort.readStringUntil( 10 ); // 10 = '\n' Linefeed in ASCII
if (myString != null) {
String[] serialInArray = split(trim(myString), ",");
if (serialInArray.length == NUM_OF_VALUES) {
for (int i=0; i<serialInArray.length; i++) {
sensorValues[i] = int(serialInArray[i]);
}
}
}
}
}


