Strike!- Zhao Yang (Joseph)- Inmi

PROJECT TITLE

Strike!- Zhao Yang (Joseph)- Inmi

CONCEPTION AND DESIGN

For the final project, my partner Barry and I decided to make an entertaining game. Basically, we chose to model an existing aircraft game. Since it’s classic and interesting, we don’t need to spend more time to introduce the mechanics of the game to the users so that we can spend more time focusing on how to accomplish a better game. For our project, we not only keep the original mechanics of the aircraft game but also add some other changes to the game. For the original game, the user needs to control the aircraft to attack the enemies and tries to avoid crashing into the enemies so that the aircraft can stay longer and get a higher score. If the aircraft doesn’t crash into the enemies or it destroys the enemies, it won’t lose their health points. However, we make some changes to this mechanics. In our game, if you let an enemy flee, your health points will also decrease. So the game encourages the user to try their best to attack the enemies. The reason why we make this change is to ensure that the game would end at some point and to increase the difficulty of the game. It is one of the creative parts of our final project. On the other hand, the way to interact with the original aircraft game is too limited. In the past, the only way to interact with the aircraft game is to click the buttons and use the joystick. In this way, the users only can interact with their fingers and hands. In that case, the users’ sense of engagement is not strong. Thus, in order to improve the aircraft game, we make changes to the ways of interaction. Based on our preparatory research, we found a project that uses Arduino and Processing. That project “tried to mimic the Virtual reality stuffs that happen in the movie, like we can simply wave our hand in front of the computer and move the pointer to the desired location and perform some tasks”. Here is the link of that project.

https://circuitdigest.com/microcontroller-projects/virtual-reality-using-arduino

In that project, the user can wear a device on his hand so that the computer could detect the motion of his hand. Then he can execute commands on the computer by moving and manipulating his hand. In my opinion, the interactive experience of this project can give people more sense of engagement. Hence, I think we can make a way to interact with our project to engage the user’s whole body. Then we came up with the idea that people can open their arms and imagine they are the aircraft itself and then tilt their bodies to control the movement of the aircraft. This is the way we expect people to interact with our project. Therefore, we chose to use the accelerometer sensor as the input of our project. This sensor can detect the acceleration on three axes. We chose the acceleration on Y-axis as the input in particular. If the user can wear the device on their wrist and wave their arm up and down, the acceleration on Y-axis will change. Then we can map this acceleration to Processing to control the movement of the aircraft. In this sense, it gives the user a sense that they are really flying. And this way to interact can reinforce the user’s sense of engagement. Moreover, the accelerometer sensor is quite small. So we can make a wearing device based on it very easily. And it’s convenient for users to wear it and take it off so that the users can enjoy the game more quickly. These are the reasons why we chose the sensor and why the sensor best suited to our project purpose. Honestly speaking, Kinect might have been another option. And it aligns with our idea that we expect people can engage their whole body to interact with our project. It’s actually our first choice of the input medium. However, it was not allowed to use the Kinect for the final project. So we have to reject this option.

FABRICATION AND PRODUCTION

Since we tried to model an arcade game, we decided to laser cut an arcade game case in our production process. By using the case to cover my computer, it can provide the user with the sense of playing an arcade game instead of playing a computer game. This case provides a better outlook for our project. On the other hand, another significant step in our production process is to make the accelerometer sensor as a wearing device. In this case, it would be more sensitive if the user wears it instead of just holding it in their hands. And here are the images of our design of the arcade game case.

During the user test, most of the feedback was positive. Only a few of the users suggested that we should add the functions to make the aircraft can move forward so that the game could be more interesting. Furthermore, at that time, we only had one sensor. We found a problem that by only wearing one sensor, the user could only move their right arm to control the aircraft. And it was a little confusing for the users to open their arms and tilt their bodies to control the movement of the aircraft. Even though they read the instruction, some of them were still confused about the way of interaction. If we didn’t explain to them, most of them couldn’t properly interact with our project. And these are several of the videos during the user testing process.

As a result, after the user test, we decided to add another sensor to control the aircraft to move forward. Besides, we changed the one-player mode and two-player mode to easy mode and expert mode. However, it still aligns with our original thought about two players. Because of the addition of another sensor to control the aircraft to move forward, the game becomes more difficult. It’s really hard for the user to use their right arm to control the aircraft to move left and right and flip their left hand to control the aircraft to move forward and backward at the same time. If you don’t want to challenge the expert mode alone, you can ask your friend to collaborate to control the movement of the aircraft. From my perspective, the adaption of adding another sensor is effective and successful. During the IMA End of Semester Show, by wearing two sensors, even though the users chose to play the easy mode, which can only move the aircraft left and right, it made more sense to them to open their arms and tilt their bodies to control the movement of the aircraft. And the users can easily follow our instructions without being confused. I think our production choices are pretty successful. They align with our original thought that the users can use their whole body to interact with our project. Moreover, the way of using the sensors makes the game more interesting and gives the user more sense of engagement.

CONCLUSIONS

In conclusion, the goal of our project is to make an entertaining and interesting game so that the users can have fun with it and spend their spare time playing it to relax. My definition of interaction is that it is a cyclic process that requires at least two objects which affect each other. In my opinion, our project quite aligns with my definition of interaction. The motion of the user’s body controls the movement of the aircraft in the game. Meanwhile, the scores and the image of the game immediately show to him. It aligns with the part that the objects affect each other. Moreover, the user has to focus on the game and keep interacting with it so that he can get a higher score. It aligns with the part of the cyclic process. In this sense, our project aligns with my definition of interaction successfully. Basically, all the people who have played our game align with our expectations of how they should interact. Just sometimes some of the users didn’t read the instructions that we provided to them, so they might be confused about how to interact. If we had more time, we could come up with more innovative ideas on the mechanics of the game. Since the mechanics of our game is quite similar to the original game, the user might not find much novelty on our game. If it is allowed, we would like to try to use the Kinect as the way of interaction because the direct detection of our motion can make the connection between the way of interaction and the game itself more clear. After all, our idea of engaging the whole body to interact fits the use of Kinect more than the use of the accelerometer sensor. I’ve learned a lot from our accomplishments in our final project. For instance, we have to test the game by ourselves, again and again, to ensure that the user can experience the best version of the game. We had to spend a lot of time debugging. Besides, in order to laser cut the arcade game case, I learned how to use illustrator. What’s more, the most important thing when creating an interactive project is that the user is always the first thing that we need to consider.

Code

https://github.com/JooooosephY/Interaction-Leb-Final-Project
Recitation 10: Workshops – Zhao Yang

Code:

https://github.com/JooooosephY/Recitation-10/tree/master/animation

Introduction:

For recitation 10, we attended the workshop for map() function and we could choose another workshop based on our interest. Since my group decides to make a game for the final project, the way to organize the code is really important. Thus, I attended the Object-Oriented Programming workshop. In the workshop, Tristan taught us something about class. Basically, he showed us how to code as well as why we should do it in this way. In this sense, we can directly see the structure of the code so that we can understand OOP well. As for the exercise, we were required to use OOP to write an animation with some interaction at some level. Besides, we also need to use the map() function when we wrote the code. Here are the videos about how my exercise looks like. 

Basically, when you press the space on the keyboard, it will generate several crying faces with different colors and sizes from random positions. And the speed of each face depends on where the mouse is when you press the space. And I map the position of the mouse to the speed of the faces. Thus, when you interact with it, it seems all the new faces are moving towards the mouse. 

Recitation 9: Media Controller – Zhao Yang

Code:

https://github.com/JooooosephY/Recitation-9

Introduction:

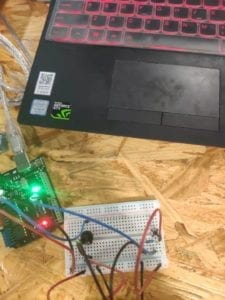
For this recitation class, we were required to use Arduino to send values to Processing to interact with some media, such as images or videos. I was interested in making some instant interaction so I chose the live camera as the media that I would change. Basically, it’s like an exercise that I used the Arduino to change the filter of the camera. Here is the video about how I interacted with the camera and an image of the circuits. 

Reflection:

I first looked up the filter function to check what kind of filter I can use. Then I found the filter POSTERIZE. Since it requires a  parameter to change the filter, I decided to use the potentiometer to change the value. I thought that if I only use the potentiometer as the tool to interact, it would be too boring. Thus, I added another button to control whether to use the INVERT filter. Fortunately, the output was pretty interesting. However, when I finished the exercise, I felt the way of interaction is still too simple. According to Golan Levin’s article, he notes that “Myron Krueger’s legendary Videoplace, developed between 1969 and 1975, was motivated by his deeply felt belief that the entire human body ought to have a role in our interactions with computers” (Levin 1). It is the first interactive artwork to incorporate computer vision. I really appreciate the Krueger’s idea that the entire human body ought to have a role in our interactions with computers. Since using buttons or potentiometer to interact are just the interaction with your fingers, the use of sensors could be a better way to create an interactive project. In my opinion, the values that the sensors can send are actually from the real world, while the values that some buttons send are the values inside the computer. So you can interact with sensors through your body. And some projects that use sensors as the input are usually more interesting than the projects that only use buttons as the input. Therefore, when I make the final project, I will try to make it a project that can involve the user’s whole body to interact with so that the project can be a good entertaining project. 

Final Project Essay – Zhao Yang

Project Title

Aircraft War

Project Statement of Purpose

Basically, we want to make an entertaining game for the final project. This game would be an aircraft game, in which the primary mechanics is that the player can control an aircraft to attack the enemy aircraft. This is a video that we found when we did the research and it is about a normal aircraft game. 

https://www.youtube.com/watch?v=XLAIqHptY_g

However, since there are already some aircraft games like this existing, we are trying to add some improvement to this kind of game to make it more meaningful and interesting. The game would have two modes. One mode is the infinite mode, in which the player needs to control the aircraft and tries to stay alive as long as possible. And the score depends on how many enemy aircraft he crashes and how long he could stay alive. In this sense, this mode mainly focuses on the entertaining role of the game. The user can play this mode to just relax to pass the boring time. The other mode is a story mode. In this mode, the basic way of interaction is the same as the infinite mode. But different from the infinite mode, the player not only can have fun by attacking the enemies but also can enjoy the story that we provide. Thus, as for the story mode, it can reveal some important meanings that we want to tell the users. In other words, the game itself is like a media for us to tell a meaningful story to the users. Moreover, the difficulty of the story mode is actually decreasing instead of being harder and harder, which could give the user a sense of success because he can be stronger after passing a level. All in all, this game can not only provide the user with an entertaining role but also tell the user a meaningful way so that they can enjoy the game itself as well as the story. And the users can play this game to pass the boring time, and if they play the story mode, they can also relax by experiencing a meaningful and interesting story. 

Project Plan

For the first step, I think we can come up with a story that can be told vividly by this game. A suitable story is really important for our project because if the story is nor suitable for the game, the players cannot fully engage in the atmosphere that we want to create. Besides, a good story can not only resonate with the player but also can attract the user to continuously play the game. After creating the story, the next step is to consider how to express the story by this game. For example, what kind of background music we can use to reinforce the emotion of the story? How to show the story visually to the user? Using video, or images, or playing the game with the sound of telling the story? We need to hold up these questions and ask ourselves when we make the game. Since we just learned how to interact with videos and images by Processing, it brought me many ideas about expressing the story that I can apply to our project. The third step is to think about how the users can interact with the game. In other words, it’s to think about the structure of the game. I think we would do this step through two aspects. One is to consider the user experience. According to Igoe and O’sullivan’s text, there is a figure about how the computer sees humans. This figure only contains three parts, which are a finger, two ears, and one eye. This figure implies how people usually interact with computers. In my opinion, if we can only use fingers to interact with a project, it would be too limited and boring. Thus, the user experience is really significant for a successful interactive project. And this is also what we need to consider for our final project. According to our thoughts now, we want to simulate the experience of driving a plane as a part of user experience. The other aspect is the game itself. As there are already a lot of similar aircraft games existing, if we just copy one without any innovation, our project would be meaningless. Hence, we need to make some changes to make this game more interesting and meaningful. For example, the story mode is one of the innovations we have on this project. The fourth step is to try to make the game by Processing and complete the user experience by Arduino. After having a prototype of the game, we can have some user tests and gain some feedback to make our game better. And this is probably our last step. 

Context and Significance

As I mentioned above, the user experience should not be limited by finger, eyes, and ears. My preparatory research also inspires me a lot. 

https://circuitdigest.com/microcontroller-projects/virtual-reality-using-arduino

This project requires the user to wear a glove made by Arduino. And the user can interact with the Processing via the glove and the output totally depends on the movement of his hand and arm. It breaks the limitation of fingers. Thus, I also came up with some ideas that users can use their feet and a joystick to control the plane. I think it can give them a sense that they are actually sitting in an aircraft and control it. Also, the way of simulating the real driving experience can attract the user to continuously play this game and can make people engage in the plot of the story. Therefore, it aligns with my definition of interaction that interaction is a cyclic process. If we can successfully make it, it would be a special aircraft game. By the way, we are actually recreating an existing game. The interactive parts of the common aircraft games are mostly using the keyboard or a mouse to control the aircraft. So the way of interaction is our first innovation. Moreover, the story mode is another innovation. In this way, the users can enjoy the feeling of killing enemies as well as the experience of listening to an interesting story. And the users can also play the infinite mode to try to get a high score and compete with other players. 

Recitation 8: Serial Communication – Zhao Yang

Exercise 1:

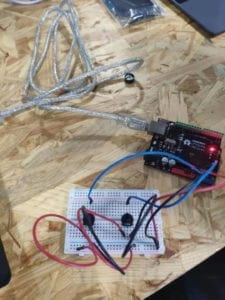
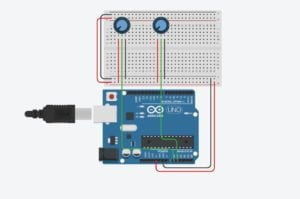
For this exercise, we were required to use Arduino to send values to Processing. We had done some similar exercises during classes before this recitation class, so this exercise was not too difficult to complete. When we do the first part of this exercise that control the position of the circle, the circle would move out of the canvas if I directly use the values from the Arduino. Thus, I had to map the value between 0 and 500. As I moved to the second part to make the Etch A Sketch work, I found the difficulty to store the previous values of x coordinate and y coordinate. In this case, I reread the original code and found that I just needed to assign these two values before the updateValue function. Finally, I created another Etch A Sketch by using Arduino and Processing. But I cannot draw as well as what the video showed. 

Exercise 2:

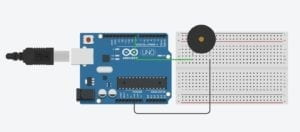
The second exercise required us to use Processing to send values to Arduino. We used the buzzer as the output of the exercise. And the values which were sent were the x coordinate and the y coordinate of the mouse, which are assigned as the frequency of the tone and the duration of the tone. At first, the tone would change as soon as you moved the mouse. Then, I added the interaction with the keyboard. In this case, only when you press the space key on the keyboard can the tone change. Since the tone wouldn’t change continuously, you can even play some melodies by moving the position of the mouse and pressing the space key. Maybe in the future, I would add more interactions with the keyboard to make it more interesting. 

Code:

https://github.com/JooooosephY/Recitation-8