Class 16 Exercise (Processing) – April 9 – Skyler Liu

Code:

void setup() {
     size(500, 500);
     background(255);
}
void draw() {
     if (mousePressed == true) {
     }
}
void mousePressed() {
     int r = int(random(0, 255));
     int g = int(random(0, 255));
     int b = int(random(0, 255));
     int c = int(random(0,150));
     fill (r, g, b, c);
     noStroke();
     int s = int(random(0, 300));
     ellipse(mouseX, mouseY, s, s);
}

Process: 

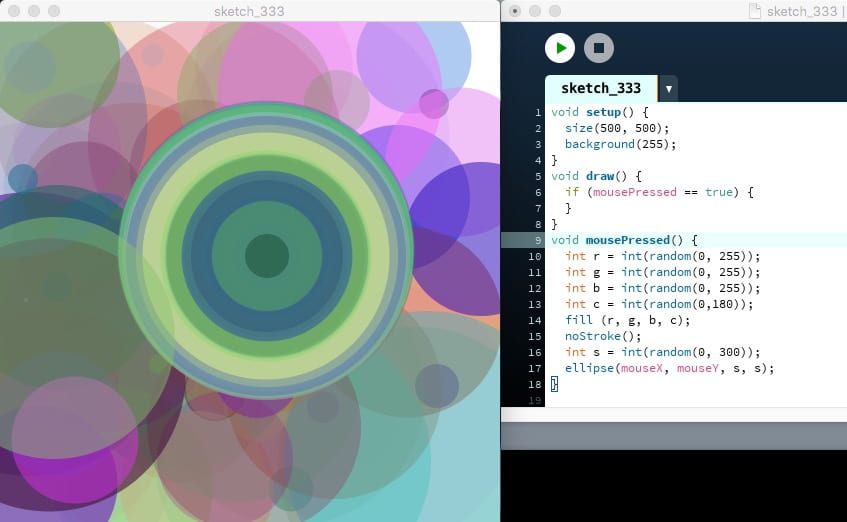
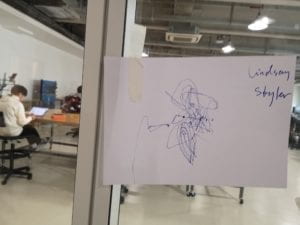
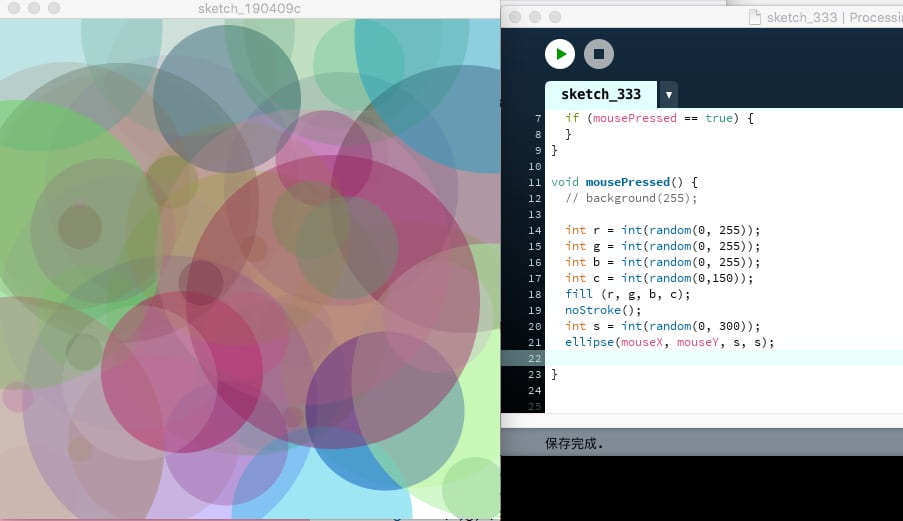
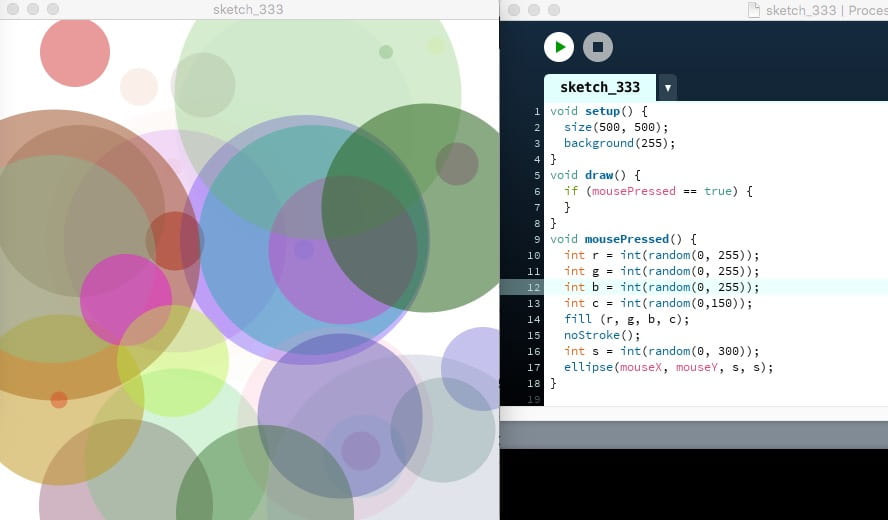
The original class exercise requires us to create a composition by using only circles and varying its color and/or size, and the interaction is only allowed by mousePressed. After completing the basic requirement, Professor Rudi suggested that I could also set a low transparency value in the work which would make the composition look more interesting. Inspired by this idea, I added an indefinite transparency which changes with the color and size together following the mouse pressing every time. My final production is shown in the pictures.

Music Conductor Simulator – Skyler Liu – Rudi

Context and Significance

During our group research project before, I defined interaction as the process of a device receiving signals from other subjects and reacting to it.  Based on the definition, we designed an intelligent feeding robot “Sfeeder” and our core aim is to design a device which can facilitate users’ life through interaction. The idea of facilitating users’ life through interaction has been continued in my midterm project, meanwhile, my partner and I also added artistic elements to it.

Our basic idea of the midterm project is to make an instrument which can be easily played by the beginner and their hand movements while playing it can also be a part of the artistic performance which has ornamental value. The idea originates from my experience that I learned piano for years and I have seen many beginners give up learning it because they thought they lacked the coordination of hands and brain – they would either press the wrong key if pay attention to the standard hand movements, or play the correct melody with hard or weird hand movement. Thus, we wish we could design an instrument that everyone can easily make a melody through it. The significance of such design is to lower the threshold of the art world, making all the people who are interested in music have the ability to play an instrument. Meanwhile, the players’ hand movements can also be appreciated from the perspective of arts, which is also the unique point in our design. 

Conception and Design

With the rough idea of making an interactive machine that makes melody based on the user’s movements it tracked, the basic components we chose for the project are 3 Arduinos, 3 breadboards, 4 sharp infrared distance sensors, and 8 buzzers. Each buzzer was coded with a  ¾ beats of melody in reference to the theme song of Netflix series Daredevil. And each sensor was coded to detect movements within two sets of ranges: 4cm to 10 cm and 10 cm to 30 cm, and both ranges affect a unique ¾ beats of melody from two different buzzers. In this way, we expected that when a player moves his/her hands above the instrument like a music conductor, the sensors would detect hand movements and trigger different buzzers with different melodies; the melodies together would assemble a song created by the player himself/herself. 

We chose buzzers to make the melody because they are small and can be easily hidden under the surface of the instrument. We also considered using MP3 players to replace the buzzers according to Professor Rudi’s advice, as the MP3 player could create more fair-sounding melody than buzzers. However, because we designed the instrument as a portable one, its volume should be as small as possible. At last, we gave up on the idea of MP3 player because it’s much bigger than buzzers and would complicate the circuit which had been already hard to be hidden in a shell; and if there were some parts of circuit naked before players’ eyes, they might feel uncomfortable. What’s more, the reason why we chose sharp infrared distance sensors as the core components is that they are a kind of basic sensors which can detect human movements; its usage exactly fits our vision of the project. Also, in the precious recitation, I once used the ultrasonic sensor, which provided me an experience of coding a sensor to detect the distance; comparing to it, sharp infrared distance sensor has a smaller volume which makes it a better choice for the appearance of our instrument. In addition, at first the components we used also included 8 LEDs as we planned to place the sensors on four different faces inside a box, and the LEDs were placed on the surfaces of the box so that they can indicate the relevant position of the sensors inside the box. But later we noticed when a user made movements inside the box, their attention would be attracted by the interior of the box instead of where the LEDs were, so the LEDs could hardly achieve the effect as we expected and even confused the users. Professor Rudi also pointed out this problem; as a result, we finally cut out the LEDs from our circuit. 

Fabrication and Production

Step #1 – Circuit
Step #2 – User Testing Version
Step #3 – Final Version
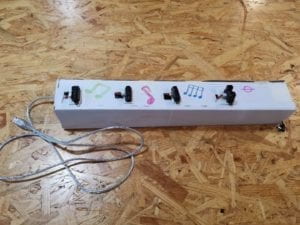
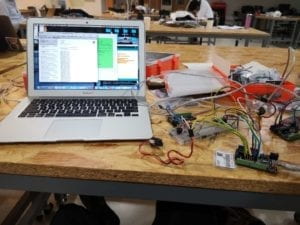
The most significant steps in my production process should be coding and user testing. Because coding is the basis of our project and user testing offers really valuable advice for us to make the project better interacted with users and closer to our goal. I was mainly in charge of designing the circuit, code, and appearance for our project. At the very beginning, I found the most difficult part is to code the melody for different buzzers since I did not have much experience of coding. I had totally no idea about how to do the work. Then I searched a post of the process that a blogger made the little device which can play Happy Birthday Song for his girlfriend through Arduino and buzzer. This post helped me a lot to understand how to edit the notes and beats by codes. When I first completed the code of melodies, I didn’t know how to combine the code for melodies and the code for sensors together. Which means at first I could only make the buzzer ring once when I connected the power supply, instead of making them play the melodies following the data change of sensors. After Tristen and Nick’s help, I finally understood the key was to remove the loop for the melody beneath the “if; else” code which divided the distance value into two ranges, and successfully completed the code.

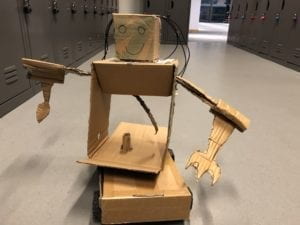
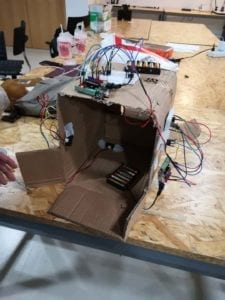
And we made some important changes after the user testing: one is cutting out the LEDs as I mentioned before; another one is changing the appearance of it and the position of the sensors (as pictures show). During the user testing, some users mentioned that the naked circuit made the instrument looked scary and messy and made people not want to get close to it, so in the final version we hid all the circuits under the shell; some users also mentioned that the look made them confused about its function and purpose, so we made the final version looked neater and drew some notes on its shell to remind people that it was an instrument; and because some sensors always detected something even when there were no hand movements in front it, some users also got confused about how to trigger the melodies, therefore, we arranged the sensors in an orderly manner on one surface of its shell for reducing such situation. However, the sensors sometimes still could not work perfectly after we made sure the circuit and code had no problem; according to others’ advice, I think maybe changing the sensors into another more stable kind of sensors is a good idea for future development.

Conclusions

The goal of our project is to design an interactive instrument that the player can create their own melody by combining different hand movements, while the melody and the hand movements can be both considered as parts of the artistic performance; we hope our project could encourage those people who failed to learn piano or other complicated instruments to still keep the passion for the music and build up the confidence of playing an instrument well with artistic hand movements. Our project aligns with my definition of interaction because it achieves the intelligent communication between other subjects and the device – it receives signals from the player’s hand movements and gives responses in the way of different melodies. However, the interaction was not perfect because the sensors we used sometimes misread the distance of obstacles in front of them. This was also what our audience expressed kind of disturbed their experience of interacting with our project. If I had more time, I would adjust the sensors or even change their kinds to make sure the sensors can work accurately. I would also make some changes to the interactive method. Our instrument now plays basically different melodies when the player changes the position of their hands, and some audiences expressed that sometimes the connection between the melody change and their hand movements was not clear. If I had more time, I would like to make the interactive method of how the player’s hand movements affect the change of melody clearer to observe and learn. So that it would also be easier for the player to create their own song through our instrument after having a clearer sense of how to change the basic melodies. For example, I could choose only one basic tone for each buzzer, but make their beats change responding to the distance between the hands and the sensors.

From my perspective, the most valuable thing I have learned from the setbacks and failures is that we should do everything step by step instead of expecting to achieve a lot of functions at the same time, otherwise, we might not make each function work well as we expected. The midterm project made me realize how hard it was to design a product and accomplish it. I appreciate all the interactive projects and their designers because they all try to facilitate our life or bring us a sense of beauty in some ways. Even the failed or imperfect project should be appreciated because without them we cannot achieve a better work. I will always carry the courage of starting from zero and standing up wherever I fall which grew inside me during the project. I believe such lessons are important to all the creators, designers and inventors in the entire world.
Recitation 4: Drawing Machines – By Skyler Liu

Step 1: Build the Circuit

Materials:
1 * 42STH33-0404AC stepper motor
1 * SN754410NE ic chip
1 * power jack
1 * 12 VDC power supply
1 * Arduino kit and its contents

Diagram:

Picture: 

Video:

Process:

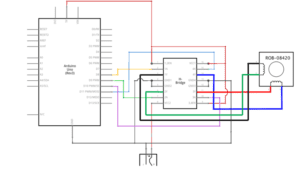
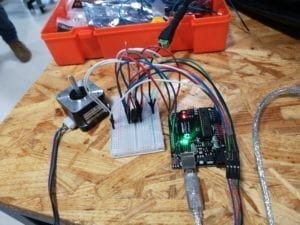
Though the circuit is complicated, I didn’t really encounter any difficulties when I made it. I made the circuit as the diagram very carefully and connected it to my computer after double check. My first try was successful. After I finished my work, I helped my partner check her circuit because the motor did not move at all. At last, we found there was a short out in her circuit – she forgot to connect a pin of the ic chip to the ground, and that mistake unfortunately burnt out her Arduino. This event taught me a lesson that only when we make sure our circuit is safe, we can connect it to our computer, otherwise, both our computer and Arduino could be destroyed.

Step 2: Control rotation with a potentiometer

Materials: 

1* potentiometer
1 * 42STH33-0404AC stepper motor
1 * SN754410NE ic chip
1 * power jack
1 * 12 VDC power supply
1 * Arduino kit and its contents

Video:

Process:

When I completed the circuit of step 2, I found the motor didn’t react to the potentiometer. After our assistant Eszter helped me check my work, we found my circuit had no mistake but I less copied one line of the sample code. Therefore, my code wasn’t completed and it couldn’t make the potentiometer command the motor. Next time I would copy all parts of the sample then make changes, instead of taking it for granted and leaving the key components.

Step 3: Build a Drawing Machine

Materials (based on the work of step 2):

2 * Laser-cut short arms
2 * Laser-cut long arms
1* Laser-cut motor holder
2 * 3D printed motor coupling
5 * Paper Fasteners
1 * Pen that fits the laser-cut mechanisms
Paper

Video:

Picture:

Process:

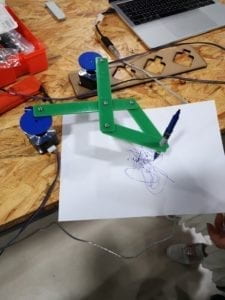
Because my partner burnt out her Arduino in step 1 and it took us a lot of time to figure out where the problem was, her progress was very behindhand – after I completed step 2, she was still stuck on step 1. I turned to help her again when I once finished my work. However, when her work of step 2 was finally done, the official class time was just over. Thanks to the fellows waiting for us till we completed the entire work. Our drawing machine made a kind of post-modern painting, I would call it “The Order in Disorder”.

Question 1: What kind of machines would you be interested in building? Add a reflection about the use of actuators, the digital manipulation of art, and the creative process to your blog post.

I want to build an automatic door unlike the revolving door but the normal push/pull door, because the revolving door is not suitable for every place and the push/pull door is more common; sometimes the push/pull door is too heavy and hard to open or it’s confusing for the passerby to recognize whether pushing or pulling can open the door, at that time, I think an automatic push/pull door would be helpful.

When someone is close to the door, the sensor would detect the signal and send a command to the actuators, then the actuators would provide power to open the door. And the door needs to be able to rotate 180o because it has to rotate to the opposite direction of the passerby to be open, otherwise, it might hurt the passerby. When it detects movement on its both sides, it should open the door slowly to make sure the passerby can recognize the opening direction and avoid hitting.

Question 2: Choose an art installation mentioned in the reading ART + Science NOW, Stephen Wilson (Kinetics chapter). Post your thoughts about it and make a comparison with the work you did during this recitation. How do you think that the artist selected those specific actuators for his project?

Aoki Takafumi, Kobito: Virtual Brownies, 2005

This project is an interaction between the real world and virtual world. If a user pushes a physical block in the reality, a small animal on the digital screen would also be pushed by a digital block; and if the digital block is pushed by the small animal on the digital screen, the physical block would also be moved. The designer uses magnetic actuators to control the movement of the physical blocks. Similarly, in the work we did in the recitation, we used the actuators to control the movement of a pen. I think the artist chooses the actuators depending on their functions – if their functions can fit into the project, helping achieve the movement as designed better. For example, in Takafumi’s project, the physical block needs the magnetic actuators to actuate as the track of digital block on the screen.


Group Project Reflection – By Skyler Liu

Definition of Interaction:

In my opinion, “interaction” means the process of a device receiving signals from other subjects and reacting to it; it either proceeds specific intelligent algorithm or procedure as the response to received signals, finally comes out feedback. It is a conversation between two subjects, including the exchange of information.

Project that aligns with my definition:

Sharing Faces

(https://www.creativeapplications.net/openframeworks/sharing-faces-seeing-yourself-reflected-in-the-image-of-others/)

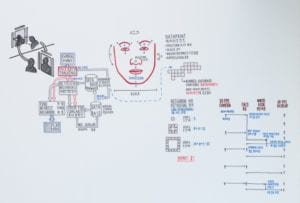
This project aligns with my definition of interaction because its working process requires information exchange with other subjects. When a person looks at the screen, the device matches his face locations and as the person moves, the device pulls out a mirror-like image of others matching the new location (process as picture shows). Without a person moving in front of it, the project cannot work independently. Meanwhile, the face match technology is an intelligence algorithm helping the project come out the interacted result for its experiencers. Therefore, combining the conversation between the users and itself with a “thinking” process, the project aligns with “interaction” in my definition.

Project that does not align with my definition

Opening Highway 

(https://www.creativeapplications.net/environment/open-highway-surfacing-the-hidden-layers-of-the-city/)

Though the project proceeds specific arithmetic and when people walk close to this project, they can receive information – which is a visual and auditory effect simulating the environment in the highway. However, the effect which the project gives just runs a pre-set independent algorithm instead of responding to other subjects, which means the relation between the project and its audience is not bidirectional; it cannot form a real sense of “conversation” between other subjects and itself.

Our Project:

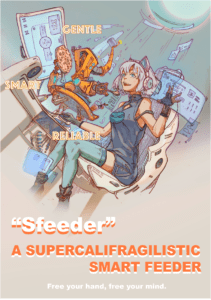
Poster (version#1)
Poster (version#2)
“Sfeeder”

The idea for Sfeeder originated from a similar experience of many members in our group that during the waiting time for our delivery food, we usually started to do another thing and at that time interruption would be unpleasant, so that sometimes when the delivery food arrived, we met a dilemma of finishing the work in hand first or finishing the food first. Most of time, the result was not perfect: we either found our food was already cold when we put down the work or could not enjoy both eating and working at the same time. Therefore, we thought that if there was a device could feed us while we were doing other things, the problem would be readily solved.

By our design, Sfeeder is a little robot which is able to recognize the masters’ voice and understand their request is for which dish, then it would scan the dishes on the table and deliver required food to the master, feeding him by its arms with knives and folks (could change to chopsticks or other tableware). It would also be able to detect the masters’ health condition and warn the master if the required food is not suitable for his health condition. 

Sfeeder follows my definition of interaction because it can “listen” to the master’s requirement and gives feedback in the way either feed the master or give warnings after scanning and analyzing. The process of its work is highly interacted while it has continuous communication with the master. The communication between its master and Sfeeder is bidirectional. Not only the master does enjoy its service, it takes the master’s words as command and carries out analysis with technology as well. By the way, its appearance is also designed by us on purpose. It has hair and arms, that is because we wanted to make people feel close to it; with an agreeable appearance, the interaction between the user and the device would be more harmonious. 

Recitation 3: Sensors – By Skyler Liu

Sensor: Ultrasonic Ranger (as a Distance Sensor)

Components:

1 * Arduino Uno

1 * USB-B to USB-A cable

1 * HC-SR04 Ultrasonic Sensor

3 * LED

3* 220-ohm resistors

Several jumper cables

Diagram:

Picture:

Videos:

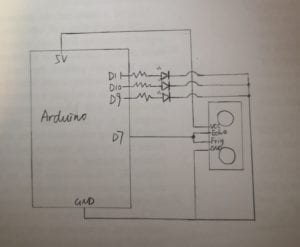
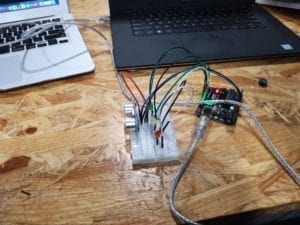
Process: My partner chose an Ultrasonic Rager for our team. First, we tried to figure out how the sensor works. After we connected the circuit, we used the example code Ping to test the sensor. However, though we got some changes in the value on the monitor when we moved our hands in front of the sensor, we found the range of the value could even reach 3000 cm, which was obviously not correct. Then we got help from the assistant, she pointed out that the value was wrong because we didn’t connect both Trig and Echo to the same Digital Pin in the Arduino. After we corrected this mistake, the sensor finally worked normally. Then we started to add other components into the circuit. We first added one LED into the circuit and I suggested that we could take the example of the code we learned in the last course which was to command the LED to light up when the sensor value got below or beyond a certain number. After a few minutes trying, we successfully fit the piece of code into the Ping code and made the LED light up when the distance of something and the sensor was less than 20 cm. Then we tried to complicate the circuit and the code. We added another two LEDs into the circuit and altered the code. Finally, we made a device which would light up the green light when something is less than 50 cm from it; light up the orange light when something is less than 30 cm from it, at the end light up the red light when something is less than 10 cm from it.

Question 1:

What did you intend to assemble in the recitation exercise? If your sensor/actuator combination were to be used for pragmatic purposes, who would use it, why would they use it, and how could it be used?

We intended to assemble a distance annunciator which gives warning information by lights in the recitation. I think every resident could use the device. They can either assemble it in the doorway or put it in the car. It could warn the homeowner or the car owner if someone wants to stalk closer and intend to do a crime. We can also add rings into the device to make the warning more obvious.

Question 2:

Code is often compared to following a recipe or tutorial.  Why do you think that is?

I think the first reason is that they all need to run certain steps one by one. When we follow a recipe or tutorial, we need to do what it requires to do and cannot mix up the order, otherwise, the product might be horrible. Code is also like this. If the order of some commands is wrong, we would be very likely to not get the result as expected. Also, I think they are all the basis for work in each of their fields. For a new cook, a recipe is the basis for him to produce a meal and for the circuit, code is the basis for us to command the circuit to follow our ideas.

Question 3:

In Language of New Media, Manovich describes the influence of computers on new media. In what ways do you believe the computer influences our human behaviors?

I think the computer will make the public’s patience for obtaining information and publishing opinions decreased  – people will not wait for TV or broadcasts and other media due to the convenience and efficiency of getting information and making comments in the computer. Also, I think there will be fewer and fewer people going to the physical store because buying things through the computer is much easier, and online shopping is becoming safer and safer following the development of other technologies. There will be fewer reasons for people to not choose it.