TONY STAR – Yu Yan (Sonny) – Inmi Lee

  • Context and Significance

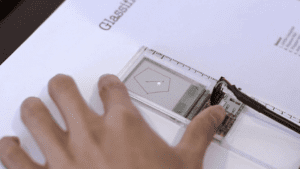
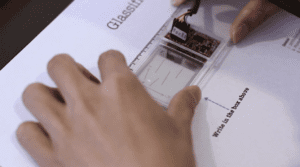
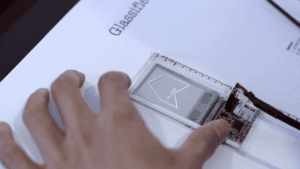
In the previous Group Project, the definition of “interaction” that my group came up with is one of my inspirations of this midterm project.  We came up with the idea that “interaction is a continuous conversation between two or more corresponding elements”. In order to realize this “continuous conversation”, the output of the design should change as soon as the input varies. Therefore, there should be multiple outputs corresponding to different inputs. The project that aligned with this definition during my research for Group Project is a ruler with transparent display to supplement physical drawing. In this project, the input is different physical drawings from the user, and the output is different dynamic / static feedbacks shown on the screen which based on the input. In addition, there are over one type of outputs such as playing ballgames, measuring length, and calculating area. It makes me realize that interaction should contain various kinds of outputs according to different inputs. For our project, what is significant is that we set up two inputs to control three different outputs. We used two ultrasonic sensors to detect the distance of controlling hands. One sensor controls the speed of the lights flashing and the melody that is playing, another one controls the brightness of surrounding lights. Our initial idea for the project originated from the Launchpad which many artists, DJs, and people who are interested in playing music would use it to make their own music. So we plan to make a musical instrument as well. Since in the Launchpad, there are multiple buttons that control different melody, drumbeat, and also the variation of lights on the board, we borrowed the idea of different buttons controlling different outputs. However, we designed our project in a different way. Instead of using multiple buttons, we changed the input to two ultrasonic sensors. We also simplified the output to change only one piece of melody and two kinds of lights. To accommodate the theme of our melody (Twinkle Twinkle Little Star), we designed a star-shape container for the instrument. Our intended users are children and people who enjoy making their own music. For children, this is a very interesting toy that can not only teach them how to sing a nursery rhyme but also cultivate their intelligence on how to control things. For music lovers, it gives them a chance to create their own music that doesn’t require any musical background. 

  • Conception and Design

When we designed the product, we wanted to apply multiple inputs and outputs so that it would not be too boring. According to my definition of interaction, our product should constantly give feedbacks, especially different feedbacks, corresponding to the user’s different input. During the first phase of our designing, we tried to use buttons as the input. However, as buttons are too normal and tedious for users, we changed the input to a pressure sensor. But when we tested it, we found that the sensor is not sensitive enough and that we could not write the code to make the output change as soon as the input changes. So we changed the input again to ultrasonic sensors. This time the sensor is more sensitive, and we made a few adjustments to our code so that the device can work as we want. In terms of the output, we planned to add different kinds to the device. So we chose the output on both vision and hearing – LED lights and a buzzer. In this way, users can change two types of outputs when they change the input. For the appearance of the instrument, we used several plastic boards with laser-cut. When choosing the materials, what we were looking for is something light and stable enough, and doesn’t take too much time to assemble. At first, we thought about using 3D printer to print the container. However, considering the time limitation and the difficulty of modeling, we decided to use laser-cut to cut the shape and then use melt adhesive to stick each part together. Since plastic is light, stable, and easy to assemble, we think it’s the best material for our project.
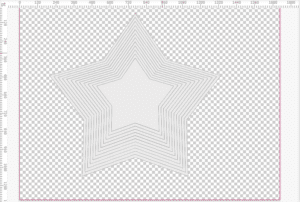
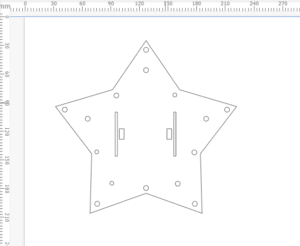
(This is our designing graph for the laser-cur.)
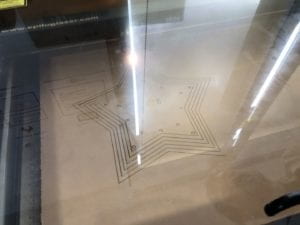
(When the laser-cut machine is cutting the plastic board.)
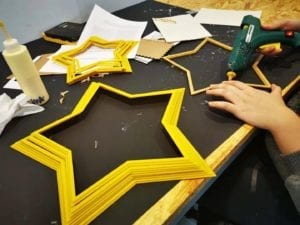
(We are using the melt adhesive to stick each part together.)
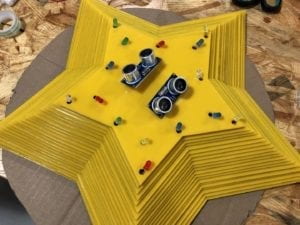
(The final look of our TONY STAR!!!)

  • Fabrication and Production

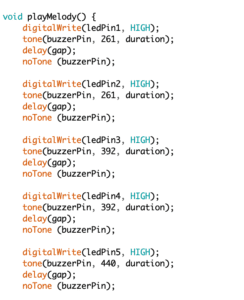
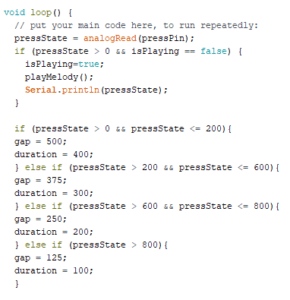
The hardest and the most significant part of our production process would be writing the code. At first, things went well as there was not a serious problem occurred. We drew a “void” function called “playMelody()” that stores all the notes and the sequence of lights into the code. We also added a few “if statements so that outputs can vary based on the value of users’ pressure. By changing the gap and the duration, we changed the speed of the melody. The harder users press, the faster the melody would get. However, at the night before the user testing session, as we were working on making the lights turn on one by one following each note of the melody, somehow we got stuck on the situation that all the lights turned on at the same time and we cannot find the flaws in our code. After we turned to our professors for help, they worked with us to see where the problem is. Finally, one of our professors found a solution for us: by adding a “boolean” statement in a new “if” statement, we created a condition-based function to control the circuit. Also, the key to fix our problem is to add a “noTone (buzzerPin)” at the end of each note. After we added these crucial parts into our code, the circuit worked as the way we want, eventually. 
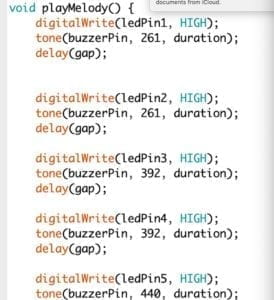
By contrast, the process of making the appearance of the instrument has been much smoother. Since we’ve already had a basic idea for the appearance, the only thing we need to do is to turn our ideas into a physical form. Our idea is to make a star-shape box with lights and input devices on the top of its surface. We were attempting to use 3D printer to print this box, so we tried to model it on our computer. However, due to the complexity of the shape, we found it too hard to model and it could cost us too much time. After taking one of my friends’ advice, we decided to use laser-cut to build the box. We also received help from other fellows that are very useful and essential to our final version of the star-shape box. In this process, we learned a lot of skills that we don’t get the chance to practise during the class such as building a 3D model for 3D printer, drawing a cutting graph for laser-cut, and making the most use of Arduino’s functions. The process also taught me that I should ask for help as soon as I get stuck at some point. Searching help from other people is very useful and helpful to make the project progress continue.

During the user testing session, we received many useful feedbacks that can help us improve our project. We were still using the pressure sensor as the input device at that time. When other classmates came to interact with our project, they didn’t know exactly what to do to the device working. The interaction was supposed to be that users press once, leave their fingers off the sensor, and wait until the melody stop to begin another round. However, many users kept their fingers on the sensor until the melody stopped, and due to the lack of sensitivity of the sensor, they cannot change the speed of the melody. So we had to explain to them how our project works and how they should interact with it. Some classmates pointed out that our project is not obvious enough and they didn’t know what to do at first when they see it. They also mentioned that using the pressure sensor may not be the best input since it’s not sensitive enough. They suggested us to change another sensor and make the output change as soon as the input has changed. After the user testing session, we took their advice to change our input to ultrasonic sensors which are more sensitive than the pressure sensor. We also modified the code so that the output can change immediately when users change their input. This change helps us make the project more align with our definition of interaction. 
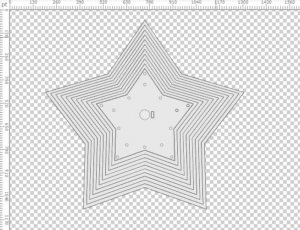
(This is the former sketch of the appearance when we still used the pressure sensor.)
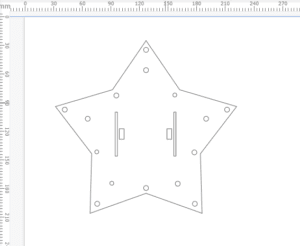
(This is the final sketch after we changed the input to ultrasonic sensors.)

  • Conclusions

The goals of our project are to make an interactive device that is interesting and entertaining, and to help people explore their potential possibilities. Our definition of interaction is “a continuous conversation between multiple units, which involves variation of inputs and outputs”. The final product of our project aligned with our definition since users can change the output continuously when they interact with it. It meets our standard of having a “continuous conversation” between the device and the users. We expected to see audiences make sense of it as soon as they see it. During the final presentation session, many classmates interacted with our product before we made an explanation. However, it took them some time to figure out that one sensor controls the speed of flashing lights and the melody, another one controls the brightness of other lights. They viewed it as an interesting musical instrument that they can use to be a DJ to create their own music or remix. As our professor pointed out, users who are not from our class may not understand what the sensors are and it’s possible that they don’t know how to interact with it. This is a useful comment for us because we didn’t think about this aspect when we designed our project. If I had more time, I would probably print a sign on the box’s surface to make it more obvious to users. I also considered changing the input to a more obvious one that everyone can make sense of it without any background knowledge, and adding more harmonious melodies as well as drumbeats to the output. From the setbacks we met during the coding phase, the first thing I learned is to seek help promptly. The process of solving the problems also cultivate my patience and calmness to face all the challenges I meet. What I learned from my accomplishments is teamwork and cooperation. Without my partner, I cannot come up with so many good ideas and build such as amazing product by myself. The key element of our success is the teamwork with my partner. The experience of completing this project enlightens me that building something that aligns with your definition is never an easy thing, but with your own constant efforts and the help of others, you will accomplish your goal, eventually. The most important thing about the assignment is never the result, but the lessons you learn from the process.

  • References

Glassified – Ruler with transparent display to supplement physical drawing

https://www.youtube.com/channel/UCBLijWZ1jr_6VrIlhp3fFtw
Recitation 4: Drawing Machines by Yu Yan (Sonny)

Introduction:

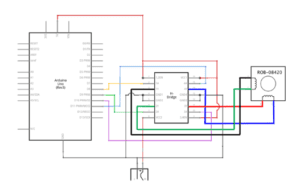
In this recitation, first, I built a circuit to control the stepper motor and then add a potentiometer into the circuit individually. After I finished these steps, I paired up with a partner to build a drawing machine using two stepper motors.

Materials:

For Steps 1 and 2

1 * 42STH33-0404AC stepper motor
1 * L293D ic chip
1 * power jack
1 * 12 VDC power supply
1 * Arduino kit and its contents

For Step 3

2 * Laser-cut short arms
2 * Laser-cut long arms
1* Laser-cut motor holder
2 * 3D printed motor coupling
5 * Paper Fasteners
1 * Pen that fits the laser-cut mechanisms
Paper

Step 1: Build the circuit

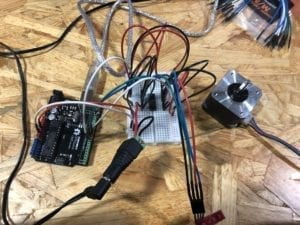
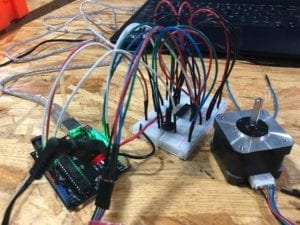
I followed the given diagram to build a circuit that can control the stepper motor. After I finished building the circuit, I tried to connect my Arduino board to my computer. However, the Arduino board didn’t work, and it was heating. So I asked my instructor for help. At first, we both thought I fried my Arduino board and it cannot work again. But after we checked how I connected the circuit, we found that I put some wires in a wrong place. There were two wires that were supposed to be connected to the power, but I accidently connected them to the ground. That’s why my Arduino board isn’t working after connecting to the computer. When I fixed this problem, my Arduino started to work and the stepper motor rotated smoothly.

This is a picture of a wrong circuit.

These are some pictures and video of the working circuit.

Step 2: Control rotation with a potentiometer

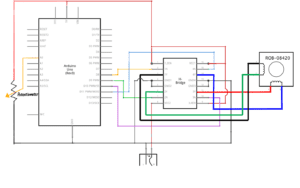
In this step, I changed the circuit by adding a potentiometer into it so that I can control the rotation of the stepper motor. I also made a few changes to the code to fit the motor and to match the movement of the knob with the rotation of the motor.

Here is how I changed the circuit and how the circuit worked.

Step 3: Build a Drawing Machine!

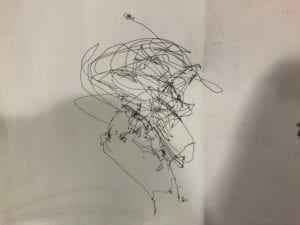
After completing the steps above, I paired up with another classmate and built a drawing machine together. We used some Laser-cut arms, 3D printed motor coupling and paper fasteners to build the machine.

Let’s see how the machine works!

Question 1:

What kind of machines would you be interested in building? Add a reflection about the use of actuators, the digital manipulation of art, and the creative process to your blog post.

I think I would be interested in building the kind of machines that are very entertaining and artistic. I’m thinking of a keyboard whose shape is like a semi-disco ball and people can use it to play certain music games or make your own music. Unlike traditional keyboard, this one is based on ergonomics which allows people to use it for a long time without hands getting tired or stiff. Besides, functioning like the launchpad, people can use it to create or compose their own music as well. By creating different drumbeat and instrument sounds when pressing different buttons, people can produce various kinds of musical pieces. It can also be an art piece decorating your house because it has a very nice and unique appearance. 

Question 2:

Choose an art installation mentioned in the reading ART + Science NOW, Stephen Wilson (Kinetics chapter). Post your thoughts about it and make a comparison with the work you did during this recitation. How do you think that the artist selected those specific actuators for his project?

I’m very interested in the project called Waves made by Daniel Palacios JimĂ©nez in 2006. The way it interacts with people is through motion sensing. When there is no motion, the elastic rope stays still. When there is much motion, complex and chaotic patterns and sounds would show up. I think it represents people’s physical actions directly and dramatically. By presenting sounds and visual waves using the elastic rope, it shows a strong and close interaction with people around. Comparing this project with the drawing machine that I just built, they both use rotatable motors to realize the output. However, while the drawing machine responds to people rotating the potentiometer, Waves respond to people’s motion, which contains much more physical interactions than simply rotating something. The output of these two machines differ as well. The output of the drawing machine is the movements of its arms, or the painting eventually. The output of Waves is the sounds and movements of the rope. In terms of how the artist selected those specific actuators, I think it depends on the effects he wants to show and the sense organs that he wants to interact. For Waves, the artist chooses visual and auditory effects in order to exaggerate people’s motion. This kind of effect can be more directly perceived through the senses, thus it is clearer to the audience. 

Reflection for Group Project by Yu Yan (Sonny)

From my point of view, interaction is an iterative process which involves actions and feedback. The whole process are composed by input, process, and output, or more straightaway, “listening, thinking, and speaking”. Interaction needs constant response. It exists not only between humans but also between humans and machines/devices. 

Before I read the article called The Art of Interactive Design, I haven’t had a concrete definition for interaction. For me, interaction just means actions or talking between different people. However, after I read Crawford’s article, I started to have a more detailed definition for interaction. In Crawford’s article, he gives the definition that “interaction is a cyclic process in which two actors alternately listen, think, and speak”, which exerts a strong influence on me when I built my own definition for interaction. Besides the definition, Crawford also mentions the degrees of interactivity. He mentioned that objects such as refrigerators interact with human beings at a low level (Crawford 6). This reminded me that interaction exists not only between different humans but also between humans and devices. The only difference is that interactions between humans and devices could be at a lower level than the ones between different humans. That’s basically how I shaped my definition for interaction.

During my research, I found a project that aligned with my definition for interaction called Glassified – Ruler with transparent display to supplement physical drawing. In this project, users can draw any geometric figure. After placing the glassified-ruler onto the figure, the screen can give dynamic feedback to the users. The reason why I think this project aligned with my definition is that this device responds to people’s drawing. The geometric figure that people draw is the input. The process is “to solve math problems, combine drawing with computer algorithms, and learn physics using a physics simulator to understand movement and forces in physics drawings”. The output is the image that displays on the screen. 

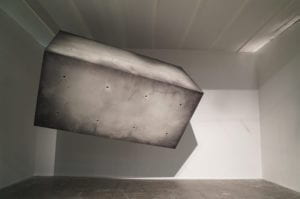
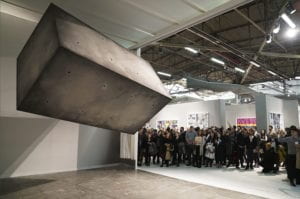
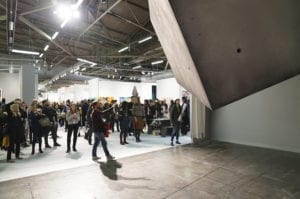
In terms of the project that doesn’t align with my definition, I chose the one named Studio Drift – Free floating concrete monolith & HoloLens Artwork. Even though it seems like this floating concrete object is interacting with the surrounding air, there is no “input, process, output” cycle. Besides, there is no interaction between this object and visitors. It stays by its own floatage and gives no feedback or response to human actions. That’s why I think this project doesn’t align with my definition.

For my group, we came up with a definition for interaction – interaction is a continuous conversation between two or more corresponding elements. Our idea is to use the thermometer as a sensor to sense the user’s body temperature and adjust the ambient temperature accordingly. In the process, the user is interacting with sensors and the air conditioning system. The input is the user’s body temperature. The process is that sensors transfer the temperature information to the house’s air conditioner and the AC start to compute the appropriate house temperature according to the information that sensors provide. Then the output is the suitable house temperature. Our project has a complete process for interaction and gives response/feedback to the user’s body temperature (input), just like the project that aligned with the definition. We tended to make our project interact with human beings and also with different devices so that it wouldn’t happen to be like the project that doesn’t align with the definition. 

Reference:

http://s3-ap-southeast-1.amazonaws.com/ima-wp/wp-content/uploads/sites/3/2017/08/05164121/The-Art-of-Interactive-Design-brief.pdf

Glassified – Ruler with transparent display to supplement physical drawing

Studio Drift – Free floating concrete monolith & HoloLens Artwork

Recitation 3: Sensors by Yu Yan (Sonny)

Introduction:

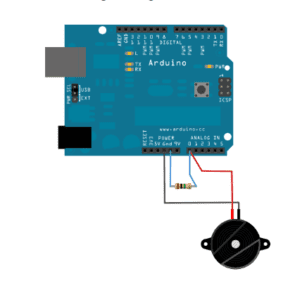
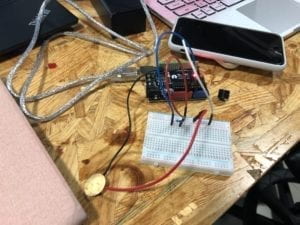
In this recitation, my partner and I built a vibration sensor which can detect vibration and provide output. Despite the original circuit, we also added a buzzer and an LED as the output.

Materials:

  • Arduino Board
  • Piezo electric disc
  • 1 Megohm resistor
  • 1 Breadboard
  • 1 LED
  • 1 Buzzer
  • Several wires

The Original Circuit:

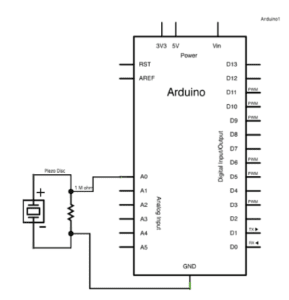
In the original circuit, we used an Arduino board, a breadboard, a resistor and a Piezo electric disc. When the circuit is working, we opened the serial monitor to check the output. We also changed the threshold value to change the sensor’s overall sensitivity.

Adding Different Outputs

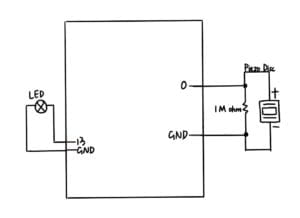
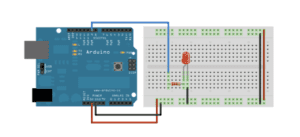
We tried to add an LED as the new output first. The basic circuit stayed the same. The only thing we need to do is to connect an LED with digital pin. When we knocked the Piezo disc, the LED would be turned on and another knock would turn it off.

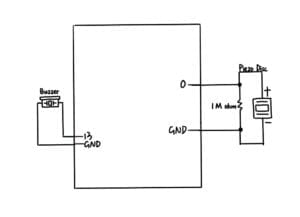
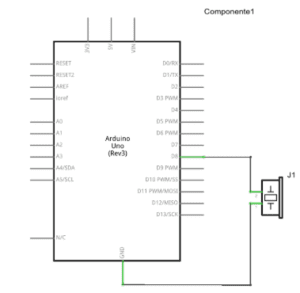
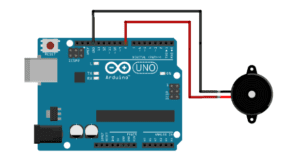
The second output we tried is a buzzer. The circuit for the buzzer is nearly the same as the LED’s. When we knocked the disc, the buzzer made a sound. 

(Reference: https://www.arduino.cc/en/Tutorial/Knock)

Question 1:

We intended to assemble a touch board. This circuit can be used as a lamp with a touch board as its switch. Students would use it because there is no noise when you turn it on or turn it off, which could avoid interrupting their roommates. Whenever you use it, you just have to touch the board, and the lamp would be turned on.

Question 2:

A recipe or tutorial provides detailed steps and the materials that you need to make something. If you follow the recipe, you can make a good dish.  But if you make a mistake or forget some ingredients, the taste would change and you cannot make the same dish that you want to. The code is quite similar.  By following the code, the process can run successfully and eventually you can get what you want. However, if you didn’t follow it correctly, you cannot get your desired output.

Question 3:

Computers have provided a lot of convenience to our daily lives. After using the computer, we don’t have to do any calculations, we can get all kinds of information from the Internet, and we can type our ideas or homework down so that pen is not needed anymore. Computers have changed our lives a lot. Without computers, life would be so inconvenient. That’s why I believe the computer influences our human behaviors.

Recitation 2: Arduino Basics by Yu Yan (Sonny)

Introduction:

In this class, we learned to build three circuits including fade, toneMelody and speed game. The details are as followed.

Materials:

  • 1 * Arduino Uno
  • 1 * USB A to B cable
  • 1 * breadboard
  • 1 * buzzer
  • 2 * LEDs
  • 2 * 220 ohm resistors
  • 2 * 10k ohm resistors
  • 2 * pushbottons
  • A handful of jumper cables
  • 2 * arcade buttons
  • 1 * Multimeter

Circuit 1: Fade

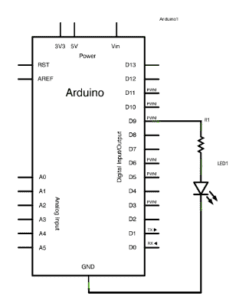
For this circuit, we followed the instruction from the website and built a circuit to fade an LED off and on. To build the circuit, we used three wires, an Arduino Uno, a breadboard, a resistor and an LED. By changing the number in “delay”, we also changed the speed of its fading.

Circuit 2: toneMelody

This circuit is also very simple. We used two wires, an Arduino Uno, a breadboard and a buzzer to build it. In this circuit, we used the code to let the buzzer make a melodic sound.

Circuit 3: Speed Game

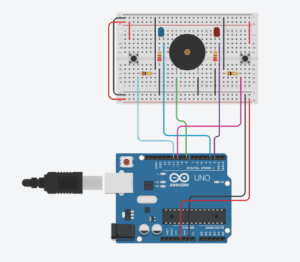
This is a relatively complicated circuit compared to the previous two. We used a breadboard, an Arduino Uno, two push-buttons, two LEDs, a buzzer, four resistors and several wires. When the circuit is completed, two players can play together. If one player press the button fast enough for a few seconds, the LED on his/her side would be turned on showing that he/she has won the game.

Question 1:

Definition: Interaction is an iterative process which involves actions and feedbacks. The whole process are composed by input, process, and output, or more straightaway, “listening, thinking, and speaking”. Interaction needs constant response. It exists not only between humans but also between humans and machines/devices. I often use my computer and my phone in my daily lives for doing my homework, chatting with my friends, searching information, etc. I think the relationship between me and my devices can be counted as an interaction because they can respond to my action constantly. In other words, they process my input and provide output back to me. The circuits that I just built also did the same thing. They respond to my input — the code and pressing the button. 

Question 2:

We used the 10k resistor to protect the circuit. If we don’t use the resistor, the voltage would be too high and the circuit might be damaged.

Question 3:

If I have 100,000 LEDs of any brightness and color at my disposal, I would make it as a light curtain and put it on the wall in my living room. I think turning them into a light curtain would be so cool and I can also make them create any picture that I want to.