Project Proposal by Anica Yao

Idea 1: “Doctor’s training kitchen”

This is a health detector and also a cooking tutorial. Firstly, the user can stand on a “scale”( force sensor ) and type a group of body information (eg. weight, diet habit, etc. )  on the screen. Based on your health condition ( BMI may be calculated and indicated through an animation ), it will recommend the most suitable dish for you. There will be a handful of choices in the data library, and the dish together with its recipe will pop on the screen. Then, the user can follow a cooking tutorial. The tutorial provides a hands-on experience where you can use sensors to make your delicious dishes step by step. For example, you can clench your fist to knead the dough, wave your hand up and down to cut the vegetables, and hold the gravity board to cook them on the stove. Based on your performance during this process, you can get a final score and feedback.
This game is based on the cooking games we played before. One of them linked down below is called Cooking MAMA. Also, we notice that more and more students are trying to cook at the dorm, but sometimes they can not go pretty well. We consider this project significant, for it targets those young people who want to pursue a healthy life but don’t know what to do or those who live on their own. Usually, when people want to cook by themselves, they buy recipes at the store, search for online recipes in various apps, or search the Tiktok for cooking videos. In comparison, our potential design may help people cook more easily through trials and errors without possible losses ( eg. waste of raw materials ), so that they can be more motivated to cook and figure out how to develop a healthy lifestyle. 

Idea 2: “The aviator”

This is a game involving two or more players in an aerial competition. It requires each of the players to move their arms/hands to change the position of the virtual “aviator” on the screen( We want to let the players move their hands left and right/up and down to change the vertical height of the virtual “aviator”). To control the speed the players are required to blow into the tube. You can also click the button and speed up when you see the “speed up” prop. Also, in this competition, People can choose to have a battle or build a team. For example, in battle mode, players are able to “kick” others and take the lead. In the teamwork mode, the aviators are bound together with a rope. The players should be careful that the obstacles will not cut off the rope, or both of them will lose the game. We got the inspiration from  “The Aviator”. It’s a fun game made from Javascript 3D. It requires both multitasking and cooperation skills. It’s targeted at anyone who is interested in it.

Idea 3:  “The Best Detective”

This is a party game testing who has the quickest reaction. Pictures are covered by a dark layer initially. One of the users can wipe out the layer ( waving their hands above the sensor ) so that the picture will gradually appear on the canvas. The rest of the players can have a guess what it is. There can be hints below the picture. But the more you wipe out, the more time and score you will lose. The point is that he/she should let others figure out what’s on the canvas in a very short time. There can be three to four rounds in a game and the one who uses the shortest time will win the game. The possible challenge might be about how to make the picture gradually appear. This game is specially designed for the party and it also involves competition and entertainment. 

Recitation 7: Functions and Arrays – By Anica Yao

Question 1: In your own words, please explain the difference between having your for loop from Step 2 in setup() as opposed to in draw(). 

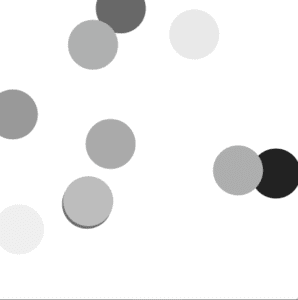
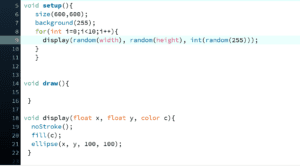
If the for loop is in setup(), it runs once. If i is the variable of the for loop, there will be i objects appearing at random positions and stay static. 


(PS: Since this is halfway during the process I only screenshotted my codes at that time)

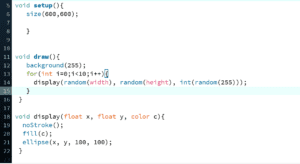
If the for loop is in draw(), those circles will flash fast because the draw() function runs over and over again. Every time the circles will appear at random positions.(Or if the background is put in the setup(), there will be more and more circles piling up on the canvas. )

Question 2 : What is the benefit of using arrays? How might you use arrays in a potential project?

When there’re similar patterns we want to make,  we use arrays to avoid repetitive codes that take too much time and space. Also, it’s clear to follow the three steps ( create an array, define it, and use it ). I may use arrays in Arduino in a potential project so that a bundle of LEDs can glow based on my codes. 

Reflection

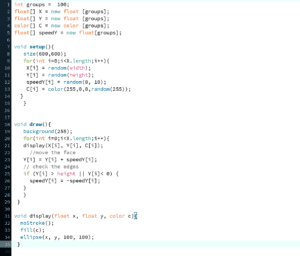
What I want to do is to make fruits bouncing up and down. Initially, I focused on how the objects move instead of their specific shapes. So I just drew some red circles.

Later I thought that it might be fun to create lots of tiny fruits. ( The red circles made me think of apples, and that might be my inspiration lol ) The only problem I met was that when one graphic reached the edge and changed the direction, another one will also change the direction, even though it didn’t reach the edge. Later I realized that I should use separate SpeedY so that different graphics will not affect each other.

Final creation ( with codes ):

int groups =  100;
float[] X = new float [groups];
float[] X2 = new float [groups];
float[] X3 = new float [groups];
float[] Y = new float [groups];
float[] Y2 = new float [groups];
float[] Y3 = new float [groups];
color[] C = new color [groups];
color[] C1 = new color [groups];
color[] C2 = new color [groups];
color[] C3 = new color [groups];
float[] speedY = new float[groups];
float[] speedY2 = new float[groups];
float[] speedY3 = new float[groups];

void setup(){
   size(1000,1000);
   for(int i=0;i<X.length;i++){
    X[i] = random(width);
    Y[i] = random(height);
    X2[i] = random(width);
    Y2[i] = random(height);
    X3[i] = random(width);
    Y3[i] = random(height);
    speedY[i] = random(0, 10);
    speedY2[i] = random(0, 10);
    speedY3[i] = random(0, 10);
    C[i] = color(255,0,0,random(255));
    C1[i] = color(0,255,0,random(155));
    C2[i] = color(0,0,255,random(255));
    C3[i] = color(255,200,random(100));
    }  
   }

 
void draw(){
   background(255); 
   for(int i=0;i<X.length;i++){
   display1(X[i], Y[i], C1[i]);  
   display(X[i], Y[i], C[i]);
   display2(X2[i], Y2[i], C2[i]);
   display3(X3[i], Y3[i], C3[i]);
   //move the objects
   Y[i] = Y[i] + speedY[i];
   Y2[i] = Y2[i] + speedY2[i];
   Y3[i] = Y3[i] + speedY3[i];
   // check the edges
   if (Y[i] > height || Y[i]< 0 ) {
     speedY[i] = -speedY[i];
   }
   if (Y2[i] > height || Y2[i]< 0 ) {
     speedY2[i] = -speedY2[i];
   }
   if (Y3[i] > height || Y3[i]< 0 ) {
     speedY3[i] = -speedY3[i];
   }
   }
 }


void display1(float x, float y, color c){
  noStroke();
  fill(c);
  arc(x,y,100,100,PI/8,PI/2);
}

void display(float x, float y, color c){
  noStroke();
  fill(c);
  //ellipse(x, y, 100, 100);
  arc(x,y,75,75,PI/8,PI/2);  
 }
 
void display2(float x, float y, color c){
  stroke(0);
  fill(c);
  triangle(x,y,x+20,y,x+10,y+12);
  line(x+10,y+12,x+10,y+20);
  line(x+8,y+24,x+12,y+24);
}

void display3(float x, float y, color c){
  noStroke();
  fill(c);
  ellipse(x,y,30,25);
}

Preparatory Research and Analysis —— by Anica Yao

Exhibition Experience:  Chronus vs. non-tech exhibition

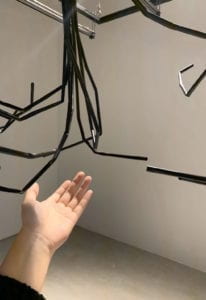
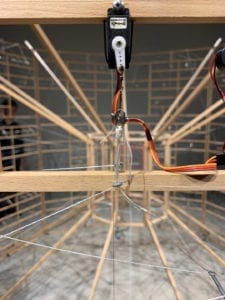
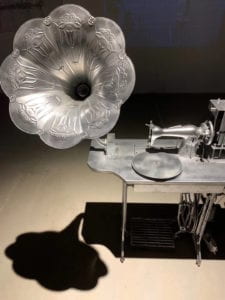
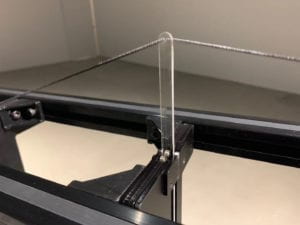
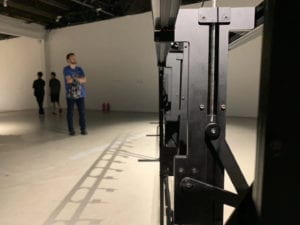
In Chronus, there’re mostly components we’ve learned in class, like motors and distance sensors. But I didn’t understand the meaning of this exhibition until I took a close look at Beholding the Big Bang, a device composed of many gears. As is implied in the title “Chronus”, this device reveals that time is eternal, no matter how this material world changes. The interaction triggered by the first gear has nothing to do with the last one, which is deeply inserted in the concrete. Another device called Rechender Raum has a similar principle. It works constantly based on an autonomous system, where human interaction has no effect on the whole operation. That’s why I feel, strictly speaking, the exhibition is not that interactive. And based on its theme, it is this kind of non-interaction that precisely reflects the intrigue and nonsense of today’s computer. However, the machine itself, as well as the technology contained in it, is still attractive to me. Those are all simple gadgets connected together, but what they present is incredible in terms of audio and visuals. 


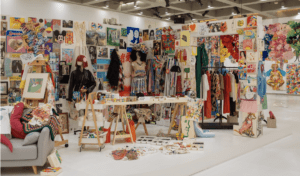
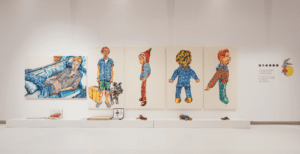
Another non-technology based artwork I visited a month ago is an individual exhibition by Qu Jiarui at Elite Bookstore, Suzhou. The exhibition shows her incredible collection of all kinds of dolls, as well as her sketches based on her life stories.


By comparing these two exhibitions, I found that both of them help build an immersing experience for the audience. The audience can only interpret the meaning behind the non-technology art. Usually, those artworks are static, and usually, there’s no interaction between them and their audience. But as we see nowadays, the combination of art and technology drags part of our attention to how the art is made, or the machine itself. It can also make possible the interaction between the artwork and its audience. 

Interactive Projects As Inspiration

Project 1

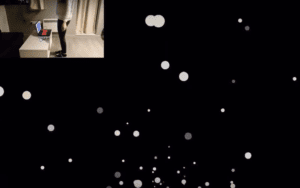
This is an interactive work I regard as successful. Initially, it shows the animation of many balls coming up. With Arduino and Processing connected, the speed of balls will change according to the distance between the user and the sensor. Also, the brightness of the room will change the background of the canvas. I consider it a successful interaction because it demonstrates clear and engaging physical interaction focusing on user experience. In this case, the installation really doesn’t matter. Both the user and the device are in a continues loop, where the device will give response whenever the user make some movement. Because there’s another input — light, it works together with the user and continuously send information to the device. 

Project2

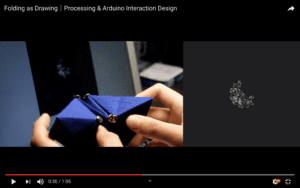
Folding as Drawing is another project I fond less successful in creating an interactive experience. The creator said that both the movement of brunching tree and paper folding are associated with each other to create a continuous pattern, expressing the concept of continuity. However, I don’t think the interaction is obvious enough. The folding process doesn’t match the drawing process. As an audience, I’m kind of confused about what to do.

What is a Successful Interactive Experience?

During group research, interaction in my understanding is a process in which an actor receives and processes the information from another through a certain medium and then gives the results accordingly. It’s sufficient to describe a basic interaction. But to be a successful one, in my opinion, the experience should (1) self-explanatory, clear, and obvious (2) put the user in a continuous loop to make responses (3)  be multi-dimensional with visuals, audio and other factors involved so that the user will be more engaged.

My midterm project Plastic Sea makes the corresponding reactions based on the random choice of the user. The more bottles they pick up from the “vending machine”, the more animals will “die” (in order). For all the problems with the visual design and coding part, we both believed that the most tricky part is how to make it more engaging to the user. And to make it more engaging we must know who is the targeted user, when and where this device will be used. Right after the user test session, we put more instructions to make clear the whole idea. We didn’t use the “vending machine” at first. But later we realize that because the vending machine is pretty common in our daily life, it may help people better understand the interaction. It’s the same with those projects that I discussed above. The obvious and continuous interaction create an immersing environment for the user to be highly engaged.

In the introduction to Designing Interaction, Gillian Crampton Smith suggests that there are four dimensions to an interaction design language: words, visual representations, physical objects or space, time, and behavior. He adds that “the qualities of interaction determine a user’s overall experience of and satisfaction with it.” and “presentation is multi-dimensional, though it is mostly visual”. What he means corresponds to my third point. To make the project more engaging and more successful we need not only visual but also audible, touchable experience. 

In conclusion, a successful interactive experience between some device and its user is a continuous conversation, in which the user is continuously and fully engaged.

Reference

https://meet.eslite.com/tw/tc/news/201909100005

https://www.youtube.com/watch?v=HbZKqJCxXak

https://www.youtube.com/watch?v=mM1lD8l6T-M

https://www.interaction-design.org/literature/article/what-is-interaction-design

https://www.uxmatters.com/mt/archives/2007/07/what-puts-the-design-in-interaction-design.php

Recitation 6: Processing Animation – By Anica Yao

In-class exercise:

In this class, I made a sequence of circles. By pressing the left and right key, those circles will rotate at a different speed so that we will see a beautiful pattern on the screen. After the slowest circle completes one revolution, all the circles will overlap again, which is amazing to me. 

Besides the basic functions we covered in lectures like for loop and keyPressed(), I also used:

 
translate(x, y)
rotate(angle)

Since the default rotation center is at (0,0), so I need to use translate( width/2, height/2) so that the circles will rotate around the center of the canvas. Initially, I created a triangle. I let it move horizontally while rotate around its own center at the same time. But I found that once a new rotation center is defined, it can not be changed. I think that’s the main reason why my initial code is problematic.

Code: https://github.com/yy2552/Anica-Yao/blob/master/rotatecircle/rotatecircle.pde

Final creation video: 
Screen Recording 2019-11-05 at 1.06.11 PM

Final creation screenshot:

Given the time constraint in class, now I think It needs further improvements. For example, the codes in my for loop are too long. According to what we’ve covered in today’s class, for this kind of repetitive code, I may create a function and move them into it.  Or I can create another for loop inside the loop. 

Additional homework:

Basically, the circle follows my keyboard’s arrow. When it touches the edge of the canvas it will stop.
What I found difficult in this homework is that (1) It expands and contracts at changing speed. The radius x and speed d are correlated. (2) The color changes gradually and slowly. 
During the process, I learned how to use colorMode() to change RGB to HBD, and how to make the circle expand and contract using if statement. In this case, I only need to limit the range of x value. As for the change of color, simply putting random(x,y,z) only changes the color rigidly. But when I made one parameter change according to the x value it finally works as expected.

Code: 

Final creation video:
Screen Recording 2019-11-05 at 7.52.13 PM

“Plastic Sea” – Anica Yao – Marcela(Midterm Project)

Project Name: Plastic Sea
Partner: Xueping Wang

Final Creation: 
https://www.youtube.com/watch?v=vIfGPVLn5hM&feature=youtu.be

Context and Significance

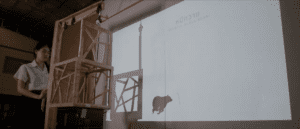
Days before we began our project I was watching a Youtube video 50 Minutes to Save the World ( link). It shocked me so much because I didn’t realize how serious plastic pollution in the oceans is nowadays. I used to think it’s the factories who should be blamed most, and without the industrial waste, the situation of our ocean can’t be such bad. But this video made me realize that we, as a consumer, are destroying our ocean every time we buy the plastic product. We won’t realize the severity of plastic pollution in the oceans until we see the wildlife has died. Life underwater is easily killed because of these plastic products. So we searched online for some interactive art about wildlife protection. One of them is called Liberate Life from the Wildlife Exhibition ( link), where people can open the cage with their hands and the animals projected on the wall will automatically get out of the cage. For me, it is an interesting form of interaction. The audience can physically participate in the conversation, but the reaction you receive is random. In this video, for example, the result can be a rabbit, a giraffe or an elephant. Based on that, we also wanted to build our project based on randomness. 

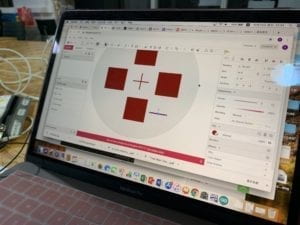
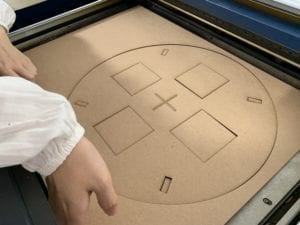
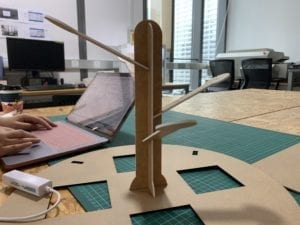
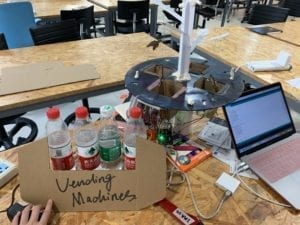
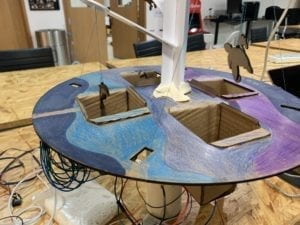
There are two parts in Plastic Sea. One is the “vending machine” and the other is “the ocean”. In the vending machine, there’re four plastic bottles. We used a laser-cut round board to represent the ocean. In the center of the board, there’s a “blenched coral” hanging down four different marine animals—— the turtle, seahorse, shark, and dolphin. If people randomly choose to use one of the four bottles, one animal will die ( be static in the air); if people pick another bottle randomly, the second animal will die …… and so on. ( Actually, we did some research and found that the turtle is the most sensitive to marine pollution, so we decided that the turtle is supposed to be the first one to die). Therefore, the user will have a continuous interactive experience, in which the device will make the corresponding reactions based on their random choice.

We consider our project unique and significant. It is an educational device. it can not only be used in schools, but also on the streets. If it’s linked to the vending machine, people will realize how every decision they make will impact the health of our oceans. Whenever they pick the plastic bottles rather than other ones made of recycling material, this device will be activated.

Conception and Design

Elements and materials we chose:
(1) Breadboard * 2
(2) Arduino UNO *2
(3) Gear motors * 4
(4) H bridge *2
(5) M/F, F/F wires * N
(6) String 
(7) Clay
(8) Laser-cut animals, corals, trapezoid boxes, and the round board
(9) FSR 406 sensors * 4
(10) Plastic bottles * 4

Decisions we made when choosing elements and materials:
(1) Initially, we chose the weight sensors. But it has to be suspended, which is hard to realize in our device. So we used FSR406, which is a force sensor with a bigger area when other force sensors. 
(2) We changed the DC motors to the gear motors. The gear motors rotate more slowly, can it’s easy to control.  Also, the string won’t slip away easily.
(3) We made gears to fix the strings with 3D printers, but given the errors, we used the clay instead.

Fabrication and Production

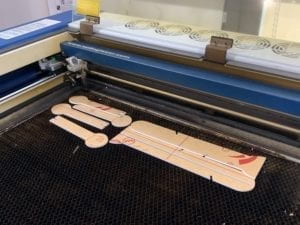
We chose to laser cut most of the materials.
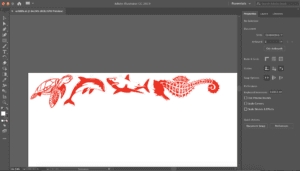
Our original idea is to let people remove the litter out of the box, and then the animal will become alive and begin to bounce. As the sensor value changes, the motor will begin to rotate. 

  • During the user test, however, we found some problems with the original ideas:
    – As for its meaning, people don’t know what to do. They thought it’s an angling machine or some game. Although we built an artificial coral in the center with the white plastic board, they didn’t notice the round board means the ocean. Even after they understand how it works, they were kind of confused about the reaction of the animals. In general, its interaction is obscure.
    – As for its function, the sensor at the bottom of the box didn’t work well. Because the animal itself would change the sensor value, too. 
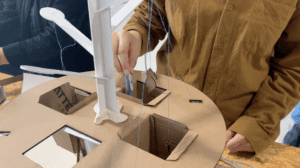
  • Thanks to Prof. Marcela, Andy, Eric, and Jingtian, we changed our original ideas and made some improvements:
    (1) Instead of using the boxes inserted in the board, we moved all the sensors out of the device and built a vending machine. So that people can mind their behavior as a consumer more easily and more directly. 
    (2) We used the bouncing effect to show the animals alive. 
    (3) We painted the board black and blue, which means the polluted ocean. Also, we added some decorations and instructions.
    (4) Some people thought the bottles are in a rubbish bin, while others thought it’s a vending machine. So we made it clear.
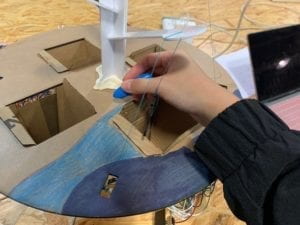
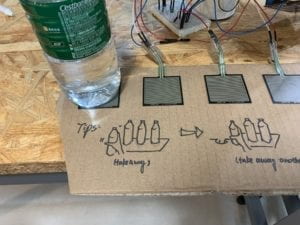
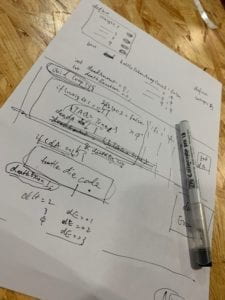
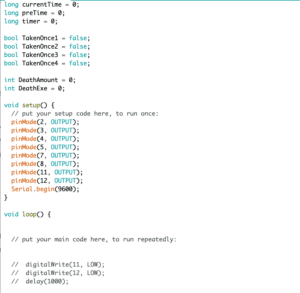
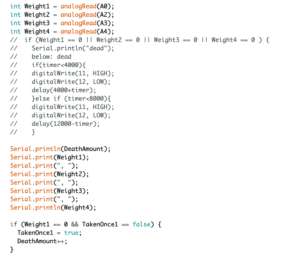
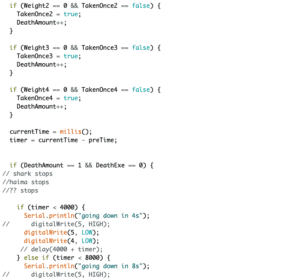
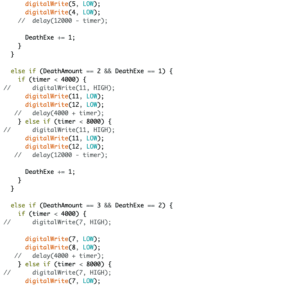
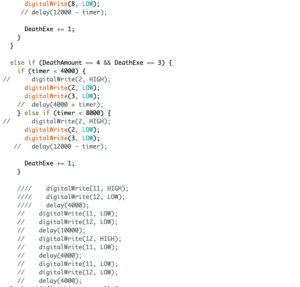
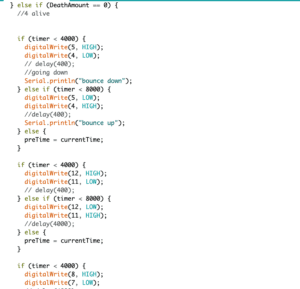
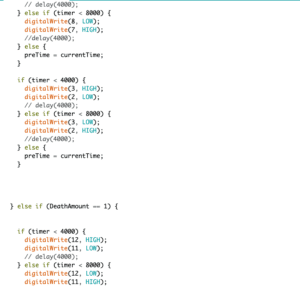
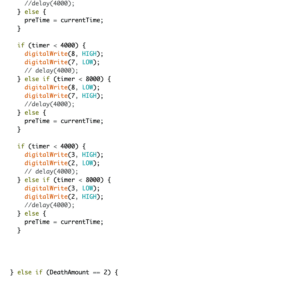
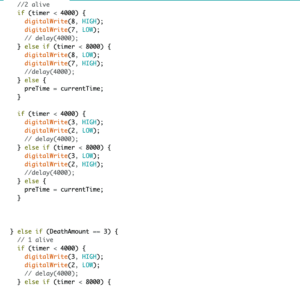
After we finish the visual part, we began coding. The most difficult part is the logic of randomness. No matter which bottle is picked, the turtle will “die” first. When the participant puts back the bottle, the turtle actually won’t come back to life. We asked Jingtian for help and created two variables: DeathAmount and DeathExe. Also, we learned how to use a timer to count the time and put the bouncing of the animals in a small loop

Conclusions

Finally, the project works as we expected. This is a precious experience for me.  To make it more interactive, you should always put yourself into others’ shoes to see if they will understand you correctly. After all, things obvious to you may not necessarily obvious to others. That’s why the user testing session is really important for us. 
If time permits, we still need further improvements: (1) Considering the security, the movement of the animals is very small, so it’s hard to observe. (2) Since the device is big, it’s hard to pay attention to both the vending machine and the “ocean” at the same time. (3) We can add more bottles made of other materials, so the participants can make their own decision to choose plastic ones or not. The results will be more obvious and easier to understand. 
I remember people are engaged in this project, and they were surprised when they found it a vending machine, and that how the animals are going to react to their consumer behavior. After seeing the polluted ocean, the blenched corals, and the dying animals, we hope every participant will be more aware of our human impacts on the plastic pollution of the oceans and make further consideration about how we are going to protect our environment.

Big thanks to all the professors and fellows who have helped us!!!

Reference:
– https://www.youtube.com/watch?v=7mvX2XYQSNk
– https://pixabay.com/vectors/shark-jaws-sea-fish-ocean-white-305004/
– https://pixabay.com/vectors/animal-fish-ocean-sea-seahorse-2027685/
– http://poofycheeks.com/2019/05/sea-turtle-svg-dxf-png/
– https://learn.adafruit.com/force-sensitive-resistor-fsr/using-an-fsr
– Class 10 – Thursday Oct 10 – DC Motor Control (Direction) / Stepper Motor Control and High Current Loads
– https://www.creativeapplications.net/python/aweigh-open-navigation-system-inspired-by-insect-eyes/
– http://www.smartshanghai.com/event/55029