Don’t Touch Me-Chloe(Yuqing) Wang-Rudi

In my first group project, the Knowledge Transmitter 2.0, we came up with a product that would save time for students when they are preparing for a test in the year 2100. However, the device only has a low interactive level. It is mostly inputting knowledge (that will be forgotten very fast), or in terms of fiction, it projects a hallucinating storyline into the user’s brain without safety ensured. After the first group project, I wanted to use what we have learned in class and assemble it to be more interaction. To find an approach to making something more interactive, I looked back to the quote by Tom Igoe: “Your task in designing an interactive artwork is to give your audience the basic context, then get out of their way. Arrange the space, put in the items through they can take action, suggest a sequence of events through juxtaposition. If you want them to handle something, give it a handle…”(Igoe). After looking at the interactive guitar course by Fender “I Spent a Month Learning Guitar on the Internet and It Actually Worked”from my previous project, and looking in to the various uses of a high interactive device:the Nintendo Switch, I realized that games and gaming devices are probably the most interactive among all products. With this idea in mind, in our project “Don’t touch me”, Kat and I aimed to make a simple but fun and addictive gaming device, and the users would immediately know how to react and interact with it.
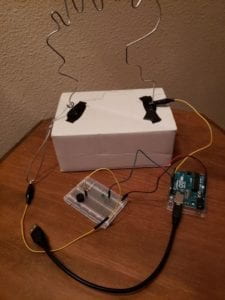
We got the idea from a simple buzz wire game by Joe Coburn on Make Use Of. The game has already been made by many people, but they were all similar.
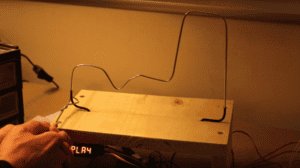
example
Buzz wire game by Joe Coburn
example
Buzz wire game by jlskala319

We wanted to make our own version of the game. At first we thought about adding another track to the game so two people would be competing, but eventually, we chose to make the game into a collaborative game so two players would be holding two ends of the stick, and they would have to balance out each other’s force to be successful in the game. Our project is made for everyone to have some fun in their lives, to relax after a tiring day by focusing on a simple task, or for those who would like to train their patience and ability to focus. During the user testing session, someone pointed out the the game is also good for couples to have some quality bonding time. As I wrote previously, our device is designed to be intuitive. We wished that people would know what to do with it immediately when they see it. We don’t need a fancy setup to achieve that. We took a pair of chopstick, something we would hold with our hands, to indicate that they are two handles. We had proposed to use 3D printing for the handles, but we weren’t so confident about the result would have people immediately realize that it is for their hands to hold. For the best results, we kept the original idea. A little ugly, but useful chopstick handles. We made a simple cardboard base for the game’s course, and used a metal wire for the course and the stick with the loop. However, if we got the idea earlier, we should have changed the cardboard base to a laser cut base to make the presentation better. Apart from that, I think the rest of the materials we chose suits the goal of this project.
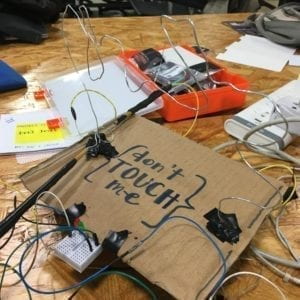
“Don’t Touch Me”

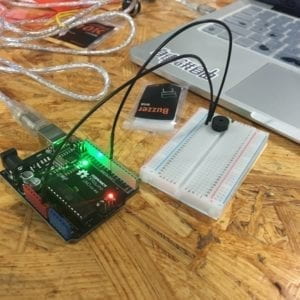
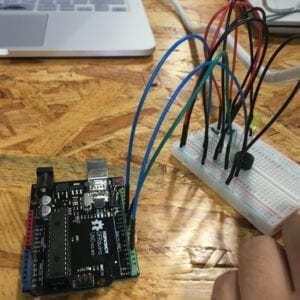
The making of the project actually took some effort. We did not want to completely copy what was made in the existing buzz wire games. After building the game with a simple buzzer that would make a noise as the player let the loop and the course contact, there was also an LED that functions as a timer that indicates the player only has one minute to complete the course. When the time finishes, the LED turns off.
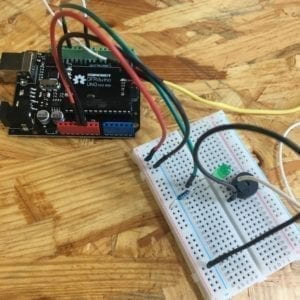
First simple version

first version of game
First version of the game

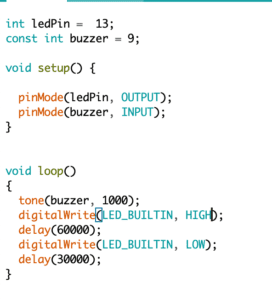
After the framework of the game was set-up, we tested it with a sample code we found online.
first code
The first version of our code

As we put our project to the User Testing Session, the wires connecting the handle and the buzzer got loose, so for parts of the user testing, we didn’t receive feedback from the buzzer. This happened so we soldiered the all the connecting points that might get loose after user testing.

We received many feedbacks during the user testing session. Here is a list of all the feedback we received. 1. We could have a victory music played as the player finishes the course successfully. 2. We could have different ringtones as the player touches the course. 3. At each place on the course, there could be a different musical note. 4. There is a possibility that if the player touches the course, they would get shock. 5. People thought it was obvious what to do with the game without us explaining the function, but they wouldn’t realize that the LED is a timer. The LED could blink faster. 6. Maybe there can be feedback in multiple ways. 7. There can be music playing along the course. But later I asked someone else whether they would like to have music while they are playing, they responded that for this game, they would rather focus without distractions. 8. The shape of the course should be more complicated.(x2) 9. Something that tells you that the loop shouldn’t touch the course.
After considering all the feedback, we added another LED that would blink each time the loop touches the course, and we set up an indicator in the serial monitor that writes: “Hit! You lose!” when the player touches the course. We also got the LED timer to blink faster as the player has less time. After the user testing session, we also changed our code to make the LED blink faster and faster as the time is up with a new code.

2
Our second version of code, to make the LED blink faster

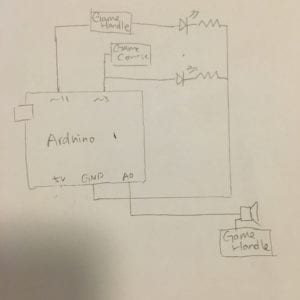
Then after consulting fellows, we found a better way of making the LED blink faster with the “millis” function. So here is our final code

3
Our final version
7
Basic setup

During the User Testing Session, we realized the position of the LED was not so obvious. We tried many times of positioning the LEDs so they would be more obvious for the players to see. We tried different ways of directly putting the LEDs on the cardboard without showing the breadboard and the wires, and we tried to have the LEDs pierce through the cardboard. But none of those worked. So later we changed the LEDs to a smaller breadboard and attached them to the cardboard base. Sadly we did not get the

music related ideas into the project, and we didn’t add the shock onto the handles. But I think the other suggestions for our project worked well as we implemented them into our project.

In the end, we added a laser cut plate stating the name of our project on top of the game for a little decoration.

From the ways other people saw and used our “Don’t Touch Me” game, I know that the set up of the game can clearly tell them how this game works. However, there are different approaches to the game. Some groups would start all over when they touch the course, and other groups would continue with the course despite touching it. I think our project is successful in indicating how it is used, but it is a little weak on actual responses once the players started playing. All users immediately held the handless they first see the game, and the unbearable buzzer noise can let them no that they should avoid making that noise. But some users would hold the two handles by themselves and turning this into an individual game, while others would find a friend to play with them. If we had more time, I would definitely put the victory music in, and maybe a vibration to the handles when users touch the course. This project made me realize that anything that seems simple is actually not that simple. In defining interactivity, I wrote that games are the most interactive forms of art. Our project took a basic concept in the use of Arduino and made it into a more interactive game. Our goal was to create a bonding experience in which two people would collaborate for their common goal, try get to the end of the course without touching it. There are still a lot of room for improvement. We could hide all the wires so the presentation looks better. We should have put in the victory music so the players have a goal to finish the game. The reward and punishment mechanism Making it into a racing game with two players is also a good idea since it makes people competitive and thus care about focusing on the game more. It was still satisfying to see people interacting with the game without us telling them how the game works.

References:

Coburn, Joe. “Make a Buzz Wire Game With an Arduino.” MakeUseOf, 21 Sept. 2016, https://www.makeuseof.com/tag/make-buzz-wire-game-arduino/.

Igoe, Tom. Making Interactive Art: Set the Stage, Then Shut Up and Listen. 21 Aug. 2012, http://www.tigoe.com/blog/category/physicalcomputing/405/.

jlskala319. “Buzz Wire Game With LED Timer for Arduino UNO.” Instructables, https://www.instructables.com/id/Buzz-Wire-Game-With-LED-Timer-for-Arduino-UNO/. Accessed 27 Oct. 2019.

Rosenthal, Emerson. “I Spent a Month Learning Guitar on the Internet and It Actually Worked.” Vice, 10 Aug. 2017, https://www.vice.com/en_us/article/433y3n/learning-guitar-on-the-internet-fender-play.
Recitation 4: Drawing Machines Chloe Wang

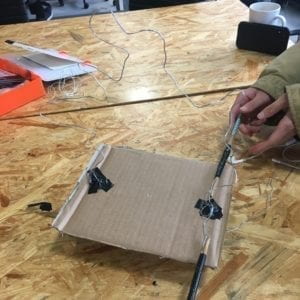
 In this recitation, we built a drawing machine. The machine has two arms controlled by two stepper motors that use two mechanical arms to draw as we turn the knob on the potentiometer

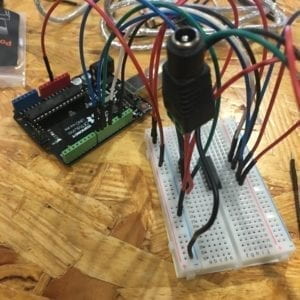
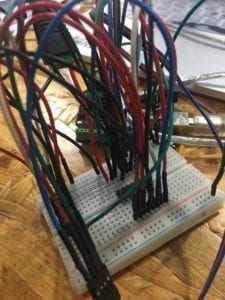
At the beginning I built the circuit by myself, made sure that the H bridge was positioned in the right direction. The finished circuit looks quite complicated, but all the wires are along the H bridge or along the positive and ground side on the breadboard. I first connected a positive side to the ground, and when I ran the code, nothing happened. After correcting this mistake, my stepper motor successfully rotated. 
Building the circuit
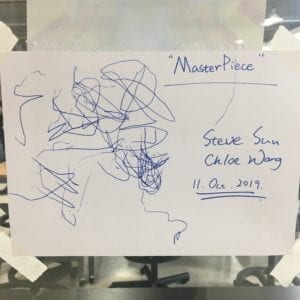
Then I went on to step two and added in the map function as well as the potentiometer to the circuit. My stepper motor successfully turned as I turned my potentiometer. I added my part of the stepper motor to Steve’s stepper motor, and as we each controlled our stepper motor, the mechanical arms created a confusing drawing on the paper. 
Spaghetti Circuit
“Masterpiece”
I first connected a positive side to the ground, and when I ran the code, nothing happened. After correcting this mistake, my stepper motor successfully rotated. Then I went on to step two and added in the map function as well as the potentiometer to the circuit. My stepper motor successfully turned as I turned my potentiometer. I added my part of the stepper motor to Steve’s stepper motor, and as we each controlled our stepper motor, the mechanical arms created a confusing drawing on the paper. 
Question 1: What machines are you interested in building?Add a reflection about the use of actuators, the digital manipulation of art, and the creative process to your blog post. 
I am interested in building a machine that does not only draw with turning the knob, but also with our whole body movement. Although we can draw with our hand, it is still interesting to see a machine drawing. What the machine drew is our own artistically output, but it is also not our own art. What we made in this class is also a collaborative drawing machine. My teammate and I are both controlling the machine for something neither of us can foresee. 
 
Question 1:Choose an art installation mentioned in the reading ART + Science NOW, Stephen Wilson (Kinetics chapter). Post your thoughts about it and make a comparison with the work you did during this recitation. How do you think that the artist selected those specific actuators for his project?
I found the project â€śINVISIBLE-the shadow chaser” by Yoshinobu Nakano and Team Shadow extremely interesting. It uses computer-controlled manipulation of water to simulate the act of catching a goblin. The artist made something completely fictional into reality. Although we all think that goblins don’t exist, the creation of this vacuum-cleaner-like tool made it as if goblins do exist. Our drawing machine was creating random art, and the shadow chaser was creating a imaginary world to its audiences.

The Shadow Chaser

Presentation Reflection – Chloe(Yuqing) Wang

  Interaction and interactivity can be defined as two actors responding to each other. That is, with every input, there is an output in response. After reading Tigoe’s “Making Interactive Art”, I believe interactivity is more than that. There’s a sentence in “Making Interactive Art”:” Let the audience listen to your work by taking it in through their senses.  Let them think about what each part means, which parts afford contact or control, and which parts don’t.  Let them decide how they will interpret the parts, and how they will respond.  Let them speak through their actions”(Tigoe). Then I believe interactivity must emphasize on the receiving end. Interaction should convey a message that is differently understood by each person. Interaction makes one feel unique, cared about and as an individual human being. 
    It was quite impossible for me to find an art or installation that is considered not interactive. Just as stated in The Art of Interactivity: “we make it possible to accept that anything can be interactive and simply discuss the degree of interactivity subjectively”(Crawford). I was interested in two installations: Visually-Striking Collages of Man Gazing into the Abyss” and “I Spent a Month Learning Guitar on the Internet and It Actually Worked”. If the second one has a degree of interactivity of high interactivity, the first one then has a low degree of interactivity. The collection of collage is a form of visual art. It sparks new ideas, thoughts, and different understandings in each person. However, it does not necessarily generate a higher degree of output unless someone creates another art in response to this one. The Guitar one introduces Fender’s online course, which should be highly interactive since the users would actually play along with the tutorial and receive a set of skills as the lessons are treating each student(user) individually. 
Man Gazing into the Abyss
    Our design is called Knowledge Transmitter 2.0. At first, we envisioned it to be something that could instantly transmit information of a book to a person’s brain, so we wouldn’t need to read books anymore. Since it is something that will be used in 100 years, we want something that seems impossible now. We have a 2.0 after our Knowledge Transmitter and show that there were malfunctions in the 1.0 version to signify that even after 100 years, taking an easier route in things is still impossible. 
    Our Knowledge Transmitter 2.0 has an input of which book the person want to read, and an output of knowledge directly into that person’s brain. It can align with my definition of interaction also in the sense that the knowledge is actually being transmitted to someone’s brain just like what they would actually experience reading a book- reading and forgetting, and forming new ideas. This design emphasizes on the receiving end – the individual users, and can somehow make one feel unique since that person using the device is the only one who receives the information unless they are sharing the information with others. Individual device means individuality. However, our product is designed to make money for the company and would not be perfect for the users if they actually want to actually remember something forever.
 
Crawford. “What Exactly Is Interactivity.” The Art of Interactivity, pp. 1–6.
 
TIGOE. Making Interactive Art: Set the Stage, Then Shut Up and Listen. 21 Aug. 2012, http://www.tigoe.com/blog/category/physicalcomputing/405/.

Recitaition 3: Sensors by Chloe Wang

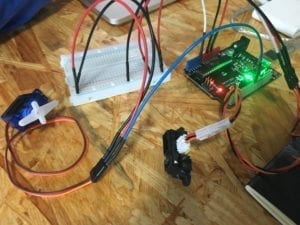
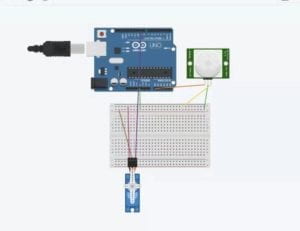
My partner and I used the infrared distance sensor with a servo and created a distance sensitive machine that would turn the turbines on the servo when an object is moving away from and close to the sensor. 
We simply connected the sensor to the Arduino, following the graph we made on tinkercad, and tested our codes with analog read. We encountered problems with coding. We write the code according to our own understanding, with some help of the examples.Our own code worked well. As we move the sensor away and close to the table top, the blades turned 180 degrees both ways. 
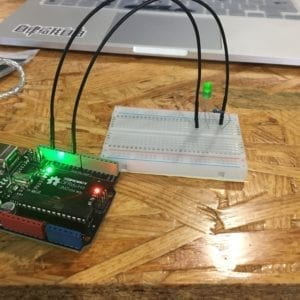
However, when we copied the code from the website, the blades didn’t work as smoothly. We didn’t have enough time to figure out what caused that problem, but it was great to see that such a simple circuit would achieve this level of interactivity. 
 
Question 1:
We wanted to build a servo that turns as we move the infrared distance sensor closer to an object. My idea is that this distance sensitive servo would be used for an automated door. When the turned on, the sensor detects a wild animal I don’t want to get in to my house, the little door for my cat would be shut. I would use it when my cat is in doors, I don’t want it to leave while I don’t want other animals to come inside. 
Question 2:
A code tells the computer what to do, same as my mother telling me how to cook. I have to do one thing following another not only in the right sequence but also with the right materials. I think the code is very much like a tutorial or a recipe, telling the computer what to follow. 
Question 3:
In the chapter, Manovich raises the idea of using concepts of computer science theories as categories of new media theories. In this day and age, it is impossible to discuss human behaviors or mass communications without mentioning computers or programmings. For example, in media theory, the panopticon concept now have to be considered with the implementation of computers, that one’s actions online or on a computer might be watched all the time. 

Recitation 2: Arduino Basics by Chloe Wang

 
In this recitation, we built three circuits with an Arduino: Fade, Tone Melody, and Speed Game. We followed sample instructions on the website, and finished the first two circuits successfully. The third circuit went through some complications but in the end we successfully achieved our expectations. We used the following materials for the three circuits. We were doing it to see Arduino actually being used in 
1 * Arduino Uno
1 * USB A to B cable
1 * breadboard
1 * buzzer
2 * LEDs
2 * 220 ohm resistors
2 * 10K ohm resistors
2 * pushbuttons
A handful of jumper cables
2 * arcade buttons
 
Process:
Fade: 
Just as we did many times in class, we connected a resister and a LED to the breadboard, used the example code in Arduino to let the LED change its brightness. We had to make sure that the port was selected correctly and the pin number was the same in the code as well as on Arduino. 
 
Tone Melody:
With tone melody, we took out the resistor and added in the buzzer. The size of the buzzer was awkward and couldn’t fit in to the holes in the breadboard at first. We tried placing the buzzer at 45 degrees and twisted the legs a little to finally fit it in.   
Speed Game:
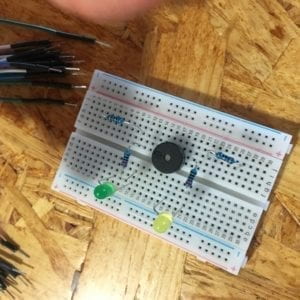
The speed game circuit was quite complicated. We also forgot to check the breadboard before putting them together. So at the first try, we got the positive and negative sides flipped. However, the game worked out. We also didn’t know that the serial monitor would tell us when the game is starting. Only after we took off everything and put everything together again (in the correct way) First try, building from left to rightwhen we realized that the serial monitor tells us when the game starts. Next time, I would check to make sure that the cords are connected to the correct positive and negative sides on the breadboard.  In the process of building the circuit again, we installed all the electronic components first in their correct positions, made sure that the resistors were correct since they look very similar, and then connected them together with jumper cables to ensure we have a clear and organized circuit. Second try, step one
Questions 1:
Physical Computing defines interactivity to be input, output, and processing. My understanding for interactivity is that interaction conveys a message that is interpreted differently by each person. Interaction makes one feel unique, cared about and as an individual human being. When there is an input, I can get a response that is the result of something that I did. With the circuits we built, I still believe that interactivity can make one feel unique. The speed game involves two person, each person control their own outcome of the game. The machine is acting as the medium for individualistic expressions. 
 
Question 2:
The 10K resistor is for protecting the circuit. When we forgot to put a resistor in the circuit, the Arduino program in my computer showed an error message and our program wouldn’t go through. 
 
Question 3:
With 100,000 LEDs at my disposal, I would make a screen of LED out of them for an arts installation. The wall of LED would light up all white once every 140 years, for one minute, signifying the technological advancements that humans had made to this world since 1879,  the year that Edison invented lightbulb.