Final Project:Truth about Truth – Chloe(Yuqing) Wang – Rudi 

Truth about Truth – Chloe(Yuqing) Wang – Rudi 

My idea of how this installation would look like changed a lot during my development process. At first I wanted to be a complicated series of questions and answers with data collected from user interactions. But after talking to various people about my project, I gathered different opinions and came up with the final version. 

Artist Statement

Contemporary media has the power to shape the way we think. We are all blind when it comes to truth. In this environment, how do we determine right from wrong, black from white? In what ways do we interpret something as a fact and how likely is it for us to view something/someone without prejudice?Truth about Truth is an installation that is intended to remind individual observers the importance of not categorize and define others from only one perspective, not to have our decisions influenced by what the media portrayals or merely considering what’s on the surface. However, this work is also open to all interpretations. 

Conception and Design

As written in my final essay, I based my project on two medi theories: “Selective Exposure” and “Third-Person Effect”. Selective Exposure means that people have the tendency to read and accept those news that are in accordance with their beliefs. Third person effect is the concept that individuals believe others are easily influenced by the media but they themselves are not. With this project, I wished users can slowly explore by themselves and come to their own understanding of what this project is about. 

The Three photos

Changing the images to any group photo would make sense, but in this case, I choose three images with opposing groups of people in them. If we look at these images without cropping out the individual faces, we can automatically give each of them a definition, a job title, and we decide whether they are good or bad people. 

1.Hong Kong Protest: I got the idea of my project because of the Hong Kong protests. For me, the protest did not happen only on the news, but they have impacted some of my closest friends who were studying in Hong Kong. As someone sandwiched in between the two sides of this conflict, I wish to maintain a neutral perspective. Each person holds their own perspective when looking at this image. By cropping out the individual faces, I wish to put the emphasize individuals’ roles in this whole situation. Interestingly, although the image I use doesn’t explicitly say that it is Hong Kong, many people automatically relate the image to the Hong Kong protests. This shows that a pre-set image of what the protesters and the polices are like. 

Image1 (combined two photos)

2.Andy Lau: I think this image can successfully reflect my main idea of media portrayals and the star-making process. Andy Lau is one of the most well-known and commercially successful Chinese singers. His fame was built by mass media in China in the 1990s. Being the focus of this image, Andy Lay is still a well-known figure even when cropped out. The media has made us(at least the Chinese users) connect Andy Lau’s face with fame. People get crazy when they see him. So in this image, Andy Lau is separated from everyone else. He is a commercial phenomenon, while the others are consumers of this fame.
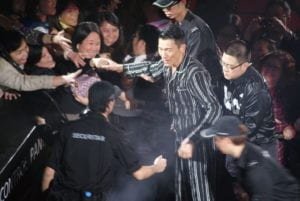
image2

3.Occupy Wall Street in 2011:There are not so many protester-police opposition images that are available. I chose an image of the 2011 Occupy Wall Street protest. This protest was about economic inequalities in the U.S. Many were arrested while the police and protestors conflicts were intense. With this image, it does not limit the topic of this project to just China. Who’s side are you on when the protest is happening in New York? How are people’s perspectives changed when the context of the image is not so obvious and recent?

image3

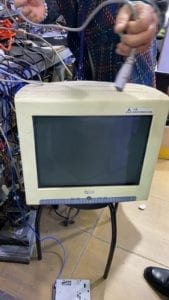
The Vintage MonitorFor this project, I didn’t want to have my project shown directly on my computer screen. My initial idea was to laser-cut a box that can cover my computer so it would look like a TV screen. Then I wanted to have an old TV set that is smaller, with buttons on the sides, to create a more intuitive user experience. I have also considered getting a newer monitor, but it still does not fit the aesthetics and goals I want to achieve with this project. However, what I found in the second hand market was a huge monitor with a rather high resolution. With the monitor, I wanted to make the users feel as if they are controlling a surveillance camera to observe individuals, as the set-up of this machine only allows you to look at one face at a time unless you press the button. There is another layer of meanings. Nowadays with our smartphones and laptops, we feel like er control the world, we know everything that is happening, we can easily reach out to those we want to talk to or comment on things we want to comment on. However, at the time when this monitor was used, information is only starting to be transferred faster. At the same time, with this machine, it also shows that the social media today only gives us fragments of information. You still cannot fully understand someone just by looking at  a small fragment of their face.
love at the first sight

The Case: The clear case for the Arduino is also a hint to the title of my project. I remember in class we talked about putting an input to a black box and receiving an output, but we don’t know what happens in between. This transparent case is to show that there are lots going on underneath the deceptive surface. I think it was necessary in this project, to have a see-through wire case.
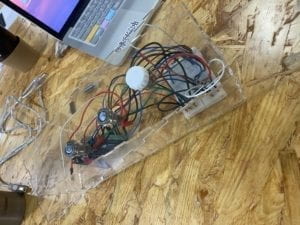
The Transparent Case

Sound Effects: The sound effects as the user is turning the knob signifies surveillance camera focused on individual faces. Although this interpretation might be adding another layer to the project, it has made the project more engaging for the users. Although I received recommendations to add some background music to my project, I realize that if the project was in an environment like the IMA show, adding a background noise would not improve the whole experience. 

Fabrication and Production

I started my project based on what I have done in one of the recitations where users can control two potentiometers to reveal parts of an image. At first, I wanted to make a similar interaction device with other sensors. But I realized that my ideas can be better expressed if it only reveals faces. So I chose the first police and protestors image and cropped out those people’s faces with Gravit, labeled them image1 to image13. The last image is the original photo. I also used two push buttons and one potentiometer for the actions of revealing the whole image, changing the image, and changing individual faces. One problem I encountered was that the images all had different sizes. Rather than changing the canvas size every time, I fitted all the images to the same size so the image change was smoother. 
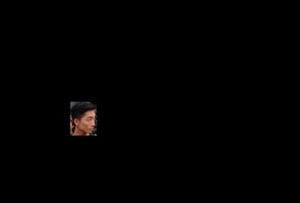
Cropped out faces
Cropped out faces

User Testing

The user testing process helped me to foresee many problems that could occur once the project is done. Many people also gave me critical suggestions for my project. During user testing, I only had one image and two buttons. They wanted more images and more ways to interact with the machine. I also realized that people tend to push the buttons first and only focus on the screen. The light-up button did not signify “press me” for the users. Everyone interpreted the project as: focusing on individuals as parts of a whole. Some people thought that one image was enough to explore and it gives a strong statement. While others wishes to see more images so the project has a more diverse or complete storyline. Furthermore, most liked to have the image only revealed when the knob was turned to the end. Because of this suggestion, I changed this part for the final version. However, I did not realize adding more images is already making the installation more complicated. I should have the image revealed more often as the user is turning the knob. 

Video: User-testing version

To organize the wires but still showing them for the aesthetics, I laser-cutted a clear box that can fit the breadboard, Arduino, and can fit in front of the monitor while not blocking the screen. I also made sure to have three holes with the size of the two buttons and the potentiometer. Then I 3D printed a knob for the potentiometer. However, when I assembled the case to the buttons, the potentiometer was not so stable. So I soldered it and put a tape underneath to support the potentiometer. 

Here are some photos of the building process:
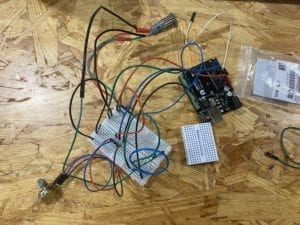
Building Process

In one of the images, there are 13 faces. While the other two have 7 faces. To make sure the potentiometer can evenly spread out the degree it turns to the number of images, I used the map function in Processing.   

  prevknobValueMapped= int(map(sensorValues[0], 0, 1023, 13, 1 ));
  prevknobValueMapped2= int(map(sensorValues[0], 0, 1023, 6, 1 ));
  prevknobValueMapped3= int(map(sensorValues[0], 0, 1023, 5, 1 ));

Because there are three different images each with different faces cropped out, I had to separate them as three groups of images with three individual folders: pic1, pic2, pic3 in the data folder. To retrieve those images from those folders, I used

  for (int i=0; i<14; i++) {
    photos[i]=loadImage("pic1/image"+i+".jpg");
  }

and

    if ((sensorValues[1] == 1) &&(knobValueMapped == 13) ) { //sv1 = big picture, sv0=knob
      image(loadImage("pic1/image14.jpg"), 0, 0);
    }

The two push buttons correspond to two digital values and the potentiometer corresponds to the analog value. They only have 1 and 0 two values of whether they are being pressed or not. 

This is the code for the second group of images:

    if ((sensorValues[1] == 1 ) && (knobValueMapped == 6)) {
      image(loadImage("pic2/image7.jpg"), 0, 0);
    }
    if (prevknobValueMapped2 != knobValueMapped) {
      sound.play();
    }

Conclusion
I wanted to show that contemporaty media has the power to shape the way we think, and that individuals matter. During my mid-term project, I defined games as the most interactive forms of art. However, they are only interactive because they are immersive.  The process of developing my ideas for this project and finally getting it done has been quite a journey for me. There were many times when I got lost in my own ideas. However, the end result of my project was successful for me. All the users I interviewed came to the conclusion that individuals are more important in the big picture. Most people I saw were able to figure out how this installation was operated if they focused on it for longer periods of time. However, I still needed to improve the intuitiveness of the machine. Many people got lost when using it, and even if I put a note explaining how to use it, people still would not read it. Although the machine’s “complication” can make people want to explore it more, some people do not have enough patience to explore, or they simply did not see the button lighting up and did not interprete it as time to press them. If I had more time, I would add more images and try to make the operation of my project simpler. From this project, I realized that everyone thinks differently. It is quite difficult to arrange three input values that fits everyone’s habits. I used some  images that can be considered controversial in this project, but there were no words accompanying the images so there is not a forced understanding to my project. Also, because I used three “irrevalent” images, this project covers quite a diverse topic and can be applied to more areas, which traces back to my initial struggle of being neutral and not taking sides. 

Here are all the version of my codes for the final project: https://gist.github.com/Chloeolhc/2662115e00a0ab9844e73ec224b66792

Here is a video of the final presentation of my project:

Sources:

https://www.mpweekly.com/entertainment/focus/local/20170120-33977
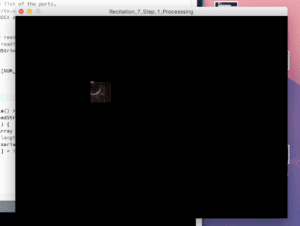
https://www.thepeninsulaqatar.com/article/02/09/2019/Hong-Kong-students-rally-peacefully-after-weekend-of-protest-violence

https://www.flickr.com/photos/akinloch/6207968006

https://www.channelnewsasia.com/news/asia/hong-kong-protests-police-children-bullied-data-leak-yuen-long-11746034

Recitation 10 Media Manipulation Chloe Wang

In this recitation, I decided to do the media manipulation workshop. For the workshop, we needed to choose a music video or any video clip and recreate it with processing.  I chose a clip of my favorite Chinese TV show as the original video to work on. I downloaded the video and renamed it to liuxing.mp4. Liuxing is one of the main character’s name. At first, I was confused because I didn’t know how to incorporate the map() function in the video. So my first action was to loop the video to make it play over and over again. 
I also wanted to make the video pixelated when mouse is pressed because this is a quite old TV series with low resolution. But when I watched it while I was young, I remembered it to have rather a high resolution. 
To use the map function, I made the video to change speed according to where the mouse is placed on the canvas. To change the speed, I used a float i function, i is the speed, and it is changed according to the map. 
float i =map(mouseX,0,mouseY, 0,4);
myMovie.speed(i);
Here is the final result of my media manipulation project:
https://youtu.be/erkvH7dAsC4 
Here is my code:
import processing.video.*;

Movie myMovie;
void setup() {
  size(636, 360);
  myMovie = new Movie(this, "liuxing.mp4");
  myMovie.play();
  myMovie.loop();
  //define the state of the video
}
void draw() {
  if (myMovie.available()) {
    myMovie.read();
    //read the current frame of my video
  }
  image(myMovie, 0, 0);
  //draw the current frame of the video
float i =map(mouseX,0,mouseY, 0,4);
myMovie.speed(i);

if (mousePressed){
int rectSize = 10;
  int w = myMovie.width;
  int h = myMovie.height;
  for (int y = 0; y < h; y+=rectSize) {
    for (int x = 0; x < w; x+=rectSize) {
      int a =  x + y * w;
      fill( myMovie.pixels[a] );
      rect(x, y, rectSize, rectSize);
    }
}}
}

Source:
 

Final Project Essay: Chloe Wang

Project Title: Truth about Truth

My project is called“Truth about Truth”. This is an interactive art installation that aims to deliver to the audience my thoughts on how a fact is conceived by us, and how difficult it is to be “right”, or to know the whole truth when we are receiving information for those outlets of our choosing. The project will have an image that is blurred or blocked that would only have one spot that is clear when someone actively interacts with it. One image will be on the screen for 15 seconds, and the person interacting with it would have to choose a storyline of what they think is in this image after that. I want to show that our individualized decision-making process is influenced by our different cultural backgrounds, which defines what truth is for us. 

During my preparatory research, I found Daniel Rozin’s “Mirror” installations most inspiring. His installations with various objects mirrors the face or shadow of the person in front of it. This way, when there is no observers, his installations do not have meanings. Only the presence of an observer gives his art a meaning. I wanted to make an installation that responses to the viewer’s movement. When someone walks close to the frame, some parts of the image would become clear, and the person’s movement would change the focused area on the canvas. The canvas is black in the beginning, and when someone walks into the frame, there would be a small shape that shows part of the photo. As the viewer moves a magnifier or a flashlight, the shape moves and reveals other parts of the image. With this effect, the viewer can navigate the image and complete it in their brain. The person needs to figure out what they think is in the image and decide in the end. There are no right or wrong answers, but in the end, there will be data gathered to show the result. 

General visualization of my project:Final Project idea

The Hong Kong protests happening this year has pushed me to think about the relationship between media and our beliefs. It seems like everyone is taking a side on this issue. The news on Weibo and the news on twitter display completely opposite sides of the violence in Hong Kong. As someone who is sandwiched in between Chinese identity and Western ideologies, I found it quite difficult to choose one extreme on this spectrum. Yet, I am not completely unbiased. For this project, I was inspired by the ideas of “selective exposure” and “third-person effect”. Selective exposure is: “individuals’ tendency to isolate themselves by selecting only attitude-consistent news”(Knobloch-Westerwick and Johnson, 2014). It is based on Festinger’s “cognitive dissonance theory”, which means:“people have an inner need to ensure that their beliefs and behaviors are consistent. Inconsistent or conflicting beliefs lead to disharmony, which people strive to avoid”(Cherry, 2019). Third-person effect means that: “Each individual reasons: I will not be influenced, but they (the third persons) may well be persuaded”(Davison, 1983). I hope the completion of my project could reflect on these theories and remind us that maybe it is better if we can accept the existence of the other side of the rhetoric. Instead of rejecting them or judging them, think about why this rhetoric exists and why there are divided opinions on it. Recently I watched a documentary called “Of Fathers and Sons”. This documentary shows the story of a radical Islamist family, a group of people we would not read about from the news we access. It is scary to see how the children were trained to become terrorists and their numbness to violence. On the other hand, this documentary shows the love between their family members. After watching the documentary, our perception of terrorism will not be changed, but at least we have insight into why they exist. In general, my goal is not justifying or judging any actions. Rather, I want to emphasize that although we know things are not all black and white, we tend to choose to believe in those that align with our beliefs that continue to reinforce our beliefs.  

Cherry, K. (2019) Cognitive Dissonance and Ways to Resolve It, Verywell Mind. Available at: https://www.verywellmind.com/what-is-cognitive-dissonance-2795012 (Accessed: 24 November 2019).

Davison, W. P. (1983) ‘The Third-Person Effect in Communication’, Public Opinion Quarterly, 47(1), pp. 1–15. doi: 10.1086/268763.

Knobloch-Westerwick, S. and Johnson, B. K. (2014) ‘Selective Exposure for Better or Worse: Its Mediating Role for Online News’ Impact on Political Participation’, Journal of Computer-Mediated Communication, 19(2), pp. 184–196. doi: 10.1111/jcc4.12036.

Wired (2019) ‘This Artist Makes Kinetic “Mirrors” That Echo Your Movements’. Available at: https://www.wired.com/story/daniel-rozin-mechanical-mirrors/ (Accessed: 24 November 2019).

Derki, T. (2018) Of Fathers and Sons – Official Trailer. Available at: https://www.youtube.com/watch?v=Zd0bRdYb8AI&feature=youtu.be(Accessed: 26 November 2019).
 
WIRED (no date) How This Guy Makes Amazing Mechanical Mirrors | Obsessed | WIRED. Available at: https://www.youtube.com/watch?v=kV8v2GKC8WA&feature=youtu.be(Accessed: 26 November 2019).

Recitation 9 Media Controller Chloe Wang

In this recitation, we incorporated the use of images in the interaction between Processing and Arduino. In this week’s class, we learned how to put an image in processing and manipulate the image using values in Arduino. This week, I built my recitation project based on last week’s project of Etch a Sketch. First, I took the first step from last week’s Etch a sketch where I got an ellipse to move according to me turning two potentiometers. 
Here is what I had last week:
Then in my codes, I added codes for PImage:  photo = loadImage(“cat.jpg”);

and dragged a picture of my cat in Processing.  At first, my goal was to have a blurred picture of my cat on top of the clear picture, and wherever the ellipse moves, that part of the canvas would show the photo beneath rather than the blurred picture on top. I used the maskImage function in doing this. At the time, blurring a photo would take some time, so I added another photo that has a similar size with

  maskImage = loadImage("mask.jpg");
  photo.mask(maskImage);
  maskImage.resize(652, 484);

But the program still did work as I wished. I did not screenshot the result, but it would show a picture of my cat with some colors distorted. The ellipse on the canvas would leave a faded trial behind as it moves around. Later I realized that the mask would only be used when the mask image needs to contain only greyscale data. So with some help, I changed the maskImage to black with maskImage.set(x, y,255); and a rectangle would move around to reveal the photo beneath. With set function, it changes the color of those pixels of the selected area.  For the rectangle that is moving around, I (with help) used two for functions

  for (int y=200; y<300; y++) {
    for (int x=200; x<300; x++) {
      maskImage.set(x, y,255);
   }
  }
 and 
  int a=round(map(sensorValues[1],0,1023,0,height));
  int b=round(map(sensorValues[0],0,1023,0,width));
  
  for (int y=a; y<a+50; y++) {
    for (int x=b; x<b+50; x++) {
      maskImage.set(x, y,255);
    }
  }
in set up and draw. 
This way, when the rectangle moves around the black canvas as I turned the two potentiometers on Arduino, the rectangle would only reveal the part of the image it is at. Using int a and int b and the map function, I finally gave a boundary to where the ellipse can freely move. Now the ellipse would be on the canvas at all times.
From doing this exercise in class, I also reflected on my final project. Rather than having a blurred picture representing the things we don’t know about, a black screen and just a small part of visible image would be more representative of our actual experience with modern media that we don’t see most of the things we comment on. After reading Computer Visions for Artists and Designers, it provided me with another idea with “simple object tracking”. If this rectangle was generated by an analog source of flashlight, maybe I could step up the interactivity of my project to have people “looking for the truth in the dark” with an actual flashlight and black screen. 
 
Here is the complete code to the final version:
 
Here is a video of my final result:
Here is another video of my final result that could lead to another direction for my project:
 
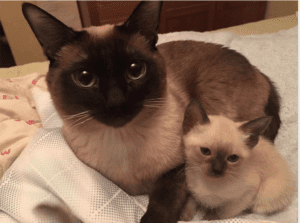
Just in case you want to know, this is the picture I used in this exercise.
Image used in Recitation 9

Reference:

Levin, G. and Collaborators (2012) ‘Computer Vision for Artists and Designers: Pedagogic Tools and Techniques for Novice Programmers’. FLONG. Available at: https://drive.google.com/file/d/1NpAO6atCGHfNgBcXrtkCrbLnzkg2aw48/view.

Recitation 8: Serial Communications Chloe Wang

In this recitation, we connected the Arduino and Processing that they can react to each other’s actions. My first test was to make a â€œEtch a Sketch” with Processing that could draw a line according to physically turning two potentiometers with Arduino. I used the sample code Arduino to processing with one value. 
First I changed the serial.List number to 2 as shown on my Arduino port, and NUM_OF_VALUES to 2 since we have two analog values coming from the two potentiometers. Then I setup the size and background. In draw, I put in an printArray and an ellipse. In the values for the ellipse, I put in sensorValues[0] and sensorValues[1] to use the array function I have created. Now the ellipse could move around on the screen according to the potentiometer on Arduino. 
Here are the codes for step 1 https://gist.github.com/Chloeolhc/a97e8376dd088dfb7f4de319f027ae21 
Here is a video for my first step.
Going into step 2, to make an actual Etch a Sketch, I need to change the ellipse into drawing a line. I changed the four values for the posy1 and 2 in a line into a=sensorValues[0];
b =sensorValues[1]; so the four points become line( a, b,sensorValues[0], sensorValues[1]);
a = sensorValues[0];
b =sensorValues[1];
a and b are defined. 
This way, my two potentiometer could control the x-axis and y-axis on the canvas. However, as I was testing, the line often goes out of the border and it was difficult to find its position. So I edited my canvas size from 600×600 to 1024×1024. After editing the size, I could clearly see the path that my line was going as I was turning the two potentiometers. 
Here is the video of the final result. 
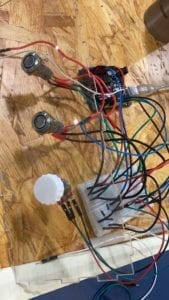
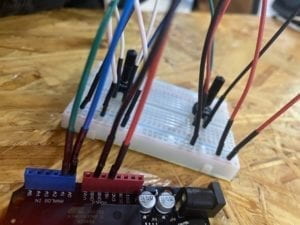
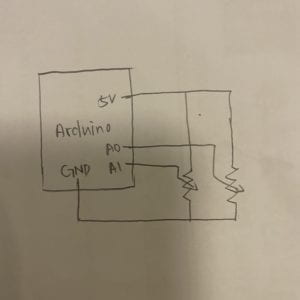
Here is the circuit and a sketch of the circuit for Arduino:
Recitation 8 part 1 circuit
 
recitation 8 part 1 circuit
Here are the codes for the final result in the first part:
https://gist.github.com/Chloeolhc/010b0a7521164f8edbaac4e7e318ecb0 
 
 
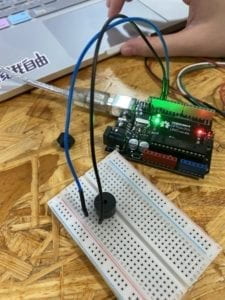
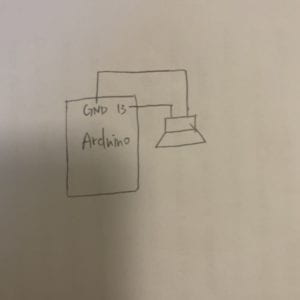
For part two of this recitation, we needed to make a musical instrument with a buzzer on Arduino that changes pitches according to the movement of the mouse on the processing canvas. I used the One Value Processing to Arduino file to create this. The idea is that the buzzer reacts to different x and y positions on the canvas. For the tone() function, it has two syntax tone(pin, frequency). I did not change the ledPin to others because there is only one buzzer involved in this project. So I had tone(ledPin,valueFromProcessing); and an if statement following this to control the reaction of the buzzer from Processing. 
Here is my circuit.
Recitation 8 part 2
 
recitation 8 part 2
Here is a video of the final result.
Here are my codes. https://gist.github.com/Chloeolhc/0f8b0397c28866b4f7d7ef0bc6a6424d