Recitation 5: Processing Basics by Yifei LI

In this recitation, we used processing to draw a picture. I chose the one called T1 by artist  László Moholy-Nagy as the motif. Because I thought this painting looks really nice and simple, like three planets in the universe.

Link:https://www.guggenheim.org/artwork/2980

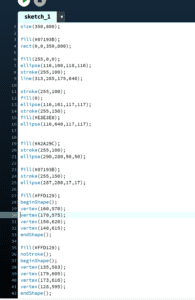
I thought this would be easy since the painting doesn’t have complex symbols. But I was wrong. I tried to make it look exactly the same as the painting, but I had many problems adding the details. I didn’t know how to add texture nor the gradients. So my sketch lacks many details, which makes it look too plain. Locating the symbols was hard as well, especially when you don’t know where they need to be exactly. Except for all the details, other parts generally look similar to the motif.

I think it’ll be better to use it if you’ve already had a sketch and known the coordinations, which will save a lot of time. Processing can be very efficient in drawing complex and repetitive images, as the computer can finish it quickly. But using code to paint is still different from using your own hands to draw. The latter one is more direct and easier to control.

Recitation 04: Drawing Machines by Yifei Li

In this recitation, we created a drawing machine by building a circuit to control the mechanical arms. We assembled the circuit individually and worked together to make the machine.  I ran into many problems while building it and running the code, and stayed another 10 minutes after the class finished to complete the project. But luckily, we got it done at the end.

Materials:

For Steps 1 and 2

1 * 42STH33-0404AC stepper motor
1 * L293D ic chip
1 * power jack
1 * 12 VDC power supply
1 * Arduino kit and its contents

For Step 3

2 * Laser-cut short arms
2 * Laser-cut long arms
1* Laser-cut motor holder
2 * 3D printed motor coupling
5 * Paper Fasteners
1 * Pen that fits the laser-cut mechanisms
Paper

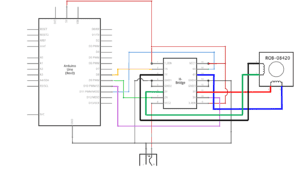
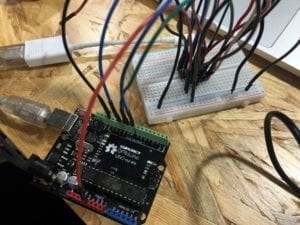
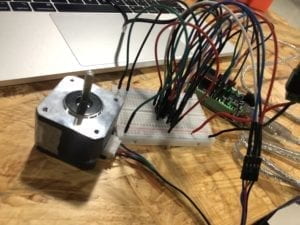
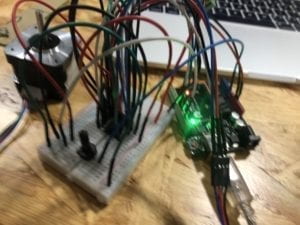
Though the schematic looked complicated, merely building it seemed easy. I didn’t realize how many mistakes I had made until one of the fellows helped check it. Forgetting to separate 12V and 5V power, put H-bridge in the wrong direction, misconnecting the ground… I spent a long time to adjust the circuit, leaving little time for other steps。

But after correcting the circuit, the code still didn’t work, which confused me a lot. We later realize it was because I selected the wrong port in Arduino.

In step two, we added a potentiometer into the circuit and modified the code to match it with the motor, so we could use the potentiometer to control the rotation of the motor.


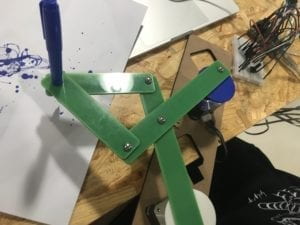
In step 3, we built a mechanical arm and combined it with the motors—a drawing machine was done.

Question 1:

I’m interested in building something that is both of practical use and art value. Somehow many machines now merely have one of them, but these two qualities aren’t incompatible. We’ve used a few different kinds of actuators so far, such as servor motor and stepper motor, each of whom is used for different purposes. As we combine them and other things together, we can make something more complex and useful. Digital art is a more modernized way of expression, which not only can be a completely new form but also can be used to help the traditional ones adapt to today’s society.

Question 2:

In the reading ART + Science NOW, Stephen Wilson (Kinetics chapter), one art installation called Mechanical Mirrors: Wooden Mirror by Daniel Rozin is mentioned. It is a computer-controlled installation that uses wooden blocks to recreate digitalized video images. The artist uses cameras to detect the grey value. Then the system reads it and adjusts the blocks accordingly. It uses servo motors to change the angles in order to show different grey-scale values. In our recitation, we used stepper motors because we needed the mechanical arm to move differently. However, both of the installations show the process of interaction. The wooden mirror reflects people’s movement when they interact with it, while the drawing machine draws out the picture for the users as they use it.

Individual Reflection by Yifei Li

Definition

For me, interaction is mutual, requiring certain participation of at least two actors. It is when one does something to another, the receiver responds to the initiator, and then the initiator responds to the receiver’s reaction…It is a cyclic and iterative process that can go on and on and on. In The Art of Interactive Design,  Crawford uses conversation as an example to explain what is interaction, as conversation applies to the definition of it. In a conversation, the speakers both listen and talk; they pay attention to another’s words and respond to them. This also corresponds to the idea in Physical Computing by Igoe and O’sullivan, which are input, output, and processing in computer terms.

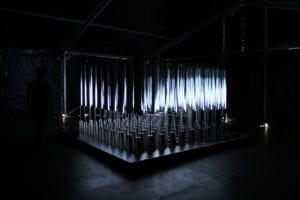
The project “Volumeby NY based art and architecture collective Softlab helps me shape my definition of interaction, and align with it well. It is an interactive installation that is made of responsive mirror panels, and as people interact with it, it can redirect sound and light to spatialize their feelings.  In this project, people’s movement around it and the sound are the listenings or input, which is caught by the cameras and LEDs. Then the process of mirrors using the data cameras collected to decide which direction to turn to is thinking. At last, the mirrors rotate to face the nearest person, and LEDs respond to the ambient sound, thereby redirecting light and sound as output or a way of talking to the crowd. As people move around, light and sound will change again accordingly. 
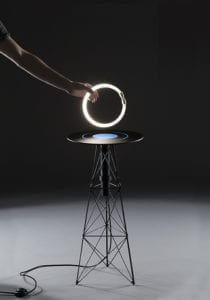
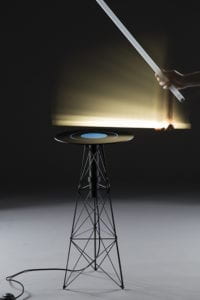
Another project I find interesting is “EM Table” by Florian Dussopt, but this one is at a lower level of interaction if following my definition. According to the article, “EM table is an experimental object that is able to produce a localised electromagnetic field when switched on”(Visnjic). When fluorescent tubes get close to the table, it’ll be lighted up by the electromagnetic field without physical contact. It looks very beautiful and magical but doesn’t correspond to my definition. It seemed interactive to me at first sight, but I realize later that the table doesn’t show the complete process of “listening, thinking, and speaking”(Crawford 1). It is more like a wireless switch rather than an interactive project since it can’t “think” and “speak” to people in a way that is more meaningful than lighting up a tube.
Group Project

Our group project Skype 2.0 is a VR chatroom software powered by a specially designed headband. All the user needs to do is to put the headband on, connect it to the computer, and then his body will physically fall into a sleep state while his mind is uploaded to the virtual chatroom online. Our inspiration came from the concept of VR technology, which is widely used in games and films nowadays. We decided to design a chat app that uses VR to provide a more immersive and interactive experience for the users, which can satisfy their needs of having face-to-face conversations with long-distance friends.

In this project, there are two kinds of interaction. First, the user interacts with the device. His mind is the input, uploaded online being processed, and is finally carried to the chatroom. He can also change various settings as another way to interact—the background of the chatroom, the on-off of different sensations such as hearing and olfaction, etc. Second, he also interacts with other users, in which we can easily find the three components of interaction. They can see, touch, and talk to each other like in real life with all the lifelike simulations of reality. During their conversation, there is no doubt they listen, think, and speak, interacting with one another. The project not only interacts with the user but provides a chance for him to interact with others. With these two kinds of interaction, we think this project fulfills the criteria.

Works Cited

Crawford, “What Exactly is Interactivity,” The Art of Interactive Design,  pp. 1-5.

Igoe and O’sullivan, “Introduction,” Physical Computing, pp. 1-4 

Visnjic, Volume – Interactive cube of responsive mirrors that redirects light and sound                        https://www.creativeapplications.net/processing/volume-interactive-cube-of-responsive-mirrors-that-redirects-light-and-sound/                                                          —, EM Table – Exploring possible new interactions https://www.creativeapplications.net/objects/em-table-exploring-possible-new-interactions/

Recitation 03: Sensors by Yifei Li

For this recitation, we chose Moisture Sensor and used a LED as output to show the data. The circuit itself wasn’t complicated, but the code could be a bit tricky since we need to combine the code for AnalogInOutSerial and code for the sensor together.

AnalogInOutSerial

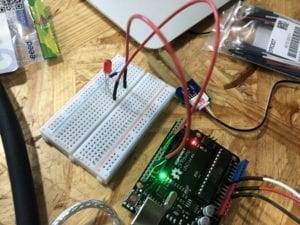
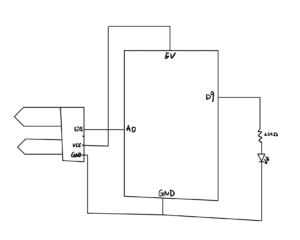
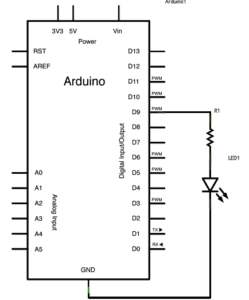
Building the circuit was easy. Connect the sensor’s three pins to Arduino’s ground, power and one of the analog input pin(we chose A0 here) respectively, and add a LED and a resistor to the circuit using the breadboard—then you got your circuit!

This is the diagram of this circuit.

we found the code for the sensor on this website: http://wiki.seeedstudio.com/Grove-Moisture_Sensor/

We added it to Arduino’s sample code AnalogInOutSerial and made a few modifications to let them work. At first, it didn’t work well, but we then found the problems and solved them.

This video shows how the circuit works. When we use damp hands to touch the sensor, it collects data and transfers it to the computer, and then lights up the LED. Later, we also tried to make the delay short and had the lightness changed according to the dampness.

I’ve had a deeper understanding of how the code works and how should we write it through this recitation, and I’m also more familiar with different kinds of sensors.

Question 1:

We intended to build a circuit that could show the data Moisture Sensor collected through the brightness of a LED. For practical use, I think farmers may find it useful. They can tell whether they need to water the plant or not by the brightness of the light as it is a symbol of the dampness of the soil. It can be a good way to save water and increase productivity as well.

Question 2:

There are many similarities between code and recipe. They both have clear goal and procedure —what dish to cook, what step should be taken first, what’s the next, etc. They use the most straightforward sentence to make the receivers understand and do their job.

Question 3:

I believe the computer has a huge impact on the way we socializing and thinking. With so many social media platforms emerging, many people prefer talking to each other online rather than face-to-face. We spend less time interacting with people in reality but online. When we run into some problems, we tend to search online and do less thinking ourselves.

Recitation 02: Arduino basics by Yifei Li

We built three circuits in this recitation: Fade, toneMelody, and speed game,using our own Arduino Kit. The first two were easy, but the last one was relatively harder. We did this in a group of two.

Materials:

From Arduino Kit:

1 * Arduino Uno
1 * USB A to B cable
1 * breadboard
1 * buzzer
2 * LEDs
2 * 220 ohm resistors
2 * 10K ohm resistors
2 * pushbuttons
A handful of jumper cables

From cart:

2 * arcade buttons

Circuit 1: Fade

this circuit was really easy, so we didn’t run into any trouble.
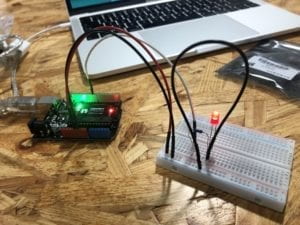
After finished the original one, we changed the code a little bit to make the LED fade faster.
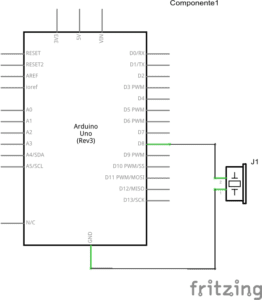
Circuit 2: toneMelody

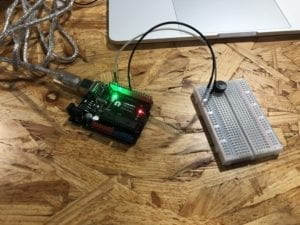
This was the second circuit, and it was as simple as the last one. We later put the code into the loop section and then enjoyed the melody again and again.
Circuit 3: Speed game 

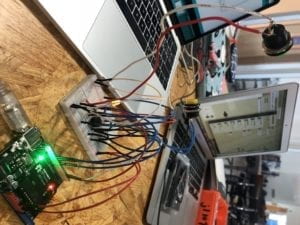
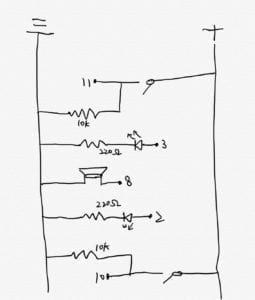
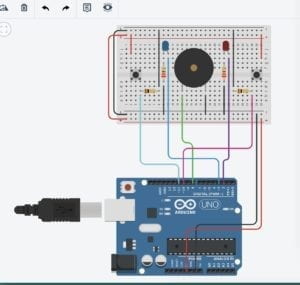
obviously this one was way more complicated than the last two, but luckily the diagram was clear enough for us to follow. We spent much time figuring out how the cables went and building it. It became a bit difficult when you need to insert so many cables into the board with all the tiny holes—it was difficult for eyes at least. And when we uploaded the code and found the circuit not working, we realized we forgot to put two cables to their right place. After fixing this, the game started running successfully.

We didn’t have enough time to build Circuit4 after we finished Speed Game, but we did enjoy all the process a lot. We now are certainly more familiar with the circuit and Arduino code.

schematic for this

Question 1:

Interaction is a mutual process. It is about when one does something to another, and the receiver then responds back. In the third circuit, the Speed Game is a good example of interaction. We do input by pressing the button, and the computer processes all the data, at last, it shows the result as output. It is us interacting with the computer.

Question 2:

The 10K resistor has large resistance, so there’s only a small amount of current can pass through, which can protect the circuit from shorting.

Question 3:

I’d like to use them to make a decorative carpet, though I can’t step on it. Its brightness and color will change depending on your mood or temperature.