Floating keys – Fay Li – Eric

CONCEPTION 

Our project was like a physical version of Piano Tiles and Guitar Hero. There were four boxes as four keys of the piano, each with a sensor inside. The player should follow the moving tiles on the screen and put his hand into the right boxes accordingly to reach a high score and complete the jingle bells melody. Compared to simply tapping the screen, we wanted players to have feel more engaged with the game through the physical process of interaction.

DESIGN,   FABRICATION, AND PRODUCTION:

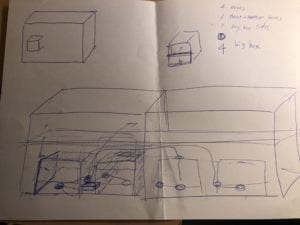
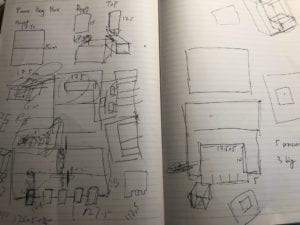
Our original design for the physical part was to put four small boxes in one big box, to make all the circuits and keys an integral part. But it was thus rejected by the TA the first time we went to fab lab, because it would use more than ten boards of wood, which was a lot. Later we decided only to make four small boxes with a big platform (built by two boards), which altogether would take six boards. And the idea was rejected again as six was still too much. Therefore, we had to give up the idea of using the wood board as the platform. We found a box in the cardboard room and cut it to the proper size and glued the boxes onto the board, which turned out working well though looked kind of weird.

We left a small hole at the back of each box so the wires could come out more organized. I also added some decorations onto the top of the boxes to show the theme of music, and add some Christmas vibe to the project.

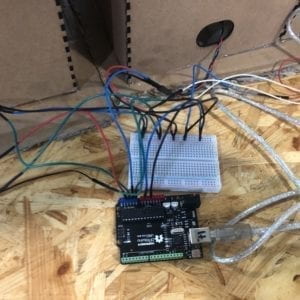
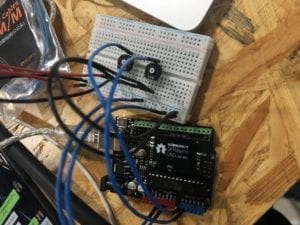
We also met some problems with the Arduino when building the circuit, though it was supposed to be the easiest part. We found that when connecting the Arduino to the computer, it didn’t show up in the port list, and the green light turned off, and Arduino became extremely hot. Later we found out that it was because we misconnected some of the wires. And the same mistake occurred several times throughout our production and even right before the presentation, and each time it took us long enough to figure out.

The coding was the hardest part of the project. We were able to complete the code with help from professors, TAs and many friends. Especially thanks to my partner James, who put a lot of effort into this. The project wasn’t fully functioning during the user test due to the same mistake I mentioned above and we didn’t figure it out before the user test, so we used four keys on the keyboard to replace the sensor to only test the code. We didn’t get many useful suggestions during the session, but Eric helped changed the code to make it work better.

Later we added more details to the game interface, such as the title screen, time bar, highest score record. And the game could be restarted as well.

CONCLUSIONS:

Though we still ran into some problems the day our presentation, the project overall interacted with the player well. They interacted with it by placing their hands into the right box and complete the melody, which aligned with my definition of interaction as being a reciprocal and cyclical process between the user and the machine. It also reached the goal that making the users feel more engaged with the game through physical interaction. The problem was that once the melody was completely played, the array reached its end and the game would crash (Eric helped fixed it after the presentation). If given more time, we could improve it by adapting the suggestions we received during the presentation, such as making it a two-player game, or making a vertical version so that the keys can really “flow”, or adding more songs to it… The project experience was very interesting and meaningful, as a team we overcame many difficulties and finally had a good outcome. And hopefully, the attempt of adding more interaction and making a physical version of a game can bring more fun and engagement to the players.

Recitation 10: Workshops

For this recitation, I chose the object oriented programming workshop. We learned about object, class, and array, especially Arraylist.

For the exercise, I made an animation based on the code we wrote during the class and created a class for the Spiderman symbol. As the background, there are many of it moving and bouncing around. For interactivity, every time I click the mouse, it will add one more white symbol to the screen, and a pink one will be added every time the keyboard is pressed.  And I used map() function to make sure that the white symbol will only start at the center of the screen.

ArrayList<Spider> sList;

void setup(){
  size(1600,800);
 sList= new ArrayList<Spider>();
  for(int i=0; i<100; i++){
  sList.add(new Spider(random(width),random(height),color(random(100,255),random(0,50),random(0,85)),color(0)));
  }
}
void draw(){
background(0);
 for(int i=0; i<sList.size(); i++){
  Spider temp = sList.get(i);
   temp.display();
  temp.move();
 }
}
  void mousePressed(){
   float xx = map(mouseX,0,width,width/4,width/2);
float yy =map(mouseY,0,height,height/4,height/2);
   sList.add(new Spider(xx,yy,255,0));
 }
void keyPressed() {
  float x=random(width);
    float y=random(height); 
     sList.add(new Spider(x,y,255,#EA219A));
}
class Spider {
float x,y;
float size;
color clr;
float spdX;
float spdY;
color str;

Spider(float startingX,float startingY,color startingColor,color startingstr){
 x= startingX;
 y= startingY;
 size= random(50,100);
 clr=startingColor;
 str=startingstr;
spdX= random(0,6);
spdY= random(0,10);
}

void display(){
  fill(clr);
  noStroke();
  ellipse(x,y,size,size);
  stroke(str);
  strokeWeight(size/17);
  fill(255);
  arc(x-size/5,y-size/6,size/3,size/1.5,QUARTER_PI,PI,CHORD);
  arc(x+size/5,y-size/6,size/3,size/1.5,0,QUARTER_PI+HALF_PI,CHORD);
  
}
void move(){
  x+=spdX;
  y+=spdY;
 
if(x>=width || y>=height){
  spdX=spdX*-1;
  spdY=spdY*-1;
}
if(x<=0|| y<=0){
  spdX=spdX*-1;
  spdY=spdY*-1;
}
}

}

Recitation 9: Media Controller by Yifei Li

In this recitation, I used two potentiometers to control the values of the tint and blur filter. The image changes from clear to blur and dark to bright according to the values from the potentiometers.

code for Arduino

// IMA NYU Shanghai
// Interaction Lab
// For sending multiple values from Arduino to Processing

void setup() {
Serial.begin(9600);
}

void loop() {
int sensor1 = analogRead(A0);
int sensor2 = analogRead(A1);

//int mappedsensor1 = map(sensor1,0,1023,0,255);
//int mappedsensor2 = map(sensor2,0,1023,0,255);

// keep this format
Serial.print(sensor1);
Serial.print(“,”); // put comma between sensor values
Serial.print(sensor2);

Serial.println(); // add linefeed after sending the last sensor value

// too fast communication might cause some latency in Processing
// this delay resolves the issue.
delay(100);
}

code for Processing

PImage img1;
import processing.serial.*;

String myString = null;
Serial myPort;


int NUM_OF_VALUES = 2;   /** YOU MUST CHANGE THIS ACCORDING TO YOUR PROJECT **/
int[] sensorValues;      /** this array stores values from Arduino **/


void setup() {
  size(800, 800);
  background(0);
  setupSerial();
  img1 = loadImage("im.jpeg");
}


void draw() {
  updateSerial();
  printArray(sensorValues);
  float mappedsensor1 = map(sensorValues[0],0,1023,0,255);
 float mappedsensor2 = map(sensorValues[1],0,1023,0,255);
 
  float mappedsensor3 = map(sensorValues[0],0,1023,0,800);
 float mappedsensor4 = map(sensorValues[1],0,1023,0,800);

 image(img1,0,0,800,800);
 filter(BLUR,sensorValues[1]/100);
tint(mappedsensor1,mappedsensor2);
 noFill();
 circle(mappedsensor3,mappedsensor4,200);
}


void setupSerial() {
  printArray(Serial.list());
  myPort = new Serial(this, Serial.list()[ 13 ], 9600);
  // WARNING!
  // You will definitely get an error here.
  // Change the PORT_INDEX to 0 and try running it again.
  // And then, check the list of the ports,
  // find the port "/dev/cu.usbmodem----" or "/dev/tty.usbmodem----" 
  // and replace PORT_INDEX above with the index number of the port.

  myPort.clear();
  // Throw out the first reading,
  // in case we started reading in the middle of a string from the sender.
  myString = myPort.readStringUntil( 10 );  // 10 = '\n'  Linefeed in ASCII
  myString = null;

  sensorValues = new int[NUM_OF_VALUES];
}


void updateSerial() {
  while (myPort.available() > 0) {
    myString = myPort.readStringUntil( 10 ); // 10 = '\n'  Linefeed in ASCII
    if (myString != null) {
      String[] serialInArray = split(trim(myString), ",");
      if (serialInArray.length == NUM_OF_VALUES) {
        for (int i=0; i<serialInArray.length; i++) {
          sensorValues[i] = int(serialInArray[i]);
        }
      }
    }
  }
}

Final Project Essay by Yifei Li

Project Title

Floating Keys

Project Statement of Purpose

We want to make something like a piano keyboard with sensors connected to the computer. There will be a game in processing that plays different songs and shows which key can make the correct sound. The player should follow the hints and put his hands above the right key to play the song correctly and win the game. With the sensors, he doesn’t need actually to touch it, which we think is more interesting. We got the inspiration from the instrument simulator kind of games and my partner’s personal experience of practicing piano. We hope it can make the process of practicing more effective and enjoyable for both people who have learned the piano before or have no experience with it. 

Project Plan

The project consists of two parts, the physical part of the keyboard with sensors and the part of code and images in Arduino and Processing. In Processing, we’ll need to create an interface for the game that changes according to different songs and the user’s movement. The sensors will be placed under the keyboard, detecting the hands’approach and returning the data to Arduino. Then Arduino will send relevant values to Processing, and the interface in Processing will change accordingly. For next week, we need to build a prototype and work on the necessary code of the game. In the second week, we’ll run tests to modify and improve the code, also continue to complete its exterior. During the last week, we’ll add more decorations to make it look better and add more details to the code to perfect the game experience. As it is a game, we’ll need to collect feedback from the players to improve it throughout the whole process.

Context and Significance

My previous research on ICEBERG reminds me that the interaction between the machine and the user might need to be more transparent and direct so that the user can get a sense of participation and satisfaction easier. Later the research on LATE SHIFT inspires me that we could make a game to create a combination of interaction and entertainment, where the user is actively engaged during the whole process. So we intend to do the project in the form of a game.

The process is that the computer shows above which sensor the user should place his hand, and the sensor will detect the hands, and the result will be returned and shown on the screen. The game can be restart, and the process can go on and on. What happens during the game aligns with my definition that interaction is a cyclical and mutual process that one responds to the action of another. Just like Crawford’s metaphor of conversation and the idea of “input, output, and processing” from Physical Computing, it is a conversation between the input of the user and computer’s processing and output in the form of music and image. 

Compared to games like Guitar Hero or Rock Band, the physical part (the keyboard) of our project can make the interaction more direct, and more like a real piano. And the fact people don’t need to touch the keyboard makes the game more futuristic and fun. This game helps people who want to get more familiar with the songs and notes, but find only practicing on the real piano for a long time could be a bit dull. For those who have never played the piano before, it can both provoke their interest and help them relax. It can be fun and educational at the same time.

Works Cited

Crawford, “What Exactly is Interactivity,” The Art of Interactive Design,  pp. 1-5.

Igoe and O’Sullivan, “Introduction,” Physical Computing, pp. 1-4 

Recitation 08: Serial Communication by Yifei Li

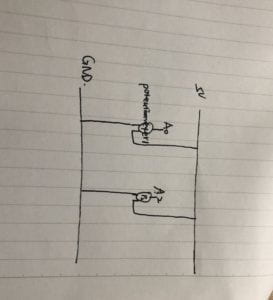
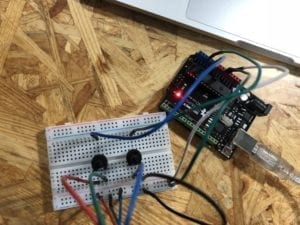
The first exercise was to make a Processing Etch A Scetch. The circuit was easy to build, only using two potentiometers. We first drew an ellipse in Processing and used the values from the potentiometers to control the “x” and “y” of the ellipse. Since we needed two values from Arduino, I used the sample code for multiple values and modified it. But when I tried to draw the line, all I got were dots. Luckily I later fixed it with the others’ help. I think the interaction is that people can use the potentiometers to change the values of “x” and “y” , and the line in processing is drawn accordingly.
code for Processing

// IMA NYU Shanghai
// Interaction Lab
// For receiving multiple values from Arduino to Processing

/*
 * Based on the readStringUntil() example by Tom Igoe
 * https://processing.org/reference/libraries/serial/Serial_readStringUntil_.html
 */

import processing.serial.*;
float pX;
float pY;

String myString = null;
Serial myPort;


int NUM_OF_VALUES = 2;   /** YOU MUST CHANGE THIS ACCORDING TO YOUR PROJECT **/
int[] sensorValues;      /** this array stores values from Arduino **/


void setup() {
  size(800, 800);
  setupSerial();
   background(0);
}


void draw() {
  updateSerial();
float x = map (sensorValues[0],0,1023,0,width);
float y = map (sensorValues[1],0,1023,0,height);
  strokeWeight(3);
  stroke(255);
  line(pX,pY,x,y);
 pX=x;
  pY=y;


  // use the values like this!
  // sensorValues[0] 

  // add your code

  //
}


void setupSerial() {
  printArray(Serial.list());
  myPort = new Serial(this, Serial.list()[ 9 ], 9600);
  // WARNING!
  // You will definitely get an error here.
  // Change the PORT_INDEX to 0 and try running it again.
  // And then, check the list of the ports,
  // find the port "/dev/cu.usbmodem----" or "/dev/tty.usbmodem----" 
  // and replace PORT_INDEX above with the index number of the port.

  myPort.clear();
  // Throw out the first reading,
  // in case we started reading in the middle of a string from the sender.
  myString = myPort.readStringUntil( 10 );  // 10 = '\n'  Linefeed in ASCII
  myString = null;

  sensorValues = new int[NUM_OF_VALUES];
}


void updateSerial() {
  while (myPort.available() > 0) {
    myString = myPort.readStringUntil( 10 ); // 10 = '\n'  Linefeed in ASCII
    if (myString != null) {
      String[] serialInArray = split(trim(myString), ",");
      if (serialInArray.length == NUM_OF_VALUES) {
        for (int i=0; i<serialInArray.length; i++) {
          sensorValues[i] = int(serialInArray[i]);
        }
      }
    }
  }
}

code for Arduino

// IMA NYU Shanghai
// Interaction Lab
// For sending multiple values from Arduino to Processing

void setup() {
Serial.begin(9600);
}

void loop() {
int sensor1 = analogRead(A0);
int sensor2 = analogRead(A2);

//int mappedsensor1 = map(sensor1,0,1023,0,255);
//int mappedsensor2 = map(sensor2,0,1023,0,255);

// keep this format
Serial.print(sensor1);
Serial.print(“,”); // put comma between sensor values
Serial.print(sensor2);

Serial.println(); // add linefeed after sending the last sensor value

// too fast communication might cause some latency in Processing
// this delay resolves the issue.
delay(100);
}

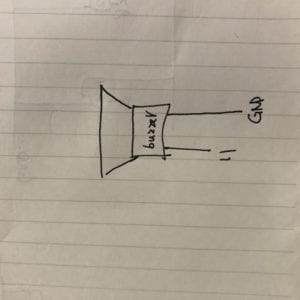
The second exercise was to make a music instrument with Arduino. For this one, I used the sample code for multiple values from P to A. I used the values of mouseX and mouseY to control the frequency and duration in Arduino. The interaction is that people can move the mouse around to change the pitch and length of the melody. As the mouse moves from left to right, the pitch changes from low to high accordingly. Moving the mouse up and down will change the length of the melody.
code for Processing

// IMA NYU Shanghai
// Interaction Lab


/**
 * This example is to send multiple values from Processing to Arduino.
 * You can find the arduino example file in the same folder which works with this Processing file.
 * Please note that the echoSerialData function asks Arduino to send the data saved in the values array
 * to check if it is receiving the correct bytes.
 **/


import processing.serial.*;

int NUM_OF_VALUES = 2;  /** YOU MUST CHANGE THIS ACCORDING TO YOUR PROJECT **/


Serial myPort;
String myString;

// This is the array of values you might want to send to Arduino.
int values[] = new int[NUM_OF_VALUES];

void setup() {
  size(500, 500);
  background(0);
 
  printArray(Serial.list());
  myPort = new Serial(this, Serial.list()[ 9], 9600);
  // check the list of the ports,
  // find the port "/dev/cu.usbmodem----" or "/dev/tty.usbmodem----" 
  // and replace PORT_INDEX above with the index of the port

  myPort.clear();
  // Throw out the first reading,
  // in case we started reading in the middle of a string from the sender.
  myString = myPort.readStringUntil( 10 );  // 10 = '\n'  Linefeed in ASCII
  myString = null;
}


void draw() {
  background(0);
    
  values[0]=mouseX;
  values[1]=mouseY;

  // changes the values
  // sends the values to Arduino.
  sendSerialData();

  // This causess the communication to become slow and unstable.
  // You might want to comment this out when everything is ready.
  // The parameter 200 is the frequency of echoing. 
  // The higher this number, the slower the program will be
  // but the higher this number, the more stable it will be.
  echoSerialData(200);
}

void sendSerialData() {
  String data = "";
  for (int i=0; i<values.length; i++) {
    data += values[i];
    //if i is less than the index number of the last element in the values array
    if (i < values.length-1) {
      data += ","; // add splitter character "," between each values element
    } 
    //if it is the last element in the values array
    else {
      data += "n"; // add the end of data character "n"
    }
  }
  //write to Arduino
  myPort.write(data);
}


void echoSerialData(int frequency) {
  //write character 'e' at the given frequency
  //to request Arduino to send back the values array
  if (frameCount % frequency == 0) myPort.write('e');

  String incomingBytes = "";
  while (myPort.available() > 0) {
    //add on all the characters received from the Arduino to the incomingBytes string
    incomingBytes += char(myPort.read());
  }
  //print what Arduino sent back to Processing
  print( incomingBytes );
}

code for Arduino

// IMA NYU Shanghai
// Interaction Lab

/**
This example is to send multiple values from Processing to Arduino.
You can find the Processing example file in the same folder which works with this Arduino file.
Please note that the echo case (when char c is ‘e’ in the getSerialData function below)
checks if Arduino is receiving the correct bytes from the Processing sketch
by sending the values array back to the Processing sketch.
**/

#define NUM_OF_VALUES 2 /** YOU MUST CHANGE THIS ACCORDING TO YOUR PROJECT **/

/** DO NOT REMOVE THESE **/
int tempValue = 0;
int valueIndex = 0;

/* This is the array of values storing the data from Processing. */
int values[NUM_OF_VALUES];

void setup() {
Serial.begin(9600);
pinMode(11, OUTPUT);

}

void loop() {
getSerialData();

tone(11, values[0],values[1]*10);

// add your code here
// use elements in the values array
// values[0] // values[1] }

//recieve serial data from Processing
void getSerialData() {
if (Serial.available()) {
char c = Serial.read();
//switch – case checks the value of the variable in the switch function
//in this case, the char c, then runs one of the cases that fit the value of the variable
//for more information, visit the reference page: https://www.arduino.cc/en/Reference/SwitchCase
switch (c) {
//if the char c from Processing is a number between 0 and 9
case ‘0’…’9′:
//save the value of char c to tempValue
//but simultaneously rearrange the existing values saved in tempValue
//for the digits received through char c to remain coherent
//if this does not make sense and would like to know more, send an email to me!
tempValue = tempValue * 10 + c – ‘0’;
break;
//if the char c from Processing is a comma
//indicating that the following values of char c is for the next element in the values array
case ‘,’:
values[valueIndex] = tempValue;
//reset tempValue value
tempValue = 0;
//increment valuesIndex by 1
valueIndex++;
break;
//if the char c from Processing is character ‘n’
//which signals that it is the end of data
case ‘n’:
//save the tempValue
//this will b the last element in the values array
values[valueIndex] = tempValue;
//reset tempValue and valueIndex values
//to clear out the values array for the next round of readings from Processing
tempValue = 0;
valueIndex = 0;
break;
//if the char c from Processing is character ‘e’
//it is signalling for the Arduino to send Processing the elements saved in the values array
//this case is triggered and processed by the echoSerialData function in the Processing sketch
case ‘e’: // to echo
for (int i = 0; i < NUM_OF_VALUES; i++) {
Serial.print(values[i]);
if (i < NUM_OF_VALUES – 1) {
Serial.print(‘,’);
}
else {
Serial.println();
}
}
break;
}
}
}