Week08: Midterm Documentation–Crystal Liu

Demonstration

Process

Virtual button

The first step to make my project is to replace buttons that users need to use the mouse to press by to the virtual button triggered by the human body part, for example, the wrist. To achieve it, I searched for the image for the button and found the following gif to represent the virtual button. To avoid touching mistakenly, I put the buttons on the top of the screen which looks like the following picture.

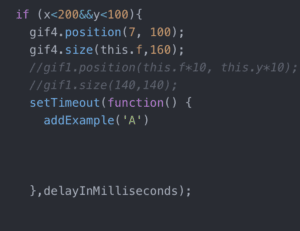
I used the poseNet to get the coordinates of the user’s left and right wrists and then set a range for each virtual button. If the user’s wrist approaches the button, the button will change into GIFs containing different instruments (Guitar, drum and violin). These GIFs play the role of feedback to let the user know they have successfully triggered the button. 

After that the model should automatically record the video as the dataset. The original one is that if the user press the button once, there will be five examples added to the class A. For my virtual button, the recording part should run once the user trigger the button. However, I need to set a delay function to give users time to put their hands down and prepare to play a musical instrument. Because the model shouldn’t count the image that users put their hands down as the dataset. So I set 3s delay for the users. But collecting examples is discontinuous if I keep raising my hand and dropping it.
Sound

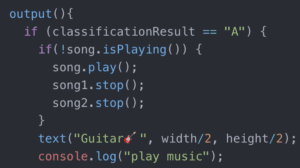
The second step is to add audio as the output. At first I said if the classification result is A and then the song will play (song.play( ); ). But the result is that the song played a thousand time in 1 second. Thus I can only hear noise not the sound of guitar. So I asked Cindy and Tristan for help, and they suggested me to use the following method: if the result is A and the song is not playing right now, the song will play. Finally it worked. there was only one sound at a time.
UI

The third step is to beautify UI of my project. First is the title: Virtual Instrument. I made a rectangle as the border and added a image to decorate it. It took some time to change the size of the border to the smaller one. Also I have added shadow to the words and added 🎧🎼 to emphasize music.

Then I added some GIFs which shows the connection between body movement and music. They are beside the camera canvas.
At last I added the border to the result part:

Experiment 

The problems I found in the experiment are as follow:

  1. The process of recording and collecting examples is discontinuous. It often gets stuck. But the advantage is that the user will know whether the collection part end by seeing if the picture is smooth or stuck. Also the stuck image may have something to do with my computer.
  2. Sometimes the user might touched two buttons at the same time, but it is hard for me to avoid this situation through the code. So I just changed the range of each button to widen the gap between them. 
  3. I have set the button to start predicting but it was hard for the model to catch the coordinates of left wrist. Sometimes it took a lot of time for the user to start predicting. Thus I have changed the score from 0.8 to 0.5 to make it better.
  4. Once the user pressed the start button, there would be a sound of the drum, even though the user didn’t do anything. It made me confused. Maybe it is because that KNN cannot consider the result that doesn’t belong to any classification. The model can only consider the most possible classification the input belongs to and give the corresponding sound.

Therefore, the next step is to solve the problems and enrich the output. For example I can add more kinds of musical instruments. And also the melody can be changed according to different speed of the body movement. 
Week 06: Midterm Project Proposal — Crystal Liu

Initial Thought

       My expected midterm project is an interactive virtual instrument. Firstly, the trained model can identify the differences in how musical instruments are played. Once it gets the result it will play the corresponding sound of the instrument. Also there will be a picture of the instrument on the screen around the user.

        For example, if the user pretended to be playing guitar, the model would recognize the instrument is guitar and automatically play the sound of guitar. Then there will be an image of guitar showing on the screen. The expected result is that it looks like the user is really playing the guitar on the screen.

Inspiration 

         My inspiration is a project called teachable machine. This model can be trained in real time. The user can make some similar poses as the input for a class. The maximum of the class is 3. Each pose correspond an image or gif. After setting up the dataset, once the user makes one of the three poses, the corresponding result will come out.

For me the core idea is excellent but the form of output is a little bit.  There are also some projects about motion and music or other sound.

So I want to add audio as output. Also the sound of different musical instruments is really artistic and people are familiar with it. Thus my final thought is to let users trigger the sound of the instrument by acting like playing the corresponding musical instrument. 

Technology 

In order to achieve my expectation, I need the technology to locate each part of my body and to identify different poses and then classify them automatically and immediately. According to the previous knowledge, I decide to use PoseNet to do the location part.

I plan to set a button on the camera canvas so that the users don’t need to press the mouse to input information and the interaction will be more natural. To achieve it, I need to set a range for the coordination of my hand. When I lift my hand to the range, the model will start receiving the input image and 3 seconds later it will automatically end it. Next time the user makes similar poses the model will give corresponding output. KNN is a traditional algorithm to classify things. So it can be used to let the model classify the poses in a short time and achieve real time training.

Significance

My goal is to create a project to let people interact with AI in an artistic and natural way. They can make the sound of a musical instrument without having a real physical one. Also it is a way to combine advanced technology and daily art. It provides an interesting and easy way to help people learn about and experience Artificial Intelligence in their daily life.

MLNI Week 06: Interactive Portraiture –Crystal Liu

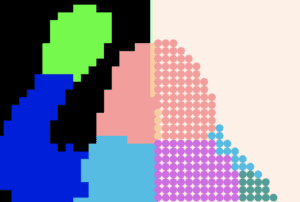
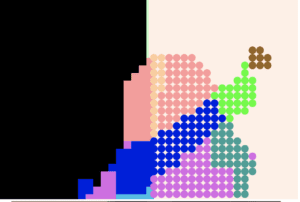
This week I create an interactive mirror, which can reflect your different body parts in different colours and shapes. This project is mainly used BodyPix to distinguish body parts. I have set the range for x to make a boundary for the left part and right part. On the left side, the body parts are reflected in a lot of rectangles while on the right side the shape changes to ellipse and the colour changes as well. I also use black and light pink as the background colours to emphasize the differences. 

The demonstration is as follows.


 Link to the code

Week 05 Assignment: Train CIFAR-10 CNN –Crystal Liu

Experiment

This week’s assignment is to train the model. The first step for me is to understand the meaning and the function of the key concept. And then I will validate them by practicing.

  1. Epoch:

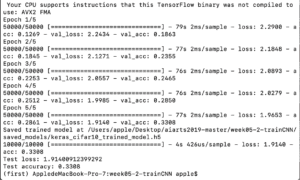
According to Sagar Sharma’s article on Medium, an epoch is when an entire dataset is passed forward and backward through the neural network only once. According to my trials, the more the time of epoch, the more accurate the result.

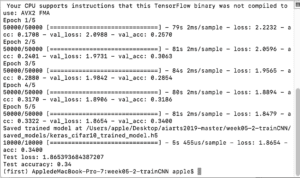
When the epoch is 5, as other variables are the same, the accuracy is 0.34.

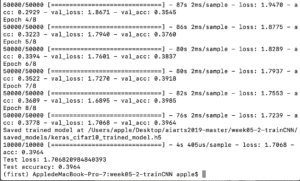
When the epoch is 8, the accuracy is 0.3964.

  1. Batch size

The batch size means the number of samples that will be propagated through the network. Since one epoch is too big to feed to the computer at once we divide it into several smaller batches. For example, if the batch size is 50, the algorithm will divide every 50 samples into groups and use these groups of data to train the model. The larger the batch size, the faster the training. 

In my experiment, the smaller the batch size, the more accurate the result.

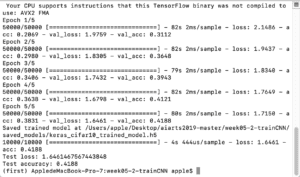
when the batch size is 1024, the accuracy is 0.4188 (epoch=5). The time it took is 409s.

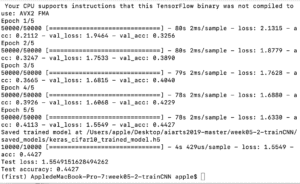
when the batch size is 512, the accuracy is 0.4427(epoch=5). The time it took is 399s.

3.Dropout: 

Dropout is a technique where randomly selected neurons are ignored during training. If some random neurons are dropped out during the training, others will replace them in the training. The result is that the network will be less sensitive to the specific weight of neurons and then get better generalization and to some extend avoid overfitting the training data.

I changed the data of the dropout from 0.25 to 0.50 but the accuracy  decreased from 0.34 to 0.3308. I’m still not so sure whether there’s specific and close relationship between the dropout and the accuracy since I did’t find clear explanation on the internet.

4. Size:

layers.Conv2D(32, (3, 3), padding=’same’, activation=tf.nn.relu,
input_shape=x_train.shape[1:]),
layers.Conv2D(32, (3, 3),activation=tf.nn.relu),
layers.MaxPooling2D(pool_size=(2, 2)),
layers.Dropout(0.1),
 
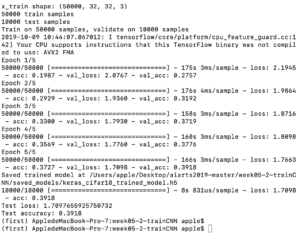
This time I chose to change the bolded data to 64, and the accuracy changed from 0.34 to 0.3918. The accuracy has increased.
 
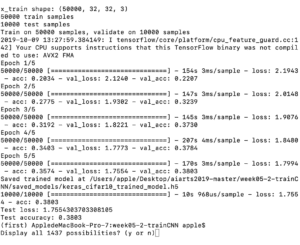
Then I changed the pool size from (2,2) to (3,2), and the accuracy changed from 0.34 to 0.3803. So the accuracy increased when the pool size increased.
 

Confusion&Thought

I was confused about the relationship between the batch size and the accuracy. Since I have searched batch size before and the articles said that compared with the number of all the sample, the use of batch size will decrease the accuracy of the estimation of the gradient. According to this idea, I thought that the larger the batch size, the more accuracy the result. However, the real case is totally opposite. Then I did some deeper researches and found that the smaller batch size can help the model training better by adding a little bit of noise into the search. But the bigger batch can help run faster although it has to sacrifice the accuracy. So it is important to set up a proper batch size based on the total number of samples to keep the balance of the speed and the accuracy.

Week 4 MLNI: Interactive game PoseNet (Crystal Liu)

Introduction

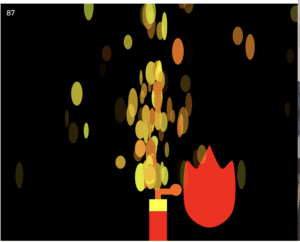
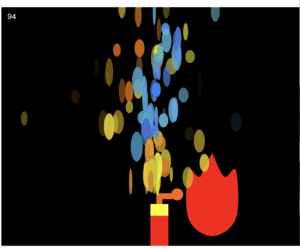
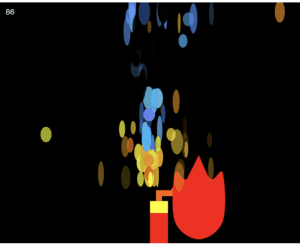
For this week’s assignment, I made a firecracker. To fire it, the players need to move their nose to get close to the firecracker fuse, since I have put the shape of fire on their nose by PoseNet. Once their nose is close enough to the fuse, the sparks appear and shoot vertically upward. Also if you move your mouse to the sparks, the color of it will change from golden yellow to blue; if you click the mouse, it then will turn to black, the same as the background, and then disappear.

The inspiration of this project is Brandon’s work from last week. His smoke was really beautiful and it reminded me of the beauty of sparks. Thus I decided to create a project of firecracker. The players can use their noses to light it and then use the mouse to change the color of it. In this way, the nose is the abstract button and the interaction is based on the mouse and the screen.

Technique problem

At first I wanted to achieve this effect: once you have successfully lightened the firecracker, you clicked the mouse and then the fire on your nose would keep staying on the fuse and the sparks would keep shooting. However, I cannot let it stay on it, so the users need to keep the nose within range so that the spark can continue to appear. After several trials, when I click the mouse, there would be a fire on the fuse but the fire on my nose could not disappear and it looked really weird so I gave up this effect and then tried to use the mouse to change the color of the sparks and finally got the final version.