Documentation 4-Yixuan Liu (Recitation Instructor Younghyun Chung, Eric Parren)

Materials:

1 * 42STH33-0404AC stepper motor
1 * SN754410NE ic chip
1 * power jack
1 * 12 VDC power supply
1 * Arduino kit and its contents

2 * Laser-cut short arms
2 * Laser-cut long arms
1* Laser-cut motor holder
2 * 3D printed motor coupling
5 * Paper Fasteners
1 * Pen that fits the laser-cut mechanisms

For this week’s recitation, I built the circuit and also edit the code for the first time. For the physical connection part, I found that it was very clear by following the diagram. Because of the accumulated experience that I have had from the former recitation, I could be able to accomplish the circuit very quickly. Besides, I am more familiar with all the equipment now which also helps a lot. Hence, I finished step one very fast.
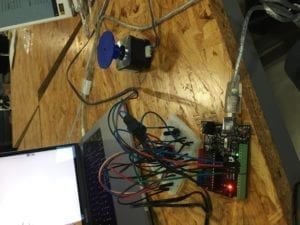
However, I met a huge problem in step two. I could not figure out the proper code for my circuit. At first, I thought it was because I connected some wired incorrectly, so my motor could not function well. However, after checking a couple of times, I realized that it was the code that was the problem. But the problem is that I cannot correct my code or have the ability to check which part of it is wrong. This reality makes me realize that because I have always been responsible for build the circuit, so I was very unfamiliar with the coding part. During the group work, I always volunteer to do the physical circuit so that we can save more time for the practice. However, this arrangement turns out to be me having a limit knowledge of the code we need.
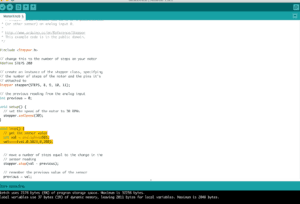
In order to solve this problem, I asked help from the learning assistance of the recitation. After solving the problem of the code, I finally was able to launch my circuit and make the motor rotating regularly. I also realize from this recitation that I cannot always keep doing the same work just because I am used to doing it, on the contrary, I have to practice the thing that I am not familiar more often so that I can have bigger progress.

For step three, I and my partner was working very hard, however, her circuit kept having the unnormal vibration. We tried to rewrite the code several times but did not work. In the end, we finally figured out that was because we did not plug a single wired in so that the entire circuit failed. This small mistake wastes lots of time, which also teaches us that never be careless for the projects because just one small wired can crash the entire work.

Question 1:

 When we are using the actuators, we should focus on expanding and emphasizing the superior capacity of the machine. We should design our project which can make use of the technology to achieve what we are normally unable to do. For example, we can draw on the wall of a skyscraper by controlling the actuators. Works like this cannot be achieved easily, and the difficulty of the environment does limit people’s creativity. However, if we can remove the barrier by applying advanced technology, we can provide more space for interactive engaging and artistic creating.

Question 2:

The project Waves by artist Daniel Palacios Jiménez at 2006 gave me the deepest impression. Jiménez materializes the invisible moves and waves around people. By interacting with this project, people can get a sense of the flow of the air. This process of transforming the invisible element into visible helps people to develop a more exquisite sensibility of their surroundings. Compared with the Wave, the drawing machine I made during the recitation provide audiences with less reflective thinking and inter-communication. I am still staying at the basic level of creating both an artistic and interactive project.
Individual Reflection–Yixuan Liu (Recitation Instructor: Younghyun Chung, Eric Parren)

The significant core of the interaction is the process of “two way” communication. During this process, the machine should contribute to the reproduction of people’s memory of their past, people’s imagination of their future, and people’s reflection of their present.

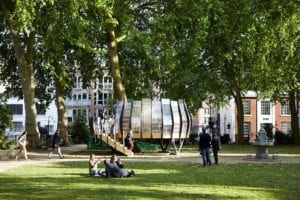
During my research, I found a project called “TreexOffice”.


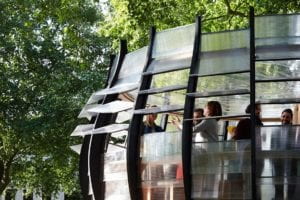
The builder of this project builds an open-air office around a tree which provides people with Wi-Fi and power for their electronic devices. People can pay membership to use this service, and the income of the Treexoffice will be used to nurture the tree. For this project, it fails to achieve the idea of interaction. Because when people use the office, they have neither physical nor spiritual communication with the office or the tree. People are still using it as a nicer place to work which has fresher air. Besides, the action of paying for taking care of a tree let people have an illusion of they are engaging with nature and being more environmentally friendly. However, all these conclusions come people’s self-assumption which is not interactive enough. Hence, I realize that the “interaction” has to mutually happen between the project and its users, and also users have to gain more outcome instead of just self-imagination.

Then I found another project called “Neova”, which is a special ring that can give you different music according to your different gestures.

Firstly, this product is very individually distinguished. People have different finger gestures when they play music, and when we consider these differences also into their music, their work can be more unique. When people re-play their music of a different period, they can learn how their body language has been changed and how these changes influence their music style. For this project, inventors consider the functions of this product in long run, which makes the duration of the “interaction” last longer in people’s mind for it allows musicians to reflect on their music and see the connection between their physical bodies and their music.

From these two projects, I realize Crawford’s article is not only educational but also inspiring for us to define the “interaction”. Crawford points out that there are different degrees of interactivity, and by using a measurement of a continuous variable, we can, according to Crawford, “… make it possible to accept that anything can be interactive and simply discuss the degree of interactivity subjectively” (Crawford 6). Crawford provides us a completely new idea to consider the meaning of interaction. If there are degrees of interactivity, then what should we do to improve the sense of interaction of our project? What should we do to increase both the duration and degree of our project?

For our project “Dream Cather”, in order to qualify the standards of high degree and long duration of interactivity, we design its function based on the deep mutual “two way” communication between the “Dream Cather” and its users. It can record the brain waves when people are dreaming, and give people the visualized reappearance of their dreams.  By keeping records of people’s dreams, Dream Cather can provide a constant reflection of people’s consciousness as well as their psychological movements. Through watching our dream scenarios, we can face our most unfiltered emotions, which is impossible to achieve when we are rational and conscious. These reappearances and records do not only matter in a short period but are also meaningful in the long run. Dream Cather is similar to a dairy but with more evidence of the trace of our spiritual world and also related to our mental health condition. With both enough degree of interactivity and duration, the Dream Cather can be an ideal project that may inspire more people to reflect their lives thoroughly.

Works Cited

Crawford, Chris. The Art of Interactive Design: a Euphonious and Illuminating Guide to Building Successful Software, June 2002. No Starch Press, 2003.

“Neova MIDI Ring Controller.” Enhancia, www.enhancia.co/.

“TREExOFFICE.” Tate Harmer, tateharmer.com/projects/treex-office/.

Documentation 3-Yixuan Liu (Recitation Instructor Younghyun Chung, Eric Parren)

The last recitation we had the opportunity to use all kind of sensor and really thought of designing the circuits ourselves. Before starting building our circuits, we first checked all the sensors and their functions. After having a basic understanding of them, we decided to use the Ultrasonic Ranger which could be able to measure the distance between its screen and the object in front of it.

Here are the components we used:

1* Arduino Uno
1 * USB A to B cable
1 * breadboard
2 * LEDs
2 * 220 ohm resistors
1 * Multimeter (optional)

1* Ultrasonic Ranger

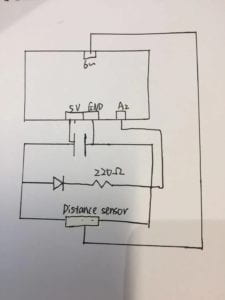
Here are the circuit diagrams:

I and my partner hoped that the distance sensor could be able to control the LED, hence, by putting our hands at the distance in front of the sensor, the LED could be turned on or off. In order to achieve this, we first designed the circuit diagram with all the components being placed in the right position. Besides, we also needed to make sure that we connected the LED with the analog input so that we could be able to write certain code to control it. We also should connect the sensor with digital input for the same reason

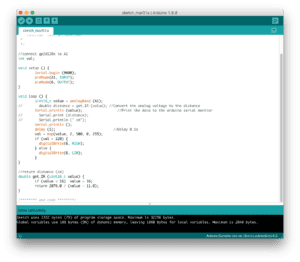
In order to get the correct range of distance sensor’s data, we had to first test its capability with distance. We hoped that we could control the range of distance. For example, we wanted to tell the computer to turn the LED on when our hands got close to the sensor while turned it off when we were far away. To achieve this goal, we did a test and got the normal range of the induction distance.

After finishing assembling the circuit and editing the code, we sent the code to the Arduino, however, our circuit did not function well as we assumed it would be. This kind of situation was under our estimation because it happened all the time. We went back to check our code trying to figuring out what we have done incorrectly. Then we realized we did not

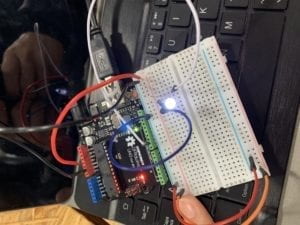
After correcting the mistake, we finally lighted the LED by waving our hand in front of it. However, later we realized even we did not wave our hands, the LED would still light up automatically, and also we could turn it off. All of these means our code were still wrong otherwise it should be able to follow our order. Hence, we had to check our code again. Then things turned out to be that we only gave the computer the order of turning on the LED, but did not input the “else” code. Because of this incomplete code, our LED could only be turned on at a certain distance, but there would not be changed after being turned on. In addition, we also failed to find the proper statistic data of “delay” and “value”.

Finally, we corrected all mistakes and the LED worked perfectly with the distance sensor. We could control the LED by moving our hands in front of the sensor. However, our experiment did not end with just one circuit. We then wondered whether we could also change the brightness of the LED by moving our hands. In order to achieve this, we must change our code. We entered another code which told the computer that the brightness should be stronger when things were closed and weaker when things were far.

Question1:

For this week’s recitation exercise, the biggest concern for me is how to really choose a sensor and design the accordingly circuit, and also, I wonder whether I can change the code base on my requirement. After the exercise, I think I have a relevantly more complete understanding of the coding process. It does not seem to be abstract as before anymore, instead, I have a more clear awareness of what am I doing right now. If our project is going to be used for the pragmatic purpose, I believe that people who are disabled may use it as an automatic switch for their house. Since the sound sensor is not very stable, and if people would like to stay in the room for a long time, then they have to make a sound all the time. By applying this distance sensor switch, as long as they are detected within a certain area, the light will always remain open.

Question 2:

For me, a beginning level learner of coding, the recipe or tutorial is playing the role of a learning map which helps me find my destination and get familiar with this land. In the beginning, there is no way for me to create my own code without knowing all the rules of this field. Hence, by following all the recipe and tutorial, I can accumulate my knowledge and practice skills until I am capable to invent my own code.

Question 3:

Manovich points out the mutual influence between computers and culture. In this process, the media develops its own culture in terms of the wide application of computer technologies. From my perspective, computers and human behaviors are already separable. They are shaping each other to create a type of new culture which is centered around hypermedia and computer technologies. By inventing all the revolutionary products, computers are involved in every corner of people’s lives. It is not we human being that has the right to reject technologies, instead, it is the way the computer technology develops that direct the civilization of human being.    

Documentation 2 Yixuan Liu (Recitation Instructor Younghyun Chung, Eric Parren)

Here are the materials we used during the recitation:

1 * Arduino Uno
1 * USB A to B cable
1 * breadboard
1 * buzzer
2 * LEDs
2 * 220 ohm resistors
2 * 10K ohm resistors
2 * pushbuttons
2 * arcade buttons
A handful of jumper cables
1 * Multimeter (optional)

This week we finished three circuits, and they were more complex than the last week. 

The first one was relevantly easier than the other two, hence, we finished it quickly. Since we already connected the breadboard with Arduino properly after the first circuit so the second circuit went smoothly by switching only one component. From the process of building the first and the second circuit, I felt much clearer about the construction and function of the breadboard and Arduino than the last week. In addition, I also realized professors’ intention of assigning the first and the second circuits. After all, the process of learning new knowledge is always starting with familiarity.

When came to the third circuit, the process got much more complex, not only the circuit itself, but also the coding part required more effort. Even though the instruction picture was super clear about which line should be connected to which interface, me and my partner still spent a lot of time on making sure we connected them in the right way. However, after we finishing building the circuit, instead of showing up all the data, two LEDs were only lighted up. We were not sure about whether we made mistake on connection or coding. Then, after asking help from the class instructor, we realized that there was a mistype of punctuation, which turned out to be a failure of our circuit. We assumed that it was highly possible that we missed punctuation when we were doing the “copy” and “paste” from the website. Since this problem has been solved through the help of our class instructor, we then moved to our optional task, the fourth circuit, of the recitation.

The last one has its reason to be the optional practice since it was comparatively much more complex than all circuits that I have ever built before. It not only required us to think very hard to connect two breadboards together but also asked for editing the original code to four players’ mode. I was responsible for the physical part which was trying to figure out how to use one Arduino to actuate two breadboards as well as the components on them. Even though we tried so many times, after connecting every component together, our game still failed in the end. There was one button which was player two that failed to be connected to the right position. No matter how many times we pressed, the data kept not changing. We could not be sure where was wrong, but we still got a slight taste of how complex the IMA projects could be.


Question 1

Talking about technology, I think there is a very important point of view in the text which is the distraction level of technology. Nowadays, technology has reached every part of our lives. However, our impression is always based on whether they are user-friendly, and neither have we thought about how the simply computing process becomes more and more user-friendly. In other words, the interaction happens when people do not pay attention to. For example, the Arduino we use during class is already a user-friendly product. We almost do not need to create new codes for completing circuits, we find certain code samples to match the requirements instead. Technology is becoming more and more aware of what people need and how people would like to get it. This is already a process of interaction.


Question 2

If I have 100,000 LEDs of any brightness and color at my disposal, the first question comes into my mind is how to deal with the power that these LED need. If I have to use wires to connect them with power, I have to make sure they are not too far away from each other. After having this conclusion, I already limit my project into a certain area. I want to collect them together and use them to build a project which can show how brightness just 100,000 LEDs can bring. I hope people can realize how much energy we are consuming every day and how much impact we have done to nature every day since our technology starts growing fast. I want to place this project at a museum so that it can be more educational.

Documentation Week 1 Yixuan Liu (Marcela)

During the first recitation, our main task was to have a basic understanding of the commonly used components, and after that, we used these components to build three simple circuits to better absorb the materials that we have learned from the class.

Here are the components me and my partner used for building circuits:

  • Breadboard
  • LM7805 Voltage Regulator
  • Buzzer
  • Push-Button Switch
  • Arcade Button
  • 220-ohm Resistor
  • LED
  • 100 nF (0.1uF) Capacitor
  • 10K ohm Variable Resistor (Potentiometer)
  • 12-volt power supply
  • Barrel Jack
  • Multimeter
  • Several Jumper Cables (Hook-up Wires)

For this exercise, my original assumption was that this would be an introduction based recitation. I hoped that I could have a general idea of my class material this semester and be more prepared for this class. To be honest, after seeing the schematics of the circuits, I became more confident about what I was going to do because, from the diagrams, those circuits looked simple and clear.

Circuit 1

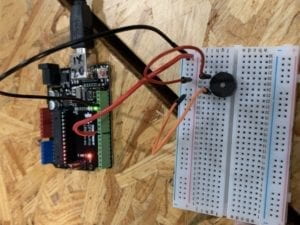
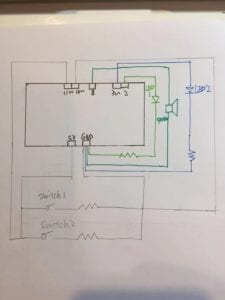
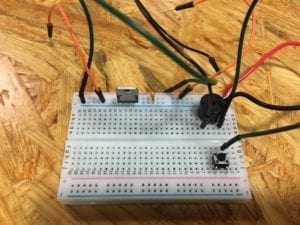
However, once I started, I realized the complexity of this exercise which was beyond my expectation. I and my partner started building the first circuit by connecting the switch with a resistor on the breadboard. After I plugged three wires into the breadboard, I immediately realized that doing the actual circuit was way complex than understandings the schematics. My first experiment, of course, failed because of my inaccurate understandings of my components. I also figured out the breadboard was the biggest problem. I did not understand how the breadboard functioned or what should I do to connect components correctly on the breadboard. In order to solve the problem, me and my partner asked the recitation instructor for detail explanation. Professor Young brought us the special breadboard with the transparent back from which we could be able to see the inside construction of the breadboard. After figuring out that we connected the negative part to the positive of the power and other several similar misconnecting mistakes, we quickly adjusted the circuit and heard the buzzer rang.

Circuit 2 & 3

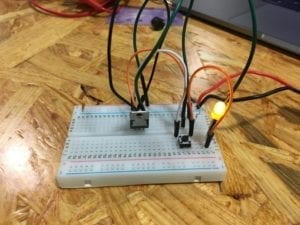
For the second circuit, me and my partner actually used a shorter time than the first one took. However, this did not mean we make the LED light work successfully. For this time, we had a problem with the switch. No matter how many times we pressed the switch, the light just kept lightning all the time. It seemed like the switch became a hook-up wire and had no function at all. We had to ask for help again for this weird situation because we were not sure whether the switch was broken or we did something incorrectly. After checking the circuit with Professor Young, we found that we should connect the different sides of the switch for the positive and negative directions, otherwise it became a part of the hook-up wire.

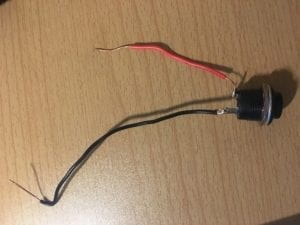
As for the soldering stations, we did pretty well and got our new switch quickly after the instructor explained everything. After all the mistakes that we made before, the third circuit finally functioned well.

From all these processes of building circuits, I personally realize that how important to get a thorough understanding of the inside construction of my component. The case of the breadboard tells me that I should never make a naive assumption for an experiment without actually working on it. Besides, it also teaches me that in the future learning process, I should always be modest and ask for help.

Questions:

  1. I do feel the interactivity during building the circuits. From the reading we had this week, I learn that interactivity is absolutely more than just touching or hearing, but more, it should let people who interact with have the process of communication with the circuit. After lighting the LED, I felt that I could better understand the flow of the electricity and somehow I did not take the shining light for granted, instead, every time I saw a light, I unconsciously went through the process in the lab again. This experiment makes me more aware of my surroundings, and this is already interactive enough for me.
  2. From my point of view, after watching Zack Lieberman’s video, interactive art is trying to build a connection between people’s spiritual world and our physical world. Usually, how we use our biological sensors to interact with the outside world is quite invisible. By making this mutual communication process more visible and more influential is what physical computing can achieve. However, physical computing alone cannot become the art, but how we make use of the technology and how we interpret the statistical outcomes from technologies that resign endow physical computing deeper meaning. Hence, combining both physical and spiritual approaches, interactive art is making our inside world more visible.