- CONCEPTION AND DESIGN:
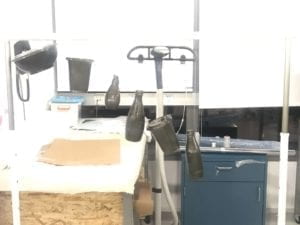
For our final project “Chime”, we keep the design of the original traditional instrument. We use several popular brands such as Starbucks, Luckin Coffee, and waimai food containers, and paint them with metal material spray lacquer which makes these plastic products more relatable to audiences. Then, we hang nine of them on a clothes hanger using metal wires. There is a capacitive sensor attached to every item through wires. If you watch this project from a distance, it is more likely a set of metal bottles and containers hanging on a shelf. Since for the Chinese chimes, they are pretty big and heavy, hence, performers need sticks to hit it, and playing it is a collaboration work. In order to also mimic this detail, we also make a stick using a selfie stick which people can use to “hit” the “chime”. The idea of using all the modern element of consumerism culture is that we want to show audiences the huge contradiction between the past society and the current one. We hope that this project can build a connection between the past and the present. When people play this “instrument”, they will realize that they are playing a modern project but an ancient sound is played. They can feel how much our society has changed. Before we finally decide to use consumerism as the theme of our project, we also think about whether we should consider making it more aesthetically attractive. We originally plan to use plastic spoons to make water lilies and create an experience design. However, later we realize that aesthetic design cannot bring us the thoughtful interaction that we hope to achieve. The final design is settled with plastic bottles and containers.
When people use their hands to touch the items, there will be sounds played and also a piece of the picture which is a part of a Chinese chime’ pictures appear on the screen. People can also choose to use the selfie stick to touch hanging items, since we already use metal wires to connect stick and its handle, hence they can also make sound using the stick.
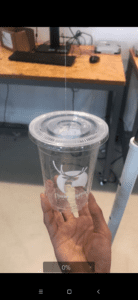
The process is shown in the testing video:
- FABRICATION AND PRODUCTION:
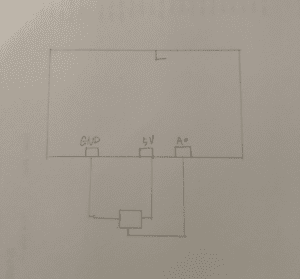
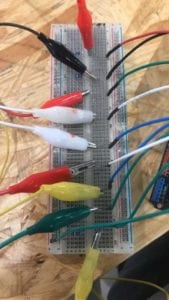
Two major challenges that we meet during the production are a coding and physical connection.
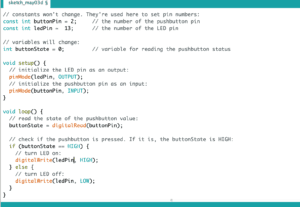
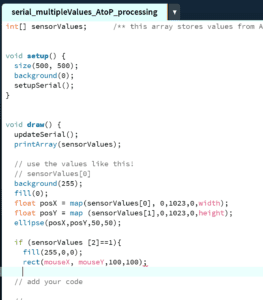
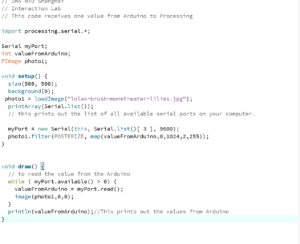
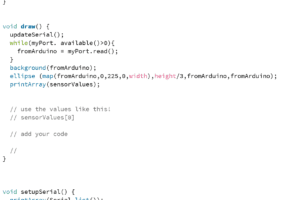
We split work before we start working, and I was mainly responsible for the code part. I spent a lot of time to make code works. Our original idea was that when people touch hanging items, the sound of chime would be played and a piece of the picture will appear which symbolizes a further understanding of this project. Pictures would work like a puzzle. In order to achieve this goal, I had to build the serial communication and sent the sensor value from the Arduino to Processing and make outcomes happen according to certain circumstances. However, when I finished coding, only the picture that people first touch would show up, and the rest of the pictures seem to get stuck in the loop function. I did not know why this was happening, so I turned a fellow for help. After testing my code, Professor Young said that I had an inefficient logic, and computer could not get clear instruction from this so it functioned in a wrong way.
void draw() {
background(0);
updateSerial();
//printArray(sensorValues);
// state1
if (sensorValues[0] == 1 && !h1) {
//filef4.play();
h1 = true;
}
if (h1) {
if (filef4.isPlaying()==false) {
filef4.play();
}
tint(255, i1);
image(photo1, 0, 0);
i1 = i1-step;
if (i1 < 0) {
h1 = false;
i1 = 255;
}
}
Professor Young said that I was sending three different flags in the loop function and they were intertwined together. I need to figure out how to simplify them. For example, with the int h, how to make it be the signal for both image and sound function. Then Professor Young helped me fix the logic into this.
if (sensorValues[0] == 1 && !h1) {
filef4.play();
h1 = true;
}
if (h1) {
//if (filef4.isPlaying()==false) {
// filef4.play();
//}
tint(255, i1);
image(photo1, 0, 0);
i1 = i1-step;
if (i1 < 0) {
h1 = false;
i1 = 255;
}
}
After this, I split the if condition into nine separate one. I used to put nine conditions in one if function. After splitting them, there was more than one picture can show up at the same time.
After user testing, we got a very important suggestion. People suggested that why not make pictures fade away so that people will continue playing them. In order to achieve this, I started working again. I found the function tint() and (isPlaying). For tint() function, it can help picture change its transparency which can create the feeling of fading away. I changed the variable of tint and mapped value in it so that the transparency could change by time. For the (isPlaying) function, it could make sure that every time the sound file will be completely played once before starting next round. However, the problem was that all sound files played more than once. I have tried the once() function but it did not work. Then I went to Professor Marcela, she helped me recognize my code and solve my problem.
- CONCLUSIONS:
In the final presentation, we found that people prefer to touch by hands and feel them in
the person instead of using a selfie stick. I realized that we should not limit our project within the definition of a mimic work of Chinese chime. People are m=not familiar with the traditional instrument anymore, and we need more new creativity to motivate them to interact with this project. Using their hands to touch the project and playing the sound is a very modern style of interaction, and when combined with a traditional element, people feel a sense of excitement, and this is what makes our project special. If I have more time, I hope that I can have an upgrade to the physical installation part. I want to have a better-decorated appearance for our project so that it is easier for audiences to dive into the atmosphere. I think my takeaway for this project is that we should find the trace of culture and tradition in modern life. It is always important to reflect on the process that we have gone through. If we simply look to the front, we will lose our cultural root, and what is more important is that we should recreate the connection between the past and the present. By giving new energy to the tradition, they can survive in this modern society using another characteristic.
Code:
import ddf.minim.*;
import ddf.minim.analysis.*;
import ddf.minim.effects.*;
import ddf.minim.signals.*;
import ddf.minim.spi.*;
import ddf.minim.ugens.*;
// IMA NYU Shanghai
// Interaction Lab
// For receiving multiple values from Arduino to Processing
/*
* Based on the readStringUntil() example by Tom Igoe
* https://processing.org/reference/libraries/serial/Serial_readStringUntil_.html
*/
Minim minim;
AudioInput in;
import processing.serial.*;
String myString = null;
Serial myPort;
int NUM_OF_VALUES = 9; /** YOU MUST CHANGE THIS ACCORDING TO YOUR PROJECT **/
int[] sensorValues; /** this array stores values from Arduino **/
PImage photo1;
PImage photo2;
PImage photo3;
PImage photo4;
PImage photo5;
PImage photo6;
PImage photo7;
PImage photo8;
PImage photo9;
import processing.sound.*;
SoundFile filef7;
SoundFile filera;
SoundFile filexi;
SoundFile fileso;
SoundFile filela;
SoundFile filef4;
SoundFile filef5;
int i1 = 255;
int i2 = 255;
int i3 = 255;
int i4 = 255;
int i5 = 255;
int i6 = 255;
int i7 = 255;
int i8 = 255;
int i9 = 255;
boolean h1 = false;
boolean h2 = false;
boolean h3 = false;
boolean h4 = false;
boolean h5 = false;
boolean h6 = false;
boolean h7 = false;
boolean h8 = false;
boolean h9 = false;
boolean once1, once2, once3, once4, once5, once6, once7, once8, once9;
int step = 2;
void setup() {
size(1200, 802, P2D);
//frameRate(5);//
stroke(1000);
minim = new Minim(this);
in = minim.getLineIn();
setupSerial();
photo1 = loadImage(“1_01.jpg”);
photo2 = loadImage(“2_02.jpg”);
photo3 = loadImage(“3_03.jpg”);
photo4 = loadImage(“4_04.jpg”);
photo5 = loadImage(“5_05.jpg”);
photo6 = loadImage(“6_06.jpg”);
photo7 = loadImage(“7_07.jpg”);
photo8 = loadImage(“8_08.jpg”);
photo9 = loadImage(“9_09.jpg”);
filef4 = new SoundFile(this, “f4.mp3”);
filera = new SoundFile(this, “ra.mp3”);
filexi = new SoundFile(this, “xi.mp3”);
filef5 = new SoundFile(this, “f5.mp3”);
fileso = new SoundFile(this, “so.mp3”);
filela = new SoundFile(this, “la.mp3”);
filef7 = new SoundFile(this, “f7.mp3”);
}
void draw() {
background(0);
updateSerial();
//printArray(sensorValues);
// state1
if (sensorValues[0] == 1 && !h1) {
filef4.play();
h1 = true;
}
if (h1) {
//if (filef4.isPlaying()==false) {
// filef4.play();
//}
tint(255, i1);
image(photo1, 0, 0);
i1 = i1-step;
if (i1 < 0) {
h1 = false;
i1 = 255;
}
}
if (sensorValues[1] == 1 && !h2) {
filera.play();
h2 = true;
}
if (h2) {
tint(255, i2);
image(photo2, 400, 0);
i2 = i2-step;
if (i2 < 0) {
h2 = false;
i2 = 255;
}
}
// state3
if (sensorValues[2]==1 && !h3) {
fileso.play();
h3 = true;
}
if (h3) {
tint(255, i3);
image(photo3, 800, 0);
i3 = i3-step;
if (i3 < 0) {
h3 = false;
i3 = 255;
}
}
if (sensorValues[3] == 1 && !h4) {
filexi.play();
h4 = true;
}
if (h4) {
tint(255, i4);
image(photo4, 0, 267.3333);
i4 = i4-step;
if (i4 < 0) {
h4 = false;
i4 = 255;
}
}
if (sensorValues[4] == 1 && !h5) {
filela.play();
h5 = true;
}
if (h5) {
tint(255, i5);
image(photo5, 400, 267.3333);
i5 = i5-step;
if (i5 < 0) {
h5 = false;
i5 = 255;
}
}
if (sensorValues[5] == 1 && !h6) {
fileso.play();
h6 = true;
}
if (h6) {
tint(255, i6);
image(photo6, 800, 267.3333);
i6 = i6-step;
if (i6 < 0) {
h6 = false;
i6 = 255;
}
}
if (sensorValues[6] == 1 && !h7) {
filef7.play();
h7 = true;
}
if (h7) {
tint(255, i7);
image(photo7, 0, 534.6666);
i7 = i7-step;
if (i7 < 0) {
h7 = false;
i7 = 255;
}
}
if (sensorValues[7] == 1 && !h8) {
filef7.play();
h8 = true;
}
if (h8) {
tint(255, i8);
image(photo8, 400, 534.6666);
i8 = i8-step;
if (i8 < 0) {
h8 = false;
i8 = 255;
}
}
if (sensorValues[8] == 1 && !h9) {
filef5.play();
h9 = true;
}
if (h9) {
tint(255, i9);
image(photo9, 800, 534.6666);
i9 = i9-step;
if (i9< 0) {
h9 = false;
i9= 255;
}
}
float hue = random(360);
//fill(hue, 200, 100, 100);
//noStroke();
//int dropNum = int(map(random(1), 0, 1, 700, 1000));
//for (int z = 0; z < dropNum; z++) {
// float diameter = pow(random(1), 20);
// float distance = sq((1.0 – pow(diameter, 2)) * random(1));
// float scaledDiameter = map(diameter, 0, 1, 1, 30);
// float scaledDistance = map(distance, 0, 1, 0, 300);
// float radian = random(TWO_PI);
// ellipse(random(width),random(height), scaledDiameter ,scaledDiameter);
// //ellipse(scaledDistance * cos(radian) + 100, scaledDistance * cos(radian) +100 , scaledDiameter ,scaledDiameter);
//}
float a = 0;
float angle = (2*PI) /100;
int step = in.bufferSize() / 100;
for (int i=0; i < in.bufferSize()-step; i+=step) {
float x1 = width/2 + cos(a) * (1000 * in.mix.get(i) + 150);
float y1 = height/2 + sin(a) * (1000 * in.mix.get(i) + 150);
float x2 = width/2 + cos(a + angle) * (1000 * in.mix.get(i+step) + 150);
float y2 = height/2 + sin(a + angle) * (1000 * in.mix.get(i+step) + 150);
stroke(hue, 200, 100,100);
strokeWeight(5);
line(x1, y1, x2, y2);
a += angle;
}
}
void setupSerial() {
printArray(Serial.list());
myPort = new Serial(this, Serial.list()[ 4 ], 9600);
// WARNING!
// You will definitely get an error here.
// Change the PORT_INDEX to 0 and try running it again.
// And then, check the list of the ports,
// find the port “/dev/cu.usbmodem—-” or “/dev/tty.usbmodem—-”
// and replace PORT_INDEX above with the index number of the port.
myPort.clear();
// Throw out the first reading,
// in case we started reading in the middle of a string from the sender.
myString = myPort.readStringUntil( 10 ); // 10 = ‘\n’ Linefeed in ASCII
myString = null;
sensorValues = new int[NUM_OF_VALUES];
}
//void img1(){
//}
//void img2(){
//}
//void img3(){
//}
//void img4(){
//}
//void img5(){
//}
void updateSerial() {
while (myPort.available() > 0) {
myString = myPort.readStringUntil( 10 ); // 10 = ‘\n’ Linefeed in ASCII
if (myString != null) {
String[] serialInArray = split(trim(myString), “,”);
if (serialInArray.length == NUM_OF_VALUES) {
for (int i=0; i<serialInArray.length; i++) {
sensorValues[i] = int(serialInArray[i]);
}
}
}
}
}