Guy Brett approaches the concept of eye and body in his book by addressing that “the concentration on optic, the visual sense, as a vehicle for the exploration of movement and space/time, can be exploded, even from within visual are itself, by another tendency” (52). Such tendency, according to him, can be understood by and large as the separation of the visual form the other senses, or namely, the eye from the body. Through devices that “disturb, or manipulate, the body’s sense of space through a play the optic nerve”, kinetic art, allows for a “much more radical reorientation” of both out bodily experience and our thinking (52). In this sense, artworks by two contemporary artists, Esther Stocker and Sebastian Hempel, can be seen as various demonstrations of such concept of perceptual reorientation.
Esther Stocker creates spatial installations that manipulate people’s perception of space. Her ideas about space actually emerges from 2D paintings: in many of her words, the space are constantly reformed generated by perceiving lines or patched from different perspectives. In a reduced language of form consisting of black and white lines and grids, her works explore formal boundaries and spatial structures by creating a space where he viewer no longer can tell where the floor ends and the wall begins. Though her works are not kinetic, they demonstrate very well that the visual perception is a main factor for spatial experience.
Sebastian Hempel
The works of Sebastian Hempel are as full of movement as the spaces presented. While many of them are fitted with sensors, reacting to the presence of potential observers or users, who in turn trigger the artistic event by means of their body, there are also excellent works that concentrate on the motions with only installation. Those mechanical process have implications in terms of content, as all the aesthetic effects really on the motions of either installations or human movements. With a similar concept as Stocker’s work but demonstrate in a kinetic way, his kinetic light sculpture, Leuchtstabbild (Lightbarimage), really inspires me of the way space can be reformed with motions.
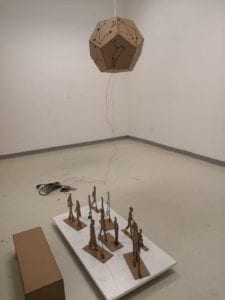
Project Description
Drawn from the concepts presented by these artists, I intend to build my project as an exploration of both motion and spatial experience. My project will be a kinetic collocation of lights which will function highly based on mechanic installation. I would have several light parts formed in based shapes like lines, squareness and grids with strip-lightings (tubes) . These parts would be place on/against a wall (by against I mean vertically) to create a combination of 2D/3D effect, and will be moving linearly in some order to generate the effect of reforming space.
To move the lights, I would build a mechanic installation with the idea of block and tackle. Each pull block will consist of motors, reels (maybe 3D printed) and strings. The movement for lights will be generative, and its order will be random for each lighting parts but synchronous as a whole, which will be achieve through Arduino programming.
Production Schedule (Three and a half weeks duration)
04/28 (Sun) Research & Material preparation
04/30 (Tue) Material & lighting test
05/02 (Thur) Physical part testing assemble (start by parts)
05/07 (Tus) Physical part testing assemble (finishing by parts, start installing)
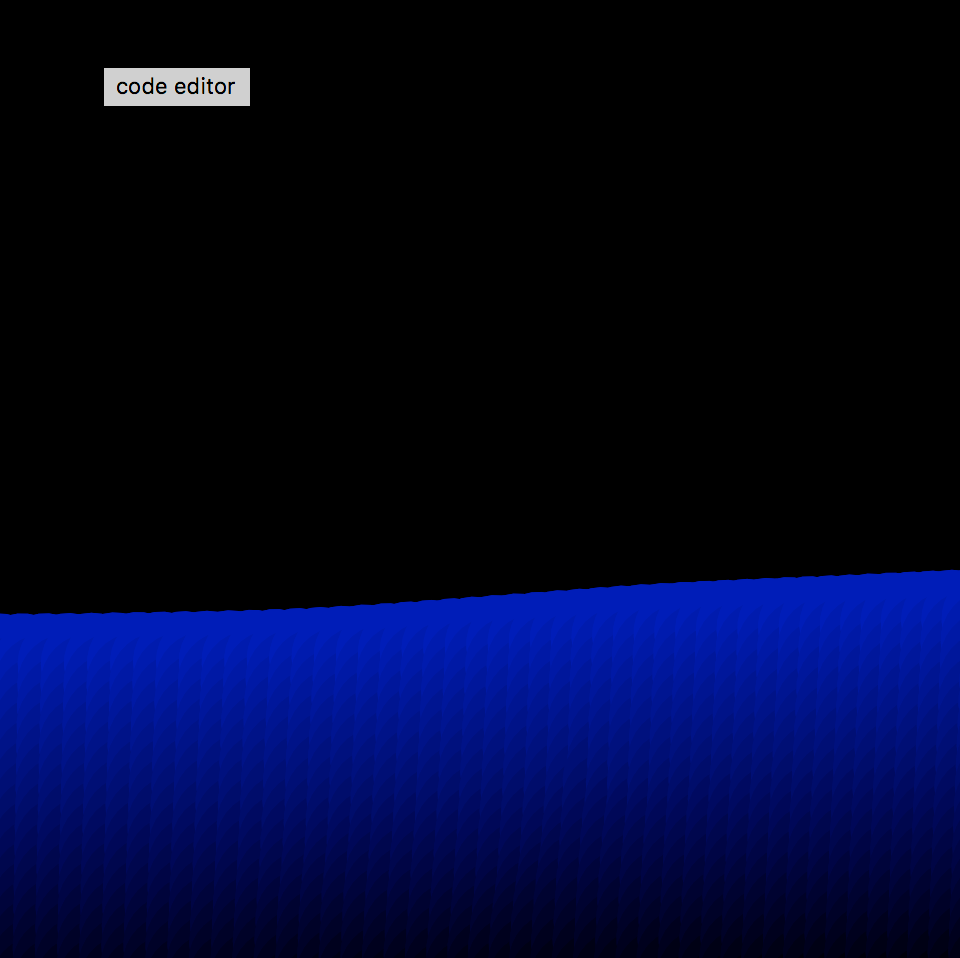
For this assignment, I created a fluid simulation effect by using the concept of autonomous agents. I created a class of vehicles to represent fluid particles and placed them at the button of the canvas. The I let each vehicle to seek the position of mouse and add the repulsion force to them once the mouse gets into the detecting area. The detect area I assigned between mouse and particles were originally the exact radius of the particles, however, in that case only a few particles around the mouse would move. Therefore I scaled up the detecting area to 20 times of radius so that it looked like the whole particle systems moving. I met some problem then as once the particles got the force they will just move away and never come back. Candy taught me how to pull the particles back by mapping the force accoding to particles’ current position and their previous position. I then, stepped to change the color of the particles according to their position to create the water effect.
The outcome is that when moving the mouse around, the particles will move and create an effect of waves.
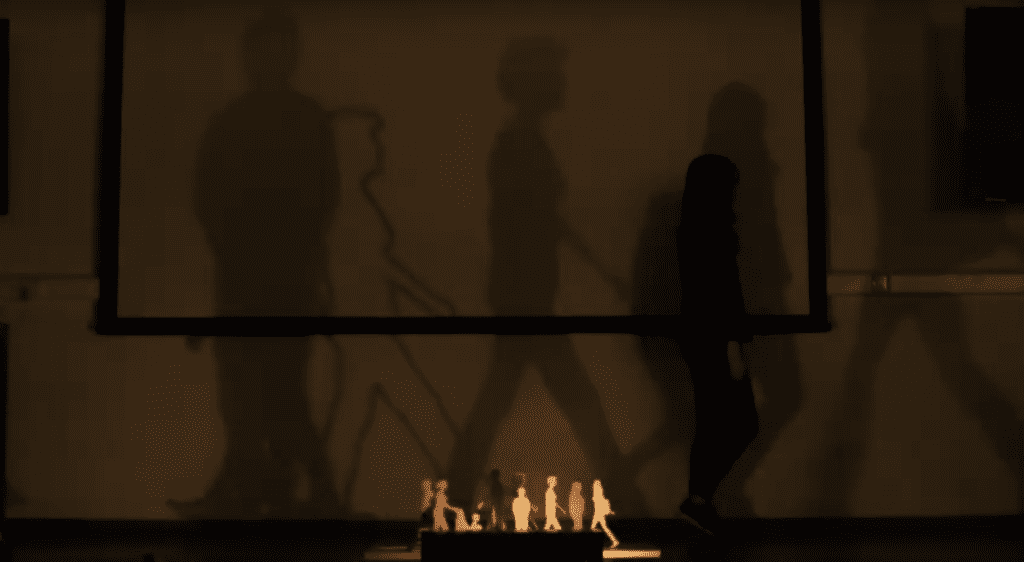
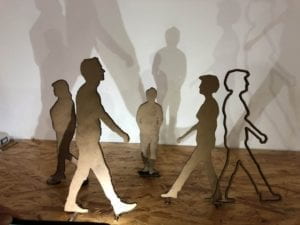
Walking Shadows is a sculptural light installation with a combination of digital fabricated sculptures and generative lighting devices. Shadows of static sculptures are projected on the wall by five halogen lights which are programmed to wink in random sequences to display shadows in movements. The installation is designed to provide immersive experiences in larger space. When audiences enter the illuminated space, their own shadows and movements will be casted on the wall and become part of the dynamic silhouettes.
Christian Boltanski, Théâtre d’ombres (Theatre of Shadows)
The core concept of this project is to create motions of static objects through the play of light and shadows in an exhibition space. The ideas are largely inspired by art works of Christian Boltanski and Olafur Eliasson.
Olafur Eliasson, “Multiple Shadow House”
Christian Boltanski’s art work of Théâtre d’ombres (Theatre of Shadows) provides senses of space constructed by lights and shadows; while Olafur Eliasson’s project “Multiple Shadow House” explores the consciousness of human Cody by visualizing and enlarging people’s every movement through arrays of overlapping shadows.
Drawn from these art works, shadows can provides instant evidence of presence and motion in a dynamic space. My project therefore intends to explore with such nature of shadow by combing vivid display of shadows and manipulation of lighting sources in one installation.
Perspective and Context
The implementation of my project is mainly based on technical understanding of lightings and shadows, but its effect owes much to people’s perception. As Maurice Merleau-Ponty states in his book The World of Perception, “the world is not made up of space and things” but also includes “[our] own vision of things.” Such understanding provides possibility to modify or even re-create our perception of surroundings. As Olafur Eliasson talks about his work of “Multiple Shadow House”, he said:”[Shadow] is a consequence of your being there.” Based on such understanding, by intentionally control what people perceive at one single moments, this project manages to break the sequence of present and re-create a spacial and temporal experience for audience. By participating into the interaction of lights and shadow, people are provided with a way to re-think and re-process the perception of time, space and presence.
With reference to my project idea, the installation mainly includes two parts: fabricated sculpture and lighting components (circuits). Since the sculpture part should not be in a large scale, to project shadows on to the wall, the lighting choice is very essential. As the LEDs we got practiced with in class are not bright enough for the effect, I first tested the lighting efficiency with three DMX lights and some human shapes roughly cut out of paper.
Test with DMX lights and paper shapes
The test results showed that with lights shining from different directions to the sculpture, it can create a moving effect of the shadow. However, the shadows were extremely blurred with DMX lights as the lights were consisted of groups of small LEDs. Each of the LEDs will cause a slight drift of the shadow and thus display a ghosting result.
Testing demo shown as below:
Drawn from this test, instead of just using “strong” lights, to create clear and
12V/20W Halogen light with lamp holder
efficient shadows what I need are single lights that are focused and intensive. From my research, torch lights and halogen lights can be two preferences. So I went to the electronic market to test and purchase some. Based on my field test and the sellers’ recommendations, compared to torch LEDs, halogen lights are more affordable and similarly efficient in terms of lighting.
Therefore, I bought five 12V/20W halogen bulbs with lamp holders.
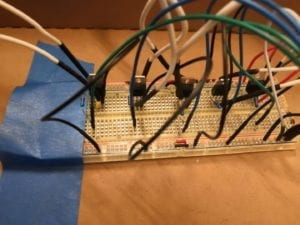
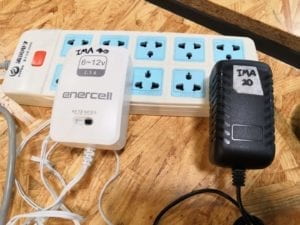
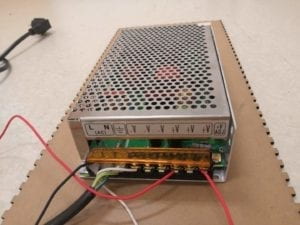
Since I have never encountered halogen light before, and there were concerns about its adaptability with Arduino, I was very cautious about its implementation. I did large amount of researches, and found this workable reference for its circuits: https://create.arduino.cc/projecthub/gr1m/lighthouse-3d-print-and-arduino-c46899. I adjusted the circuit and added four more halogen lights to it. However, since each halogen light needs 12V/20W power supply to ensure the brightness, and the ER only has two adaptors that can provide such power supply, I could only test without full lighting brightness at first before having a new power supply (12V/350W).
Circuits for halogen lights12V/20W adaptors for tests12V/350W adaptor for final result
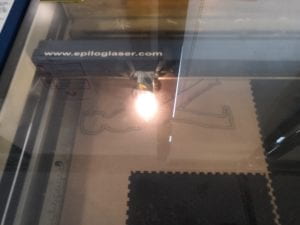
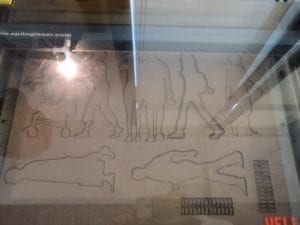
I then proceeded to build the human-shaped sculptures using laser cutting. The shapes were sketch out with reference to online images using Illustrator. I first cut out five shapes for test and later had more.
Laser cutting for human-shaped sculpture (1)Laser cutting for human-shaped sculpture (2)
The whole process of building the installation includes constant tests and adjustments. The first stage was to ensure the lighting efficiency and shadow outcomes of halogen lights. In a closer distance, the outcome went quite well:
Shadow resolution test
Construction of installation & programming
The next step was to create the moving effect of shadows, which was to program the lights. The sketch I used was modified from the example code AnalogWriteMega, which arranges the pins in a sequence with switch() function to control the signals.
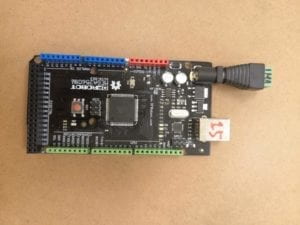
Arduino DFRobot Mega 2560
Since I had five lights, such sketch required using a Arduino DFRobot Mega 2560 board instead of a Arduino Genius Uno board.
To create a generative moving effect of crowds, I programmed the lights to go on with random orders and with an amount of one or two, so that each time there would be a different combination of shadows. The test demo of lights sequence and shadow combination are shown as below:
Then I stepped to test the display of shadows on a distant wall by adjusting distance between lights-sculptures-wall. Test demo shown as below:
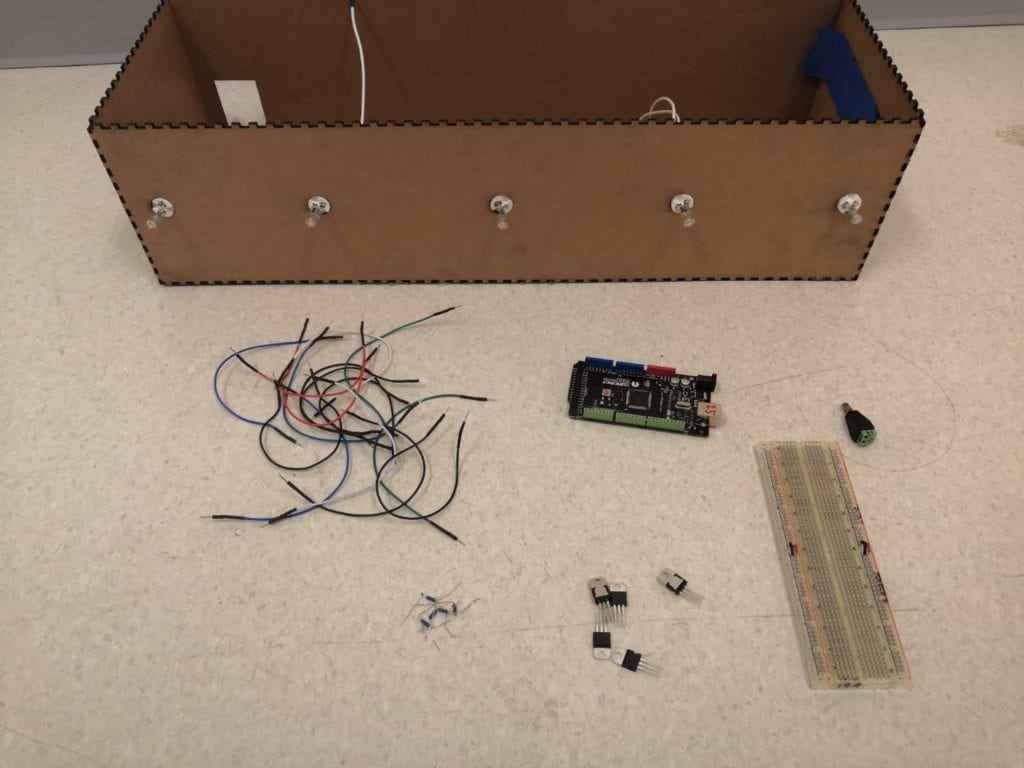
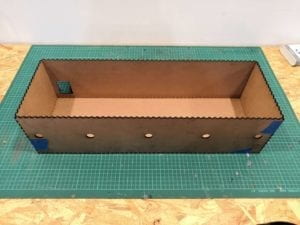
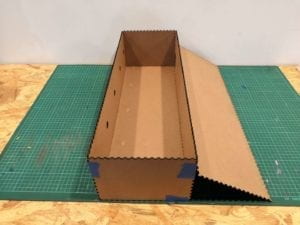
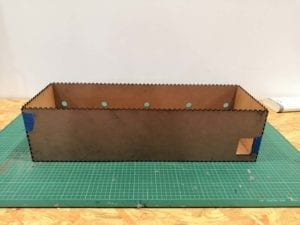
With the effects of lighting and shadows almost settled, I proceeded to build a container to arrange and place all my lights and circuits. I again used laser-cutting to build a box and plugged in the lights through the hole on the front of the box. Also, to expand the scale of the shadows, I increased the length of the box .
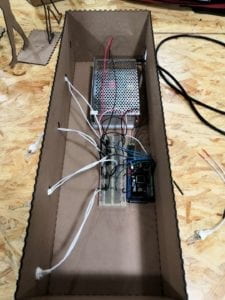
Three dimensional images of circuit container (front)Three dimensional images of container (side)Three dimensional images of container (side)Circuit placement inside device
Installation placement & final result
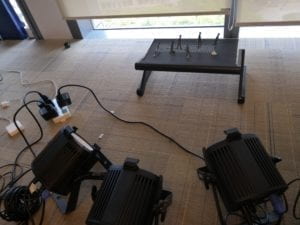
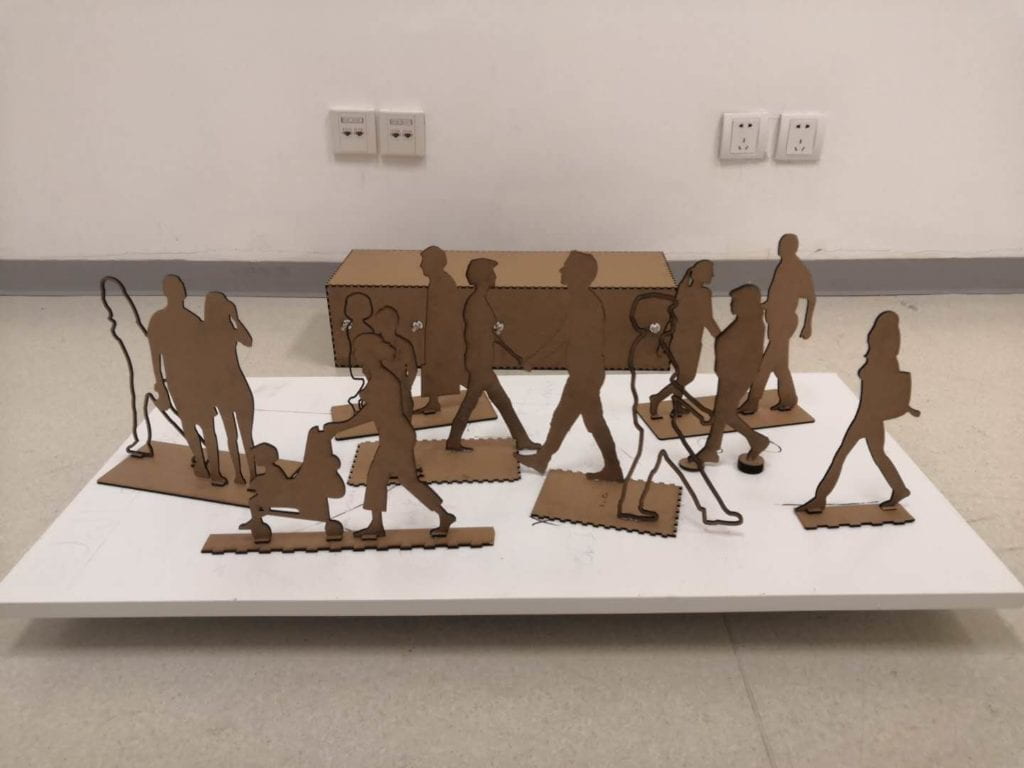
The final appearance of the whole installation are shown as below. Since the lights were placed in the middle of the box, the sculptures needed to be raised up to the same level in order to show completed shadow shapes. So I used a large board as platform to hold all the sculptures. Considering that the placement of each sculpture and the distance among them would change each time the whole installation were moved, I did not fix the sculptures to the lighting device but rather placed them in a removable way.
Placement for sculptures and lighting device
With the installation well constructed, I proceeded to find a proper space for the presentation. From previous tests results, the lighting effectwould worke best in an open room of complete darkness. The final results were displayed and documented in Room 825 at midnight, and the documentation video are shown as below:
Presentation
Scale of the Room for presentation
The presentation happened in Room 821, as it was hard to find an open but also pinch-dark room for the morning presentation. The audience were supposed to wander around and experience their existences among the changing of shadows by themselves. But considering the time and space limitation, each time I could only allow no more than four audiences into the room and guided them into the immersive experience by demonstration. Also, since the wall for shadow display during presentation was not long enough, the shadows would be projected onto the sides walls and be distorted a little bit, but it at the same time managed to create another surrounding spatial effect.
In general, the presentation went quite well. The audience were able to understand and appreciate the moving effect of shadows and participated in the immersive experience. Some of the feedback and critiques include:
There would be more space for programing the sequence of lights: instead of letting the lights going off completely the same time, the composition could have some lights still fading off as other lights turning on to generate a more consistent and apparent moving effect. The shining speed of lights could also be improved as now the time span for each frame of shadows was quite long and somehow decreased the feeling of moving. Faster speed to light changing may better fit people’s visual perception of motions.
The choice of lights could be more dynamic: The Halogen lights I used only have warm yellow color. A different tone/combination of light colors could generate a completely different effect or circumstance, but the result would need more tests.
Motion of sculptures: as for future projects, I could add on motion to the sculpture and create a much more kinetic objects.
Conclusion
The whole process of building this project is an integration of research, test, construction and modification. Though I did not utilize too much objects from class, the skills of technical implementation like soldering, laser-cutting and programming contributed a lot to the progress. By doing something “ambitious”, I also got to cultivate my abilities of testing, researching and self-learning. I enjoyed the process of discovering new technics and skills very much, but also met many challenges during the process. For example, because I did not full understand the theory of current, I postponed my schedule for several days as I thought school’s adaptor would not work (though it would). Also, I demonstrated the circuit wrongly to a classmate and led to a server derange to Arduino board. Though failure is also part of the process of learning, I think for future study I still need to prepare myself more before actually starting implementation. Moreover, it can be seen from the feedbacks that people’s perception really varies on an individual level, it also provides clues for my future improvement or projects that I should always consider more possibilities from audience’s perspective.
After the in-class test of DMX light, we realized that compared to other led light, the span of DMX light is larger and thus is more likely to create a environmental effect. So we decided to imitate Aurora in nature.
Since the Aurora we encountered before are some documentary videos online , and from the documentary videos/photos, we found the Aurora is usually in a green tone gradually change to other colors. So we found some images online as reference and took the colors from them, in this case, they are pink. blue, green, and yellow.
The composition mainly consists of gradual fading and changing of colors. The color will first show as green, and add gradually adds on the color of blue, pink, and yellow. At first we tried to place some gauze in front of the lights to show the flow and texture of Aurora. However, we found out the outcome was not very natural: we need to wave the cloth by ourselves and get out shadow into the scene.
So instead of using we decided to focus on the light and making the light flowing through programming. We approached it by set the appearing time for each color slightly different so that the visual can be more natural and creates the effect of lights moving around. We also found a background music to add on the effect.
The ultimate outcome is very satisfying, we really like the quite and relaxing feeling our composition created. We, however, need to consider the color for carefully as we got feedbacks like the pink in the light is a little bit distracting.
For this project, I wanted to sync color changes on the Analog RGB strip with music pieces. Instead of programmed the changes of colors to a settled music, I wanted composition can be applied to any music pieces. So I used a sound sensor to receive sound values and controlled color changes by setting ranges to the received values. Circuit is shown as below:
One main challenge I met was to set the range for sound signals. Since the sound sensor is very sensitive and can only identify the volume, the value it receives depends very much on the environment. Therefore, I need to change the coding each time I play the composition. As a consequence, the color displayed is very random and I can not control the speed precisely. Here is a demo for a random song test:
However, the outcome can be quite nice is the music is fast-tempoed. This is the demo for presentation:
The feedbacks I got from presentation were related to the issues I met during the process: The color change was too random and not precisely synced to the music. But I also got suggestion that, with processing, I can actually analyze the frequency of the music and sync it to the color change, which will make the composition more harmonious.
LED Light Assignment 2: Music light show “Ambush from Ten Sides”
Partners: Candy, Louis
For this project, we made a 2-min composition using RGB LED Strip synchronized with music. The music pieces we chose was “Ambush from Ten Sides”, which is a classical piece of Chinese lute music about a battle between the Chu and Han armies, set in 202 BC. We took reference from an instrumental performance on youtube and edited the music by ourselves. It consists of four chapters of the original composition: Ambush, Initial Battle, Final battle, and tight encirclement. The reference from Youtube:
The way color was displayed was inspired by one of our in-class assignment using the Fade-candy library, which processing will read the color pixels on images and shows them on led strip.
We used images online/dots we drew by ourselves, and let the led strip reveal the color on the image. It took some time to sync the image color to the music content. Image shown as below:
We later added a storyboard for the audience to better understand the cone ten of the music pieces. And this is the presentation demo in class: