Recitation 5: Drawing Machines by Tristan Murdoch

In this recitation, we used new hardware, such as the stepper motor and H-bridge to create a drawing machine. This project required two people to cooperatively control the steppers motors with potentiometers with the intent of drawing a design on paper.  The wiring was extremely complicated, but I eventually succeeded and got stepper motor working.

However, we had one issue: the holes in the part required to hold the stepper motors in place were not ideally spaced. Thus, we had difficulties attaching the drawing arms. They would often jam or come out of the wooden holes. 

Ultimately, we ended up taping the motors in place and completing the task. The drawing was not easy to control, especially since there were two people using the design.

Reflection:  This project encouraged me to use the map function for different purposes and see the multitude of purposes it can have. Furthermore, the set-up with the motors and drawing arms heavily influenced our midterm design project, which relies on servos to control a laser pointer. Lastly, if I could do this again differently, I would add a larger dial to the potentiometers. The small radius of the potentiometer makes it difficult to make the micro adjustments we needed to accurately draw anything. Increasing the radius would increase the precision of the project, thus making it easier to use.

Question 1:  I would be interested in building a machine that holds the door open for 5 seconds after you push it all the way. This mechanism would take away the stress of having to hold the door for someone who is a few feet behind you but not quite there.  In this way, you can keep walking and not feel guilty about the door closing in their faces because you did not inconveniently stop for 5 seconds to wait. 

Actuators are machines that transfer energy into torque. Regardless of how it is powered, whether by electricity or by hand, the actuator creates movement. This movement can be linear, or in our case, rotary. 

I believe the digital manipulation of art and the creative process are deeply intertwined. Reality grounds projects and creates a ceiling for how creative they can be. Digital manipulation, however, stretches the limits of what one can do with their projects. It constantly provides new methods and outlets for expression and artwork creation.

Question 2:  Danial Palacios Jimenez – Waves

The project “Waves” includes an elastic rope that connects two actuators. These rotate according to the motion detected near the rope. Perhaps I may not have the same skillset at Jimenez, but I think I could roughly be able to replicate what he has created. I find it interesting that a project that is within the realm of possibilities is featured at a show. This shows that although the design is fairly simple, the project is meaningful, interesting, and interactive.

Both Jimenez’s project and our drawing machine used actuators, but I will assume his rotated 360 degrees, allowing him to spin the elastic rope fast enough to produce the desired sound. Our motors, however, did not require 360-degree rotation: 180 degrees was enough to cover the entire range of motion for the pen to draw. 

Jimenez ideally used 360-degree servomotors to connect to the motion sensor because he needed the constant torque to rapidly move the elastic rope. 
Group Project: Super-Cup by Tristan Murdoch

Interaction and Research: Prior to the group presentation, we were tasked define “interaction” and identify and research two projects: one which fits our description of interaction, and one that does not. Initially, I viewed interaction as only possible between living things. I never understood exactly what coding can allow us to accomplish. Interaction, as I see currently see it, is a process by which two actors can make decisions based upon what the other is doing or has done. Whether the actors are human, animal, or automated, as long as they are capable of acting, processing, and reacting, interaction is possible.

The two projects I chose were Apex, a newly developed team-based first-person shooter game, and a project known as the “bomb.” The interactive part of Apex lies in its multiplayer features. When one player sees an enemy player, he makes a decision he otherwise would not make: either shoot or run away. If he shoots, the other player then responds by returning fire. The actors are not the in-game models, but rather the real people inputting controls. ‘The bomb’ on the other hand, on the surface seems interactive. It is defined as “an immersive film, music, and art installation that puts viewers at the center of the story of nuclear weapons” (“An Experience”). The project places students on set surrounded by live music and projections meant to elevate the experience and, as some may say, make it interactive.

However, I see “the bomb” more as captivating than having elements of interaction. When taking a closer look, I realized it is simply a project that aims to intensify the importance of nuclear weapons for students by immersing them and giving them a different experience. I do not see much potential for interaction, as the actor-actor relationship is only one way. That is, the simulation/project does not take into account students’ actions and responses, so the show remains the same. Based on my definition, however, Apex contains clear instances of interaction. One could even argue that simply inputting controls is interactive, as the game responds to your actions, and you respond to both visual and audio cues.

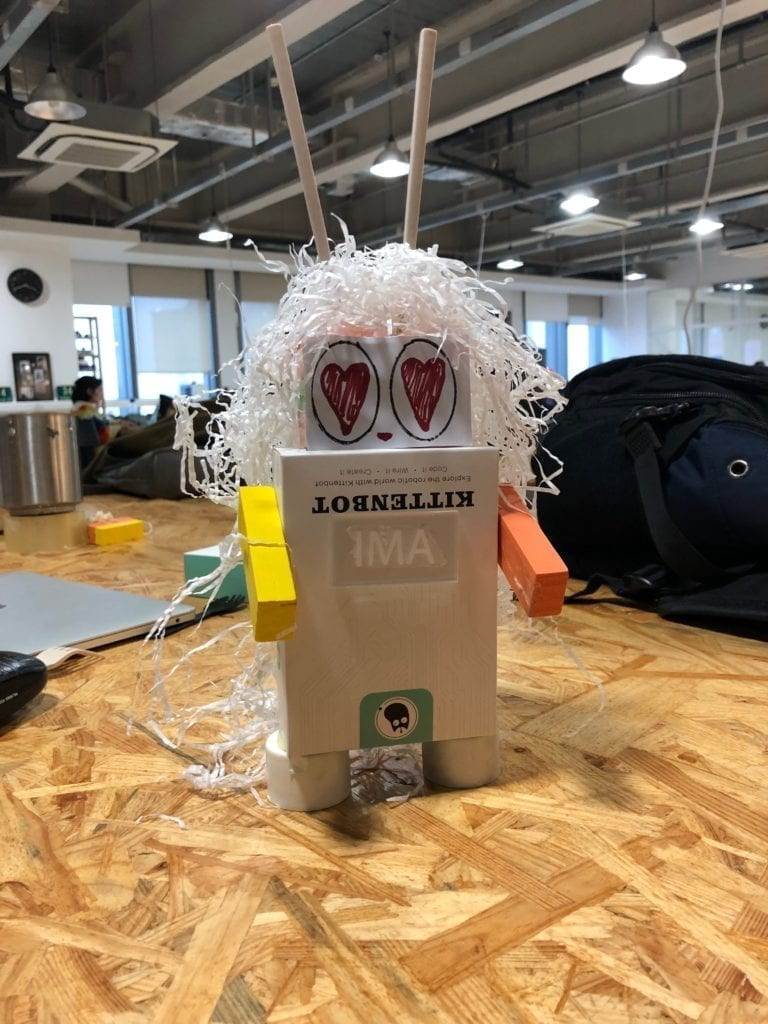
Our Project: Our project, the Super-Cup, directly reflects my definition of interaction. Although our group members had different ideas of how “interaction” should be defined, the general idea was the same: we wanted a non-human to respond to a human’s need or desire. The design for Super-Cup specifically would allow the machine to sync with a human and read when he/she is thirsty, and react by fetching the water. Both the human and the robot would be capable of acting, processing, and reacting, which is emblematic of interaction.

Work Cited

“An Experience at the Heart of Nuclear Annihilation.” VICE, 21 Nov. 2017,                  https://www.vice.com/en_us/article/3kvwaw/an-experience-at-the-heart-of-nuclear-  annihilation. Accessed 13 March 2019.

Recitation 3: Sensors by Tristan Murdoch

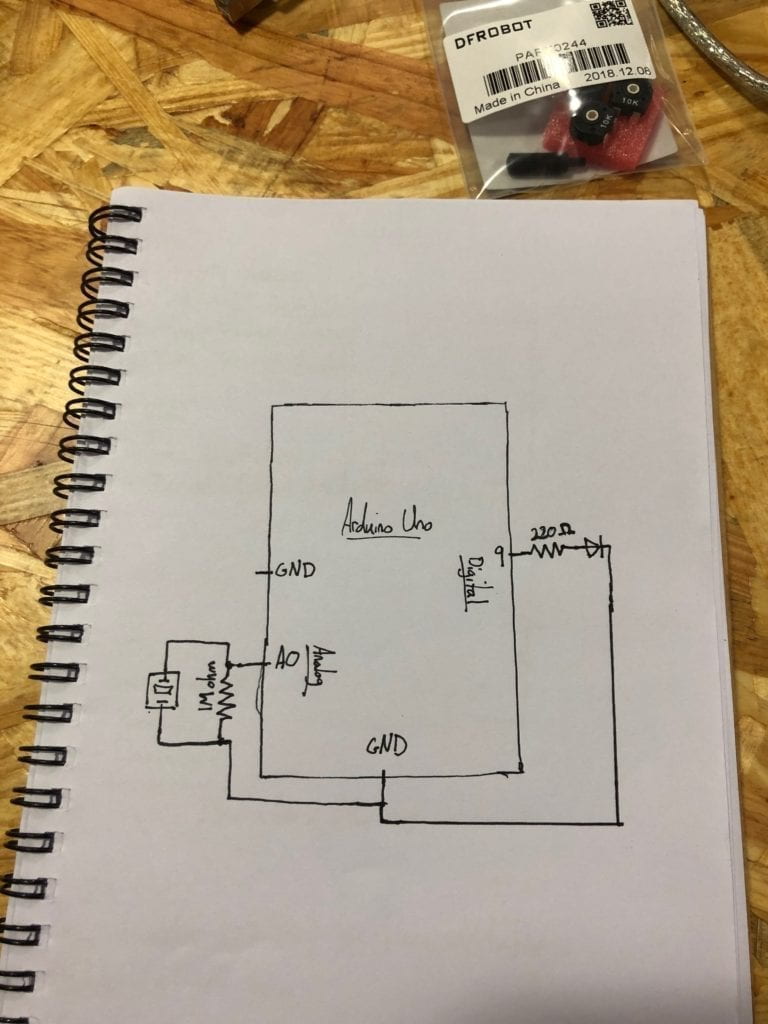
In this recitation, the objective was to create a circuit that includes a sensor and Arduino. For this task, we opted for the vibration sensor. Our materials included an LED, a 220-ohm resistor,  a piezo disk, a 1 megaohm resistor, and Arduino. With the preset “Knock” coding from Arduino and a few modifications, we were able to make a functioning circuit.

The only problems we faced in this recitation were code related. For example, in one attempt, only the built-in LED would light up. Below is the schematic for our design:

Reflection: Overall, everything went as planned. If we had more time, we would have wanted to make the LED flicker when the sensor detected a vibration. That makes the coding much more complicated, but I think we could have managed. This project helped me gain an understanding of how a variety of sensors function and what uses they may have (although many classmates’ designs, like ours, served no real purpose). 

Question 1:  We intended to create a circuit in which an LED would light up when a vibration sensor detected motion. If this were used for a pragmatic purpose, a nuclear power plant manager could (with some modifications), have the LED on his person light up if there are vibrations detected from a sensor in a restricted section of the plant. Assuming the environment around the sensor does cause vibrations and trigger the sensor, only unnatural sources of vibration would be present, thus allowing the manager to know if someone is where they shouldn’t be. 

Question 2:  A code is a set of instructions that follow an order.  Like baking a cake, first you must identify/define all the ingredients (variables). Then, a certain set of pre-written instructions are followed to produce an outcome. In a recipe, a person follows the instructions, and in a code a computer follows them. Even though the outcome is very different, both follow very similar instructional patterns.

Recitation 2: Arduino Basics by Tristan Murdoch

What Did We Do?

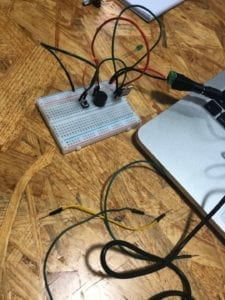
In this recitation, the goal was to begin using Arduino’s functions. We built four circuits: the first was a “fade” circuit using a resistor and an LED; the second was “toneMelody,” and included just a speaker; the third and fourth circuits were 2- and 4-player “speed games,” respectively. These fade and the toneMelody circuits, shown below, were fairly simple:

The last two were much more complicated in the first two. For the 2-player game we were given a schematic with a buzzer, two LEDs, two switches, and four resistors (two 10k ohms and two 220 ohm). This one just took time, but we built it on the first try:

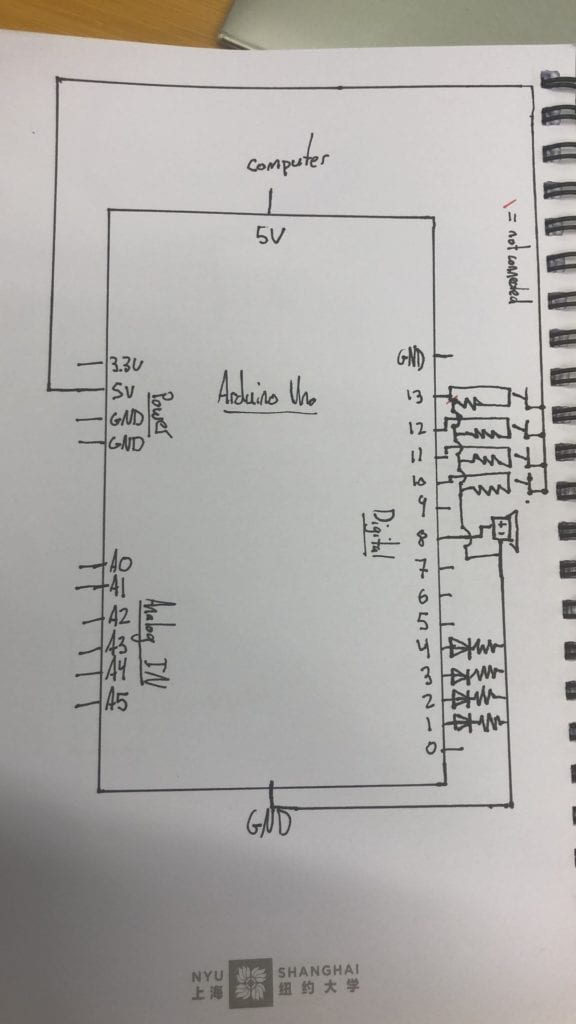
However, the last circuit (optional) was much more difficult. We used another group’s functioning 2-player circuit but removed the speaker as we only needed one. Within the code, we added 2 more players and remapped the LED output and switch inputs to other areas, as the first two players already used those slots. There were many attempts, and the trouble was mainly fixing the code, not with the wiring. Below is a video of our 4 player game functioning, as well as a schematic detailing how we set it up:

Reflection: The codes were complicated, but the circuiting made sense to me. I feel like this recitation gave me the necessary skills to work with basic functions of Arduino. If I did this again, I would color code the wires and organize them better in the final product so the I could more clearly see what is going on.

Question 1:  I interact with technology every day, when I type on my keyboard, when I turn the lights in my dorm on or off, or even when I press buttons in the elevator. In the circuits, especially the last two we made, we are sending information (either via code or via buttons that we press) and the technology responds depending on what we send or do. I

Interaction occurs when one thing, be it a computer or an organism, receives information, and outputs information based on what it initially observed or received. There must be an action, an interpretation and a reaction.

Question 2: If I had 100,000 LEDs (and the proper coding knowledge) I would be selfish and put them on my ceiling in the dorms. They would write out messages on the ceiling for whatever situation I code them for. Maybe they would tell me 15 minutes before each shuttle bus leaves. Or perhaps they could flash when someone knocks on the door, although that is quite useless.

Recitation 1: Sensors by Tristan Murdoch

Tasks 1 and 2:

The goal of this project was to complete circuits to ring a doorbell (buzzer) and light an LED in different ways. This way, we gained a basic understanding of how circuits function, what to do, and what to avoid, such as short-circuiting.

Below is an image of the first circuit we put together:

First Circuit

Included is a power source (supplying voltage) connected to a voltage regulator (to, well, regulate the voltage to the required amount).  A capacitor is connected to the voltage regulator to store voltage. The speaker is wired to the third leg of the voltage regulator, which is in turn connected to a button. From there it is connected to ground, along with the second leg of the voltage regulator. Components are held in place and connected by a breadboard.

Below are linked videos of the functioning doorbell, LED and dimmable LED circuits. The third video includes our own soldered button.

(Diagrams were already given to us for this recitation, so we decided not to include them in the post.)

In these circuits, the basics stayed the same (power source, capacitor, voltage regulator, and switch), but the speaker was replaced by an LED.  Furthermore, a 220-ohm resistor was used to limit the voltage the LED received. In the dimmable LED circuit a 10k-ohm variable resistor was used, allowing us to vary the amount of resistance, thus dimming or amplifying the light output.

Difficulties: For someone who has never touched a circuit before, the beginning was quite challenging. Connecting the capacitor to the voltage regulator took some time, but the diagrams helped greatly. The original button we used was also hard to understand. We were not aware that A/D and B/C were connected, but not to each other. A few times, our wires were not properly connected to the breadboard, causing us to think there was a complex problem while in fact we just needed to push the wires farther in. Other then that, everything went smoothly, soldering included.

Reflection:  Our project went exactly as planned with minor issues that we quickly solved. Building circuits gave me general, practical knowledge of how all the components work, but I still could not build one on my own without a directional diagram. I hope by repetition I can learn to understand how to build my own circuits for personal projects.

Question 1:  The author uses the terms, “listen, think and speak” to help define the word interaction. Take the LED circuit for instance: I press the button. The circuit “listens” processes what I asked it to do (with electricity) and “speaks” by illuminating the LED. I, seeing that the light is now on (listening), now want the light off (thinking), so stop pressing the button (speaking). 

But, I would argue that the interaction is minimal, based on the author’s definition. I can interact with the circuit, but it does send me instructions the same way I send it instructions. In this example, the circuit has no way of making me remove my finger from the button. 

Question 2: The fundamental part of interaction design and physical computing is that we can use it to make biologically non-living things react to our actions. The eye-tracking art feature in Lieberman’s video does just that. Another example is the wiring that allowed the reflective wood panel mirror to move in conjunction with a human’s movements to reflect light in the shape of what is in front of it.